Installing Windows 10 without UEFI. Installing Windows to this disc is not possible - GPT sections style. Video: How to use the program RUFUS
In the installation process clean Windows 10 may arise difficulties associated with the appearance of motherboards with UEFI instead of BIOS and an ambiguous structure hard disks, such as GPT. If the motherboard works on the UEFI BIOS, how to install Windows 10 tell me in this article.
Definition of parameters before installing
First find out which interface does the motherboard use:
- standard BIOS;
- or new UEFI.
Find out this by finding information about motherboard in the Internet. Also, the UEFI differs from the BIOS on appearance - it looks like a more advanced (beautifully decorated, advanced settings, support for the touchpad or mouse).
- MBR (Master Boot Record);
- GPT (GUID PARTITION TABLE).
From what the structure of your hard drive, will depend on the ability to start and install boot flash drive or DVD-R / RW.
To find out the style, go through:
- PCM My computer → Management.
- PCM on the disk → Properties.

- Tom tab → If empty values, click "Fill out".

- Determine style section hard disk.

- Section S. gPT style looks like that.


Installing Windows 10.
After finding out what BIOS uses the motherboard and which is the structure of the hard drive, select 3 ways to install Windows:
- Using classic BIOS, on the disk with the MBR section.
- Using UEFI (EFI), on the disk with the MBR style.
- Using UEFI, on a disk with the style of the GPT section.
If you use the RUFUS program to create a boot flash drive, below shows an example to create a flash drive with the necessary settings.
With the help of a classic BIOS, MBR
This is a classic way to install the OS. Insert the / USB drive to the / USB connector. When you boot a computer, turn on the BIOS:

Using UEFI, MBR
When using a modern UEFI with a graphic design, select the download from the flash drive / DVD-R is even easier than with the old BIOS interface. UEFI interface supports installation on MBR and GPT discsYou only need to correctly specify the load priority (see Figure).
This documentation is moved to the archive and is not supported.
Download in UEFI mode or in bIOS mode former versions
If you install Windows in incorrect modethen you will not be able to use the capabilities of the built-in software mode without re- formatting hard disk.
Selecting the built-in mode during download
Check out the built-in parameters menu to enable or disable BIOS compatibility mode.
To use the BIOS compatibility mode, check the parameters in the built-in menu to disable the UEFI SecureBoot functions.
For old computers (Windows 7® times and earlier) find the parameter Download from File And go to the \\ EFI \\ Boot \\ BootX64.efi file on this device.
Load a computer. When the built-in software starts, press the key that opens the download devices menu. For example, press the ESC, F2, F9, F12 key or other, which opens the built-in or download menu.
In the download devices menu, click the command that identifies the built-in software mode and device. For example, select USB Drive with UEFI or Network - BIOS..
Note
You may see separate commands for one device. For example, you can see USB Drive with UEFI and USB Drive with BIOS. These commands use the same device and media, but load the built-in software in various modes.
If the download device parameter for your device does not appear, follow these steps.
Use any of these methods to make sure that Windows is installed in the correct mode of the built-in
UEFI: To ensure that Windows installation or Windows preset environment is loaded in BIOS mode, delete the file bootmgr. In the root folder of the media.
If Windows is installed by the installation program or from the Windows installation DVD, use a pre-formatted hard disk on the destination computer. Use GPT file format for UEFI mode and MBR file format for BIOS mode. If the computer is loaded in incorrect mode, then when you start the Windows installation program, install Windows will be impossible. For more information, see section.
You can delete the root UEFI or BIOS files from the Windows Preset Environment or Windows Installation Program. For example, if only root files for the UEFI mode are turned on to the Windows DVD DVD, and at the factory installation stage will randomly select the BIOS mode, the computer will not be able to boot and it will be possible to immediately proceed to troubleshoot.
Before you start installing Windows 10 on the GPT disk (on new computerwhere the motherboard is standing that supports the modern API called UEFI), it is necessary to deal with the basic concepts to appear to appear with what has to deal with.
By purchasing a new computer / laptop that supports UEFI, it is strongly recommended to immediately convert its hard disk table in GPT due to the mass of the advantages that we consider below, and then install Windows 10 and copy any data on it.
What do all these abbreviations mean
To replace the outdated API, which ensured the interaction operating system With iron and passed the first brarative control after the equipment initialization, the UEFI interface came.
Features of UEFIs that are important for windows User. 10, are:
- schema support gPT sections - talk about it further;
- availability of services, one of which is necessary for windows downloads 10, and the second is used in Linux for storing dumps, where information about the problems arising from the last completion of the PC operation is recorded;
- modular architecture - here is implemented to install your own (downloaded from the Internet) drivers in UEFI. Need them, for example, to gain access to file System on a computer without an installed operating system;
- supports hard or logical drive encrypted on the hardware level;
- UEFI is characterized by high speed compared to BIOS;
- it works only in 32 and 64-bit mode, without supporting the functioning in 16-bit;
- integrated download manager - can add their own boot menu items.
GPT - new standard accommodation file tables On physical media that came as a replacement of the MBR. Unlike the predecessor released in the mass in the distant 1983 year, GPT supports any hard disk, the volume of which exceeds 2 TB (when using MBR, it is not enough of the address space to address all sectors), can work with more than 4 active volumes and 128 sections on one physical media. Also GPT stores multiple boot data copies in various sections of the section, which way, using this file storage standard, you are much faster to restore damaged boot sectors.
Preparation of the drive
 Installing the operating system on a hard disk always begins with due preparation. In our case, this is loading the suitable image and its deployment on the flash drive. Consider the process with the calculation that ISO is on the computer, and the RUFUS app latest version already running.
Rufus will be used due to the ease of use and lack of unnecessary menu parameters.
- Select a flash drive that will act as a Windows 10 distribution medium.
- In the second drop-down menu, we definitely select GPT for PCs with UEFI.
- The file system and the cluster volume is better not to change - to install the operating system, these parameters do not matter.
- Activate the quick format option so as not to wait a tet of minutes.
- Put the checkbox near "Create boot disk"And click on the drive icon.
- Select the image of S. distribution of Windows 10 and click "Start".
Windows 10 allows you to convert the MBR-section to GPT and with the standard "Disk Management" tool.
- You can call it through the execution of the "diskmgmt.msc" command or the Start context menu.

- We highlight each drive of the hard drive and delete it using the context menu.

- Through the context menu of the hard drive, call the "Convert to GPT" command.
Note that it will be active after removing all volumes, and if the Windows running Windows is not on the media, the table of which you want to convert.
 Team "Convert to GPT disk"
 Conversion will take a dozen second seconds if the disk does not have damaged sectors. After that, the disk breakdown and installing windows 10 on his active section.
Problems with installation
If the installation "dozens" on hDD ceased to appear the error that installing Windows 10 In the UEFI system, it is not possible to continue to convert GPT to the MBR to continue. The problem faces most users who have not completed the transformation before starting the OS installation.

This is done using a set of commands performed through the command line.
- To convert the disc, you need to restart the computer, and in the installation program, when the Installation button appears, click "System Restore".
Keep in mind that the execution of the instructions in the next step will clean your hard disk from all information and converts the tables of its partitions to the new GPT standard with the inability to restore anything stored on the hard drive before conversion.

- After opening the commander time, we sequentially enter the following chain of system commands in it:
- diskpart - launch utility to work with sections;
- list Disk - visualization of the list of volumes in order to choose the future system Disk for conversion;
- sELECT DISK X - selection of the desired volume;
- clean - Cleaning active partition under the number x;
- convert MBR - converting the MBR section;
- cREATE PARTITION PRIMARY SIZE XXXXXXX - Create new section specified in the bytes volume;
When entering the size of the volume, consider that 1 GB \u003d 1024 megabytes, so to obtain a 50 GB disk, it is necessary to multiply twice by 1024.

- active - we make it active;
- format FS \u003d NTFS Quick - Perform quick formatting in NTFS;
- assign - the disk will wear an alphabet label of the first free letter of the English alphabet, starting with "D";
- exit - Command windows strings 10.
- Click "update" to re-obtain fresh information about the disk and its sections.
If the installation of Windows 10 to the GPT section was not implemented, and a familiar window appeared, it is additionally necessary to perform several conditions:
- a 64-bit system should be installed;
- computer need to be included in U mode
Most likely the installation of "dozens" is impossible due to the second factor.

- To solve it, it is necessary to go to the UEFI, which is carried out mainly by the F2 keys (for a laptop) or Del (for PC).
- We find and activate (set the value as "enable") the UEFI load function.
Look more: PPPOE settings on Windows 10.

Usually, it is located in the section Bios Features. or BIOS Setup.
- We switch the SATA function mode in AHCI instead iDE mode. Most often, the change in this option is not required, but check just in case.

- Save new settings.
In different uEFI versions Settings options can be located in different sections and even wear different names.
After that, the installation of Windows 10 to the section with a new file layout standard is carried out as the usual installation "dozens".
Watch the video:
Progress goes forward, the volumes of the information that we need to process are increasing, and the capacity of computer disks increases with them. Hard disks of more than 2 TB and with large quantity Sections no one will not be surprised, but did the developers about the software for them taken care? Let's consider the formats of hard drives that are now used to store partitions and to load the operating system.
What is the standards of hard disks MBR and GPT and what are their features
Before starting to work with a hard disk or solid-state drive, it must be formatted, breaking into several logical partitions. The dimensions of the sections depend on how much space you need to take under the operating system and how much - for other programs and other files. After breakdown, the information is written in them according to a specific standard. On the this moment Used 2 standards - MBR and GPT.
Externally hard drives of MBR and GPT standards often look equally
Advantages and disadvantages of each standard
MBR (Home boot record) - This standard appeared in the early 80s with the DOS operating system. It includes a special program code, dataset with information about the operation of the operating system and partition table hard disk. The MBR standard is simplicity, but is currently considered obsolete. Disks of this standard can work with BIOS, and with UEFI. Its main drawbacks are as follows:
- the partition size cannot be more than 2.2 TB;
- you can create no more than four major partitions on the hard disk;
- the boot record of the operating system is stored in one specified place, which is possible both random overwriting and virus damage.
GPT (or GUID partition table) is a new storage standard of the partition table, which was proposed by Intel to use with UEFI (expandable firmware interface). The feature of the GPT standard is to duplicate the table of contents and partition table.Compared to MBR, this standard has the following advantages:
- supports unattainable MBR for the standard maximum volume section;
- on one hard disk, you can create a lot of sections (for Windows operating systems - up to 128);
- due to the fact that the main boot record has a duplicate, it is easy to restore it during damage and it is almost impossible to accidentally overwrite or implement malicious code into it;
- loading the Windows version of the Windows version 8 and the older passes much faster.
How to find out the type of disk in a laptop or in a computer
Consider how to determine the type of disk in a laptop or in a personal computer.
Definition of the type of disk utility "Disk Management" utility
In system Windows easier Total to determine the storage standard of the hard disk using the Disk Management utility.
 The main window of the "Disk Management" utility contains basic information about the disks installed in the computer
 In Windows 10, to start the utility you need to click on the right mouse button on the Start menu and select "Disc Control" in the context menu.
In Windows 7, right-click on the computer icon. Next, select the Control menu item "Control", and in the Computer Management window - "Disk Management" section.
Alternative way to start the "Disk Management utility": Press the Win + R key combination, and then enter the DiskMgMT.msc command in the "Run" window and press ENTER.
 Enter the diskmgmt.msc command to start the Disk Management utility
 We are waiting until the "Disk Management" utility will start. In the main window, all the disks and sections that are currently in the computer will be displayed. Right-click on the name of the disk you are interested in (it is located at the bottom of the Disk Management window), select "Properties" in the context menu and go to the TOMA tab.
 Choose discClick on it right-click, open the context menu and select the "Properties" string in it.
 In the "Disc Information" section, you will see the "Section Style: Table with the GUID section (GUID)" or "section style: the main boot record (MBR)." The first option means that the disk has a GPT partition markup standard, and the second is that there is a main loading record of the MBR on the disk.
For the GPT standard disk, the window looks like this:
 For a hard disk of the GPT standard, the "Table with GUID section" style is specified.
 And for the MBR standard disk - so:
 MBR Disk Holds the Style "Basic Boot Record (MBR)"
 Determining the type of disk using the command line
The format of the marking of the hard disk partitions (GPT or MBR) can be defined using the command line. To do this, run the command line console on behalf of the administrator, enter the DiskPart command and press the ENTER key. After downloading the utility, enter the LIST DISK command and confirm the action of the Enter key.
 To view the hard disk list, execute the DiskPart command.
 Among the displayed parameters of the hard disks there is a GPT column. The disk that uses the GPT standard is marked in it as an asterisk. The remaining discs not marked with the stranger have marking of the MBR standards.
Determining the type of disk using the Aomei Partition Assistant utility
Aomei Partition Assistant Standard - free distributed utility to work with hard drives and solid-state drives in the Windows operating system. The program has an extensive functionality and can convert GPT disk formats in MBR and back.
After starting the utility displays all the discs and logical partitions on them. At the bottom of the window called each disk, its type is shown: GPT or MBR.
 At the bottom of the Utility window, all the hard disks of the computer are shown with their types, as well as the logical partitions of each disk
 The methods described above will help you easily find out how a specific accumulator belongs to which standard.
How to install Windows 10 to GPT or MBR
Before you start installing the Windows 10 operating system to your personal ComputerYou need to figure out which firmware interface supports its motherboard. This may be an extensible UEFI firmware interface or basic interface bIOS firmware. Then you should decide on the markup standard of the hard disk or solid-state drive. Installing Windows 10 starts from copying files with installation mediawhich can be both flash drive and optical disc (CD) .
Motherboard type definition: UEFI or BIOS
Users often encounter the problem of determining the type of motherboard interface. Consider how to correctly recognize.
BIOS is easy to distinguish from UEFI: it looks like an old software And uses a small number of colors. Basically it is blue, black and white. Also in BIOS little settings and there is no possibility of selecting the download mode with UEFI and Legacy points.
 IN bIOS settings You can not choose download mode
  UEFI system interface looks more modern compared to BIOS
 Select the most suitable standard for installing Windows 10
On new computers, the motherboard of which supports the UEFI system interface, it is recommended to install Windows 10 to a disk marked according to the GPT standard. This will exclude problems with data loss and will provide faster loading. Separately, it should be noted that if you need to install the second operating system, it can only be Windows version 8 and higher. Older systems will fail when loading.
If the computer is old or you need to install two or more younger Windows 8 operating systems, then it is better to leave the disk MBR markup, but you will have to additionally configure the UEFI (as it should be described below). Remember that 32-bit versions of Windows operating systems do not support GPT standard.
Preparation of installation media
Before installing the operating system to the computer, we must prepare a carrier containing the necessary setup files. Suppose we have an image of an operating system in ISO format and an empty flash drive with a capacity of 8GB. To correctly recording the image image, it is recommended to use the RUFUS program. It does not have unnecessary settings that can mislead the user, perfectly adjusts the loading USB flash drive and avoids a multitude of errors when the data is not read or BIOS and UEFI cannot recognize them.
 Before starting the recording process image of windows Adjust on the flash drive necessary parameters In the program window
 Creating an installation media consists of the following steps:
- choose a flash drive to record will be recorded installation image operating system;
- in the drop-down menu "Section", select the disk markup type (GPT or MBR) and the type of motherboard system interface (BIOS or UEFI);
- in the File System menu, select FAT32, the cluster size parameter is left by default;
- put the ticks at the "Quick Formatting" and "Create a boot disk" items;
- select the ISO file image file and press the Start button.
After the image recording is completed, we will receive a media that can now be used to install Windows on computers with the corresponding partition markup and the type of system interface.
Installation using a classic BIOS to disk with MBR sections
Installing the operating system using the BIOS interface to disk in the MBR format will not cause any problems. You only need to follow the following instructions:
- turn off the computer and connect the installation media;
- when you boot a computer, enter the BIOS, usually you need to press the F2 or DEL key;
- find the Boot tab and select 1ST as the primary loader Boot Device. installation carrier;
- save settings, reboot and follow the prompts on the classic installation of Windows.
 Select the device from which Windows will be installed.
 No more manipulations are required. When installing the operating system, you can format the disk if before it was any information.
Installation using UEFI to disk with MBR sections
When installing Windows 10, the UEFI means on the disk with the MBR sections of the MBR may occur. It will take more thin tuning UEFI, therefore, if you can convert the disk to the GPT format, then it is better to do it right away. For those who still want to leave the format disk MBRYou need to switch the download mode from EFI to Legacy. For this:
- in Boot Menu. BIOS Select the download option from a USB media without UEFI in the title and in the download settings move it to the first place;
- in UEFI, instead of the EFI boot mode, set the Legacy or CSM mode.
 Select LEGACY download mode
 The installation carrier must have a MBR markup scheme. After performing these actions, the system considers it, and the installation will begin.
Installing UEFI to disk with GPT sections
FROM uEFI help On the GPT disk can be installed operating windows system 10 only 64-bit bit. The installation process using UEFI is not much different from the same process in the BIOS. Consider key points:
- when loading a computer, go to UEFI, usually you need to press the F2 or DEL key on the keyboard, and proceed to the setting;
- uEFI must be selected UEFI Mode loading mode and mode is enabled. Secure Boot;
- in the BOOT tab in the first place there must be an installation medium.
 Turn on the Secure Boot mode in the download settings
 The hard disk to which the operating system will be installed must have a GPT markup, otherwise it will have to be converted to this format. On the problems associated with the conversion of a hard disk markup, let's talk below.
How to change the type of hard disk markup
There are various methods to change the standard of the hard disk, but it is worth remembering that converting almost always leads to data loss, even if the program promises to leave data safe and safety. Therefore, before starting the operation, save all important information On another disk or copy to external devices.
Windows installation problems on a specific type disk
The main problem with installing the Windows 10 operating system is to receive notifications about the impossibility of continuing or start setting.
 Error message when performing conversion from MBR in GPT appears before installing Windows
 When installing Windows, the following typical errors are possible:
- errors related to system size: 32-bit operating system is not suitable for installation on the GPT disk;
- installation media malfunction or incorrect information recording on it: You need to use another media or overwrite the current;
- for the UEFI mode, the media containing the UEFI is not selected, and vice versa - for the BIOS media with UEFI in the title;
- the installation media loader is not formatted in the format: the format must coincide with the type of hard disk or solid-state drive.
Changing the disk format via the command line
One of the most fast options Disk conversion from one format to another is considered to be converted using the command line utilities. Suppose you need to convert the MBR format disk in GPT. Attention: all information that is contained on the disk will be deleted. This option can be successfully completed during the installation of the operating system. After download windows Installer Press the SHIFT + F10 key combination, as a result of which opens command lineIn which you need to sequentially enter and execute the following commands:
- diskpart (will start the disk control utility);
- list DISK (a list of disks will be displayed on the screen, you need to remember the disk number (n), where the operating system will be installed);
- sELECT DISK N (Select N);
- clean (Clean the selected disk);
- convert GPT (convert a Disk to GPT format);
- eXIT (output from the disk management utility).
 Enter the command sequentially to convert the disk format by waiting for each of them.
 Changing the format using Windows Disc Control Utility
This type of conversion requires the installed and operating Windows operating system version 7 and older. Suppose you need to convert the disk from the GPT format in the MBR. This will require the "Disk Management" utility, which we have considered above. Make the following:

 Select and run the "Convert to MBR drive" function
 Programs for converting between GPT and MBR formats
In addition to standard toolsembedded in Windows operating system exist and various third-party programs To convert disk formats. Among them you can highlight the Acronis utilities Disk Director. And Minitool Partition Wizard. They allow you to convert a format without data loss. We will discern more Minitool Partition Wizard.
 Select the download mode MINITOOL PARTITION WIZARD
 Create boot drive So, the Minitool Partition Wizard utilities and boot from it. Please note that the Secure Boot mode must be disabled in the UEFI. After the download is complete, select the desired hard disk and click on the Convert MBR Disk to GPT Disk line, which is located on the left in the Operations tab. Then press the Apply button and wait for the end of the operation, which can last for quite a long time.
 Select a disk and run the conversion of the Convert MBR Disk to GPT Disk command
 Sometimes the program cannot convert the system disk, the corresponding warning is displayed. To solve this problem you need:
- select a section in which the operating system loader is located (it is usually located at the very beginning of the list and takes up to 500MB);
- remove it and create on this place the same partition in the FAT32 file system;
- repeat the transformation actions described above.
Third-party programs open additional features in working with hard and solid-state discs. In particular, they allow you to convert them to MBR and GPT formats without losing data if the standard operating system functionality does not work or unavailable.
Video: Working with hard disk sections in the program Minitool Partition Wizard
It is impossible to say exactly which technologies better: tested by time, but technically obsolete MBR, or a new promising GPT. Both standards perform the same function: stored data on the operating system loading and the disc partition table. Each user must decide for himself that he needs from a hard disk, how many on the disk will be sections and which volume is required by him new level Security and reliability implemented in the GPT standard.
In the process of installing clean Windows 10, difficulties associated with the appearance of motherboards with UEFI instead of the BIOS and the ambiguous structure of hard drives, such as GPT, may occur. If the motherboard works on the UEFI BIOS, how to install Windows 10 tell me in this article.
Definition of parameters before installing
First find out which interface does the motherboard use:
- standard BIOS;
- or new UEFI.
It is possible to find out this by finding information about the motherboard on the Internet. Also, the UEFI differs from the BIOS on appearance - it looks like a more advanced (beautifully decorated, advanced settings, support for the touchpad or mouse).
- MBR (Master Boot Record);
- GPT (GUID PARTITION TABLE).
From what the structure of your hard drive, will depend on the ability to start and installing the loading flash drive or DVD-R / RW.
To find out the style, go through:
- PCM My computer → Management.
- PCM on the disk → Properties.
- Tom tab → If empty values, click "Fill out".
- Determine the style of the hard disk partition.
- The section with the GPT style looks like this.
Installing Windows 10.
After finding out what BIOS uses the motherboard and which is the structure of the hard drive, select 3 ways to install Windows:
- Using classic BIOS, on the disk with the MBR section.
- Using UEFI (EFI), on the disk with the MBR style.
- Using UEFI, on a disk with the style of the GPT section.
If you use the RUFUS program to create a boot flash drive, below shows an example to create a flash drive with the necessary settings.
With the help of a classic BIOS, MBR
This is a classic way to install the OS. Insert the / USB drive to the / USB connector. When you boot a computer, turn on the BIOS:
Using UEFI, MBR
When using a modern UEFI with a graphic design, select the download from the flash drive / DVD-R is even easier than with the old BIOS interface. The UEFI interface supports the installation on the MBR and GPT discs, you just need to correctly specify the load priority (see Figure).
 How to pay a domain name
 Domain zone of tokelau islands
 What is domain what problems may be
 Yandex Wordstat: detailed instructions for using the service and grouping operators and a complicated request
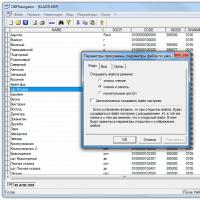 Editing DBF files
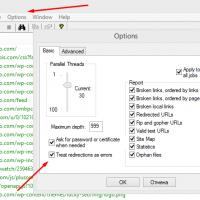 Xenu Link Sleuth - What is this program how to use the Xenu program
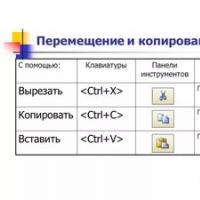 Methods Copy and insert text from keyboard without using mouse