Installing windows 10 on usb hdd. How do I install windows to an external hard drive? Step-by-step instruction. Making the hard disk partition active
As if installing the OS is not something difficult, and my opinion is that it is enough to be friends with the computer and have two more hands in addition to the head - one right and the other left. To install the OS on your computer, you need or.
But what if there is neither one nor the other, does not work optical drive, or do you have a netbook? After a little reflection, I remembered that I have an external usb-pocket for HDD and I also have a free old HDD 2.5ʺ. In general, if there is HDD-pocket, so it can be made bootable.
For this purpose, there are utilities with which you can do this, but I decided to use by standard means Windows.
There are a lot of descriptions and videos on the network, but, unfortunately, there is one problematic point, which the authors for some reason omit. Well, okay, I'll start in order.
Preparing an external HDD
Before working with a disc, be sure to transfer and save necessary information from this disk to another medium.
All settings will be carried out standard Windows tools 8.1. Perhaps there are some differences from Windows previous issues, but if there are, then not significant.
First of all, I want to note that making an external HDD bootable is much more convenient. I divided the disk into two partitions, one contains Windows distribution, another section for my needs.
1. We plug in the usb pocket and go to Disk management.
Attention! All data on the disk will be destroyed!
If you have Windows 8 installed on your PC, 1 right-click: Start / Disk Management;
If Windows is more early versions, open the Computer Management console: Start / Control Panel / Administrative Tools / Computer Management / Expand Storage Devices / Left-click Disk Management.
See screenshot:


2. Choose external HDD disk... Be extremely careful, if you mistakenly select another disk, all information will be destroyed.
In my case, this is Disk 1. As you can see in the screenshot, the disk is divided into two volumes (partitions):

3. Delete disk partitions:


4. Create new disk partitions. One for the distribution kit, the second will remain for your needs:
Right-click on a free disk space, in the context menu, select the command Create simple volume:

5. In the appeared window Create wizard simple volume, press the button Further:
Specify the volume size of 4404 megabytes and click Next. Please note that the size is indicated in megabytes. And since 1 gigabyte is equal to 1024 megabytes, then 1024 × 4.3 = 4403.2 megabytes we get for the distribution section (my weight is 4.18 GB, for example);


In this dialog, you need to format a new partition (FAT 32), press Further then Ready:

6. After that, you need to make the created section active (do not forget, because the computer will boot from this section), for this:
Right click with the mouse, in the context menu, select the command Make a section active.
To a confirmation request, we answer YES.

The external HDD looks like this:

7. In the same order, we format the second partition on the disk, best of all in NTFS, but do not make it active.
Copying Windows to an active partition of an external HDD
Copying a Windows distribution to a bootable external HDD is pretty straightforward and easy.
From a bootable DVD:
Open the installation DVD in Explorer, select all folders and files, and copy to active section external HDD;
From ISO image a:
Basically, an ISO image is a kind of archive. So you can open it with any archiver. You can also open the ISO image via Total commander or Daemon tools... Well, if you have Windows 8 or 8.1 installed on your PC, then open it with Explorer. Select all folders and files, and copy to the active partition of the external HDD;
Everything, your external HDD can act as bootable media... It is enough to reboot and set the USB HDD as the boot priority in the BIOS (depending on BIOS type).
- When you turn on the laptop, press F2, to ;
- Go to the tab Boot;
- V Boot Priority order install USB HDD;
- We press F10, and then OK.
If it didn’t work, then check out the article.
Save your changes and proceed with.
As you can see from the text, preparing an external HDD for installing Windows is quite simple. And my description will not be complete if I do not talk about one problem, which for some reason is rarely written about on the net.
Making the hard disk partition active
When I divided the hard disk into two volumes, for a reason unknown to me, none of the disk partitions could be made active. This function was not available in the context menu.
The active partition is the partition from which the computer boots.
There are two ways to make a section active:
- Using the Computer Management console. We have already considered this method, but, unfortunately, for a number of reasons, the Make section active command is not available. The solution to this problem is also not difficult. Remember how to prepare a bootable USB flash drive from the Command Prompt.
- Using the Command Line, via the utility diskpart... The second method is a little more complicated, but more efficient. You just need to do all the operations carefully and slowly.
Setting the active partition using the command line
1. Connect external USB HDD;
2. Click on Start / All programs / Standard / Command line ... Click on right key mouse and choose Run as administrator.
 3.
In the window that opens, write the command diskpart and press the button Enter... A prompt will appear for working with the utility - DISKPART>;
3.
In the window that opens, write the command diskpart and press the button Enter... A prompt will appear for working with the utility - DISKPART>;
 4.
Enter the command list disk and press the button Enter... You will see all disks installed on your computer;
4.
Enter the command list disk and press the button Enter... You will see all disks installed on your computer;
 5.
We select the disk with which we will work. To do this, enter the command select disk 0, where "0" is the disk number in the list, ie. for my external drive there will be a command select disk 1... Click the button Enter, the message Selected disk 1 appears;
5.
We select the disk with which we will work. To do this, enter the command select disk 0, where "0" is the disk number in the list, ie. for my external drive there will be a command select disk 1... Click the button Enter, the message Selected disk 1 appears;
 6.
Next, you need to find all partitions on the selected disk. Enter the command list partition and press the button Enter.
6.
Next, you need to find all partitions on the selected disk. Enter the command list partition and press the button Enter.
 7.
We select the section with which we will work. Enter the command select partition 1, where 1 is the number of the section in the list, i.e. for the section that we make active. Click on Enter, the message appears Section 1 selected.
7.
We select the section with which we will work. Enter the command select partition 1, where 1 is the number of the section in the list, i.e. for the section that we make active. Click on Enter, the message appears Section 1 selected.
 8.
We mark the selected section as active, for this enter the command active... Click the button Enter, the message appears DiskPart: partition marked as active.
8.
We mark the selected section as active, for this enter the command active... Click the button Enter, the message appears DiskPart: partition marked as active.
 That's all. Good luck.
More on the site:
How to make an external USB HDD (hard disk) bootable using standard Windows tools? updated: February 6, 2018 by: admin
Greetings to you blog readers.
Today I would like to tell you why and how installing windows on the external hard disk. This may be necessary when users want to evaluate a new version of the operating system. Or they need a shell in which certain applications will run. The method also changes depending on the needs. Next, we will look at the main points related to this topic.
Placing Windows 10 on an external hard drive involves a lot of movement. First of all, you need to prepare the device itself. So, to get a removable hard drive with an OS, do the following:
Now we see an unallocated area of 60 GB, which is needed to install Windows 8 or more. new version... Now you need to turn the space into one that will be "normally" perceived by the system:

As a result, a formatted partition with a file NTFS system... This is where we put the OS, whether it's Windows XP or more recent versions.
WinNT Setup3 program( )
After we have prepared everything, you can proceed directly to placing the operating system on a removable device:
It should be noted right away that such an operation cannot be cranked from the drive to an external hard drive. USB disk... This is due to many aspects. So, to get started, just prepare a virtual image.
Installing Win on an External HDD for Mac( )

Sometimes there are situations when users, for some reason, need to install an operating system from Microsoft on a USB drive connected to Mac computer... This may be the lack of highly specialized software options. Or a simple interest. In any case, there is a way:
We launch our Mac. We check the system for viruses AVG AntiVirus Free. Downloading drivers for Boot Camp (a program that allows you to carry out the entire operation). To do this, go to "Programs" and then to "Utilities" or "Utilities" - it depends on the version of OS X.
We launch the application and indicate that we need to download everything to support Win.
After we will go through the steps, which means the program needs to be downloaded and installed.

We launch. We choose " Car"And" Create ". The picking wizard for the new " virtuals". Click " Continue».
Enter the name of the required operating system, for example, Windows 7. The type will be set independently. We continue until we reach the desired goal. At the very end, select “ Create».
We stop at "". Click on the disk next to " Drive: Secondary ...».
We indicate the image from our OS.
We confirm the actions and start.
The Win installation screen appears.

When "" appears, go to " Devices"And then to" ".

After the end of the procedure, we restart the computer.
We go to " Start», « Computer". On the side panel, we find " Net". We open access to documents. The network should display " VBOXSVR". Go in and copy the above directory to "".

Then we go to " Control Panel" and " Programs". You need to find and delete " Oracle VM VirtualBox ...". We restart the car.
We go to the catalog " WindowsSupport". We launch " Setup.exe". After the end, turn off " virtualka».
We need to " Macintosh HD". Then in " Users"And into the directory" client_name". Further in "" and in " Windows 7».
Launch main file with extension * .vdi... The image is being mounted.
Two new disks will appear among the devices. We copy all the content from them to a new directory.

We connect and clear the USB-HDD. And you can't do without formatting here.
We go to " Start" and " Computer". Then in " Home on psf" and "". We go into the previously created directory and transfer all the elements to our portable device.
All power users know that it is very useful to have a portable operating system with all necessary programs on a portable USB drive. It turns out a kind of super LiveCD with all the software you need, while you can add or remove programs to it. Windows 8.1 is best suited for these purposes, since it has many device drivers in it and is compatible with almost any computer hardware (both new and old) and any software, unlike Windows 10. The latter is still being actively developed.
In today's article, we will install Windows 8.1 on a portable USB hard drive in a clever way and after that the operating system will be loaded on all computer devices, regardless of whether the usual BIOS on them or UEFI.
So, we will work in Windows 8.1, but if you have Windows 10 installed, then you need to do the same.
In Disk Management, you can see three disks connected to the computer.
Disk 2 is a 1 TB (931.51 GB) portable WD hard drive with data files, and we will install Windows 8.1 on it (nothing will happen to personal files).
Note that the external USB drive has a main boot record MBR.

Let's compress the space on the HDD and create two partitions for installing the OS.
Right-click on the drive and select "Shrink Volume".

150 GB is enough for me, but you can choose a different size.
Click on the "Compress" button.

The result is unallocated space. Right-click on it and select "Create Simple Volume".


We indicate the size of 100 MB.


File system choose FAT32.


As a result, a 100 MB partition is created with the FAT32 file system (drive letter I :) where we will later place the OS boot files. D to upload to UEFI mode, the bootloader must be located on a FAT32 partition.

Right-click on the unallocated space and select "Create Simple Volume".

Select the file system NTFS and click "Next" all the time.

Created New volume(J :). It is on it that we will install Win 8.1. Note that the section to install the OS must be the main one, sinceto boot in UEFI mode, the efi bootloader will not see the logical partition.

Download Windows 8.1 from the official Microsoft website.

Click on the downloaded ISO-image by double-clicking the left mouse button and connect it to the virtual drive (in our case, the letter of the virtual drive (P :)). The sources folder contains the install.esd file with compressed files OS.

WinNTSetup.

In the main window of the program, first of all, you need to specify the path to installation files Win 8.1.
We press "Select".

In the opened explorer, go to virtual floppy drive(P :) (in your case the letter may be different), open the sources folder and select the install.esd file with the left mouse, then click "Open". We have indicated the path to the system installation files.

We indicate the disk on which the Win 8.1 bootloader will be installed.
We press "Select".

Select the 100 MB partition we created on the external USB-disk (drive letter I :) and click on "Select folder".

Now we select the partition on which the system will be installed.

In the window that opens, select the section we created (J :) and click on "Select folder".

We press "Installation".

In the "Use BootSect for the bootloader" item, select ALL (for uefi and legacy).

The process of installing the operating system on partition (J :) begins.

If you click "Restart", the computer will reboot and the system installation process will continue, but before that we need to make the 100 MB FAT32 partition (drive letter I :) active, otherwise the Win 8.1 installed by us will boot only in UEFI mode.
We press "Cancel".

Download and run the program BOOTICE.
On the first tab "Physical Disk", select our external WD drive and click on the "Partition Management" button.

Highlight section 100 MB (drive letter I :) and click on the "Activate" button.


Now section 100 MB (drive letter I :) is active. This is a prerequisite for booting the system on a computer with a regular BIOS.
"Close".

Now we can restart our computer or laptop.
My BIOS has UEFI enabled,

but despite this, an external USB hard drive with master boot record MBR. I boot the computer from an external drive.

Preparing devices.

The computer restarts. Again n I am downloading from an external drive.


Skip.

I accept.


Use standard parameters.

Create a new account.

Login without account Microsoft.

We enter the username and, if you need, the password. Ready.


A UEFI-enabled computer boots to Windows 8.1 from an external USB drive that has an MBR.


Also, the eight will boot on a computer with a regular BIOS.
Why Win 8.1 boots on computers with regular BIOS and on laptops with UEFI
We boot from external media. UEFI works with external media using the FAT32 partition (which we created on the external drive), because With bootable USB we boot into both UEFI and legacy without problems.
From a flash drive, we install the operating system on RAMDisk and in UEFI and in legacy since the Windows distribution contains 2 bootloaders (one for mbr in the folder boot and the second forUEFI in the folder EFI).
We have made 2 partitions on an external USB drive, an active partition formatted in FAT32 and section with OS... N In the first section, as in the distribution kit, we have 2 boot loaders and the installed OS is not on a RAMDisk, but on a physical one.
Taking this concept one step further, I have 3 questions:
1) Is it possible to install and run Windows 10 on a portable external hard drive or USB stick with the same functionality as the internal drive?
2) Is it legal to do this or will it affect windows updates in any way?
3) What are the steps for this? (Please outline the steps I can follow so that I don't lose disk in the process). 🙂
EDIT: My question is specifically about Windows 10, the legality and the way to make it a standalone OS running with external device, and what effect, if it is in Windows Update; Questions that are not covered in another question.
Can I install and run Windows 10 on a portable external hard drive?
Yes. That's what Windows To Go is all about. See my answer to another Windows question OS to external hard drive for more details.
Windows To Go is a feature in Windows 8 Enterprise, Windows 10 Enterprise, and Windows 10 Education that allows them to boot and run from USB storage devices such as USB sticks and external hard drives. It is a fully managed Windows enterprise environment.
It is designed to enable enterprise administrators to provide users with a displayable version of Windows that mirrors the corporate desktop. Creation Windows disks To Go is not officially supported by others Windows versions.
Windows source to go
Exists different ways bypass windows To Go with other versions of Windows, see e.g. 4 Tools for Windows creation to migrate to USB from Windows 10.
Is this considered legal?
Yes. This should be the way Microsoft envisions it.
Not even advanced Windows users you have probably heard that there are several ways to reinstall a given operating system: using a DVD and a USB drive. These two options are now the most common among users. However, there is another one that allows you to perform a "clean" installation of Windows or upgrade it to a newer version using a hard disk partition. It can help in cases where you don't have a USB drive or DVD to which you can write an image of the operating system. If you are curious to know, how to install Windows 10 from a hard drive partition, we recommend that you read this manual... Perhaps it will be useful to you in the future.
Make sure you have:
- Operating ISO file Windows system 10.
- EasyBCD and UltraISO programs.
- At least 5 GB of free space on the system partition.
Installing Windows 10 from a hard drive
- Install EasyBCD and UltraISO programs on your computer.
- Start the Disk Management console. To do this, press the Win + R key combination, enter the diskmgmt.msc command and press the Enter key or the "OK" button.
- Highlight system partition by clicking on it with the right mouse button and in the drop-down menu select "Shrink Volume".

- In the field opposite the item "Compressible space (MB)" enter 6000, and then click on the "Compress" button. After that, a new space should appear in the Disk Management window.

- Click on the new space with the right mouse button and select "Create simple volume" from the context menu.

- In the wizard window, click the "Next" button three times.

- At the stage "Formatting the partition" in the field opposite "Volume label" enter a name winsetup
, and then click on the "Next" and "Finish" buttons.

- After that, open "Explorer", go to "Computer" and make sure that a new section has appeared in it with the name you specified and the volume of 5.86 GB.
- Mount the Windows 10 ISO file, open a new partition and copy the files from the mounted image into it. If you have Windows 8, 8.1 or 10 installed on your computer, you just need to double-click on the ISO file to mount it. If you have Windows 7 installed on your PC, you need to use the UltraISO program in order to open the system image and copy the files from it to a new volume.
- Start the EasyBCD program.
- In the program window, select the "Add Record" section.
- Click on the "WinPE" tab.
- Next to Type, select WIM Image (Ramdisk).
- Next to "Name", enter winsetup
.

- Specify the path to the "boot.wim" file. To do this, open the "Explorer" window by clicking on the icon with binoculars and a folder opposite the "Path" field, expand the winsetup volume, go to the "Sources" directory and select "boot.wim" in it.

- Return to the "EasyBCD" window and click on the "Add" button.

- Go to "Edit Boot Menu" and click on the "Save" button.

- Click on "Tools" and "Restart Computer".

- On the OS selection screen, click on winsetup , to start it windows installer 10.
Interestingly, in this way you can install not only Windows 10, but also Windows 7, 8 and 8.1. If you have a desire to install any of these OS, it will be enough for you to uninstall Windows files 10, copy the files of your preferred system and specify the path to "boot.wim".
 X360ce - connect any joystick (instructions for the old version) Install the joystick on the pc from xbox 360
 Recovering contacts on Android
 Pizza empire promo code october
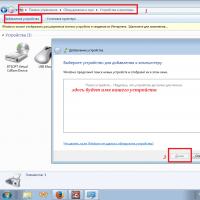 Why the steering wheel does not connect to the computer
 How to connect a gaming wheel to a computer
 How to keep a personal diary and what is the use of it
 Charger "Cedar": description, instructions