Installing Windows 7 with HDD external. How to make a bootable external USB HDD (hard disk), standard Windows tools? From ISO Image
All site sections Website
If you are missing on your computer optical driveit does not mean that it is impossible install Windows 7..
The most ordinary flash drive with a memory capacity of at least 4 GB and built in both previously windows version Utility - diskpart.
So, to follow these steps.
Connect the flash drive to the computer and enter the name of the utility
In the window that appears, type the command. As a result, a list of all drives installed in the computer will appear.

Determine which one is a flash drive, is quite easy - pay attention to the container of the drive!
After this action, enter the command and sequence number of the drive defined in the previous step. Next, alternately enter the following commands.

On this flash drive preparation ends and you can move to the next step.
In order to transfer distribution Windows 7 On the flash drive, insert the Windows 7 installation disk to the optical drive of the computer, and copy all the contents from it to the flash drive prepared in the previous steps.
To go to the flash drive, in the command line that appears, enter the name assigned to the flash drive, go to the desired folder,
Now the Windows 7 operating system can be installed from the flash drive.
Restart the computer and configure the launch of the PC from the flash drive. When installing, follow the actions listed in the subsection " Installing Windows 7. ».
When the system is installed, do not forget to install a section with the "seven" in the BIOS, when loading!
==============================

Install windows 7 without disk
I think no one needs to explain the benefits of the method windows installations 7 with flash drive - Without a disk with a WINDOVS distribution.
First, this is the only method of installing Windows on computers, netbooks and laptops without dVD Drive. Of course, you can always connect exterior drive via USB, but who has it?
Personally, I have no, but there is netbook Acer., is he uSB ports, no drive and there is a great desire to put Windows 7. And it will be necessary for this ordinary flash drive, the volume of which should be enough to record the installation windows files 7.
On the Internet you can find a lot of confusing descriptions, how to make a loading flash drive. There and the command line, and what you want.
In this case, WinTa.Ru offers a method much easier - probably, in general, the easiest of all available methods. And you will need to install Windows 7 from the flash drive, actually the flash drive itself
Of course, there should be enough free space on the flash drive to install Windows 7, and this is at least 4 GB. As you can see, in the figure above the flash drive is clearly not enough free space. So if there is little space - remove unnecessary data or take a larger flash drive.
In addition, if the flash drive is formatted in FAT32, the program will propose to reformat it in NTFS. Honestly, it is not at all necessary - Windows 7 will be perfectly installed with FAT32.
In the window that opens, specify the drive letter with the installed windows disk 7 (In this particular example, this is a G :) disk and click on the OK button.

Attention should be selected in the BIOS download from the flash drive.
Of course, BIOS-s are all different, so below only an example:


I already as a year refused to drive a DVD, and the tendencies of the netbooks talk about the correctness of the decision. But I got the question of how to install the OS OPERATION without a DVD.
Not to the place the flash drive died, and when I went to the store for a new one, on my eyes accidentally fell out the external seagate disks Expansion, 250GB version of which cost literally 500 rubles more expensive than 8GB flash drive (2323 rubles). And the size and all of which, not much embarrassed pocket jacket.
Dimensions: 141 x 18 x 80 mm Weight: 0.16 kg
But as it turned out, installing Windows 7 with USB HDD, it works not in the same way as with USB Flash. Having understood and checking the performance, I share information with you.
It works both for desktop PCs, nooktukov, and for netbooks.
HDD preparation
Cutting and preparing partitions HDD;
Copy Windows 7.
HDD preparation
You can do boot diskInstall Windows 7, and then erase it and further use HDD for your needs. Or do it much more convenient:
If you do not feel sorry for 4 gigabytes of a place on an external HDD, then the disc can be cut into two parts, in our case I did it exactly that by giving one piece to the Windows 7 distribution, which will always be at hand.
Cutting and preparation of HDD sections
1. So, we go to:
Control Panel - Administration - Computer Management (Disks Management) ...
Find disk 1 (if you have several hard drives in the system, find one that is equal to the size of your external HDD)

2. Choose our external HDD Disc:
Right click Mouse - Delete Tom;
- Right click Mouse - Create a simple volume;
In the window that appears, select the size of the volume of 4300 megabytes (under the distribution section), and click further,

In the next dialog, if you need to choose the drive letter, and click further. In a new dialogue, you must format our new section (FAT 32), click Next and Finish.

After that, you need to make the created section active, for this:
Right click on the section - make a section active.
Now our external HDD has the following form:

By the same principle format the second partition on the disk, best in NTFS. But do not make it active.
Copy Windows 7.
Never had copying windows Distribution The boot disk is easy.
If you have a DVD:
Just open your installation DVD, highlight all folders and files, and copy to active section your external HDD;
If you have an ISO image:
Just open your installation ISO image through Total Commander or Daemon Tools., highlight all folders and files, and copy to the active section of your external HDD;
All, yours outdoor HDD Ready to act as a bootable media, it is enough to reboot, and in the BIOS to establish as Primary Boot Device. - Certain external HDD, or just a USB HDD, depending on the type of BIOS.

Save the changes, and now proceed to the usual installation of Windows 7
Learn windows 7 + all nuances lessons learning to work on a computer
All secrets and subtleties of Windows 7
To the question how to install Windows 7 with external hard disk Posted by the author Mikador. The best answer is In general, you create a section of 4 gig on an external hard chart (better a little more - a little more than the DVD disk - 4.5-4.6 gigabyte) with the FAT 32 file system, make it active (through computer control (Control Panel - Administration and Computer Disc Control and On this very section on the external hardhand to the back button and choose to make active)) and simply copy files from the disk with Windows. So put on the netbook.
q | A | P
Guru
(4789)
1) With a similar approach, installation and launch occur not from under Windows as from flash key fob.
2) "Only the question was no media except for an external hard ..."
Sorry, what did I describe?
Answer from Flavored[guru]
well, if the BIOS supports the download from USB HDD there are no problems. Here is Ready Windows to install from USB
MSKD.RU - download »Soft» OS assembly]
Windows 7 - USB 4 V9.10
[Date] 09/16/2010 13:40
Program Name: Windows 7 - USB 4
Program version: v9.10
Last program version: v9.10
Interface language: Russian / English
Treatment: Not required, integrated.
Updates: pass
System requirements:
32-bit (x86) processor 1 GHz;
1 gigabyte (GB) (for a 32-bit system) random access memory (RAM);
16 gigabytes (GB) (for a 32-bit system) on the hard disk;
Support boot with USB-HDD.
Description:
Directory To install Windows7 with USB media 4 GB.
Created for clean installation from a USB flash drive.
Set of additional programs:
Data-Admin7 + Mini WPI-Zverv3.8
Contains:
Original image of Windows. 7 (x86 rus / ENG)
Copy from the Windows7 USB 4GB directory all on the USB flash drive.
Reboot and exhibit in the BIOS menu download from HDD to USB.
At the first reboot, exhibit everything back, that is, with USB on the HDD.
After complete windows downloads 7
From the Data-Admin7 folder, launch additional programs.
From the WPI-MINI folder, you launch the WPI.hta file and select the software for a quiet installation.
Assembly is intended:
To facilitate the installation of Windows7 novice users (darting the directory, copied 4GB on the USB flash drive and re-installed for an hour, the main user software assembly and do not need to break the head with the flash drive assembly).
For experienced, those who want to circumvent the installation process, layout and testing the USB carrier, since it takes time.
It is also designed for laptop owners without CD-ROM.
And for those who are convinced that the boot time with CD-Roma has passed, since the USB load is more convenient, faster and reliable.
Convenient and proven assembly, real lego - designer.
All simplicity is that all files can be copied, delete complement, without any pre-boot action, through different utilities.
Copying the contents of the downloaded directory of Windows7 USB once on the USB flash drive, you will no longer spend time on the installation of boot actions (burning, removing the image, put a check mark on check after the recording, Oh! Disks end):
- Familiar words? Drive at all fell. And convenient and fast, how much allows USB 2.0. For example: You need to delete the program - delete, you need to download - copy. To create your folder it is better to use the Data-Admin7 directory. You can and the bootloader and WPI itself are constructed, but if you can. In general, everything is copied as an ordinary folder on your computer.
Edited from September 2009.
Limit, damp, exhausted.
Who tested everyone - Thank you !!!
We wish - quick download!
Installation occurs in automatic mode,
i.e. there is no extra question during installation, all installation takes place in several clicks:
Auto Download Information
1. Expose, in the BIOS, download from USB - the download has begun.
2. We make the disk markup and indicate which section to boot.
3. At the first re-download, exhibit, in the BIOS, back, loading with HDD.
4. Enter the username, computer and password.
5. Remove a tick with automatic activation (Although it is not necessary).
All, on this installation and activation is completed.
The minimum load time is 13 minutes (comp - 2 kernels, 2 giga).
I already as a year refused to drive a DVD, and the tendencies of the netbooks talk about the correctness of the decision. But I got the question of how to install the OS OPERATION without a DVD. The flash drive died not to the place, and when I went to the store for a new one, the external wheels of Seagate Expansion, 250GB version of which cost literally 500 rubles were more expensive than 8GB flash drive (2323 rubles). And the size and all of which, not much embarrassed pocket jacket.
Dimensions: 141 x 18 x 80 mm
Weight: 0.16 kg
But as it turned out, installing Windows 7 with USB HDD, it works not in the same way as with
USB Flash. Having understood and checking the performance, I share information with you.
It works both for desktop PCs, nooktukov, and for netbooks.
- HDD preparation
- Cutting and preparing partitions HDD;
- Copy Windows 7.
HDD preparation
You can make a boot disk, install Windows 7, and then erase it and further use HDD for your needs. Or do it much more convenient:If you do not feel sorry for 4 gigabytes of a place on an external HDD, then the disc can be cut into two parts, in our case I did it exactly that by giving one piece to the Windows 7 distribution, which will always be at hand.
Cutting and preparation of HDD sections
1. We go to:Control Panel - Administration - Computer Management (Disk Management)
Find a disk 1 (if you have several in the system hard disks, Find the one that is equal to the size of your external HDD)
2. Choose our external HDD drive:
- Right click Mouse - Delete Tom;
- Right click Mouse - Create a simple volume;
In the window that appears, select the size of the volume of 4300 megabytes (under the distribution section), and click further,
In the next dialog, if you need to choose the drive letter, and click further. In a new dialogue, you must format our new section (FAT 32), click Next and Finish.
After that, you need to make the created section active, for this:
- Right click on the section - make a section active.
Now our external HDD has the following form:
By the same principle format the second partition on the disk, best in NTFS. but do not make it active.
Copy Windows 7.
There has never been to copy the Windows distribution to the boot disk so easy.If you have a DVD:
- Just open your installation DVD, highlight all folders and files, and copy to the active section of your external HDD;
If you have an ISO image:
- Just open your installation ISO image through
Greetings, blog readers.
Today I would like to tell, why and how the installation of windows on the external hDD. Similar may need when users want to evaluate the new version operating system. Or they need a shell in which these or other applications will work. Depending on the needs, the method changes. Next, we consider the highlights relating to this topic.
Placing Windows 10 on an external hard disk implies the fulfillment of a considerable row of movements. First of all, it is necessary to prepare the device itself. So, to get a removable hard drive from OS, we do the following:
Now we see a unallocated area of \u200b\u200b60 GB, which will be needed to install Windows 8 or more new version. Now you need to turn the space in such that will be "normal" to be perceived by the system:

As a result, a formatted partition appears on the USB disk, with file nTFS system. It is here that we will deliver the OS, whether Windows XP or more recent versions.
WINNT SETUP3 program( )
After we have all prepared, you can proceed directly to the placement of the OS Operations on the Removable Device:
Immediately it is worth noting that such an operation will not be able to turn from the drive to the external hard uSB disk. This is due to many aspects. So, to start simply prepare a virtual image.
Win installation on external HDD for Mac( )

Sometimes there are situations where users for some reason need to install an operating system from Microsoft to a USB disk connected to computer MAC.. This may be the absence of narrowly specialized software options. Or easy interest. In any case, the method is:
We launch our poppy. Check the system for AVG AntiVirus Free viruses. Upload drivers for Boot Camp. (A program that allows you to spend the entire operation). To do this, go to "Programs", and then in "Utilities" or "Service Programs" - it depends on the version of OS X.
Run the application and specify that we need to download everything to support Win.
After we will do action through, which means the program must be downloaded and installed.

Run. Choose " A car"And" Create ". A master of configuration of the new " virtuals" Click " Continue.».
We enter the name of the desired Operation, for example, Windows 7. The type will be installed independently. We continue until we reach the desired goal. At the very end, choose " Create.».
Stand on "". Click on the disk next to " Drive: Secondary ...».
Indicate the image from our OS.
Confirm the actions and start.
The Win Installation screen appears.

When "", go to " Devices", And then on" ".

After the procedure is completed, restart the computer.
Go to " Start», « A computer" On the side panel we find Net" Open access to documents. The network should appear " Vboxsvr." We go and copy the above-mentioned directory on "".

Then go to " Control Panel"And" Programs" Need to find and remove " Oracle vm VirtualBox ..." Restart the car.
Go to the catalog " WindowsSupport" Run " Setup.exe." After completing, turn off " virtual».
We need in " Macintosh HD." Then in " Users"And in the catalog" client name" Further in "" and in " Windows 7.».
Run main file. With extension * .vdi.. An image is mounted.
Two new disks will appear among the devices. All contents from them copied to a new directory.

Connect and clean the USB-HDD. And without formatting here is not to do.
Go to " Start"And" A computer" Then in " Home On PSF."And" ". Go to the previously created directory, and transfer all items on our portable device.
There are situations when you want to install Windows 7 to a computer that is not equipped with a CD-ROM device reading and writing (DVD-ROM), for example netbook. As a rule, on most netbooks there is no internal drive for reading DVDs. To install Windows 7 on such a netbook, you will need to resort either to using an external DVD drive, or to the USB bootable flash drive ("Flashki"). In both cases, you will need to load a netbook from an external device.
Installing Windows 7 on a netbook using an external DVD drive
If your disposal has an external drive for reading DVDs, you can install Windows 7 with installation disk.

Everything is clear here, it only needs to connect an external DVD drive to your netbook using the USB connector and insert the Windows 7 installation disk into the DVD drive.
For update previous version Windows to Windows 7 Start the Windows 7 installation process from the existing operating system. For full reinstall The existing operating system, download the netbook from the Windows 7 installation disk.
Option 1.
Installing Windows 7 on a netbook using a USB flash drive with Windows 7 installation disk
You can independently create a boot USB drive using Windows 7 bootable files.
To do this, you will need:
1) USB Flash Drive with 4 GB or more.
2) Windows 7 installation disk.
3) computer under windows control Vista or Windows 7, equipped with a DVD-Disk reader.
Preparing USB Flash Drive
Before you start creating a USB bootable flash drive, you need to format it. Please note that in the course of formatting, all data contained on the flash drive will be lost.
1) Connect the USB flash drive to the netbook.
2) Open Command line With elevated privileges (go to the "Start"\u003e menu\u003e Standard, click on the Right-click on the "Command Line" application and select "Run from the administrator").

In the command line window, enter and execute the following commands:
diskpart.
lIST DISK.
The window will display a list of drives installed on your netbook. Determine the number of your USB flash drive, completing the size of your drive with the list given (in the example in the image - disk 1).

3) Enter the formatting of your USB flash drive, sequentially entered and performing the following commands where X is the number of your USB flash drive defined in the previous step:
clean.(erases all data and sections on USB disk)
create.partition.primary (Create a new partition on the disk)
sELECTpartition 1. (Selecting a section as a further object for manipulations)
active. (Make the selected section active)
format.fS \u003d.NTFS (format the section in file System NTFS)
assign. (You activate the process of connecting the device, receiving letters for the created partitions (if the automotive option is enabled - the window pops up, as if you just connected a USB drive))
eXIT (exit from diskpart. on the command line)
ATTENTION! Check carefully that you specify the number for the flash drive. If you specify the wrong digit - the hard disk number of your computer, you can lose all data.

Creating a USB Boot Flash Drive
After performing these steps, you can proceed to the creation of a USB bootable flash drive. For this:
1) Insert the Windows 7 boot disk into the DVD drive.
2) Open the command line with elevated privileges.
3) Go to the root directory of the Windows 7 installation disk, sequentially entering and performing the following commands, where D is the letter of your DVD drive:

4) Enter and apply the following command where F - the letter of your USB flash drive to add the boot windows code 7 on USB flash drive:
bootSect / NT60 F:

To complete the creation of a USB bootable flash drive, you need to copy all files from the Windows 7 installation disk to your flash drive. This can be done in two ways:
Method A, through a conductorWindows.
1) Through the "Computer" window, find and open the DVD-drive with the Windows 7 installation disk and the USB Flash Drive.
2) In the DVD drive window, highlight all files contained on the disk, right-click on any of the files and select "Copy".
3) Click the USB flash drive window, right-click on the empty space in the window and select "Paste".
4) Wait for the end of the file copying process.
Method b andusing the command:
xCOPY H: I: / S / E / H / K
where I.: - Letter, obtained just prepared by USB drive.

Upon completion of this process, you can use your USB flash drive to install Windows 7 on a netbook. For full installation You will need to download a netbook from the USB flash drive.
Option 2.
Installing Windows 7 on a netbook with USB flash drive if there are original ISO image windows 7
For this we will need:
1) the original ISO image of the Windows 7 distribution;
3) computer or netbook running Windows XP SP2, Windows Vista. or windows 7 (32- or 64-bit versions) $
4) Clean USB flash drive with a volume of at least 4 GB.
To create a USB installation flash drive, follow the instructions below:
1) Download windows application 7 DVD / USB Download Tool from website Microsoft Store. And install it on your netbook.
2) Start Windows 7 DVD / USB Download Tool.

3) Specify the path to the image of the installation disk. To do this, click the "Browse" button and find the appropriate ISO image file on your computer. Upon completion, click the "Next" button.


4) Select the appropriate record medium. To create a USB installation flash drive, press the "USB Device" button.

5) Specify the USB flash drive to which the record should be recorded (the "My flash drive" drive in the image below). After selecting a flash drive, click on the "Begin Copying" button to start recording.

6) In the event that the flash drive is not connected to the computer, a window will be displayed that reports that compatible uSB devices No compatible USB devices detected.

In this case, connect the USB flash drive and click on the update button "Refresh", located next to the drop-down list.
7) Please note that during the record all the files contained on the flash drive are deleted. To continue, click the "Erase USB Device" button.


9) Upon completion of this process, you can use your USB flash drive to install Windows 7 on a netbook. To carry out the full installation, you will need to download a netbook from the USB flash drive.

Option 3.
Installing Windows 7 on a netbook using USB flash drive if there is an original ISO image of Windows 7 using Ultraiso
As in Embodiment 2, we will need:
- the original ISO image of the Windows 7 distribution;
- pure flash drive volume of at least 4 GB $
1) in the program Ultraiso. On the File menu, click on Open, select the Windows 7 image you need and click Open.
2) After making sure the image is open - to select the hard disk image in the Self-loading menu.
3) In the Disk Drive list: Choose your flash drive, in the recording method: USB-HDD + and click Record.
4) In the window that appears on the destruction of information, click Yes. Wait for the entry (from 5 to 20 minutes).
5) Without removing the USB port flash drive to restart the laptop.
6) Immediately after the start of restart, click on the Delete keypad to get into the BIOS.
7) In the BIOS, install the download primarily with USB-HDD.
8) Save the settings and exit BIOS. The computer is restarted and starts loading from the flash drive.
9) The installation itself is not much different from the installation from the boot DVD, but there is one point. When copying and unpacking files is completed, and the computer will start a reboot for the first time, you need to go to the BIOS again and install the load priority (default from the hard disk) or pull the USB flash drive. Otherwise, it is possible that the download will go back from the flash drive.
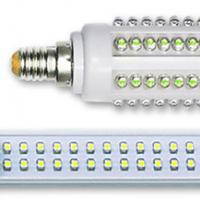 Lighting devices based on alternating current LEDs find their niche and may come out beyond its limits.
 Requirements and rates for cable laying in Earth Scope of application, Definitions
 Automobile stroboscope from laser pointer
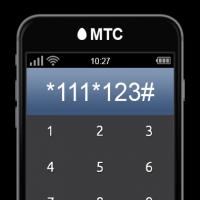 Order 20 UAH to the account. How to Borrow on MTS. Additional information on the service
 How to check the account replenishment
 How to get a loan on tele2?
 Responsiveness SSD on a miniature board What SSD Drive Buy