Windows 7 boot disk from a USB flash drive. Creating a bootable USB flash drive for installing Windows. BIOS boot selection
Before installing the system, you need to understand the how to write an image of Windows 7 to a USB flash drive, then set up the computer for Windows installations 7, and start the installation process. If you have visited this page, then you are having difficulty creating bootable flash drive or disk. Here you will find answers to all questions.
To write an image of Windows 7 to a USB flash drive, you will need specialized tools. There are quite a few of them, but we will describe them all. As an example, let's talk about UltraISO, USB / DVD Download Tool and many others.
Step 1: What you need to capture a Windows 7 image
Any operating system image or programs is a generally accepted format that most utilities recognize. The most popular image format is ISO. It can be burned to flash drives, hard disks, CD-DVD media. The format is somewhat similar to archive ZIP or RAR. In general, this is an image of an optical disc and is a single file or archive containing any other type of files. Modern operating systems already have built-in tools for working with the format. You can also use third-party software: UltraISO, DAEMON Tools, Alcohol 120%, PowerISO, ImgBurn, ISO Master and many others.
Before choosing an OS image, you need to figure out in advance the bit depth and volume that it will occupy on the media. There are 32 discharge systems(86x) and 64-bit (64x). Here you can find out about the differences in these bit depths. The scope of the systems is also different. Below is a table of all Windows editions 7 with system requirements:
| Editorial staff | RAM | Processors | KernelsCpu | ||
| 32x | 64x | 32x | 64x | ||
| Windows 7 Ultimate |
4 GB |
192 GB |
|||
| Windows 7 Professional | |||||
| Windows 7 Enterprise | |||||
| Windows 7 Home Premium |
16 GB |
1 | |||
| Windows 7 Home Basic |
8 GB |
||||
| Windows 7 Starter |
2 GB |
||||
Using these characteristics, you can choose a system for yourself. In this material, we will consider two programs, using which it is possible to write an image of Windows 7 to a USB flash drive: UltraISO, USB / DVD Download Tool.
You can download tools from resources without viruses from here:
- USB / DVD Download Tool.
- UltraISO.
- Command line.
Step 2: How to burn a Windows 7 image to a USB flash drive using UltraISO
Download the program from the above link or from your source and install. Using trial version UltraISO can accomplish the intended task, so it is not necessary to search for a keyed version. After downloading and installing, we perform the following steps (I also advise you to read the article if you work with optical media :)
- We launch the program. If it is not complete, then we use a trial period.
- Insert a 4GB or 8GB flash drive, preferably larger, into the USB port.
- In the program, click on the tab with the mouse "File" — "Open" and select the image file Windows 7 Ultimate (Maximum) or any other version.
- The files will be loaded automatically into the program window, which are displayed in the right section. Now you need to click on the "Bootstrapping" tab and select the option "Burn Hard Disk Image".
- At the next step, select the USB flash drive (Disk Drive), the image file that has already been registered, the recording method USB-HDD +... It is worth noting that the files that are already on the USB flash drive will be destroyed.
- Click on the button "Burn".

- A message appears stating that the information on the disc will be erased. We agree with the "Yes" button.

- Preparation for recording begins, and then the process itself, which does not take much time.

- The end of the operation is accompanied by a message "The recording is complete!".
The finished flash drive can now be used for its intended purpose.
Step 3: How to Burn Windows 7 Image Using USB / DVD Download Tool
- We launch the program from the desktop. A window will open where you have to perform four steps. The first step is to select an ISO image of the operating system. Click the Next button.
- Next, select the type of media, in our USB case Device.

- Select the medium and click "Begin Copy".

- Next, the formatting of the flash drive will begin and the files will be copied.

After copying, the flash drive is ready to install Windows 7. It is worth noting that using the USB / DVD Download Tool you can burn the image to a DVD or Blu-Ray disc.
Step 4: How to write a Windows 7 image to a USB flash drive using the command line
If you have the Windows operating system at hand, using its capabilities, you can create a bootable USB flash drive. We will use the command line. Run this tool as administrator and follow these steps:
- V command line(CMD) enter the command for working with disks: diskpart... Using it, we will format the media and write to it ISO files image.
- After entering the command indicated above, the user will find himself in the utility for working with disks, which is characterized by the line "DISKPART>".
- The next step involves displaying all drives connected to the computer. For this there is a command list disk.
- You need to select the media that will be used as bootable. Here we focus on volume. For example, now a 30 Gb flash drive is connected here, in the "Size" column, this volume is just indicated. To choose this disc, you need to register select disk N(your media number). When choosing, be very careful, because it is very easy to make a mistake here.
- We proceed to copying files to a USB flash drive. We mount the system image (so that it is displayed in the My Computer directory) and, in the command line, go to the created image disk.
- Using the commands, go to the boot directory and execute the command bootsect / nt60 N... Where N is the letter of the flash drive intended for installing Windows
- Copy the image files to the USB flash drive.
- Installing Windows 7.
Some users will find it a little difficult to use the command line as there are many commands to enter. The probability of making a mistake increases many times over here. Therefore, it is recommended to use UltraISO or USB / DVD Download Tool. Other utilities will be discussed in the following articles:
Using all these tools, the user will figure out in no time how to write an image of Windows 7 to a USB flash drive. In this material, third-party and regular means for creating such a medium were disassembled. The following material will be about how to create a bootable DVD disc with Windows 7. This use case is losing popularity every year, as DVD drives are embedded in computer systems less and less, but instead of optical discs flash media are coming.
Given the fact that modern computer s are increasingly used without DVD drives, and you need to install Windows now, then a bootable USB flash drive Windows 7 will come in handy.
Flash - USB stick, has long since replaced the floppy drive. A USB flash drive as a storage medium has its advantages as a replacement for both CDs and DVDs. A USB drive is generally larger in capacity than disc media and, since it is more expensive, cannot (yet) be used as a replacement.
There are still reasons to choose a USB device over a DVD drive. Not only is it faster to copy data such as setup files from a USB drive, but during use the access times are also significantly faster. Thus, installing Windows 7 will be much faster from a USB flash drive than from a DVD, and of course, it is especially useful for PCs without a drive.
Creating a bootable USB flash drive Windows 7 - officially
We will show you how to create a bootable USB flash drive 7. You will need a USB flash drive at least 4 GB of free space, and a copy installation disk Windows 7. See: How to download the Windows 7 ISO image
To turn a USB flash drive into a bootable one, use the program offered by Microsoft - Windows 7 USB / DVD Download Tool. Download the installer from Microsoft.com following the basic steps to create a bootable Windows 7 USB flash drive. Once the tool is installed, run.
- Download Windows 7 USB / DVD Download Tool: https://archive.codeplex.com/?p=wudt
The second step, to create and get a bootable USB flash drive for Windows 7, click on the Browse button and specify where the bootable USB flash drive will be written from. Next.

In the third step, make sure you are using the correct USB device. Move all files from the USB stick to a local drive before continuing. The tool will tell you about the detected data on the device.

Formatting will take place very quickly, while creating a bootable USB drive will take a little more (about 10 to 15 minutes).

After completing the process, you will receive a full-fledged bootable Windows 7 USB drive. Close the tool and use the USB flash drive to install Windows 7 as intended.
Hello.
Who would not say what, but the popularity of optical discs is rapidly falling: not even all computers and laptops have a drive for them. And, probably, this is not surprising: after all, an ordinary flash drive that fits into any pocket can easily replace them.
It is also more convenient to use a USB flash drive to install Windows (there is a USB port on any computer!). But for this it must be written down / prepared correctly.
In this article I will consider all the typical questions related to the creation of installation flash drives: programs for this operation, step by step settings before recording, the process of creating flash drives with multiple OS (multiboot), UEFI flash drives. But first things first...
Note!
You may find useful an article on how to download an ISO image with Windows 10 OS [officially and legally] -
There are quite a few programs of this kind. To cover all of them in one article is a thankless task, and not even necessary. I will give below those programs that I have used (and still use) myself many times when writing my bootable media.
Approx. : how to use this or that program will be discussed in the second part of this article.
Table number 1 (main)
| Program name / site address | Description | Screenshots |
|---|---|---|
| UltraISO
|
One of best programs for working with ISO-images of discs. Allows you to edit them, extract files from them (or add), write images to a USB flash drive / disk, etc. Generally, irreplaceable program to work with the ISO format, and I have repeatedly recommended it in my articles (and in this format, by the way, almost all Windows operating systems are distributed). |
(main window of the program) |
| Rufus
|
Small free utility, capable of creating almost any bootable flash drives, memory cards, etc. Allows you to prepare, including flash drives for UEFI. Another advantage of the utility: it works somewhat faster than other counterparts. Note: there is as portable version(not needing installation) and classic. Works in all Windows OS: XP, 7, 8, 10. |
(Rufus settings for writing a bootable flash drive) |
| One of the most famous programs for writing bootable media. Allows you to create bootable media with OS: Windows 2000, XP, 7, 8, 10, etc. The program also allows you to create multiboot flash drives (i.e. on which 2-3 or more Windows OS and at boot you can choose which one to install). In general, an indispensable software if you have to create installation media from time to time. |
(setting before burning a flash drive) | |
| WintoFlash https://wintoflash.com/ |
Simple and convenient program to create bootable media. In the process of creating and configuring you will be accompanied by a wizard: the whole process goes in steps, which is very convenient if you have never used such programs before. Possibilities:
|
(WintoFlash main window) |
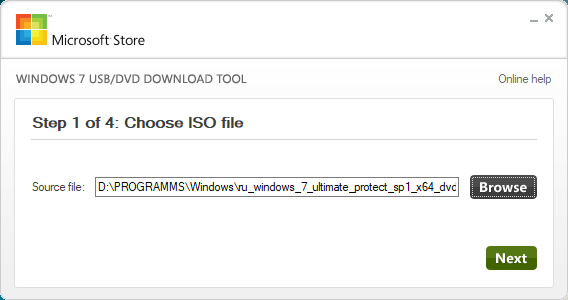
| Windows 7 usb dvd download tool | A simple and convenient utility for writing bootable flash drives from Microsoft itself (therefore it was impossible not to include it in this review ).
You can write a bootable USB flash drive with the following Windows OS: 7, 8, 10. The entire recording process is divided into several steps: choosing a flash drive, choosing an image, confirming, recording ... By the way, there is nothing superfluous in the program: the design is in the style of minimalism. In general, I recommend! Among the shortcomings: it is not always possible to write an ISO image from Windows to a 4 GB flash drive (the program asks for 8, although other similar utilities write this image to the same USB flash drive ...). |
(the first step is choosing an ISO image) |
Helper programs
A small free * imaging program (supports a huge number of different formats: ISO, MDS / MDF, CCD, etc.). After installing this program, you will have a virtual drive in "my computer" (their number can be increased) in which you can open any of the images. For a computer, it will all look as if you opened a real CD / DVD disc in the drive.
In addition to opening images, you can also create them from various disks. In general, an irreplaceable program on the PC (especially with the development and popularization of disk images).
* Note: in addition to free version, on the developer's website you can find a paid one (with advanced functionality).
Analogue Daemon tools, has the same functions: creating and opening images, support for protected disks, etc. Alcohol 120% is a paid version of the program, there is a free version - Alcohol 52%.
Basically, you can work with both Daemon Tools and Alcohol. The choice is a matter of taste!
Step-by-step creation of a bootable USB flash drive
Windows XP
Once one of the most popular operating systems from Microsoft. Now, of course, its popularity is falling, and yet a fairly large number of PCs run on this particular OS. Therefore, I decided to include it in this article ...
WinToFlash
In my opinion, the easiest way to write a bootable USB flash drive with Windows XP is to use the WinToFlash utility. The fact is that a wizard is built into it, which will guide you through all the hardships ... (by the way, the Lite version is enough for work).
After starting the utility, click on the green checkmark (screen below) - " Windows Installer to USB Transfer Wizard".

WintoFlash - Getting Started with the Wizard

The next step: you need to specify the path to the image file with Windows XP and select the USB flash drive to which this image will be written.

Actually, in the next step, the program will warn you that all information will be deleted from the disk and will offer to continue. Agree and wait until all files are copied to the USB flash drive.

To help! I have more detailed instructions for working with WinSetupFromUSB -
This program is somewhat different from the previous one. Firstly, there is no wizard here who will guide you through the steps (you need to enter all the settings yourself), and secondly, there is no support for the Russian language ...
First, insert the USB stick into the USB port and run WinSetupFromUSB and the administrator name.
- select the inserted USB flash drive;
- click the "Auto format it with FBinst" checkbox, the file system is NTFS;
- specify the path to the folder with Windows distribution XP (the ISO image can be unzipped using the WinRar program, or open it in Daemon Tools (links to programs are presented above));
- the final touch - press the "GO" button.

In the next step, the program will warn you that all data on the USB flash drive will be deleted during the process of writing data to it. Just confirm it.

If the flash drive has been successfully registered, you will see the "Job Done" window.

Windows 7, 8, 10
In principle, the same utilities can be used to write these OSes - the whole process is identical. I'll show you the whole process step by step using several utilities as an example.
Windows 7 usb / dvd tool
Despite the fact that this utility is designed for Windows 7, you can use it to write to a USB flash drive with Windows 8/10. Because This program is the simplest (it couldn't be easier) of all and the whole process of recording an image in it consists of only 4 steps, I recommend it first of all.
Step 1: specify the ISO image with Windows OS ("Browse" button, when the image is specified, click "Next").

Specify ISO file
Step 2: select the device to record. In this case, you need to choose either USB device, or DVD. We choose the first one.

Step 3: select the letter of the drive to which the recording will be carried out (i.e., indicate the required flash drive, because several of them can be connected to the PC ...).

Step 4: recording process. When the message about the successful completion of the operation (Bootable USB device created successfully) is shown, you can restart the PC and check the USB flash drive ...

As you can see above, the whole process is extremely simple and not replete with anything superfluous.
UltraISO

Rufus
Update article from 24.01.2019: Added screenshots of version 3.4. Also on my blog there was an instruction for working with Rufus 3.4 -

UEFI flash drive
UEFI is new standard, new interface(so to speak). It is intended to replace the "old" BIOS. One of the main tasks of UEFI is to protect your computer from boot viruses that are loaded together (or before) the Windows operating system boots (sorry for the tautology).
Therefore, in new computers / laptops, if you connect a USB flash drive created in the classical way to their USB port, the PC will not see it! In order for this flash drive to become visible: you need to switch UEFI to Legacy (the spelling may differ slightly, depending on the BIOS / UEFI version) and turn off Secure Boot.
In the same part of the article, I will consider a couple of ways how you can create bootable UEFI USB flash drive (so that you do not have to disable Secure Boot protection in BIOS). So...
Method # 1 - using the WinSetupFromUSB utility
First, run the utility as an administrator (how to do it: right-click on the executable file, then select the desired function in the context menu).

- Select the USB flash drive (be careful, all data on the USB flash drive will be deleted during recording!);
- Click the "Auto format it with FBinst" checkbox and select file system FAT 32 (do not touch the rest of the checkboxes);
- Next, select the ISO image file with Windows (in the example below, I chose Windows 8);
- Press the GO button and wait for the process to complete.

Configuring WinSetupFromUSB for writing a UEFI flash drive.
Method number 2 - using the Rufus utility
Rufus is a great writing utility different types bootable media. All settings are performed in one window, everything is simple and fast.
You also need to run the utility from the administrator (screenshot below).


Rufus 3.4 - creating a USB flash drive for UEFI (GPT)
Multiboot flash drive (multiple OS on 1 flash drive!)
On a USB flash drive, you can write not only one version of Windows, but several at once! For example, imagine you have an OS on one flash drive: Windows XP 32 bit, Windows 7 64 bit, Windows 8 64 bit and Windows 10 64bit. In which case, you do not need to carry with you a bunch of flash drives with different OS - with one single one, you can immediately install the desired one. Below I will consider in detail how and what is done ...
To create such a USB flash drive, you need the following:
- multiple ISO images with the systems you want (for example, Windows XP and Windows 7). By the way, it is better to take the Windows XP image with integrated SATA drivers otherwise on new motherboards get a blue screen upon installation;
- Daemon Tools or Alcohol (if you want to add Windows 2000, XP to the USB flash drive): programs that can open an ISO image (ie you will see a virtual drive in "my computer", since this is not an ISO image, but a regular disc inserted into a CD-Rom. Presented in the first part of the article) ;
- 8-16 GB flash drive (the more OS you are going to record, the more spacious the flash drive should be);
- program (presented at the top of the article).
Step-by-step instructions for creating a multiboot flash drive
- Run the program WinSetupFromUSB as administrator... To do this, just go to the program folder, select the executable file and right-click on it, then select "Run as administrator" from the context menu.
- Next, in Daemon Tools, open the image with the Windows 2000/2003 / XP OS (those who will not write these OS to a USB flash drive can skip this step).

The Windows XP ISO is open in Daemon Tools.
- Insert the USB flash drive into the USB port;
- Next, you need to set the following parameters: 1)
specify the inserted USB flash drive (in my case, drive "E: \"); 2)
Check the box "Auto Format it with Fbinst", select the file NTFS system (if you plan to create a USB flash drive for UEFI - choose FAT 32); other checkboxes by default; 3)
specify the virtual drive in which the ISO image with Windows XP / 2000 is open; 4)
specify the ISO image from Windows 10 (in my case, this OS was chosen for a multiboot flash drive); 5)
press the "GO" button - start recording the flash drive. All numbers are illustrated in the screenshot below.

- Next, the program will ask you whether to start recording exactly. By the way, it is important that all data on the flash drive will be deleted!
- Then the program will ask again - the answer is yes.

Warning 2 - click "Yes".
- Further, if everything went well, at the bottom of the window you will see a "green bar" - the program has started working. The recording time depends on the flash drive, the selected images, the speed of your USB port, PC boot, etc. On average, 5-20 minutes. for recording multiple OS. At this time, it is better not to touch the computer and not run resource-intensive tasks on it: games, video / graphics editors, etc.

- When the flash drive is written, you will see the inscription "Job Done". In principle, the USB flash drive can already be used, it now has 2 Windows XP and 10 operating systems! The screen is below.
- To add another OS, for example, Windows 7 - just insert the USB stick again into the USB port, run WinSetupFromUSB (as administrator). Then: 1)
select the desired flash drive (note: on which we previously recorded 2 OS)
; 2)
specify the ISO image with the added Windows OS; 3)
click the "GO" button. Note: please note that you do not need to check the box next to "Auto format it with FBinst", as we did before!

- When another OS is added, you will see a regular window - the job is done. Now the flash drive has 3 OS: Windows XP (32 bit), 7 and 10 (64 bit).
- If you want to add another OS, for example, Windows 8, you need to do step 9 again (see above). In principle, this way you can add quite a lot of OS to your USB flash drive (so to speak, provide all the options) ...
Checking a multiboot flash drive
To check the created USB flash drive in operation, you need to do the following:
- Go to the BIOS and queue the USB flash drive (you can use the BOOT Menu). In more detail about which buttons for running in Bios and calling the Boot Menu is described here:
- Insert the USB flash drive into the USB port and restart the computer;
- A window should appear as in the screenshot below: for example, I selected Windows string NT 6 (this is for choosing to install Windows 7, 8, 10).

After that, if you have 2 or more "new" operating systems, you will see a list with all of them. Choose the option you want and continue with the installation. The screen is shown below, the flash drive is working!

On this positive note, I am finishing the article, for additions, as always, I will be grateful.
Hello!
To install Windows on a modern computer or laptop, an ordinary USB flash drive is increasingly used, rather than a CD / DVD with an OS. A USB storage device has many advantages over a disk: faster installation, smaller size, and the ability to use even on PCs that do not have a floppy drive.
If you just take a disk with an operating system and copy all the data to a USB flash drive, this will not make it an installation one.
I would like to consider several ways to create bootable media with different versions Windows (by the way, if you are interested in the question of a multiboot drive, you can familiarize yourself with this :).
What is required
- Utilities for writing a USB flash drive. Which one to use depends on which version of the operating system you decide to use. Popular utilities: ULTRA ISO, Daemon Tools, WinSetupFromUSB.
- USB drive, preferably 4 GB or more. For Windows XP, a smaller one is also suitable, but for Windows 7+ you will definitely not be able to use less than 4 GB.
- An ISO installation image with the OS version you need. You can make such an image yourself from the installation disk or download it (for example, from the Microsoft website you can download new windows 10 at the link: microsoft.com/ru-ru/software-download/windows10).
- Free time - 5-10 minutes.
Creating a bootable Windows USB stick
So let's move on to methods of creating and recording media with an operating system. The methods are very simple, you can master them very quickly.
Universal method for all versions
Why universal? Yes, because it can be used to create a bootable USB drive from any Windows version(except XP and below). However, you can try to burn the medium in this way and with XP - only it does not work for everyone, the chances are 50/50 ...
It is also important to note that when installing the OS from a USB stick, you do not need to use USB 3.0 (this high-speed port is marked in blue).
For recording ISO image one utility is needed - Ultra ISO (by the way, it is very popular and many probably already have it on the computer).
By the way, for those who want to burn an installation USB flash drive with version 10, this note may be very useful: (the article tells about one cool utility Rufus that creates bootable media several times faster programs analogs).
Step by step actions
Download the Ultra ISO program from the official website: ezbsystems.com/ultraiso. Let's start the process right away.
If you were unable to create bootable media using the ULTRA ISO program, try the following utility from this article (see below).
Creating an image of Windows 7/8
For this method, you can use the recommended Micrisoft utility - Windows 7 USB / DVD download tool (link to the official website: microsoft.com/en-us/download/windows-usb-dvd-download-tool).
However, I still prefer to use the first method (via ULTRA ISO) - because there is one drawback with this utility: it cannot always write an image of Windows 7 to a 4 GB USB drive. If you will be using an 8 GB flash drive, that's even better.
Let's take a look at the steps.

Bootable media with Windows XP
To create an installation USB drive with XP, we need two utilities at once: Daemon Tools + WinSetupFromUSB (I have provided links to them in
Not every user has a DVD drive, moreover, recent times rare PCs are equipped with them. But you still need to install the system, and for this it is most convenient to use a bootable USB flash drive. Let's figure out how to install Windows 7 from a USB flash drive - after all, you will not buy a DVD for this purpose.
Before proceeding to the installation, carefully study this article: in the process, various difficulties may arise, which can be solved by one of the methods described below.
The installation process itself can be divided into the following stages:
- downloading the installation image;
- computer preparation;
- creating a bootable USB flash drive;
- PC BIOS setup;
- installing Windows 7.
Let's consider each stage in more detail.
Before you write the image to a USB flash drive and install the system from it, you need to download it. Today there is great amount ready-made assemblies of the operating system, which are equipped with many applications and functions.
Very often in such distributions the default theme or sound scheme is changed. But not all users like such innovations. You only need to download original images created by Microsoft. The huge headquarters of the world's leading programmers does their job better than some artisanal modifier.
A little below you will find a button by which you can download a torrent file for downloading the Russian version of Windows 7 with 32 or 64-bit architecture. The file is taken from the official Microsoft website and is completely original. Start downloading, and when the download is complete, move on to the next step.
After the file has been downloaded, open it with a torrent client. If you do not know how to work with such programs, follow our step-by-step instructions.
- First, download the torrent client itself. This will be the qBittoorent application.
- Install the program and use it to open the previously downloaded torrent file.

- We choose Windows version 7 (in our case it is a professional 64 bit) and click "OK".

- After that, the operating system will start loading at the maximum available speed.

Getting ready to install Windows 7
First of all, you need to copy to a safe place all the important information for us on the C drive. Each user stores data in his own way, so everyone has their own choice of folders for backing up. Most often these are folders: Downloads, Desktop, etc.
You can save files to another logical drive (the one on which the system will not be installed) or to external storage... You can also use cloud storage if there is not too much data. For example, the Mail.ru cloud gives you 100 GB of free space for free.
With an eye to the future, remember: during the operation of the PC, you need to store your data on a different disk than the system on which the system is installed. Divide the physical disk into partitions and save your files to any of them except the system one. To install Windows 7, a volume of 70 - 100 GB will be comfortable (depending on the type and amount of software used).
Another important point that should be considered before the installation is started is the drivers for our network card... If at the end of the installation of Windows 7 it turns out that there is no driver for the network card, there will be additional difficulties that will have to be solved using a second computer by transferring files from it via a USB flash drive.
If the computer is just purchased, there is no valuable information on it and cannot be, feel free to proceed to the next section, without copying the data.
Create a bootable USB flash drive
In order to create bootable media and start the procedure for installing the operating system, we need:
- USB stick with 8 GB or more. Instead of a USB flash drive, you can use and simple card memory card reader;
- installation distribution kit of "Seven" with the extension .iso;
- utility with which we will write the image to a USB flash drive;
Attention! Before you start creating the installation media, remember that all data on it will be irrevocably destroyed.
How to make installation media using Ultra ISO
The well-known disk imaging program can create boot drives... Let's consider the algorithm for writing Windows 7 to a USB device.
- Download and install the Ultra ISO program from the link.
- Run the resulting file and check the box next to "I accept the license agreement." We proceed to the next stage by clicking on "Next".

- Using the "Browse" button, select the installation path, then click on "Next".

- We don't change anything here and just move on.

- The program is being installed, we are waiting for its completion.

The Ultra ISO installation is complete, you can run it and go straight to creating a USB flash drive for installing Windows 7.

- The Ultra ISO program can be run in trial mode, so its functionality will not be affected in the least. Click on the button marked in the picture.

- Go to the "File" menu and click on the "Open" item.

- Select the Windows 7 image we downloaded, and then "Open".

- Go to the "Startup" section and click on the item that we marked in the screenshot.

- We make sure that the media we need is displayed in the devices at the top of the window and click on the "Format" button.
Attention! This will destroy all your data beyond recovery. If your USB storage device has required files, save them before that.

- In the next window, just click "Start".

- Ultra ISO will once again warn us that all information from the flash drive will be erased. Click "OK".

- After the formatting is over, click on "Write".

- The process of recording the "Seven" on a USB flash drive has begun. It will take about 5-10 minutes, depending on the speed of the drive and the selected OS version.

The recording is complete, our media can be used.

Let's look at a few more options for creating bootable media with Windows 7.
Rufus
This is another program that can create a bootable USB flash drive with the "Seven". First, let's download it.
The application, unlike Ultra ISO, does not require installation, so you can run the downloaded file and go straight to the process of burning the OS to a USB device. To do this, do the following:
- Choosing a device for recording. This will be our flash drive, in this case - 16 GB. Then click on the disk icon.

- We select the distribution kit we downloaded in the PC folder.

- We start the recording process with the "Start" button.

- Rufus will notify us that all files will be removed from the flash drive. If you have already created backup or there was no important information on the carrier, click "OK".

As a result, it will start Windows entry 7 to a USB flash drive, upon completion of which you will have a full installation media at your disposal.

Attention! Before starting the process of recording the system to a USB flash drive, be sure to save all data on it - otherwise they will be irretrievably lost.
As you can see, this way turned out to be much simpler than the previous one, but we will not dwell on this and consider several more options for recording Windows 7 to a USB drive.
Making a bootable USB flash drive using WinSetupFromUSB
Another application focused exclusively on writing operating system files to an external drive. Let's take a utility and look at the process of working with it.
- Select the path along which the program will be unpacked (click on the button with the image of three dots) and click "Extract".

- We are waiting for the end of unzipping all the necessary files.

- We open the directory into which the unpacking was carried out and launch the program depending on what architecture your operating system is based on. We have it 64 bit, respectively, we click on the marked file.

- We insert our flash drive into the USB port and make sure that it is displayed in WinSetupFromUSB. Next, check the box marked in the screenshot with the number "2". When the bird is placed, click on the icon with the image of three dots, marked with the number "3".

- Select the image of our operating system and click on "Open".

- It remains only to press the "GO" key and Windows 7 recording will begin.

Windows 7 is recording to an external drive. Once the process is complete, the USB flash drive can be used to install the system.


We will not stop at WinSetupFromUSB and will tell you how to burn OS to media via Windows 7 USB / DVD Download Tool from Microsoft.
Windows 7 USB / DVD Download Tool
it official app from Microsoft, which is why, in theory, it should be the best one to cope with the task of writing Windows 7 to a USB flash drive. Let's start working with the program.
- First, download the utility from the link from the official website. Then we launch it and click on the "Next" button.

- We are waiting for the program to install.

- We finish the installation process by clicking on the "Finish" button.

- Let's get down to working with the program. Initially, you need to specify the file that we will write. To do this, press the "Browse" button.

- After the path to the image file is registered, you can proceed to the next step - click "Next".

- Here you should select the type of media on which we will put the "Seven". Since we have a flash drive, we click on "USB device".

- We look so that our drive is displayed in the field indicated by the number "1", and click on the "Begin copying" button.

- After that, we will be warned that all information from the media will be erased and after confirmation, the process will start. Windows transfer 7 to a USB stick.

At the end, we will receive a bootable USB flash drive, with which it is easy to install the OS on a computer.
The program requires the Microsoft .NET Framework 2.0 library. If you do not have it, then download the program from the official Microsoft website.
We use the UNetBootin program
The UNetBootin utility is completely free. you can download it without registering or sending SMS. The program does not need to be installed - it works immediately after downloading. An application was created not only for recording on a Windows USB flash drive, but also for other operating systems, such as Linux or Mac OS.
We pass to the instructions for working with the application.
- First of all, set the checkbox to the "Disk Image" position and click on the button with the ellipsis. In the window that opens, we need a Windows distribution.

- In the drop-down list, marked with the number "1", select the USB device, indicate our USB flash drive and click "OK".

- The application will warn us that all data that is already on the flash drive will be irretrievably lost. If we do not need them, click "Yes to All".

The distribution kit is being written to a USB device. After it is completed, the flash drive can be used to install the OS.

Command line
You can create bootable media with "Seven" without using any programs by the system itself. We will use the command line for this.
The whole process is described in the form of detailed step-by-step instructions, each stage of which is accompanied by a screenshot for clarity.
- Initially, we launch the command line. This should be done exclusively on behalf of the administrator. We will create bootable media at Windows example 10, but in the same way you can get the result on Windows 7 - 8. Clamp the combination Win buttons+ R and in the window that appears, press the "Browse" button.

- We follow the path indicated in the screenshot by the number "1", and we find cmd app... We click on it with the right key of our manipulator and select "Run as administrator".

- We write the command diskpart in the command line and press Enter.

- To start recording to a disk, you must initially select it, and take this choice responsibly, because all data from it will be deleted. You can view the list of disks using the operators: "list disk", "list volume" or "list partition". The first two show the list of disks, the third displays the number of its partitions and their names. Insert the USB stick into the USB port and enter the DISKPART command "list disk". Then press Enter. You will see a list of all drives installed on this moment in the PC.

- We select the disk that we need. To do this, enter select disk disk_number. The disk number can be viewed at the last step, we have it "1" since its size is 14 GB, which corresponds to our flash drive.

- We remove the disk with the clean command. Make sure you did it again right choice- all data on the medium will be completely erased.

- Now we need to create a main partition for the flash drive, from which it will boot in the future. Enter the create partition primary command and press Enter.

- We set the drive letter using the assign letter = drive letter statement. Let's do that. We know that our PC has drives C, D and E - hence we specify F. The final command will look like this: assign letter = F.

- You can also specify the size of the partition. If you skip this step, it will take up all the free space. Set size logical drive using the create partition primary size = disk_size command. The size must be specified in megabytes.

- Select our disk using the select partition 1 command (specify your disk number) and press Enter.

- Now we need to make our section active. To do this, use the active operator.

- It remains to format the flash drive - we prescribe a command of the form: format fs = fat32 quick.

- Exit DISKPART using the exit command. Now you need to prepare the files for recording. We unpack our Windows 7 image using any archiver (we will use the familiar WinRAR) and extract all the files to our USB flash drive.

The installation media is ready and ready to use.
We use the WinToFlash program
Let's describe the process of working with another program for writing Windows 7 and other operating systems to a USB drive. First, download the utility from the link from the official website.
- Install the program and run it. In the window that opens, select the item marked with a red frame.

- At the very top, select "Windows", then specify Windows 7 and press the button marked in the screenshot with the number "3".

- We indicate the path to Windows image 7 that we downloaded. To do this, press the "Select" button.

- Click on "Add".

- We make sure that the desired flash drive is indicated as the target, and click "Run".

This will begin the process of creating bootable media with Windows 7, after which the device will be ready for use.
We write a bootable USB flash drive via WinToBootic
This application is one of the most simple tools for writing operating systems to external media. To work with the utility, you do not need to install it, nor do you need administrator rights. It will work like with Windows files, and with her images. The interface here is simple, and the speed of the program is pleasing.
To write Windows 7 to a USB flash drive via WinToBootic, do the following:
- First, download the program from the link and launch it. Check the box next to the item "Quick Format" and click "Do It!".

- We answer affirmatively to the request when formatting.

- We are again notified that all data on the flash drive will be deleted. Remember to save important information from the media, if it is there, and click on "OK".

- The preparation of the flash drive is completed, click "Thanks!"

- Next, select the files that will be written to our USB flash drive. To do this, click the icon indicated in the screenshot, and select the image we need.

- Press the button to start the process again.

Windows 7 will start recording to the USB flash drive. When it is over, the device can be used to install the system.

How to boot from a USB flash drive
For successful installation Windows 7 from a USB flash drive is not enough for us just to record operating system to the media, you also need to force the PC to boot not with hard disk, but from a USB stick. This can be done in two ways: either by modifying the BIOS, or through a special boot menu.
With regards to the Boot Menu, we can say that it is launched by different keys, depending on the model of the computer or laptop. You can see which button is responsible for this on your device in the instructions for it. We provide a list of combinations for the main brands of computers and laptops:
Launching Boot Menu on PC:

Launching the Boot Menu on a laptop:

Below is a list of the keys that launch the BIOS on different computers and laptops:

For clarity, we will show the process of installing a flash drive as the first boot device using the example of our PC with an Asus motherboard:
- We turn off or restart the computer and after starting it, press the button to go to the BIOS (for us it is Del).

- This is how the BIOS itself looks.

- Go to the Boot tab.

- We install our USB drive with the first device.

The process is similar on different computers, although the names of the tabs and items may differ. In order to understand how to enter the BIOS of your PC, read the instructions for it.
Installing Windows 7 from a USB flash drive
After the BIOS has been configured, you can go directly to installing Windows 7 from a USB flash drive. Let's get started.
- Immediately after the system starts, you will see the following window (preloading data for installing Windows 7 is in progress).

- We set regional parameters. Select the system language, region of residence, and keyboard layout. If desired, all these data can be specified after Windows startup When the configuration is complete, click on "Next".

- In the next step, just click "Install".

- It remains to accept the license agreement, and the installation will begin. Check the box as it is done in the screenshot and click "Next".

- Selecting the mode complete installation- this is the so-called clean option, when all old data on the system partition is deleted.

- We found ourselves in the section settings menu. Click on the entry with a red line.

- If your disk is not partitioned, you can do it here (for Windows 7, it would be most expedient to use about 100 GB of free space, the rest will become disk D). Don't forget to format system partition before installing Windows on it. When the operation is completed, click on the "Next" button.

- Finally started Windows installation... We are waiting for the process to be completed.

- Then the system will reboot and we are greeted by the Windows startup screen

- Initial optimization in progress. The system prepares all the necessary files.

- System services begin to start.

- Then we move on to completing the Windows installation.

- We are again informed about the need to restart the computer.

- The system will check how efficient our video card is.

- Now we need to provide our data. We write an arbitrary name and name of the computer. Then we press "Next".

- If necessary, you can set a password that the system will ask for upon startup. We skip this step, since the computer will be at home.

- If you have windows key 7, you can enter it here, however, this can be done after the system is started. We skip this step.

- We choose the option of protecting the system depending on our personal preferences. We will be installing another antivirus, so you won't need a regular one.

- Enter the time and time zone. Then we press "Next".

- We decide on the type of network. This is a pretty important step, since if we specify home network, and we will be connected to the public, our security will suffer greatly.

- The parameters are being applied and automatic setting networks.

- The last minute of optimization before our Windows 7 starts up.

As a result, we installed Windows 7 from a USB flash drive, the creation of which was described above.

Instead of an afterword
We have considered the mass different programs and the means of Windows itself in order to answer the question: how to install Windows 7 from a USB flash drive. However, these are not all options. There are a lot of such programs on the net. They differ in their convenience and functionality. Some utilities are better suited for ordinary users, while others are better for professionals.
Which method to choose for you and how to burn Windows 7 to a USB flash drive, you need to determine from purely personal preferences. Use the option that you like, and if you have any questions, ask us in the comments. We undertake to give a comprehensive answer as soon as possible.
 How to update iPad: instructions
 How Do Not Disturb mode works on iPhone
 Nokia 3310 when it came out. How they find us
 History of computer graphics in Russia 1 history of development of computer graphics
 Complete order: How to organize icons on a smartphone Complete order: How to organize icons on a smartphone
 Xiaomi Huami Amazfit Bip is the best smartwatch without any but even if
 What is Jailbreak and what is it for?