Download a program for creating bootable USB drives. Utilities for burning a bootable ISO disk to a USB flash drive. Free SARDU program for creating a multiboot flash drive
Greetings, my dear readers, subscribers and just fans of the computer theme!
Yesterday I decided to put the second operating system old, but very reliable and well-known Windows x pi. As always, I didn't have the rump. Therefore, I decided to describe how to write windows xp to a USB flash drive, why this OS is needed at all, how it differs from others and what other programs are needed. Go!
Why XP?
Many will no longer remember this operating system. However, not so long ago it was the most stable and worked almost without errors and crashes. It is cost-effective to put it because it requires less resources from the computer, compared even with the same seven and eight. For example, if your laptop is weak and you only work on it, then it is more cost effective to leave the XP operating system on it.
Imagine that you wanted to feel nostalgic, you decided to play an old game. It will not start on new systems. Downloading some emulators is dangerous for the OS themselves, but having on board hard disk the old "pig" (windows XP) will come in handy. It is easy to install, it weighs little, the problem is only with the drivers, but this issue can be solved.

XP is much more stable than its new counterparts. Of course, it is currently not supported by manufacturers. However, if your computer was bought exclusively for work, and the machine is weak, then this is the most the best choice for her.
The OS itself is quite compact, even on a 120 gigabyte screw it will take minimum space... Even the 64-bit version won't require more than 30 gigabytes to be fully functional. Of course, it doesn't support DirectX 10, but you don't need it. And such software as office, photoshop, various readers and sound editors work quite well on this shell.

Another plus is that such an OS can be written on a flash drive, only 4 gigabytes in size. After all, not everyone has media of a larger volume. You can take a quite old card lying somewhere in the closet and make a boot device out of it.
Drivers

With the necessary software, everything is a little more complicated than in modern versions of operating systems. The fact is that it is impossible to port software to new hardware without errors. Therefore, you need to look for it on the net. For this, it is better to use thematic sites. Or programs that are specially created for this.
The ideal option would be if you have left over from your old computer disks with drivers. They have everything you need. In extreme cases, you can simply update them, because it is much easier than looking for new software from unknown manufacturer.
What is required to write a bootable USB drive?
Since we will be working with the old system, we will have to find the image. We will download the full professional version. Here are some links:


Any of the links, in any case, should work even after a year, from the date of publication of the article. To download a torrent distribution, you need this program.
Install it and download the distribution kit.
Now we need programs for writing a bootable USB flash drive.

The first is ultraiso. Downloading from here.
Or will we try to write down the operating system via Rufus.
And you also need the flash drive itself. Which one to choose, we will consider below.
Media selection

It may seem to you that it is worth choosing a medium precisely according to the amount of information that fits into it. But no, a 4 gig device is enough. The port type is not important here either. Even if you use USB 3.0, it won't speed up your downloads very much. Let me explain why.
The port speed affects only the transfer of files from a flash drive to a hard drive. However, unpacking data depends only on the hardware inside your PC case. Ports have nothing to do with it. Taking a USB 3.0 flash drive is not cost-effective. You can use the old counterparts, or just buy the cheapest one.
Recording media via UltraISO
So, we install the program itself. Then we open it. We see such an interface.

We select a trial period, press the button and see this window, in which we select a position - open.
 .
.
Now we select the image of our system. When downloading a torrent, it must be in a folder under the name “ Downloads».

Then, in the menu at the top of the window, select, and in the drop-down list click on " burn hard disk image».

The flash drive will most likely be detected immediately, but the recording method must be selected manually. We put the position USB HDD + V2. Then press the button records.

Now a sign will pop up, with which you have to agree.

It is important that the operation takes place until it is completely finished, otherwise you will then have to run to the neighbors for a new image and for a record of a new device.
The installation or resuscitation disk of the operating system, with the help of certain programs, can be transferred to a flash-card and used in case of computer malfunctions or recovery of the operating system with BIOS, as a result of complete damage to Windows or other OS. For this purpose, you can use programs for creating a boot Windows flash drives 7:
UltraISO
Application for creating bootable USB stick or converting ISO CD / DVD formula files, providing the ability to parse and modify directly sound files or image files contained on optical discs CD / DVD and extract the necessary information from them.
You can manipulate the downloadable ISO information by creating installation flash media and CD / DVDs. It is a utility for revising and editing ISO documents, able to work with all modern image codes.
Rufus
NS It is a small tool for formatting and compiling bootable USB sticks, memory sticks and keys. In comparison with analogs, the Rufus program is faster and more useful when there is a need to create an installation and resuscitation flash drive with an ISO image, a variety of operating systems.
The utility can also flash BIOS or DOS or run low-level applications.You can download the program for creating a bootable USB drive from torrent sources or on our website.
Win32 Disk Imager
The program opens the ability to clone USB information and memory card for portable devices SD (Secure Digital) and store them in the form IMG files... In addition, the utility is capable of transferring ISO-images to removable media. Win32 Disk Imager has a 128-bit hashing algorithm and does not require a separate installation.
UNetBootting
Allows the user to compose LiveUSB installation disks for Ubuntu, Fedora and others distributors Linux distributions without adding to CD discs. The tool works with operational systems Mac OS X, Windows or Linux. A collection of installation files can be downloaded directly in the application window or through a native Linux ISO image file.
PeToUsb
Computer resource-saving software written to format flash drives and removable HDD with the subsequent formation of recovery distributions of Windows operating systems on them and the creation of their reserves on usb-drives. For this, the utility uses Master Boot Record. One of the undeniable advantages of PeToUSB is that the software works with pre-installed versions of BartPE and WinPE.
WinToFlash
Multilingual program for creating a bootable USB flash drive Windows 7. Allows the user to exactly move setup files almost all operating systems of the Windows family to removable drives in a few clicks.
The utility supports 32 and 64 bit processors and also works with CAB, ARJ, ISO, DMG, ZIP, RAR and 7z formats. The application can format drives in FAT-32, NTFS and FAT-16 file systems.
Windows Bootable Image (WBI) Creator
The application was created to assemble a bootable ISO image file in a few steps that fully simulates the operating system of any generation Windows 7, 8. The utility is so unassuming to use that basic computer knowledge is enough to create a resuscitation flash backup. If the speed of the program is a plus, then the disadvantage will be the lack of a burning function.
DownloadWindows Bootable Image (WBI) Creator
Universal USB Installer
A utility from a series of free distribution programs that provides the prospect of creating a bootable flash drive from recovery groups Linux files, on the foundation of Debian builds, Puppy Linux, Ubuntu, OpenSUSE, Mint, Linux and Fedora.
To complete the entire operation, you need to select the assembly that you are going to write to removable media and specify the path to the image on HDD computer... The program includes the ability to format a USB flash drive into the FAT32 system.
Windows 7 USB / DVD Download Tool
Microsoft developers provided official version a small program for the formation of a clone of the working version of the operating system Windows 7, with subsequent deployment to optical or flash media. The tool is designed for owners of netbooks and others computer devices, not equipped with drive wires. The program is as simple as possible - after installation, all that remains is to select the system distribution kit in the ISO image and specify the installation path.
WiNToBootic
Application to create an installation USB NTFS disk for Windows and Linux family. Software focused on ease of use and performance. You can record an ISO dummy by dragging and dropping information.
The program, unlike competing applications, has such features as USB creation with support for NTFS, Windows 7 bootloader, ISO 13346 (UDF), ISO 9660 (Joilet), ISO: Windows 7/8/2008 / Vista / PE2 and PE3.
WinSetupFromUSB
The program can format removable media in file system FAT32 and NTFS, as well as create an ISO copy-image of the operating systems BartPE, WinBulder, Windows 7, XP, WinFLPC, Vista and others on it. One caveat - some antivirus software WinSetapFromUSB extensions setup_dbg.ex and setup.ex can be recognized as malicious. Therefore, the response of antivirus software should be taken as false.
XBoot
Strong program for creating bootable DVD / CD or USB media of one or more ISO image files. Management is very simple - after dragging and dropping information into the program window, just run the executive command "Create USB" or "Create ISO".
The application has a universal boot option Grub4dos or ISO Emulation, in the case of working with operating systems that do not support this utility. You can download this program for creating a bootable USB flash drive for Windows 7, 8 for free on our website, via a direct link.
With many programs offering their own solution to the problem of archiving and storing a working copy of the operating system used by the user, it is difficult to make an unmistakable choice. Nevertheless, the listed applications are capable of effectively performing the declared functions. You just have to choose the option with the most suitable set of features.
Today's laptop computers are increasingly not equipped with a CD-ROM drive. The lack of a floppy drive is especially common on netbooks and ultrabooks. On the one hand, the absence of a floppy drive makes a laptop much lighter and thinner, but on the other hand, it creates a number of inconveniences when using such a device. For example, to install an operating system, the user will need, which will have to be created independently. In this article, we will walk you through the steps of how to write an operating system image to a USB flash drive via UltraISO, thus creating a bootable USB flash drive.
Step # 1. Load the image into the UltraISO program.
In order to write an image to a USB flash drive through, this image must first be loaded into the program. To do this, launch UltraISO and open the File menu. Here you need to select the "Open" item, and then select your ISO file... Alternatively, you can simply press the key combination Ctrl + O.
Then a standard window for opening files will appear. With this window you need to select. UltraISO supports all possible formats disk images, so you don't have to worry about your image not opening.

After you have selected the one you need through the "File - Open" menu, the files from this disk image will appear in the UltraISO program window.

You don't need to do anything with files that have been loaded from a disk image. Otherwise you will hurt boot image and created by you bootable USB drive will not work.
Step # 2. Connect the USB flash drive and start recording the disk image.
After connecting the flash drive, we return to the UltraISO program and open the "Bootstrapping" menu. Here you need to select the "Burn Hard Disk Image" item.

After that, the disc burning window should open. In this window, you need to select the USB flash drive to which you want to burn the disk image, and click on the "Burn" button.


Step number 3. We are waiting for the end of recording the image to the USB flash drive.
That's it, now it remains to wait until the UltraISO program writes the disk image to the USB flash drive. The recording process may take several minutes.

After the recording is complete, you will receive a bootable USB stick. In order to install an operating system using it, you will need to enter BIOS and enable booting from flash drives there.
If the computer does not have a floppy drive, then you have to use bootable flash drives to install the operating system. In this article, we will tell you how to burn an ISO image to a USB flash drive using programs and Rufus.
How to burn an ISO image to a USB flash drive via UltraISO
UltraISO is equipped with many functions for working with ISO images. For example, with UltraISO you can create and edit disc images, burn and copy discs. Also among the functions of this program is the burning of ISO images to a USB flash drive. The only downside to UltraISO is that it has to be paid for. But you can .
So, in order to burn an ISO image to a USB flash drive, you first need to open the ISO image through the UltraISO program. To do this, click on the "Open" icon located on the program toolbar.
Or use the "File - Open" menu.

After that, the screen will display small window, with which you can select the ISO image to burn to disc. Select the ISO file you need and click on the "Open" button.

As a result, the contents of your ISO image should appear in the UltraISO program.

Now this content can be written to a USB flash drive. To do this, simply open the Boot menu and select the Burn Hard Disk Image item there.

This will open a window titled "Write Disk Image". Using this window, you can write to a USB flash drive. To do this, just select the desired flash drive from the list and click on the "Write" button.


After that, the UltraISO program will start burning the ISO image to the USB flash drive. You just have to wait until the recording process is over.
How to burn an ISO image to a USB flash drive via Rufus
The second way to write ISO images to a USB flash drive, which we will consider in this article, is to write through the Rufus program. Unlike UltraISO, this program completely free and you can. The Rufus program is designed exclusively for creating bootable USB drives. Therefore, it has a minimum of functions and it is very easy to deal with them.
So, in order to burn an ISO image to a USB flash drive through Rufus, insert the USB flash drive into your computer and run Rufus. The first thing to do after starting the program is to select the USB flash drive to which you want to burn the ISO image.


If the ISO image you specified is an image of the Windows operating system, a switch between "Standard Windows Installation" and "Windows To Go" will appear on the screen. Here we select the option "Standard Windows Installation".

This is the setting Rufus programs finished, click "Start" to start the process of burning the ISO image to the USB flash drive.
This installation method is suitable if you own a netbook or your CD / DVD drive is out of order and you need to install Windows 7. This method is also good because the process Windows installations 7 from a flash card is several times faster than from a CD or DVD disc.
Before proceeding with Windows entries 7 to a USB flash drive, copy all important data from the USB flash drive to other storage media ( HDD where Windows, another flash card, disk, etc. will not be installed), since in the process of formatting and writing the Windows 7 image to the USB flash drive, all the data on it will be destroyed.
The first way
If you create a bootable USB flash drive while in the Windows 7 operating system, then you will need the program Windows 7 USB / DVD Download Tool, which can be downloaded from Of. Microsoft website at the link.
If you create a bootable USB flash drive under the operating room Windows system XP, you will need to install Microsoft .NET Framework 2.0 and Microsoft Image Mastering API 2.0... Of course, if you have them already installed (more often it concerns the first program), then you do not need to install it again.
1) Insert the USB stick into the laptop.
2) Run the program. Click the button Browse.
3) Select the ISO image of Windows 7 and click the button Open.

4) After you have specified the ISO image of Windows 7, click the button Next.

5) Press the button USB device.

6) Your flash drive should appear in this window. Click the button Begin copying

7) Click on the button Erase USB Device

8) Click Yes.
9) The process of recording the image of Windows 7 to the USB flash drive will begin

10) When the recording is finished, the status will change to Backup completed. Close the program

Second way
For the second method, you will need the program UltraISO.
1) Insert the USB stick into the laptop.
2) Run the program. In Windows 7 and Windows Vista, it is recommended to run the program as administrator.
The UltraISO program is paid, but you can use trial period, consider this option. Click the "Trial period ..."

3) Select a menu item File ->Open...

4) Select the Windows 7 ISO image and click the button Open.


6) In the field Recording method: choose USB-HDD... Click the button Format.

7) The formatting utility will start. Click the button Begin.

8) Click OK.

9) After formatting, a success window will appear. Click on OK.

10) Close the program.

11) Press the button Write down.

12) Click Yes.

13) The process of recording the Windows 7 image to the USB flash drive will begin.

14) At the end of the recording in the column Event the message “Recording complete!” appears. Close the program.

Third way
For the third method, we need the WinSetupFromUSB 1.0 Beta 7 program -.
Note: the link is a newer version, but the principle remains the same.
1) Insert the USB stick into the laptop.
2) Run the program. In Windows 7 and Windows Vista, the program must be run as administrator.

In field USB disk selection and format your flash drive should be listed.
Note: If the flash drive is not detected, then format it with the PeToUSB or HPUSBFW utility.
Also, the flash drive may not be detected if it is inserted into the laptop after the Winsetupfromusb 1.0 Beta7 program has been launched and in order for it to be detected, just press the button Refresh.
3) Press the button RMPrepUSB.

4) We mark such lines as: WinPEv2 / WinPEv3 / Vista / Win7 bootable (CC4), NTFS... Put a tick opposite Boot as HDD (C: 2PTNS)... Click the button 6 Prepare Drive.

5) Press the button OK.

6) Press the button OK.

7) After that, this will appear Dos window.
A warning: Do not close this window. It should close automatically.

8) After Dos the window will close press the button Exit.

9) Check the box next to Vista / 7 / Server 2008 - Setup / PE / RecoveryISO... Click on the square on the right.

10) A window will appear Browse folders in which you need to select a virtual drive in which the Windows 7 ISO image is mounted.
After you have done this, press the button OK.

11) Press the button GO... The process of recording Windows 7 to the USB flash drive will begin.

12) At the end of the recording, such a small window will appear. Click on OK.

13) Close the program.

Fourth way
The installation method is quite simple, so everyone can do it! For this we need:
1) Windows image 7
2) Flash drive with a volume of at least 4GB
3) A program for creating and editing ISO-images, ultraISO from the above method or the free MagicDisk
You can take any medium from a regular flash drive to an SD card, but at least 4GB!
4) Run the command line (in Windows XP these are standard-> command line. In Windows Vista / Windows 7 open start, at the very bottom there is a search, enter cmd and open as administrator).
5) Further in command line introduce diskpart, the disk management utility will open.

6) Next, in the diskpart utility itself, enter: list disk, this will display all the physical disks of the PC, namely disks and not partitions.
Among them we are looking for our flash drive.

7) Then we execute the command select disk #, where # this is the number of our flash drive.
In this case, the flash drive on the screen is numbered 1, therefore s elect disk 1... All further manipulations will be carried out only with this disc.
8) We execute the command clean, clear the drive, then the command create partition primary- create a new partition on the disk.
9) After creating a new section, we register select partition 1, select this section for manipulations, enter active thereby making the section active.
10) Now, in order for the flash drive to be visible in bios, you need to format it in NTFS format, which we do with the command format fs = NTFS.
11) Next, you need to activate the process of connecting the device and assigning letters to it, we do this with the command assign.
That's it, the preparation process is complete.

Installing Windows 7
Distribution can be recorded with any file manager or free.
In this case, you need to somehow open the image installation disk with the OS, you can do this with any disk emulator, Alcohol or MagicDisk, create an image and copy everything from it with a file manager to our prepared USB flash drive.
That's it, the process of creating an installation flash drive is completed, now we are trying to install the OS by setting it in bios.
Well, that's all, which of the four ways to create a bootable USB drive to use is up to you.
Inclusion in BIOS boot from a flash drive
Before starting the installation of Windows 7 from a USB flash drive, you need to go into the BIOS and enable booting from a USB flash drive.
To enter the BIOS, you need to press a certain key when the computer boots. On desktop computers this is the Del key. On laptops, the most commonly used key is F2.
Usually, when you turn on the laptop, a screen appears on which at the very bottom there is a line in which it is written which key you need to press in order to enter the BIOS.
If you do not have such a line, then information on how to enter the BIOS should be looked at in User Guide walking with a laptop.
1) Insert the USB flash drive into the laptop if it is not inserted.
2) Turn on the laptop, if it is turned on, then reboot.
3) Go to BIOS.
For example, the whole process will look like below, if your BIOS is different, then the principle will remain the same. If you have any questions, write in the comments.

4) Go to the tab Boot... In it, in the order of loading, you need to put our USB flash drive in the first place using the arrow keys and keys F5 and F6... That is, with the arrow keys we select our flash drive, and with the key F6 we lead her to the very top.
To find out which keys you need to use to set the boot order, see the tips on the right.
The name of the flash drive must appear in the line USB HDD.
Also, a flash drive may appear in the line USB KEY.
To save the changes and exit the BIOS, press the key F10... (Depending on the BIOS manufacturer the key may be different; see the tooltips on the right or below).

5) A window will appear in which in English it asks Save changes and Exit? You are taking Yes.

6) After that, a reboot will occur and the Windows 7 installation process will start.
Installing Windows 7 from a USB flash drive
If a bootable USB flash drive with Windows 7 was created using WinSetupFromUSB programs 1.0 Beta 7, a green screen will appear first. Please select Start Vista / Win7 / Server 2008 Setup or PE / Recovery ISO from partition 0.

Next, the Windows 7 setup program will start.
Write in the comments what is not clear and what questions have arisen.
 Can I use Google Play Market on Lumia?
 Description and secrets of the current tariff zero doubts on the beeline
 MTS option “Russia is at home everywhere
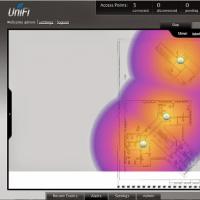 Seamless Wi-Fi Useful reviews about the work of capsman
 How to talk to Alice Screenshots Yandex with Alice
 Mts bonus program is closed
 Mobile communications and internet in the resorts of montenegro