Seamless Wifi roaming is it necessary and how to organize it? Seamless Wi-Fi Useful reviews about the work of capsman
Nowadays, various wireless devices are gaining popularity, for which high-speed access to the network is possible only via WiFi. These are Ipad / Iphone, and other mobile gadgets. When you want to organize WiFi access on an area of 30 sq. m., then installing an ordinary Dlink for 1200 rubles will solve all your problems, but if you have an area> 500 sq. m. and this is only one floor, this solution will not work. If you use ordinary access points or routers, then each router will have its own network name (unique SSID), or the routers will need to be spread far away so that the coverage areas do not overlap, and this will lead to the appearance of areas with very poor reception quality, or, generally, absent signal. About six months ago, I faced the same problem, the solution was found quickly enough - UniFi.
Example of Installing WiFi UniFi in a car wash with multiple buildings.
UniFi Provides Wireless Coverage to Arcadia California School District.
UniFi Provides Wireless Access to Upscale Hotels in Peru.
UniFi WiFi hotspots capabilities:
One network for all WiFi points.
Attractive design.
Easy to install, PoE.
Shows the coverage area and the location of the access points on the administrator display.
Centralized wireless network management.
Guest networks, without LAN access.
Creation of temporary passwords for guest users.
Automatic software updates on access points.
High scalability: up to 100 or more points.
Multiple wireless networks with differentiated access rights.
Separation of traffic of network users by VLAN.
Fast on-net roaming when switching between APs.
Tracking user traffic, identifying sources of increased network load.
Large coverage area.
The ability to generate one-time temporary passwords (relevant for public places: hotels, cafes, etc.)
Connecting points in repeater mode.
An overview of the features of the UniFi Controller is here.
Implementation of WiFi from Ubiquity in Peru hotels here (translation).
Hardware controller for Ubiquiti UniFi. UniFi Cloud Key.
How it looks in practice:
A software controller is installed on one of the computers in the network, on which all the settings of the wireless network are made.
All settings of points and network parameters are subsequently made through this controller. Below are a couple of screenshots of settings and appearance.

This is a building plan showing the locations of the points.

Setting up a guest network without access to corporate resources.
Monitoring of active clients.

Access point monitoring.

View from above.
The installation and configuration process is extremely simple:
1. Arrange the points and connect them to the local network, UniFi supports PoE so that only an ethernet socket is needed to connect them.
2. Install the software controller on any computer on the network, configure the parameters of WiFi networks, initialize the points, after initialization, the settings from the controller will be applied to the point, and the point will be ready for operation. Even when the controller is turned off, the settings on the points are saved.
Introduction
As I said, I have on the topic of setting up capsman in mikrotik. Nowadays, due to the speed of development of information technologies, information becomes outdated very quickly. Although the article is still relevant, read and used regularly, there is now something to add to it.
A new version of the Controlled Access Point system Manager (CAPsMAN) v2 technology has been released. I'll tell you a little about her. In my work I will rely on the experience of the previous article and on the official Manual: CAPsMAN from the microtic manufacturer's website.
At my disposal will be 2 RB951G-2HnD routers, which are in accordance with my recommendations on this topic. I recommend that you familiarize yourself with them, just in case, so that you have a general idea of the basic settings of routers. On one of these routers, I will configure an access point controller, and connect the other to this controller. Both points form a single seamless wifi network with automatic client switching to the nearest point.
An example of two access points will be enough for a general understanding of the technology's operation. Further, this setting is linearly scaled to the required number of access points.
What is capsman v2
First, I'll tell you what capsman v2 is and how it differs from the first version. It should be said right away that there is no compatibility between the two versions. If you have a v2 controller, then only access points with the same version can connect to it. And vice versa - if you have v2 points, you will not be able to connect to the controller of the first version.
CAPsMAN v2 has a different package name on the system - wireless-cm2... It has appeared in the system since RouterOS v6.22rc7. The previous version had a name - wireless-fp, it appeared in version v6.11. If you don't have a new package, go to the last one.
List of innovations in capsman v2:
- Ability to automatically update managed access points.
- The protocol of information exchange between the controller and access points has been improved.
- Added "Name Format" and "Name Prefix" fields in Provision rules settings.
- Improved logging of the client switching process from point to point.
- Added L2 Path MTU discovery.
If you already have capsman configured on your network, then the developers suggest the following way to upgrade your entire network to v2:
- Configure the temporary capsman v2 controller on the original network.
- You are starting to gradually upgrade your managed APs to include the wireless-cm2 package. All updated access points will connect to the temporary controller.
- After all managed APs are updated to the latest version, update the main capsman controller. After this happens, turn off the temporary controller.
There is an easier way if you are not critical of network downtime for a while. Run the update at the same time on all routers - both on the controller and on the points. As soon as they are updated, everything will work on the new version.
I warn you right away if you have any questions on this topic. I have not personally tested the upgrade to v2, it was not necessary.
Configuring a wifi network controller
Moving from theory to practice. First of all, we will configure the capsman controller before connecting access points to it. As I said, we update the system before that. We must have the package installed and activated wireless-cm2.
To activate the wireless controller function, go to the section CAPsMAN, click on Manager and check the Enabled box.

Before proceeding with the configuration, I'll tell you a little about how the system works. An access point controller is configured on the network. Individual wifi points are connected to it and settings are received from it. Each connected access point forms a virtual wifi interface on the controller. This allows standard means to manage traffic on the controller.
Presets on a controller can be combined into named configurations. This allows you to flexibly manage and assign different configurations to different points. For example, you can create a group with global settings for all access points, but individual points can be configured with additional settings that will overwrite the global ones.
Once the managed point is connected to the network master, all local wireless settings on the client are no longer valid. They are replaced by the capsman v2 settings.
Let's continue configuring the controller. Let's create a new radio channel and specify its parameters. Go to the tab Channels, click on the plus sign and specify the parameters.

There is no drop-down list in the settings and this is inconvenient. You can peep the settings in the current Wifi parameters, if it is already configured.
We continue the settings on the tab Datapaths... Click the plus sign and set the parameters.

I will linger a little on the parameter local-forwarding... If it is activated, then all traffic of the clients of the access point is controlled by the point itself. And most of the datapath settings are not used, since the controller does not control the traffic. If this parameter is not set, then all traffic from clients goes to the network controller and is controlled there depending on the settings. If you need traffic between clients, then specify the Client To Client Forwarding parameter.
Let's move on to the security settings. Open the tab Security Cfg. and press the plus sign.

It's time to merge the previously created settings into a single configuration. There can be several such configurations with different settings. For example, one is enough. Go to the tab Configurations and press the plus sign.

On the first tab Wireless, specify the configuration name, ap mode and the SSID name of the future seamless wifi network. On the other tabs, simply select the previously created settings.
The basic settings of the mikrotik controller capsman v2 are now complete. Now we need to create rules for distributing these settings. As I wrote earlier, different configurations can be transferred to different points. The controller can identify access points by the following parameters:
- If certificates are used, then by the Common name field of the certificate.
- In other cases, MAC addresses of points are used in the format XX: XX: XX: XX: XX: XX
Since in my case I do not use certificates, let's create a rule for distributing settings based on the MAC address. And since I have a single configuration for all points, the distribution rule will be the simplest. Let's make it. Go to the tab Provisioning and press the plus sign.

| Radio mac | Access point MAC address |
| Hw. Supported Modes | did not understand what it is for, the documentation is empty |
| Identity Regexp | there is nothing in the documentation either |
| Commom Name Regexp | and no about it |
| IP Address Ranges | and about that too |
| Action | selection of actions with the radio interface after connection |
| Master Configuration | selection of the basic configuration that will be applied to the created radio interface |
| Slave Configuration | secondary configuration, you can connect another config to clients |
| Name Format | defines the syntax for naming generated CAP interfaces |
| Name Prefix | prefix for the names of the CAP interfaces to be created |
This completes the configuration of the capsman v2 controller, you can connect wifi access points to it.
Connecting access points
In my story, two access points with addresses are involved 192.168.1.1 (Mikrotik) and 192.168.1.3 (CAP-1) connected to each other via ethernet cable. The first is the controller, the second is a simple point. Both points see each other on the local network. The Wifi interface of the controller, like a regular point, connects to capsman and takes the settings from it. That is, the controller is both a controller and a member access point at the same time. Even a combination of two points organizes a full-fledged seamless wifi network over the entire area covered by their radio modules.
CAP access points can be connected to the CAPsMAN controller using two different protocols - Layer 2 or Layer 3. In the first case, the access points must be located physically in the same network segment (physical or virtual, if it is an L2 tunnel). It is not necessary to configure ip addressing in them, they will find the controller by MAC address.
In the second case, the connection will be over IP (UDP). It is necessary to configure IP addressing and organize the availability of access points and the controller by IP addresses.
First, let's connect a separate wifi point. We connect to it via winbox and go to the section Wireless... There we click on CAP and specify the settings.

In my case, I indicated a specific IP of the controller, since the ip addressing is configured. If you want to connect points to the controller via l2, then the field with the capsman address is left blank, and in Discovery Interfaces select the interface that is connected to the controller. If they are in the same physical network segment, then the point will automatically find the master.
We save the settings and check. If the access point connects to the controller correctly, then the point itself will have the following picture:

And on the controller in the list Interfaces the newly created radio interface of the connected access point will appear:

If your access point stubbornly does not connect to the controller and you cannot understand what the problem is, then first of all check that you have activated wireless-cm2 packets on all devices. It turned out that after the update, the wireless-fp package was enabled at one of the points, instead of the necessary one. The access point did not want to connect to the controller in any way, which I just did not try. I did it with a controller, the other did not want to connect to it. I reset all the settings, but that didn't help either. When I was completely desperate to solve the problem, I checked the package version and found that it was not the right one.
Now let's do the same on the mikrotik controller itself - connect its wifi interface to capsman v2. This is done in exactly the same way as just done on a separate wifi point. After connecting, we look at the picture on the controller. It should be something like this:


That's it, the basic settings are complete. Now this configuration can be expanded further to new access points and cover a large area with a single seamless wifi network. All connected clients will be displayed in the tab Registration Table indicating the point to which they are connected.

Checking the work of seamless wifi roaming
Now you can take an android phone, put the program on it Wifi Analyzer and walk around the entire territory covered by wifi, test the signal strength, switch from point to point. Switching does not occur immediately, as soon as the signal of the new point is stronger than the previous one. If the difference is not very large, then switching to a new one will not occur. But as soon as the difference begins to be significant, the client jumps. This information can be observed on the controller.
After analyzing the coverage area, you can adjust the power of the access points. Sometimes it can be useful to set different wattage at different points, depending on the room layout. But in general, even in the basic setting, everything works quite stably and efficiently. These microtik models (RB951G-2HnD) can be connected and comfortably operated by 10-15 people. Further, there may be nuances depending on the load. I cited these figures from my examples of real work.
2 networks in capsman using the example of guest wifi
Let's consider, for example, one common situation that can be implemented using the capsman technology. We have a seamless wifi network configured with password authorization. We need to add another guest network to the same access points for open access. In a single mikrotik, this is done using Virtual AP... Let's do the same in capsman.
To do this, you need to add a new security setting. Go to Security Cfg. and create a setting for passwordless access. We call it open.

We create another configuration in which all other settings are left the same, only we change the SSID and the security setting.

Go to the tab Provisioning, open the previously created configuration and add there in the parameter Slave Configuration our second configuration we just made.

We save the changes. Then I waited a few seconds, the new setting did not apply to points. I did not wait, went to each point and reconnected it to the controller. Perhaps this was not necessary to do, but it was necessary to wait. I don't know, I did it as it is. The new setting spread and each access point had a new network like Virtual AP with an open wifi network.


I checked the work just in case - everything is in order. Connects clients to both networks at the same time and allows you to work.

For an example of how Virtual AP works in capsman, I considered the current situation. Here, the clients of the guest network are connected to the same bridge and address space as the users of the closed network. For good reason, you need to make additional settings:
- Create a separate bridge on the controller for an open network, assign it a subnet and an address in it, add a second wlan interface to this bridge, which will appear after connecting to capsman with two configurations.
- Configure a separate dhcp server on this subnet with the distribution of addresses only from this subnet.
- In the capsman settings in the datapath create a separate configuration for the open network. In it, specify a new bridge and do not select the local forwarding parameter.
- In the open network configuration, select a new datapath.
After that, all connected to the open wifi network will be sent to a separate bridge, where there will be its own dhcp server and an address space that is different from the main network. Do not forget to check the gateway and dns server settings in dhcp that you will transfer to clients.
Capsman setup video
Conclusion
Let's summarize the work done. Using the example of two Mikrotik RB951G-2HnD access points, we set up seamless wifi roaming in the area covered by these points. This area can be easily expanded with additional wifi points of any microtik model. They do not have to be the same, as it is, for example, implemented in some Zyxell configurations that I have set up.
In this example, I considered almost the simplest configuration, but at the same time I described all the settings and the principle of operation. More complex configurations can be easily compiled based on this data. There is no fundamental complication here. If you understand how it works, then you can work further and make your own configurations.
Traffic from access points can be controlled in the same way as from regular interfaces. All the basic functionality of the system works - firewall, routing, nat, etc. You can make bridges, share the address space and much more. But it should be borne in mind that in this case all traffic will go through the controller. You need to understand this and correctly calculate the performance and bandwidth of the network.
Let me remind you that this article is part of a single cycle of articles about.
Useful reviews about the work of capsman
Some useful information from the reviews for the article from real users of the capsman technology:
Vladimir, good article! Many letters are useful! :) When setting up capsman at the enterprise, I referred to your article - I learned a lot, but changed a little. The changes affected the "Channels" tab - removed the Frequency position since I would not recommend using the same frequency at all points, because nearby points start to "choke" and, accordingly, there are connection breaks ... signal) ... in order for users to "jump" from point to point, which has a better signal, I decided to limit the signal level threshold by making an entry in the AccessList tab. I entered the values into SignalRange => -71..120 Interface => all Action => accept, this made it possible that when the signal reaches below -71, the subscriber "leaves" the point :) The value of -71 was not taken by chance (the minimum signal level at a speed of 54Mbit ) Also, in the Provisioning tab, I changed the NameFormat value, put identity instead of cap (when connecting to the controller, it shows the name of the point that is written in the system-> identity of the device), whoever has an implementation in home devices may not need it, but who has points scattered over a large area and there are a lot of them - it will be useful :) In general, thank you very much and sorry for the many letters :)
And one more tip:
The article is very good, but I would add / revise it in the part of the guest wifi network:
1) split 2 wifi networks over different radio channels.
2) For security, I would separate the guest network from the main one. Considering that you have a guest network without a password, every student with a smartphone will want to break you. A bridge is created (bridge_open), an ip address is assigned to the bridge from another network (192.168.200.1/24), dhcp-pool is created (192.168.200.10-192.168.200.100), the server rises on the created bridge, we create another Datapaths (Datapaths_open) in where we indicate the created bridge (bridge_open), to configure the guest network cfg2 we use Datapaths_open. Next, we set up NAT and firewall so that there is access to the Internet from the guest network (192.168.200.0/24), and blocked to the local work network (drop forward from 192.168.200.0/24 to the local network).
Mikrotik online courses
If you have a desire to learn how to work with microtic routers and become a specialist in this area, I recommend taking courses in a program based on information from the official course MikroTik Certified Network Associate... In addition to the official program, the courses will include laboratory work, in which you can test and consolidate the knowledge gained in practice. All the details on the site. The cost of training is very democratic, a good opportunity to gain new knowledge in the current subject area. Features of the courses:- Practice oriented knowledge;
- Real situations and tasks;
- The best of international programs.
- Like using Mikrotik.
- Simple and fast.
- Setting up on a separate server.
- to reserve a channel to the Internet.
In this article, we will learn how to create a single seamless WiFi network on MikroTik / Mikrotik routers. Where can this come in handy? For example, in all kinds of cafes or hotels, where one wi-fi router is not enough to cover all premises and access the Internet, and with a large number of access points, various kinds of problems constantly arise: on laptops, the connection is constantly lost, and mobile devices do not independently switch to the nearest access point.
The solution to this situation is seamless roaming of a WiFi network or handover, which we can get thanks to the CapsMan functionality from several Mikrotik routers, one of which will be a WiFi controller, and the rest will be access points controlled by this controller.
The first thing to do is update to the latest software version. The firmware can be downloaded from the official website. Next, going into the MikroTik interface, drag it to the Files section and reload the router. Along with the firmware, you also need to download the Wireless CAPs MAN package, drag it to the same place and reboot. After the performed actions, you can proceed to the setting.
Let's start with the controller. Open the CAPsMAN section by clicking the corresponding button in the main menu. In the Interfaces tab, press the Manager button (enable controller mode) and in the window that appears, check the Enable box, save OK. After that, go to the Configurations tab.
The configuration settings will apply to all access points connected to the controller. We press the blue cross and in the Wireless tab specify the configuration name (3), the wireless network mode (4), the network name (5), and also turn on all wireless antennas to receive and transmit (6), save (7) and go to the Channel tab ...

Here we indicate the frequency (2), the broadcast format of the wireless network (3) and the channel (4). Save (5) and go to the Datapath tab.

Here we only need to check the Local Forwarding checkbox - this will transfer traffic control to the access points. It remains to fill in the last Security tab.

In the security section, select the type of authentication, encryption method and password for the wireless network, click OK.

After we have created the configuration, we move on to the next item - deployment. In the same CAPsMAN section, select the Provisioning (1) tab and click the blue cross. The Radio MAC field (2) allows you to select a specific access point to which our deployment will refer. We leave it at the default so that the deployment applies to all APs. In the next field, Action (3), select createdynamicenabled, since we have a dynamic interface. In Master Configuration (4), specify the name of the configuration created above.

We have finished with the CAPsMAN section, go to the Wireless section (1). In the Interfaces tab, click the CAP button (3), put the Enabled checkbox (4), select the wlan1 interface and specify the ip-address of our main router, which is also a controller.

If we did everything correctly, then two red lines will appear in the Interfaces tab, which indicate that the wi-fi adapter has connected to the controller and has taken over all the necessary settings.

This completes the configuration of the main router controller, and this network can be used to create a telephone network and connect to office PBX
Setting up access points that will connect to the controller via an Ethernet cable is pretty straightforward. They also need to be flashed to the latest version and CAPs MAN installed. Next, we combine all the ports and the wi-fi interface into one Bridge in the section of the same name.
The next step in the Wireless section is the same as on the controller, except that instead of the IP address in the CAPs MAN Addresses, we indicate the Bridge created on the access point in the Discovery Interfaces field. After the performed manipulations, the access point will receive the settings from the controller and will distribute wi-fi (the same two red lines should appear in the Interfaces tab).

 Skype free download Russian version Install Skype application
 How to recover a photo on Android after deleting it?
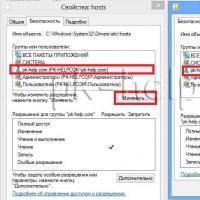 Original hosts for Windows operating systems What should be in a Windows 7 host
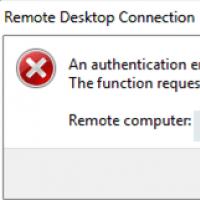 An authentication error has occurred
 Open the following ports at the client's workstation
 How to hide all VKontakte friends in the new version?
 Hide friends on VKontakte