Configure BIOS on your computer. BIOS settings - detailed instructions in pictures Pre-acquaintance with functions
Hello everyone! My name is Sergey and in this manual I will try to tell you in detail how to set up Open Broadcaster Software. (Next OBS), how to run it and consider all settings in detail. An image will be present in the manual, so on them to you, I think it will be easier to navigate.
If you have any questions on this topic, write in the comments, I will try to answer. Interesting questions and answers to them I will collect together and publish them under the guidance of FAQ.
And so, let's start from scratch?
To begin with, I will answer the question:
What is needed Open Broadcaster Software (OBS)?
Obs. - This is a free open source program that allows you to broadcast various multimedia information and record it in video format.
Often, services such as Twitch, YouTube, Dailymotion, HitBox use to broadcast.
OBS supports:
- coding with H264 (X264) and AAC;
- Intel Quick Sync Video (QSV) and NVENC;
- unlimited number of scenes and sources (learn later);
- running RTMP stream (live broadcast) on Twitch, YouTube, Dailymotion, HitBox and other projects;
- when recording video, we get MP4 or FLV format;
- capture games using a graphics processor to ensure high performance game;
- directShow capture device;
- Windows 7/8/10, OSX and Linux.
In my case, Windows 7 Professional X64 operating system will be used. Go...
OBS installation:
Download the OBS program from the official site (download) or from our site (download).
view of Obsproject website, relevant on 08.11.15
If you downloaded the archive from our site, then unpack and run OBS_0_656B_Installer.exe.if you downloaded from the official site, just run the installer OBS_0_656B_Installer.exe.. After starting, a welcome window appears:

window Drinking
Press the button NEXT\u003eThe window opens with the agreement. For reading, knowledge of English is needed.

window Agreement
If you are pressed I AgreeYou have taken an agreement and continue the installation. Installation time is less than 10 seconds (on the rapid computer). If you do not agree, click Cancel.In this case, the installation will stop.
And so, the installation is completed, this window opens:

installation window window
In it installed a check mark RUN OPEN BROADCASTER Software 0.656bit means that after pressing the button FINISH. The program will automatically start.

OBS when you first start
Excellent! Installation completed. Run and go to the OBS setting.
OBS Setup:
After launching OBS, go to the settings. To do this, press the button Settings At the bottom of the window on the right or at the top in the menu Settings\u003e Settings, no difference will not be.

The left column is the setup menu on the right - the contents of the selected category.
Let's start, of course, with the very first category General.
General. Settings:
- Language: Russian.
- Program language.
- Profile: Cyberfrags. (Name Any, default Untitled).
- Used for switching between Stream channels. That is, we have two channels on which we are streaming, for example, youtube.com/cyberfragscom and twitch.tv/cyberfrags.
- Important! Settings for each profile must be selected separately! The general settings do not apply.
- Buttons Add, Rename, Delete.
- Allows you to manage profiles, you can add, rename or delete.
- Trey icon: Yes.
- Shows the program icon in the tray (it is displayed on the right below, at around the clock).
- Fold in the tray: Yes.
- Folding the program in the tray during the broadcast.
- Display the cursor on the projector: Yes.
- Show log window when starting OBS: Not.
- Put only in case of errors with OBS.

standard settings

our settings
Coding. Settings:
- Encoder: x264. (IQS is not supported).
- Allows you to choose which technology you will encode video.
- x264. - Encoding using a processor.
- Quick Sync - Encoding using a graphics processor using Intel Quick Sync technology built into the processor itself.
- NVIDIA NVENC. - Encoding using a video card. Supported by NVIDIA video cards starting with GeForce GT 430.
- Allows you to choose which technology you will encode video.
- CBR (permanent bit rate): Yes.
- Sets the constant bit rate, within which the encoder will encode. If you choose NotIn this case, the VBR (Changing Bitrate) is used.
- CBR Padding: Yes.
- I have not found information anywhere, left standard.
- Quality: default..
- Coding quality. If you choose a VBR (I wrote this in 2 points), then you can choose the coding quality yourself.
- From 0 to 10, the higher the value, the higher the quality, the greater the load on the processor.
- Coding quality. If you choose a VBR (I wrote this in 2 points), then you can choose the coding quality yourself.
- Another buffer size: Not.
- The buffer size is set by you, see paragraph 7.
- Maximum bit rate (KBIT / s): 3000
.
- Used for the quality of broadcasting (pictures). For each quality, a different number of Kbps is used.
- Table Resolution / Bitrate, see below.
- Important! Do not use the value of more than 80% of the speed of your outgoing compound.
- Buffer size (Kbit): default..
- Allows you to choose the size of the buffer.
- If the maximum costs 3500, and in this line 5000, the audience with good Internet will see the best picture, and buffering will be with a weak Internet.
- Allows you to choose the size of the buffer.
- Codec: Aac.
- AAC - Advanced Audio Coding - an audio file format that has less loss of sound quality when encoding with the same bitrates.
- MP3 - Audio File format, which has the loss of sound quality when encoding with the same bitrates more than AAC.
- Bitrate: 128
.
- Sound quality.
- For recording songs 320 is the most.
- Sound quality.
- Format: 48Khz..
- Discretization frequency of audio recordings.
- 44.1KHz - used inCD Audio.
- 48KHz - Usedin DVD, Dat.
- The difference will only feel in the case of perfect hearing and having good speakers.
- Discretization frequency of audio recordings.
- Channel: stereo.
- Mono, represents a single-channel recording and sound playback.
- Stereo - two-channel and more.
Ratio Table Resolution / Bitrate:
| Quality | Translation resolution | Minimal bitrate | Maximum bitrate | Optimal bitrate |
| 240p. | 426 x 240. | 300 | 700 | 400 |
| 270p. | 480 x 270. | 300 | 700 | 400 |
| 360p | 640 x 360. | 400 | 1000 | 750 |
| 480p. | 854 x 480. | 500 | 2000 | 1000 |
| 540p | 960 x 540. | 800 | 2000 | 1000 |
| 720p | 1280 x 720. | 1560 | 4000 | 2500 |
| 720p | 1280 x 720. | 2500 | 6000 | 3800 |
| 1080p | 1920 x 1080. | 3000 | 6000 | 4500 |
| 1080p | 1920 x 1080. | 4500 | 9000 | 6800 |

standard settings

our settings
Press the button ApplyBy saving the current settings. Save? Go ahead.
Broadcast. Setup:
- Mode: Live.
- Direct air - live broadcast.
- Local recording is an entry on a hard disk.
- Broadcast service: Twitch. (Consider an example with the Twitch service).
- Custom - Custom service
- Twitch.- http://www.twitch.tv/
- Vaughn Live / Instagib.tv- http://instagib.tv/
- GoodGame.ru.- http://goodgame.ru/
- Dailymotion / Dailymotion Games- http://dailymotion.com/
- YouTube / YouTube Gaming- https://www.youtube.com/
- Cybergame.tv.- http://cybergame.tv/
- hitBox.tv.- http://hitbox.tv/
- connectcast.tv.- http://connectcast.tv/
- Azubu.tv.- http://www.azubu.tv/
- FMS URL: EU: FRANKFURT, DE.
- rTMP link to the service server. Each service has its own FMS URL.
- PLAY PATH / STREAM KEY (if available).
- The broadcast key is used not in all services. About it later.
- Auto transference: Yes.
- We are needed to reconnect the stream, in the event of a binding.
- Auto-shifting delay: 10
.
- The time through which the transmission will occur.
- Delay (sec): 30
.
- Delay data transfer from you to the service.
- Used mainly for competitive games to not spacing =)
- To communicate or streaming single games, it is better to use 0 to communicate with the audience.
- Delay data transfer from you to the service.
- Low delay mode: Not.
- Allows you to reduce the amount of data on data transfer.
- If a YesThe delay is very minimal, a couple of seconds (I have not checked how much it is).
- If a NotThe transfer delay will be: a set of delay in paragraph 7 + a pair of seconds. In my case, 30-35 seconds delay.
- Allows you to reduce the amount of data on data transfer.
- Automatic saving to file: Yes.
- Saves the broadcast record automatically to your computer.
- Continue recording When the broadcast stopped: Yes
- Continues to record the video when the broadcast stopped.
- If you choose NotThe video will do the same as many seconds how much is your delay.
- Continues to record the video when the broadcast stopped.
- The path to the file.
- The location of the media files. In all in different ways.
- Reference Buffer Length (in seconds): 1
.
- Delay in seconds to record repeat.
- Path to the repeat file.
- Repeat location.

standard settings

our settings
Twitch. Broadcast key:
Go to Twitch.tv.. We go to your account if you do not create. Top in the menu click on your login, opens a submenu. Choose in it Information panel. Just below, another menu, select the broadcast key in it. Press the button Show Key.. Agree that it is impossible to show anyone I Understand. And copy it, it looks like this: live_ * Random numbers * _ * Random numbers and letters *.


Copy? Great, insert it in the field PLAY PATH / STREAM KEY (if available) and press the button Apply.
Video. Setup:
- Video card: NVIDIA GeForce GT 640.
- Allows you to select a video card for capture.
- Custom: 1920x1080..
- Allows you to choose the resolution itself. The greater the parameter, the better the quality, the higher the load.
- Monitor: 1
.
- Allows you to select which monitor to broadcast. You can choose if you have two or more. This uses the full screen resolution.
- Scaling permission.
- Reduces the size of the picture, but increases the load on the system.
- Filter.
- You can change only when the scaling is turned on. Allows you to improve the quality of the reduced picture.
- Personnels per second: 30
.
- The number of frames per second. Various from 10 to 60. The more value, the smaller will go video, but the load on the system will increase.
- For weak computers: 10-25
- For mid-computers: 25-45
- For powerful computers: 45-60
- The number of frames per second. Various from 10 to 60. The more value, the smaller will go video, but the load on the system will increase.
- Disable Aero at startup: Yes.
- Disables the transparency of windows in the operating system.
- For powerful computers there is no difference, the choice is yours.
- Middle and weak, it is better to turn off.
- Disables the transparency of windows in the operating system.

standard settings

our settings
Audio. Settings:
- Playback device: Default.
- By default, the playback device installed by the system is used.
- The device name - there may be several of them, depends on how much playback devices are connected.
- For example, you have the main output on the speakers, and you take Skype calls through the headphones, so the viewer will not hear the one with whom you are talking, but will hear you.
- Microphone: Default.
- Disable - turns off the microphone.
- By default, the microphone installed by the system is used.
- The name of the microphone - there may be several of them, depends on how much microphones are connected.
- Forced mono mode: Not.
- Includes mono mode regardless of settings.
- Show only connected devices: Yes.
- Shows the working devices that are connected to the computer.
- NIG (MS) delay: 200
.
- Delay for the function "Click and say".
- Strengthening applications (multiplier): 1
.
- Enhances the sound from applications, the value is multiplied.
- Accessing the microphone (multiplier): 1
.
- Enhances the sensitivity of the microphone, the meaning is multiplied.
- Microphone shift: 0
.
- Delayed microphone reproduction in milliseconds.

standard settings, we have the same
In principle, I did not change anything if you were configured in your own way, press the button Apply.
Hotkeys. Setup:
- Use the "Click and say" function: Not.
- Holding the button you put, you will talk to the microphone. We do not need it, not convenient because.
- Click and say: Not.
- closed The corresponding key.
- Click and say 2: Not.
- Spare option 2 item.
- Disable / enable microphone: Num1.
- Allows you to enable or disable the microphone, press The corresponding key. In my case, this is the num1 button.
- Disable / enable desktop sounds: Num3..
- Allows you to enable or disable desktop sounds (System Sounds), press The corresponding key. In my case, this is the num3 button. Why not num2? To accidentally disable the microphone.
- Start broadcast: Num 0.
- Allows you to start broadcasting press The corresponding key.
- Stop the broadcast: Num Del..
- Allows you to stop the broadcast, press The corresponding key.
- Start recording: Not.
- Allows you to start recording the broadcast, press The corresponding key.
- Stop recording: Not.
- Allows you to stop the broadcast recording, press The corresponding key.
- Repeat: Not.
- Allows you to start reproducing the repeat, press The corresponding key.
- Stop repeat: Not.
- Allows you to stop repeat playback, press The corresponding key.
- Save Repeat: Not.
- Allows you to save press The corresponding key.
- Record from repeat: Not.
- Allows you to start recording from the repeat, press The corresponding key.

standard settings

our settings
Chose hotkeys? Save by clicking the button Apply And then turn to the most interesting, advanced OBS settings.
Extended. Settings:
- Multi-threaded optimization: Yes.
- Determines the number of processor cores and distributes the load evenly between them.
- Process priority: Middle.
- Sets the priority of OBS over other programs.
- Scene buffering time: 500
.
- Download time scenes in milliseconds.
- Disable coding when viewing: Not.
- Disables encoding when previewing (does not affect the broadcast).
- Allow system modifiers for hot keys: Not.
- Allows you to use modifiers for hot keys.
- Preset X264 CPU: very Fast..
- Sets the coding level. The faster, the worse the quality, but less load on the processor:
- slower - very slowly
- slow - slow
- medium - Medium
- fast - fast
- faster - faster
- very Fast - very quickly
- superfast - super fast
- ultrafast - over fast
- Sets the coding level. The faster, the worse the quality, but less load on the processor:
- Coding profile: main..
- hIGH - to broadcast high definition.
- main - to broadcast standard clarity.
- Key personnel interval (sec, 0 \u003d auto): 2
.
- Determines the key frame frequency.
- CFR (constant frequency): Yes.
- Allows the encoder to encode information with a constant frame rate.
- Additional X264 encoder settings.
- The field does not touch, because I do not understand it.
- Encode in full spectrum: Not.
- Increases the coding quality, due to the load on the processor, increasing the picture quality.
- Allow 61-120 FPS in video settings: Not.
- Allows to use 61-120 FPS in broadcast. Not all monitors can work with this number of FPS and this setting significantly increases the load on the processor.
- Customized sound under the timing video. Total audio offset (MS): 0
.
- Experiment If you have problems with video synchronization and audio streams.
- Improved microphone synchronization (QPC Tags).
- We read subparagraph 12.
- Automatic low delay mode: Not.
- Binding to the interface: default..
- The degree of influence on the delay: 20 .
- Disable TCP optimization: no.
- Use only if you have a bad connection quality to stream service. It is best to change the server / stream provider.

standard settings

our settings
Ready! Basic settings are completed.
Noise gate. Setup:
Here I will not deepen in details. This feature will allow you to configure your microphone, if there is a "extra" noise.

And so, the settings are completed. It remains to connect with the stream service and start broadcast.
How to start broadcasting via Twitch I will describe in the next manual.
Perhaps in some points I was mistaken, but I would be glad if you fix me. Successful streams;)
If you purchased a collected computer or laptop, then its BIOS is already configured properly, but you can always make any personal adjustments. When a computer is assembled independently, it is necessary to configure BIOS to properly work yourself. Also, this need may occur if a new component has been connected to the motherboard and all parameters have dropped by default.
The interface of most BIOS versions, with the exception of the most modern, represents a primitive graphic shell, where there are several menu items from which you can go to another screen with already customizable parameters. For example, menu item "Boot" Opens the user options for distributing the priority of the computer loading, that is, you can select the device from which the PC load will be performed.
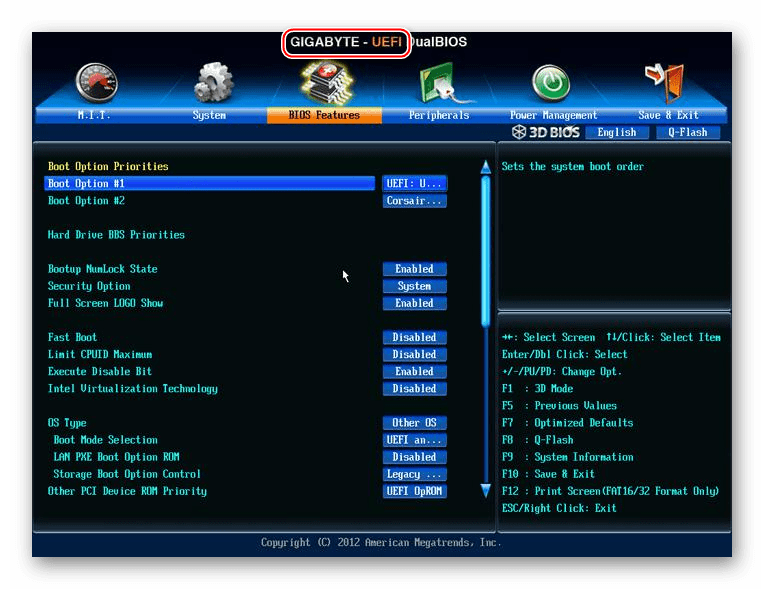
In total, there are 3 BIOS manufacturers in the market, and each of them interface can vary significantly outwardly. For example, AMI (American Megatrands Inc.) has an upper menu:

Some versions of Phoenix and Award all partition items are located on the main page in the form of columns.

Plus, depending on the manufacturer, the names of some items and parameters may vary, although the meaning they will carry the same one.
All movements between items occur with the arrow keys, and the choice - using ENTER. Some manufacturers make even a special footnote in the BIOS interface, where what is written what key for what is responsible. In UEFI (the most modern variety of BIOS) there is a more advanced user interface, the ability to control with a computer mouse, as well as the translation of some items into Russian (the latter is quite rare).
Basic settings
The basic settings include the time parameters, dates, the priority of the computer loading, various memory settings, hard drives and drives. Provided that you just collected a computer, you must make settings for these parameters.
They will be in the section "Main", "Standard Cmos Features" and "Boot". It is worth remembering that depending on the manufacturer of the name may differ. First, configure the date and time according to this manual:

Now it is necessary to make tuning the priority of hard drives and drives. Sometimes, if not to do it, the system simply will not be loaded. All the necessary parameters are located in the section "Main" or "Standard Cmos Features" (depending on the BIOS version). Step-by-step instructions on the example of Award / PHOENIX BIOS looks like this:

Similar settings You need to produce BIOS users from AMI, SATA parameters change here. Use this guide to work:

AMI BIOS users can finish standard settings on this, and the developers of Award and Phoenix have several additional items that need the user's participation. All of them are in the section "Standard Cmos Features". Here are their list:

On this standard settings can be completed. Usually half of these items will already have what values \u200b\u200bneed.
Advanced parameters
This time, all settings will be made in the section "Advanced". It is in the BIOS from any manufacturers, however, may be a little different name. Inside it can be a different number of items depending on the manufacturer.
Consider the interface on the example of AMI BIOS:

Now proceed directly to the settings of the parameters from the item :

At Award and Phoenix, you do not need to configure these parameters, as they default are correctly configured and are completely in another section. But in the section "Advanced" You will find advanced settings to set up loading priorities. If the computer already has a hard disk with an operating system installed on it, then FIRST BOOT DEVICE Select Value "HDD-1" (sometimes you need to choose "HDD-0").

If the operating system on the hard disk is not yet installed, then it is recommended to put a value instead "USB-FDD".
Also at Award and Phoenix in the section "Advanced" There is an item regarding the entry settings in the BIOS with a password - "Password Check". If you set a password, it is recommended to pay attention to this item and set an acceptable value for you, all of them are two:

Safety and Stability Setup
This feature is relevant only for machine owners with BIOS from Award or Phoenix. You can enable maximum performance or stability mode. In the first case, the system will work a little faster, but there is a risk of incompatibility with some operating systems. In the second case, everything works more stable, but slower (not always).
To enable high performance mode, select Main menu "TOP PERFORMANCE" and put in it "Enable". It is worth remembering that there is a risk of violating the stability of the operating system, so work in this mode for several days, and if any failures that were not previously observed in the system, then disconnect it by setting the value "DISABLE".

If the speed you prefer stability, it is recommended to download a secure settings protocol, and there are two types of them:

To download any of these protocols, select one of the items discussed above, on the right side of the screen, after which you confirm the download using the keys ENTER or Y..
Installation of the password
After completing the main settings, you can set a password. In this case, no one except you can access the BIOS and / or the ability to change its parameters (depends on the settings that were described above).
In Award and Phoenix, in order to set a password, you need to select item on the main screen. "SET SUPERVISOR PASSWORD". A window will open where the password is entered up to 8 characters long, after entering the same window opens, where you need to register the same password to confirm. When typing, use only Latin characters and Arabic figures.

To remove the password, you need to choose the item again. "SET SUPERVISOR PASSWORD"but when the new password input window appears, just leave it empty and click ENTER.
A AMI BIOS password will set a little different. To begin with, you need to go to the section "Boot"that in the top menu, and there already find "SUPERVISOR PASSWORD". The password is set and removed in the same way with Award / Phoenix.

Upon completion of all manipulations in the BIOS you need to get out of it with the preservation of previously made settings. To do this locate "SAVE & EXIT". In some cases, you can use the hot key F10..
Customize the BIOS is not as difficult as it may seem at first glance. In addition, most of the described settings are often exhibited by default as it is necessary for the normal operation of the computer.
Want to check how the effectiveness of advertising change depending on certain elements of the landing page? Use Google Optimize - A tool in which you can configure an experiment without third-party help.
Google Optimize allows you to:
- hide, add or change certain items on the site - texts, images, buttons, and the like;
- compare different landing pages;
- test pages with different designs.
In this article, I will describe what you need to do to configure and run the experiment.
What is needed to configure the experiment using Google Optimize?
To work Google Optimize you need:
- Install on the site Google Analytics, Tag Manager and Optimize codes.
- Install Google Optimize extension in Chrome browser.
- Configure the experimental conditions in Google Optimize.
Consider a Read more Experimental Settings on the example of A / B test.
2.1. A / B-Test - a randomized experiment with two or more options for one page;
2.2. Multivaant test - testing several elements of one page;
2.3. Redirect Allows you to compare two different target pages or design options for one page;
3.1. To associate Optimize with your analytics, click the "Go to Container Page" link.

Click on the "Link Property" button and in the window that opens, select Resource and Google Analytics.

3.2. Skip the Google Optimize code to install the Google Optimize code - then we will look at the installation of the required codes in detail.

Click on the created experiment to open the window with the settings of its operation.

Option in Google Optimize - Modification of the selected page element that you want to compare with the current view of the element.
4.1.1. By default, the system has already created the original option called "Original". To add a test option, click "+ New Variant".
Specify the name of the new page and click "Add".

4.2.2. Click on the created option and wait until the page is loaded for which you want to configure the experiment.
In the window that opens, you can:
- delete page item;
- change the size or location of the element;
- change text on the site, as well as its font, alignment, size or color of the inscription;
- add background in the form of fill with color, set a frame or change transparency.
- edit HTML or JavaScript code.
Save the changes made.
By default, the system puts equal weight to each page.

If you want to check, for example, the efficiency of the planned redesign button "buy", you can send more traffic to the test option to more accurately evaluate the reaction of users to innovation.
To change the weight of the option, click on the icon of this setting.

In the window that opens, enter the required weight for each option and click "Done".

4.3. Choose Goals
To evaluate the work of experimental options, you need to set up targets. For example, you can see how new design has affected the number of failures or page conversion.
4.3.1. Google Optimize has three types of purposes:
- last Visitors of pages;
- duration of the session;
- failures.

4.3.2. You can also use goals from Google Analytics. To do this, go to the "Objectives" and click "Link to A Google Analytics View".

In the window that opens, select the desired view:

4.3.3. You can combine the standard Google Optimize targets with your own goals from Analytics, but only three goals can be used in the free version at the same time.


5. Adjust Targeting
All users of the site or selected according to certain criteria can take part in the experiment. I will describe in more detail that you can configure on the Targeting tab.
5.1. Site visitors share
By default, all visitors to the site will participate in the test. If you want to check your hypothesis on a smaller number of users, simply enter the required value in percent in the field allocated in the screenshot below.
On the same tab, you can change the weight of options by clicking "Edit".

5.2. Activation condition
Targeting settings in Google Optimize allow you to specify when you need to activate the experiment.
By default, activation occurs when the page is loaded. To set an event as an activator, go to the "When" section and select the Custom Event field. 
5.3. Create Rule
Ten types of targeting are available on Google Optimize, on the basis of which you can create your own experimental error rule.

- URL Targeting. - Targeting on the URL;
- Audience Targeting. - Audience created in Google Analytics (Available only for users of the pack version Optimize);
- Behavior Targeting. - new or returned visitors who have moved from certain sources;
- Geo Targeting.- visitors from a certain city of region or country;
- Technology Targeting.- Users using a specific device, browser or operating system;
- JavaScript Variable. - value of the JavaScript variable used on the site;
- FIRST-PARTY COOKI - Targeting on cookie users;
- Custom JavaScript.- Custom code that allows you to target based on information inaccessible in previous methods of targeting (for example, time of day).
- Query Parameter. - Get-parameters, with the type of targeting you can target the experiment on UTM tags;
- Data Layer Variable.- based on values \u200b\u200bthat are stored in data level variables.
6.1. Open the menu with the steps of the experiment setting and go to the Optimize Installation.

In the window that opens, copy the Google Optimize account identifier.

6.2. Go to Google Tag Manager and create a new Tag type "Google Optimize".

6.3. In the tag settings, specify the Google Analytics tracking identifier and the Optimize account identifier you copied earlier.

Save the new tag. Triggers will not need for him.
6.4. Now you need to change the procedure for performing tags so that the Optimize tag has triggered before Google Analytics.
Go to Advanced Analytics Tag Settings, check the "Activate the tag before the Google Analytics tag" checkbox and select Google Optimize from the list.

Please note that Google Optimize code consists of two parts. The second part must be installed directly on the site so that visitors to the site have not seen the process of elements substitution.

The standard element substitution code is not very good, because during the substitution shows simply the white screen and the user is difficult to understand whether the site is loaded at all. Analytics Strategist Netpeak Alexey Danilin felt the script so that it would show on top of the white screen and the picture on which it will be understood that it is loading.
You can use the script below as an example:
conclusions
Google Optimize is a powerful tool for testing the efficiency of your site, its individual pages and elements.
How to work with him:
- Create an account on Google Optimize and select the type of experiment.
- Tie Optimize with Google Analytics
- To configure an experiment, create page options for comparison and install how traffic between them will be distributed.
- Set the targets to Optimize or select the previously configured in Analytics - so you can evaluate the effectiveness of the compared elements.
- Adjust Targeting - Experimental Activation Conditions on the site.
- Add directly to the site code script that hides the element substitution.
If you were looking for the BIOS settings in the pictures, they got along the right address.
WRITING Changes will be a lithium battery built into the motherboard and support the required parameters when the voltage loss.
Thanks to the program, it is possible to establish the steady interaction of the operating system (OS) with PC devices.
Attention! The BOOT network configuration section is present, allows you to adjust the parameters for the speed of the system loading, the keyboard settings with the mouse.
After completing the work or familiarization with the BIOS Setup Utility menu, you need to click on the Exit Box automatically saving changes made.
Main section - Main menu
Let's start working from the MAIN partition used to modify the settings and adjust the time indicators.
Here you can independently configure the time and date of the computer, as well as make the configuration of the connected hard drives and other drives.

To reformat the functioning mode of the hard disk, you need to select a hard disk (for example: "SATA 1", as shown in the figure).
- Type - This item indicates the type of the connected hard disk;
- LBA Large Mode. - responsible for supporting drives with the volume of more than 504 MB. Thus, the recommended value here is AUTO.
- Block (Multi-Sector Transfer) - For faster work here, we recommend choosing AUTO mode;
- Pio Mode - Includes the hard disk operation in the outdated data exchange mode. It will also be better to choose AUTO;
- DMA Mode - gives direct access to memory. To get a higher reading or write speed, select AUTO value;
- Smart Monitoring - This technology, based on the analysis of the drive, is able to prevent the possible disk failure in the near future;
- 32 Bit Data Transfer - The option determines whether the 32-bit data exchange mode will be used by the standard IDE / SATA chipset controller.

Everywhere with the "ENTER" and the shooter, AUTO mode is displayed. The exception is a subsection 32 Bit Transfer, in need of fixing the Enabled setting.
Important! It is required to refrain from changing the "Storage Configuration" option, which is in the section "System Information" and prevent the correction "SATA.Detect.Time.out. "

Section Advanced - Advanced Settings
Now we will proceed to the settings of the PC basic nodes in the Advanced section, consisting of several sub-paragraphs.
Initially, it will be necessary to install the necessary parameters of the processor and memory in the Jumper Free Configuration system configuration menu.

By selecting Jumper Free Configuration, you will be transferred to the Configure System Frequency / Voltage subsection, there is an opportunity to perform the following operations:
- automatic or manual overclocking of hard drive - Ai overclocking;
- change the clock frequency of memory modules -;
- Memory Voltage.;
- handmade voltage installation of chipset - NB Voltage.
- changing port addresses (COM, LPT) - Serial and Parallel Port;
- installing Controller Settings - configuration Onboard Devices.

Power section - PC meals
Power item is responsible for PC power and contains several subsections that need the following settings:
- Suspend Mode. - exhibit automatic mode;
- ACPI APIC - Install Enabled;
- ACPI 2.0 - Fix Disabled mode.

Section Boot - Download Management
It is allowed to determine the priority drive, choosing between the flash card, drive or hard drive.

If the hard drives are somewhat, then in the Hard Disk subparagraph, the priority hard drive is selected.
The PC boot configuration is installed in the Boot Setting subsection containing a menu consisting of several items:

Choosing Winchester
PC boot configuration is installed in the Boot Setting subsection,

- Quick Boot - acceleration of the OS load;
- Logo Full Screen. - Disabling the screensaver and activate the information window containing information about the download process;
- Add on Rom - setting the focus on the information screen of the modules connected to the motherboard (MT) by slots;
- Wait For 'F1' IF Error - activation of the functions of the compulsory press "F1" at the time of the error system identification.
The main task of the BOOT partition is to define the download devices and the task of the required priorities.
- ASUS EZ Flash. - With this option, you have the ability to update the BIOS from such drives, like a flush, flash drive or CD.
- Ai Net. - Using this option, you can get information about the CABILE connected to the network controller.

Exit section - output and saving
Special attention, it is necessary to pay an exit item that has 4 working modes:
- Save Changes. - We maintain the changes made;
- Discard Changes + Exit - We leave the factory settings in action;
- Setup Defaults. - Enter the default settings;
- Discard Changes. - We cancel all your actions.

The above step-by-step instructions explain in detail the purpose of the basic sections of the BIOS and the rules for making changes to improve PC performance.
BIOS setup
BIOS settings - detailed instructions in pictures
 Cellular - what it is on the iPad and what's the difference
 Go to digital television: What to do and how to prepare?
 Social polls work on the Internet
 Savin recorded a video message to the Tyuments
 Menu of Soviet tables What was the name of Thursday in Soviet canteens
 How to make in the "Word" list alphabetically: useful tips
 How to see classmates who retired from friends?