Lost access to the domain: what to do? Domains and subdomains where the domain lies
I mentioned that when changing the hosting provider can be performed transfer Domain Between the old and new hoster. For this, at a minimum, it will be necessary to find out which organization is the main Registrar Our domain and write a letter to this organization with a request to carry out the transfer between the hosts, in most cases, by putting a passport scan from this letter (to confirm the identity of the domain owner). In addition, each registrar can have their own special conditions and the requirements necessary to meet such an application. However, there is another option to manage your domain. You can transfer a domain directly to the recorder itself and get full access to the domain management directly from the registrar site. This will allow us to depart from a dependence on some particular hosting provider and freely dispose of your domain without having to carry out a domain transfer at each next change hosting.
However, it is worth understanding that such "freedom" has its price, and if the domain is from the registrar on our direct control, then we will have to pay for a domain name several times more. For example, when registering a new domain in the .ru zone through any hosting provider, the value of the annual payment for such a domain will fluctuate around 140-150 rubles, while when registering a domain directly at the organization of the registrar, the value of annual payment will already be in area 500-650 rubles.
I think here to make clarity into terminology, it is worth explaining what I understand and share for myself the concepts of the hosting provider and the registrar in the context of the conversation on registration / extension of the domain names of the Internet. Registrar - This organization has the right to register and sell names in the domains of the first level of type RU, COM, NET, etc. in accordance with the agreements ( accreditation) and international rules Domain Name and IP Address Management Corporation - Internet Corporation for Assigned Names and Numbers (ICANN.). On the Internet, it is easily able to find a list of accredited registrars for top-level domains, for example, for the RU zone, such a list can be found here -Accredited registrars in domains.ru I.RF . Most of the hosting providers are not registrars and are Partners of registrars, that is, in fact, act as intermediaries between accredited registrars and end owners of domains. Hosting providers buy domain names from registrars in large quantities and on reduced partner prices and that is why they can afford to distribute domain customers at low prices.
So, in this note, consider an example of how to withdraw from the hosting provider the possibility of controlling the domain belonging to us and move to self-control directly from the registrar site. Like last time, all manipulations we will perform on the example of the domain It-kb.ru.
At the time of the start of writing this note, the IT-kb.ru domain is managed by the IHC.RU hosting provider previously used by us. In this case, delegation of the domain is made on our current hoster - Smartpe.
First of all, find out which organization is the main registrar of our domain. To do this, you can use the online service. WHOIS on any of the site sites, for exampleRU-CENTER:
In the information received about the domain, we are interested in the value of the attribute registrar.
As you can see, the main registrar of our domain is the company RegtaymHere, the URL of the PE Regitor site is shown. Now you can go to the site of the registrar, to find out the contact details of its technical support and ask the question of the possibility of direct domain management through the registrar's website without the participation of intermediaries (hosting providers).
In the questionnaire fill all the necessary fields Real dataSince later we will have to confirm the scan-copy of our passport. We celebrate the daw with the consent to the processing of our personal data and press the button Save.
At the end of the questionnaire, once again, I celebrate a daw with the consent to the processing of our personal data and click the button Save, after which the list of saved questionnaires appears, where next to the newly created questionnaire click on the link Confirm the data.
Here we will need to attach the scan of the passport
As indicated in the instructions on this page do color scan passport On pages 2-3 (basic passport data), 5 (and the following pages with a change in registration), 19 (History of passport replacement). Before sending the scans of the passport page to the registrar's website, in a graphic editor I added a clear readable text to each page (or you can make a watermark) "Copy for WebNames.Ru". Well, just in case, to exclude the possibility of using this scan copy in the inadequate directions.
When sending scans, an appeal will automatically be created in the technical unit and we will report the number of the Ticket for which we can further track the status of verification of the scan copy of the passport.
After literally 15 minutes, I received a letter by mail on an open application that the passport details were confirmed.
After that in the site menu Personal Area > Feedback form Create a new application in free form asking for transfer
After that, a new application will be created and approximately within one business day (I came to approximately within an hour) Let us come to an email on the status of the task - either the domain was successfully transferred to the recorder or not (describing further actions to eliminate problems). In my case, the letter came for half an hour:
The domain management of it-kb.ru was transferred to your account.
After a successful domain transfer, we can log in to the registrar's website in the section Personal Area > My domains and services And make sure that now we have access to our domain.
On the registrar's website, in the future, you will need to replenish the balance of your personal account (in the section Personal Area > Top up balance) and include the auto-extension option of the domain (in section Personal Area > My domains and services > Domain Management) to "not blink" your domain.
In turn, on the website of the hosting provider from which the domain transfer was carried out, information about the domain registration service should change its status on inactive and now with a calm soul to say goodbye to the old hosting provider.
The domain management section in the control panel is designed to make such actions with domains as:
- Registration, domain transfer
- Adding a domain entry
- Creating subdomains
- Configuring mail servers to a domain incoming mail
- Setting up domains and subdomains (control A, MX and other records, changing NS servers, etc.)
Domain registration
To register a domain, enter it in the "Add Domain" form, select the zone from the "RU, COM, NET" list or any other. Select the "Register" action. Optionally, enter a comment (although it is displayed only for you in the control panel, it can be useful if you have many domains). After some time after adding, the domain will be fully registered (the registration time usually does not exceed 24 hours).
Transferring an existing domain
If you already have a domain, possibly supported by another hosting provider, but you place the site with us, then there are several domain transfer options to us:
You fully endure the domain under our management
This means the transfer of the domain to our partner contract with the registrar, to prolong the domain it will be possible through us.
- Just add domain domain in our control panel.
- Write a letter to our technical support () with a request to transfer a domain to our administrative management. We will take on all the troubles on the transfer.
This is a technical transfer. The domain will simply be serviced by our servers, and extend the domain you will independently, or through the former registering organization:
- In the DIPHOST control panel you need to "raise zone". For example, add a domain to transfer.
- Then your domain must be prescribed by our NS servers (NS1.bz8.ru and NS2.BZ8.RU). You can do it yourself or, for example, asking the technical support service for another hosting provider.
Submitting management
Any domain located on our NS servers can be an unlimited number of subdomains.
To add or delete the subdomain, you need to go to the "Details" page of the corresponding domain.
This page contains a subdomain form. You need to enter a subdomain name, and perhaps the comment (this comment is purely for you).
There is a list of subdomains. You can delete the subdomally unnecessary to you.
To add a degree of deeper level ( For example: sub.bill.one.two.ru to the domain two.ru), Just enter its name to your domain (i.e., in our case, the name subdomain will be sub.bill.one). Voila!
Thin setting of a domain or subdomains
Thin setup allows you to:
- Install mail reception settings ("Take", "Do not accept", "Reserve")
- Install in a, in mx, in txt records for domain
- Change NS servers for domain
- Enter the IP address from which the transfer of the domain is allowed
Q: Does the domain administrator be responsible for the information on the website posted on the Internet under this domain?
Oh yeah. The domain administrator from the moment of making his name to the registry personally is responsible for the use of the domain, including in illegal purposes, regardless of who the domain is used.
Q: How can I find out who is the domain administrator?
A: Public information about the domain name can be obtained by using WHOIS service on the website www.nic.ru. Full information about the domain administrator can only be provided at the request of the court, law enforcement or a law enforcement request.
Q: Is the printout of the Internet page proof of an offense in the sings?
O: Yes, but only if it is certified by a notary. The person interested in the assurance of offenses (for example, the use of a domain name to accommodate the site under it with a proposal for the sale of goods for which the plaintiff has been provided with legal protection in accordance with the law on trademarks), in the name of the notary request, in which he asks to certify the fact Looking for such information at a specific address on the Internet. At the same time, the request indicates: the purpose of providing evidence, the address of the page on the Internet, the details of the document. It is advisable to specify the header of the text or graphic information, its location on the Internet page, specific quotes that will be used in the lawsuit, complaint or application.
In the inspection protocol, it is advisable to indicate how the notary has received access to it, that is, describe the sequence of actions that are made by the notary to receive the screen image of the page. The notarization of the page needs to be made to court.
Q: For a fairly long time, "spam" comes to our email [Email Protected] Can an RU-CENTER cancel the domain registration?
A: The registrar has the right to apply only actions to the domain administrator directly stipulated by the regulations for the registration of relevant domains.
The domain administrator independently determines the procedure for the use of the domain; It is responsible for choosing a domain name, possible violations of the rights of third parties related to the choice and use of the domain name, and also bears the risk of losses associated with such violations.
The issues of creating a site and place information on it, as well as the use of the site to send spam to the issue of using the domain, and not to the question of its registration. The registrar is not entitled to interfere with the relationship arising from the domain administrator with third parties when using the domain.
Registration of a domain name can be annulled earlier than the end of the registration period only on the grounds established by the regulatory documents of the relevant registry or registrar of the domain.
Accordingly, for all issues of using a domain, first of all, to contact his administrator.
If the domain administrator does not respond to appeals, we recommend contacting the hosting provider, whose resources are used for illegal mailing. If you yourself find it yourself to determine the source of the mailing, then the registrar support service will be glad to assist you in this matter.
To do this, please send an email to the address [Email Protected] With the statement of the situation with which you encountered the service headers of an unwanted message. You can read the instructions for viewing the service headers of mail messages on our website.
Q: Can a domain name be registered on two persons (for example, legal and physical)?
O: No, it can only be registered on one person (physical or legal).
Q: What does the term "domain administrator" mean? What powers is the domain administrator?
A: The domain administrator is a legal or individual, whose name is registered by the domain.
The domain administrator selected the domain name independently.
The domain administrator determines how the domain will be used, as well as who will carry out technical support for the domain.
The domain administrator owns a password (and can change it) to access the domain information (contact details, password change), can transfer their rights to the domain to another person, remaining at the same time responsible for possible violations of the rights of third parties related to the choice and using a domain name.
Q: Can I get the official answer that our organization is the domain administrator?
A: For domains registered in RU-CENTER, you can get a certificate of domain accessories, sending a request to the address [Email Protected] , C indication of the name of the domain and the method of delivery of reference.
A certificate of domain belonging can be obtained in the following ways:
- letter to the postal address of the administrator;
- by fax;
- in the office of RU-CENTER.
The domain administrator can print a copy of the domain accessories independently in the "For Customer" section → My Domains by selecting a domain for which a certificate is needed.
Q: To solve the disputed question, we need to get more complete information about the domain administrator than the one that is provided by the WHOIS service. Can we get it?
ABOUT: Information on the domain administrator contained in the closed Database of the RU-CENTER may be provided by the written request of the court, law enforcement agencies or in a law request (in accordance with Article 6. Federal Law No. 63-FZ "On advocacy and advocacy in Russian Federation ". Requirements for the execution of a lawyer request, including a sample of such a request, approved by the Order of the Ministry of Justice of the Russian Federation dated December 14, 2016 No. 288" On approval of the requirements for form, the procedure for designing and sending a lawyer request "(registered in the Ministry of Justice of Russia 12/22/2016 No. 44887).
Q: Domain registered on one of our employees, i.e. It is he who is the administrator of this domain. Is it possible to make that the domain administrator perform our organization as a whole?
A: Yes, the domain administrator (legal or individual) can transfer the rights to the domain of another organization or physical face. This requires to provide a letter from the domain administrator. The receiving party must confirm the reception of domains in the "For Customer" section.
More detailed information on the transfer of rights can be found.
IN: The site contains information containing insults into my address. I have already appealed to the site administration asking you to delete this information that makes my reputation and inappropriate reality. But never received a response. Where can I ask for help?
A: To resolve the current situation, we recommend that you primarily notarize the information on the site. Then you can go to court with a lawsuit against persons who posted this information, or contact the law enforcement agencies. RU-CENTER carries out domain registration, but does not have the authority necessary to resolve your question. As for the complete information about the domain administrator, it can only be provided by the request of the court, law enforcement agencies or in a lawyer.
Q: The site contains materials with unlawful content: where can you advise to appeal to curb such activities?
A: According to these questions, you can contact the specialists of the hosting provider, on whose resources a site, or to the specialists of the domain registrar, for more recommendations.
Q: Our organization is the copyright holder of the trademark / film / articles / programs for computer / other results of intellectual activity, which is illegally posted on the site, hosting services for which provides RU-CENTER. To whom you can advise to appeal to curb such activities?
A: We recommend that you contact the site owner, where your results of intellectual activity are illegally posted. If the site owner does not respond, you can contact RU-CENTER with a complaint. Requirements of the RU-CENTER for complaints and the procedure for their consideration is governed by the rules for consideration of the complaints of copyright holders for violation of the hosting services of exceptional rights to use the results of intellectual activities and (or) of individualization tools equated to them posted on the RU-Center website at HTTPS: //nic.ru/dns/reglaments/rules_Petition.html.
Q: Is it possible to transfer the domain by inheritance? And how to do it?
A: First of all, it should be noted that in relation to domain names it is impossible to talk about inheritance, as the domain registration occurs on the basis of the contract of compensated service provision, and in accordance with Art. 1112 and art. 128 Civil Code of the Russian Federation Services in the hereditary mass are not included. However, RU-CENTER offers its customers a reference procedure for obtaining domain administration rights in the event of his administrator's death (individual) and after 6 months from the date of the opening of the inheritance, that is, from the death of the domain administrator.
For this, the applicant (a formal heir) must be concluded a contract with JSC "RSC" (RU-CENTER) and provide the registrar:
- a written application addressed to the General Director of the RSC JSC, in which to state a request for the registration of a domain in the name of the claimant of the previous domain administrator (in the form of the registrar);
- a notarized copy of death certificate;
- a notarized copy of the certificate of inheritance (if any) or a certificate of the notary, in which the heirs of the testator are indicated;
- the consent of the heirs (if the deceased domain administrator is more than one heir) for the registration of a domain in the name of the interested person in the form of a statement addressed to the General Director of the RSC JSC (RU-CENTER) in the form of the registrar.
(Last updated: 04.12.2018)
Hi, my dear blog readers! POST UPDATED! Due to the fact that Yandex combines interfaces for controlling the connector and mail for the domain, you have to update your record. After all, for me, the main thing is that the content for visitors has always been relevant. Mail for your domain on Yandex - How much in this sound is well, so on. I created the recent mail for my domain (Site), now the email address looks beautiful, solid with info :. Did you think about such mail? If yes, then, Ida for me.
Yandex. Connect is a set of services for working in a team. They work well with Mail for the domain
We will connect / configure your domain to Yandex.We (First created mail for the domain on, but I didn't like something) completely free.
What is Yandex.We?
In the spirit of the words: Yandex.poshta - free service from Yandex, with which you can create email for your domain.
For example, if you have a domain name "Your Website.ru", then you can connect it to Yandex.We and create the required number of boxes based on this domain of the species of your site.ru, that is, address with any login and address of your domain . Mail with the name of your site - fast, free and without spam. Free with unlimited drawer. Beautiful address with any login (aliases).
Yandex. Connect is a platform of services optimized for collaboration. Connect includes corporate versions of Yandex. Goods, disk and calendar.
Connect includes corporate versions of Yandex.Mes, disk and calendar
Compared with the mail for the domain, Yandex. Connect provides more opportunities for managing domains and user mailboxes. Connect new domains only in Connect. In Connect, the administrator will receive more opportunities - for example, it will be able to create a system of employee accounts, which will reflect the structure of the company. For each department there will be its own distribution. It will save from many routine tasks. A new colleague will be enough to determine the desired department - and it will be signed on everything that should receive.
How to create mail with your domain
To connect your domain to Yandex. You need to go to the page https://connect.yandex.ru/pdd/ (There must be an account on Yandex, if not, then you need to create it) and enter the domain name for your mail. Important: Only its owner can connect the domain:
 Mail for the domain on Yandex
 Then, click on the "Connect Free" button. After you, Yandex.Connect (portal) can be thrown into your administration, where you can produce all operations with your domains:
 Admin Paul Yandex. Connect. Mail for domain
 The red icon means that your domain is not confirmed (if your site then will be all okay). Plus, opposite the section, you can add other domains from here. Now you need to confirm the property of the domain by clicking in the right row to the domain. You have three options for confirmation. The first two are the easiest. First method: meta - tag:
 Select a way to confirm the domain and start checking
 Add your site to the main page code (in the Head section, slightly above it.) The proposed meta tag. And run the check. But note that after updating the WordPress template, you will have to confirm the right to the domain again.
I chose the second option, in my simplest, HTML file. Just only you need to create an HTML file with the proposed name and the specified text within the file and download to the root directory of your site. This is done so. Open the ordinary notepad on the computer, insert the text in it and save it (file - save as ..) with the proposed name. Next, saved by HTML - File download in the root directory of your site using the FTP or file manager. The root directory of the site is where the site files are located such as - .htaccess, robots.txt, index.php and others:

After the verification file is loaded, wait the minutes and press the "Run Check" button. After you confirm the domain ownership, you will need to add MX records, from the domain registrar where you bought it (domain).
Setting up DNS entries for Yandex.Mes
To use Yandex. You will need to make specific DNS records on your domain.
MX records for the Yandex domain
MX record indicates a server receiving mail for your domain. To make your mail to the Yandex server, you need to create a MX record indicating it.
Go to your account where you have domains, select the desired and then go to the section (in all registrars in different ways, but what should be similar to the DNS zone control. Start a new MX record with the following parameters:
Subdom name - @
Recording Type - MX
Data - MX.YANDEX.RU.
Priority - 10.
Here's like me, for example:

On my hosting run, and you should have MX - templates. For MX records beget.
 Management of DNS records
 Click on MX templates. You just need to press the Yandex and the entry automatically inserted. Save. After text there are MX records.
 MX templates for domain
 Wait for the entry into force of the DNS changes (can take to the time of time - 72 hours). The next step is to create an alias.
By default, your main domain is domain species of domain.yaconnect.com, which you have chosen when we created an organization. You can connect one or more of your own domains - then the main one can do any of them.
You can have only one main domain. Additional domains become alias main. This means that letters sent at the address on the Alias \u200b\u200bdomain will fall into the box with the same name on the main domain. For example, if you have connected the Example.ru domains and example.com, letters sent to, and will fall into the same box.
I see in the list box. What it is?
The address of the species is the overall mailing of your organization. The mailing has no separate mailbox. Letters sent to the address of the general distribution will receive all employees of your organization.
How to create a mailbox?
Mailboxes in Yandex. Connect are tied to the accounts of employees. To add a new employee:
Go to the Organization page.
Under the list of employees, select + Add → Add employee.
Set the parameters and save the changes.
You need to come up with a beautiful username for a mailbox, for example, very popular so - Info or Admin, but in general any. For those who poorly figured out, everything is written for you to help Yandex Connect.
Ladies and gentlemen, I showed you one of the ways to create, mail settings for a domain that is suitable for most domain name recorders. Please note Yandex has instructions for configuring domains from some registrars and hosters, you can see if your list is in this list. On the page - instructions for setting up the MX record - https://yandex.ru/support/pdd/set-mail/mx.html#mx.
MX records for the yandex domain - Yandex.connect. Video
I hope friends, the instructions will be useful for you. And I will not forgive me for a long time, see you.
Try free Yandex.mount service for a domain.
You read about how to create, configure and use this service in our current article.
Yandex.mount for the domain - what is it?
"Yandex.mount for a domain" is a service that allows you to integrate a domain name with free service "Yandex Mail", Getting all the benefits of the work of the latter.
This service may be needed to hold the owner of the domain name, which wants to make his mail unique, for example "username @ domain name".
The advantages of such a solution are obvious and after connecting the service, the user receives:
the ability to create 1000 mailboxes (a large number is possible after submitting an application for an increase in the limit);
comfortable web interface management post accounts (Account lock in case of dismissal of the employee, creating a new, etc.), as well as various additional features, for example: Creating an Alias, list of mailings, import mail from other mail servers , etc.;
tools for working with letters via the web interface (view office documents, listening to nested .Mp3 files in the browser).
protection against spam and viruses;
the ability to access the web interface, postal programs and mobile devices;
the ability to install the logo of its organization in the web interface and select a variety of different topics for the interface;
due to more trust from other mail servers, Yandex. Letters are not so often falling into spam lists.
calendar for organizing a working day.
Also, the list should add no need for content in the state administrator.
And if you still need his services to customize the service, the price will be minimal.
At the moment, the service serves about 300 thousand domain names and about 4 million mailboxes.
Create and configure Yandex.mount for domain
Getting Started To configure this service you must already be registered in the Yandex. The service and own the domain name for which the setting will be made.
Step 1.Connect and check domain. At this stage, a person who wants to use the service must prove that is the owner of the domain name.
Check, as a rule, takes no more than 24 hours and as soon as the domain is confirmed, the administrator has access to all functions.
Go to the confirmation page and select one of the proposed methods to confirm:
creating a subdomain with a specific name that generated the system;
changing the address of the contact email address, to the address containing a domain name for which registration is registered.
The first two ways are simpler than the latter. In our example, we will use the first way.
Create a file in a notebook (call it as the system specified), we place the text generated by the System, rename V.HTML and load the site directory in the root directory.
After performing these manipulations, click the "Check domain ownership" button.

Step 2. Setting up MX records or domain delegation Yandex .
In case the domain name was registered only in order to use a unique name domain For the company's postal addresses or for personal purposes (to emphasize individuality), it is recommended to use the delegation of the Yandex domain.
In this case, you can use only Yandex services, but all the settings of your domain will be automatically produced.
If the domain is used for the site located at a certain hosting provider, the best solution will be configured by the MX recording in its control panel.
For the convenience of users, the company has placed information on setting up a domain on the official website for the most popular recorders and Internet providers.
Setting MX recording
The MX record setting is different for each service, so you will confine ourselves to a general description without binding to the hosting provider interface or the registrar.
Going to the Administration Panel, you must delete all existing MX records that do not specify the Yandex servers, after which you should create a new selection of Priority - 10, and in the Purpose field (Data) specify mx.yandex.net.
The settings can be seen by following the link. If you all made correct status "Expect the installation of MX records" will be changed to "connected".

Note! In some cases, hosting providers integrate settings for the most popular services incl. And for Yandex. Please, in this case, the setting is reduced only to the checkbox in the desired field and save the changes.

After MX records settings, you can go to the My Domains page and make sure that the settings are correct.

In the case of delegation of the Yandex domain, its performance will be provided by the company servers.
The setting consists of two stages of editing on the Yandex side and on the side of the name registrar or hosting provider.
To delegate, you need to go to the My Domains page, select a domain to delegate to Yandex, go through the "DNS Editor" link and make sure that all the necessary data is written in the DNS records list.
Important! If any record is missing, add it using the corresponding button.

On the domain registrar side, you need to change the domain NS settings by specifying the primary and secondary DNS server DNS1.yandex.net and DNS2.yandex.net, respectively.
If there are fields for IP addresses in the interface of your recorder, they should be left empty.
After a while, your domain will be delegated to Yandex. To do this, visit My Domains page.

Mail for the domain - a beautiful e-mail address indicating its belonging to your domain. We can say that the mail for the domain gives you an individuality, since not everyone can create mail on a specific domain, for example Site.ru, but only his owner. This article will consider the registration process and configuration of this service.
Step 1. Connecting a domain
How to set up mail for a domain?
First of all, you must start an account on Yandex. If you already have, then go immediately to the section. Enter your domain in the field and click on the button. Connect domain.
Step 2. Confirmation of domain ownership
You will be offered several options to confirm the domain ownership:

Choose the first, the easiest option. You need to create.html file with the specified name and content and load it in the root directory on FTP. Read more about domain hold confirmation methods.
We expect domain ownership check.
Yandex scans domains not instantly, so you have to wait. On the settings page, it will be indicated, at what time the following check will be carried out:

If you have done everything correctly, after the specified time you will see a message about a successful confirmation of domain ownership, and the domain status will change on the waiting for the installation of MX records.
Step 3. Setting up MX records
In Yandex, you can configure MX records in two ways:
- Delegate a domain on Yandex - In this case, the MX-record setting will occur automatically, but the domain will be tied to Yandex, and not to hosting, so we use the option 2:
- Independently to start a new MX record through the control panel of the registrar / hosting provider with the following parameters:
- Subdom name - @
- Recording Type - MX
- Data - MX.YANDEX.RU. (Mandatory with a point at the end!)
- Priority - 10.
In some domain recorders and hosting providers, such as 2Domains, and configure MX records can be automatically in the Personal Account / Control Panel.
If you did everything right, after a while your domain will connect, and you will see the following message: Domain is connected.
Step 4. Creating a mailbox for a connected domain
After we have connected our domain to Yandex, you can create up to thousands of mailboxes!
In the My Domains section under our domain choose to add a mail box

We prescribe the login of the box, set the password for it and click Add.
After adding a message that the new box is added successfully.
Choose our created mailbox and choose to configure:

The following options are available to us:
- Change password,
- Block the mailbox,
- Remove mailbox
- Add an alias drawer.
Let us dwell in more detail on the Alias \u200b\u200bof the box. Alias \u200b\u200b- alternative e-mail address for a specific box. You can create an alias for the previously created box. For example, you created, and added to it alias in such a way, if you send Pysima on, they will still be coming to the address I think everything is clear.
And the last thing you need to do is to pass the Doregistration. Click at the very top of the page Log in to the mail, enter the login (you can not @ domain.ru) and the password from the box, this page will appear:

Fill in all data (name, surname, gender, question for password recovery and answer to it, e-mail to appeal to support service (optional), date of birth), introduce a security code from the picture and click Complete registration.
Everything! Now the mailbox is available through the Yandex.pox web interface. And you can send to the postal program. It is very convenient!
Connect the domain to Yandex You can go to https://pdd.yandex.ru/domains_add.
In order to connect the domain, you must log in (if you do not have an account on Yandex, you need to register). After authorization you need to enter your domain in the field next to the button " Connect domain"And click on it.
After that, you will need to confirm your domain ownership rights. Yandex proposes to do this in three different ways:
- by placing an HTML file;
- with the creation CNAME records for subdomain;
- by changing the contact email for the domain (this method, we do not consider, as we consider it less convenient and long. Changing the contact email for domains registered through us is made through a request to the support service. In addition, for domains in international zones you also It will be necessary to provide a copy of the identity document).
Confirmation of the domain using an HTML file.
To confirm this method, you need to create a file with the specified Yandex name and add a specified string to it. The fastest way to do is - using our File manager. Go to the control panel in " File manager».
In the window that appears, enter the file name and click " OK».
Open the created file by double-clicking the left mouse button and fill out according to the requirements that Yandex offers.
Confirmation of the domain using CNAME record
To confirm this method, you need to create the specified Yandex subdomain and register for him a given entry CNAME.. Create a subdomain in the section " Subdomains" To do this, go to this section, then select your domain from the list and enter the name of the desired subdomain. The remaining points fill out in the picture. Click the " Add subdomain».
Now you need to go to the section DNS..
Select your domain from the list, then in the list DNS zone Click in front of the zone with your subdomain button " Open editing mode". A form will appear approximately as in the figure below. You need to choose CNAME. and enter the necessary record. Then click " Save".
After performing some of these ways, go back to the Yandex page and click " Check domain ownership"If everything went successfully, then go to the next step - setting MX records For a domain.
Setting MX records.
After confirmation of the domain, you need to configure MX records.
For this B. Control panels need to go to the section again DNS. And choose the domain in the list that you connected to Yandex. Please. Now press the button " Open editing mode"In front of the subzones with the domain name. Use the finished template for Yandex (just click on the button. MX templates and select Yandex) and click " Save". You can also enter the necessary records manually without using a ready-made pattern.
Returning to Yandex and check shift MX records. This process is not instant - it will take 10-15 minutes to update. MX records. After the verification is completed, you can create mailboxes you need on Yandex.mounts.
Good job! If you have any questions - write to us, please, the ticket from Account control panels, section "".
Free for any domain registered or on service
Connect the free Yandex.At for your domain, and you will receive:
- Beautiful mailing address with any login and address of your domain;
- 1000 post accounts that you can distribute your friends, relatives and acquaintances or for your business;
- Convenient interface for managing mail accounts (blocking boxes and establishment of new boxes, password shift, etc.);
- The ability to set the logo of your organization in the mail web interface.


Email access via the web interface (from any computer) and postal programs for POP3 / IMAP protocols
Calendar for organizing a working day, schedule of meetings and business lists
Yandex Mail on your domain is a convenient service for small and medium-sized business representatives, which makes it possible to get corporate mail for the domain. Customers will be able to use drawers with the appearance of "[email protected].". Yandex service is very popular thanks to its advantages:
- the familiar visualization of mail;
- effective spam filtering;
- effective viral verification of files coming by mail, and so on.
Clients who prefer "Yandex" are also available other services - disk, music, and so on. To use them is sufficiently logged in the site. Customers who have chosen on Yandex will be able to register 1 thousand boxes and managing mail through a convenient online interface or API.
How to set the email "Yandex" for the domain?
To connect Yandex mail for your existing domain, you should perform a few simple steps:
- Authorized on our website, go to the domain section.
- Select the domain to which you want to connect mail, and click on it.
- Go to the Mail and Business Services tab.
- Translate the Runner located near the item with Yandex, to the "ON" position to enable mail on the domain. Then you will enter the Yandex mail site. There you can find all the instructions necessary to proof the rights to domain ownership.
- Authorized in Yandex services to save data on all connected services in the account.
The further procedure for connecting the domain mail depends on the DNS servers used. If you use free NS1..At from the site, then all the required information will be transferred automatically. The service will earn immediately after checking the rights to the Yandex domain. If you use other DNS servers, then all data will have to be transferred manually. The information that is necessary in order to check the domain in the "Yandex" can be obtained in the "Information for manual service setting" section, which is located in the service management panel. After that, the mail for the domain will work.
If you have no domain, Yandex is not connected, then use the site. You can choose any free name in the domain zone of interest ..
In order for the site to be available for all Internet users, you must register as the names of the names of the registered domain, service servers of our hosting: ns1.ipipe.ru., ns2.ipipe.ru..
Responsible for the zone of the server name for the domain is spelled out in the panel where the domain was recorded, therefore the changes should be made in the panel of the current registrar.
If a domain name is registered or serviced by us, To parking domains to hosting, go to the Domain Names / Domains Control Panels section.
In the area of \u200b\u200bthe required domain name, in the column Server names follow this link Change
In the form that appears, enter the necessary names for names and click Change.

When, if the domain is registered or serviced not from usYou need to change information about the names of the names in the panel where the domain name is served.
Important! Any changes to the DNS domain entries - take effect after a while necessary to update the DNS of the Kesha servers. As a rule, it takes from 8 to 72 hours.
Extension of domain name registration
To extend the domain, in the Domain Name / My Domains section click on the link Extend Near the required domain.
In the form that appears, select For how long it is necessary to extend and click Extend.

Important! Extension of domain zones of RU, RF, SU is only possible for a period of 1 year!
Do I control my domains in case of refusal of your hosting services?
YesIn this case, access to the domain control panel intended for individuals / organizations, not using the services of our hosting and the account translated into the tariff plan Domain.
Receive information about the domain name
How can I get to my site before there are changes in DNS?
To do this, you must register match between the IP address of the site and its name on the local computer in the file hosts. adding a string of type
111.222.333.444 MyDomain.com
111.222.333.444 - This is the IP address of the server on which the domain is located, find out which you can in the section Hosting / Sites column IP addressVirtual hosting administration panels.
myDomain.com. - The domain name of the site you want to open.
In case the domain name consists of Cyrillic characters domain.Rf. , then a string for a file hosts. Must contain the name of the domain in Punycode. 111.222.333.444 XN - D1ACUFC.XN - P1AI
those. The IP address of the domain and then his name. HOSTS file location depends on operating system:
Windows Families NT (NT4, 2000, XP, Win7) - C: \\ Windows \\ System32 \\ Drivers \\ ETC \\ HOSTS
Windows Families 9X (95, 98, ME) - C: \\ Windows \\ Hosts
Linux, UNIX - / ETC / HOSTS
Do not forget to remove or comment on the match line in the file hosts. After updating the DNS.
How to change MX records for my site?
Update time DNS records
I parked the domain to your hosting (changed the responsible NS "s) - after what time is my site will be available?
Within 24-72 hours, DNS is updated with regional providers, i.e. Your site will be available throughout the maximum after 72 hours (but, as a rule, it takes up to 2 days). .
Creating a subdomain (subdomain)
In our virtual hosting control panel, you can create subdomains of your main domain. All DNS settings for subdomain will be created automatically, provided that the main domain is registered with us.
If, the main domain is registered with a third-party registrar, you need to specify in the settings of the DNS NAME server settings: ns1.ipipe.ru. and ns2.ipipe.ru..
 Cellular - what it is on the iPad and what's the difference
 Go to digital television: What to do and how to prepare?
 Social polls work on the Internet
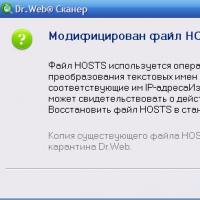 Sending mail is blocked, how to unlock?
 Savin recorded a video message to the Tyuments
 Menu of Soviet tables What was the name of Thursday in Soviet canteens
 How to make in the "Word" list alphabetically: useful tips