How to install windows 10 with flash card. Read more about the bit
Ways how to prepare a USB flash drive for installing Windows 10 quite a lot, I will scatter the most popular:
Attention!!! For any of the described methods, you must prepare USB flash drives - transfer all the data from it or is ready for the fact that all information on it will be deleted.
Make a boot USB USB USB flash drive using copy.
This method is extremely simple and requires a minimum of action from you, but it will only suit those who want to install Windwos 10 to a computer / laptop with UEFI instead of BIOS.
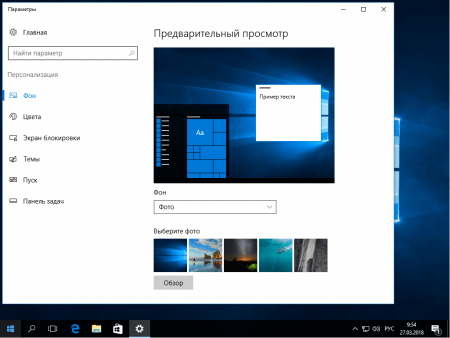
UEFI (Single EFI Interface) is a standard built-in software interface for computers that replaces the BIOS. Distinguish it from bios is quite simple, it possesses graphical interface + Available Mouse Cursor Control.
If you plan to install Windows 10 on your computer / laptop with bios or you do not know what is used on it, it is better to use any other method described below.
For this method we will need:
Installing Windows USB / DVD Download Tool does not hide the pitfalls in itself, several clicks "Next" and a shortcut with a utility on your desktop. Next remains to run the utility.

You will see a window in which you need to choose ISO image of Windows. 10. Press the "Brouse" button and specify the path to the image. After that, click "NEXT".


Select a USB flash drive to which you want to record Windows 10.

A message appears that all information from the flash drive will be deleted, click "Erase USB Device".

Then another window of a similar content will then appear, click "Yes."

Within a few minutes, your USB flash drive will be prepared. As a result, you will receive a string that everything is ready "bootable usb Device Created SuccessFully".

Now you can close the window with the program.
How to make a loading USB flash drive using Ultraiso.
Before that, I considered creating ways to create. boot flash drive windows toolsIn this way, I propose to use the utraiso third-party program.
For this method will need:
1) USB flash drive volume of at least 6 GB;
2) Ultraiso program;
Download and install the program Ultraiso. . We are satisfied free version, so on the site select "Free trial"

Choose a Russian version and download it.

The installation of the program comes down to several pressing the "Next" button, so that, I think there will be no problems with anyone. Start Ultraiso and select a "trial period".

After that, select "File" - "Open".

Specify the ISO image of Windows 10 and click "Open"


Check that your USB USB flash drive has been specified in the "Disk Drive" field and click "Record".

A window will appear, warning that all information from the media USB will be deleted, click "Yes."

Then you need to wait a few minutes until the Ultraiso program prepares blood USB USB flash drive. As a result, in the program window you must see "Record completed!"

Now you can start installing Windows 10 from the flash drive.
We make the installation USB USB USB flash drive using the command line.
I bring to your attention the most ascetic method for creating an installation flash drive Windows10 - using the command line. For this method we will need:
1) USB flash drive volume of at least 6 GB;
Launch command line On behalf of the administrator.
Below is a touchscreen of the command line with the commands to create a boot flash drive. Stepodno perform every step. It is even further described why you need a command or another.

diskpart. - Interpreter that allows you to manage objects (discs, sections or volumes).
lIST DISK. - View disks / flash drives connected to a computer.
sELECT DISK 1. - The choice of a disk with which the future will be performed. You must specify the figure that the OS assigned to your USB media. Be careful with the choice.
clean. - Disk cleaning
cREATE PARTITION PRIMARY. - Creating a partition on a flash drive
sELECT PARTITION 1. - Select the first partition.
active. - We mark the selected section as active
format FS \u003d NTFS - Formatting of the section in NTFS (the process is quite long, it may take more than a dozen minutes).
assign. - Purpose Disc Letter
eXIT. - output
Now you need to unzip ISO image of Windows 10.
And copy everything to USB media.

In this article I described 5 different wayshow to make a bootable USB uSB flash drive10, you remains to choose which methods fits you and use it.

For a convenient and fast installation, Windows often use a flash drive as a carrier, and with the help of a special program, a bootable flash drive is created with windows. In this article, you will learn how to record Windows 10 on a flash drive, which programs are needed and how to start installing the OS. At first, it is necessary to look at the PC characteristics and make sure that Windows 10 Pro 64 Bit Rus is compatible with your iron. To do this, in the control panel, locate the system icon, in open window You will learn what processor you have how much the RAM is installed (RAM).
Windows 10 Pro x64 system requirements for flash drive:
1. The processor it is the CPU must be at least two nuclei and more, with clock frequency From 2 Hz on the kernel. In modern processes integrate the video chip that allows you to abandon the installation of the video card. But this option is not suitable for gamers, with high requirements for games.
2. RAM - rAM, one of the important factors responsible for the performance of the system, and the more, the better. For normal windows work 10 Pro 64 Bit will be required of 4 GB and more, ideally 8 GB if you plan to use multiple browsers.
3. Graphic map. GPU - responds to performance only in games, does not depend on the system speed. Often use an integrated video card in a processor for office and home PCs.
4. Free space under the system, a very important factor where the system will be stored, it is clear that on the system with a disk. The volume of which is recommended for 64 bit Windows 10 Pro to highlight at least 50 GB. In case you are planning to receive updates and install programs for everyday work.

If the listed requirements correspond to your computer, go to windows records 10 Pro x64 on a USB flash drive. You will need a flash drive from 4 GB ideally if it is with USB 3.0 (speed copying and installation will be much faster). For recording, we use the already familiar Ultraisovo program, now in more detail.
How to record iSO Image Windows 10 on the USB flash drive (loading flash drive):
1. Download the image of Windows 10 Pro x64 ISO for a flash drive at the beginning of the description for free.
2. Install the ultraiso on the computer and launch, open our image in it and choose a self-loading - write a disk image - write down, and wait for the completion of the end of the flash drive with installed windows 10.
3. Reboot the computer and immediately call the menu button with a burning key. This may be (F8, F10, F11) depends on the manufacturer of the motherboard.
4. Choosing a USB flash drive, we proceed to install Windows 10 x64 c USD
The installation process is understandable everything in Russian, after completing on the desktop, we start the activator for Windows 10 and put required driversIf you do not know where to take them, I recommend - a large pack driver with all drivers. Now you know how to create a Windows 10 Pro 64 BIT boot flash drive and install on a computer or laptop. If you have any questions, write in the comments. Download image windows 10 for flash drive Through the torrent, you can link at the beginning of the review for free, the loading USB flash drive 10.
When preparing for installation of Windows 10 or during the process itself, problems may arise that will not be allowed to complete the update procedure. There are cases when the installation hangs is interrupted, it gives an error and other similar situations, to exit from which you can independently using the instructions below.
Problems before starting the system
To install the system, you need an installation media that is recommended to be created using official program Microsoft. After you install it, pass the first steps with the selection of the parameters and the bit of the system, you will be offered to choose which of the connected media to the installation. The list provided by the Program may not turn out to be a flash drive that you wanted to use for further installation of Windows 10. This may, for the following reasons:
- the flash drive was not properly prepared. The flash drive must be empty formatted in FAT32 or NTFS format and have at least 4 GB of a total volume. If at least one of the parameters is not followed, then the Windows 10 installation program will not see the USB flash drive;
- USB port in which a flash drive is stuck, faulty, try to transfer it to another port and check the result, without forgetting to restart the program;
- restart the computer may have any unfinished operations with a flash drive, so it cannot be done with it, and after restarting the device, they will complete;
- check if the computer itself sees the flash drive, if not, then the problem is the reason lies in it;
- if nothing helped, replace the USB flash drive or apply any other way to turn it into an installation media, for example, download the image of the system and write it manually.
Infinite receipt of updates
If during the creation boot media With the new operating system, the update is searched by infinitely long, it is necessary to close the update center:
Problems in the installation process
All the following errors and problems occur during installation: hang, interrupt, incorrect outcome of the process, etc.
The disk contains the MBR partition table
This error occurs during the selection of the disk or its partition assigned to the installation itself operating system. It appears due to the fact that hDD Formatted in a format that does not correspond to the mode that is exhibited in the BIOS. You can get rid of this error in two ways: change the mode of operation in the BIOS or reformat the disk. The second option is recommended, as the mode selected in the default BIOS is most optimal. Reformat disk you can standard methodBut at the same time having lost all the data from it, or with a third-party program, while interrupting the installation process, but saving all the information.
 Error "Installing Windows on this disc Impossible. On the selected disk there is a MBR-partition table "
 Changes in the BIOS parameters
By default, the EFI mode is activated in the BIOS, which works only with disks in the GPT format. Since your disk works in MBR format, you will have to change the mode to Legacy. To do this, turn off the computer, start its inclusion and as soon as the first download signs appear, press the F11, F12 or ESC key to activate Boot Menu.. Which of the possible buttons will be assigned in your case, described in a small footnote that appears on the screen during the start of the download. In the discontinued list, you will need to choose your USB flash drive, but without the UEFI or EFI console in the title.
 Change the order of loading so that the flash drive is in the first place without UEFI and EFI
 You can also change the download session in the BIOS itself, in the Boot section or "Download", putting the name of the flash drive without the UEFI and EFI consoles. After that, it will only be left to exit Boot Menu or BIOS, prening new parameters. Ready, you can continue installing Windows.
 Put a flash drive without the UEFI and EFI prefix in first place
 Changing the disk format on the MBR standard method
The format changes will be made via the command line. The minus of this method is that you have to delete all the data on discs, so copy them to another media in advance to save.

Changing the disk format on the MBR using a third-party program
To convert with a third-party program, you can use the Minitool Partition Wizard Bootable application, the image of which you want to download from the developer's official website and write on a flash drive formatted in FAT32 format. The advantage of this method is that you do not have to delete data from the disk to convert it.

After the disk is converted to the GPT format, log in to Boot Menu and boot from the installation media to return to installing Windows 10.
The system is not installed on an SSD disk
The reason to install Windows on SSD Disc It does not happen, most likely, is that the IDE operation is installed in the BIOS instead of the required ACHI. To fix it, follow these steps:
- While turning on the computer, press the Delete key several times on the keyboard to enter the BIOS. Another button can be used to enter the settings menu, it depends on the motherboard model, but during the computer booting the computer, a footnote appears on the screen, in which it will be said how to enter the BIOS.
 We enter BIOS.
 - After entering the BIOS, you will see either a standard BIOS, or a newer version of UEFI. Also possible options for the presence of Russian language and its absence. Sections B. different versions Bios may be called differently, so the main task is to find the IDE mode switch to ACHI. In one of versions of UEFI This is done like this: first go to the SETTING section.
 Go to the SETTING section
 - Switch to additional settings.
 Open additional settings
 - Open the "Built-in peripherals».
 We enter the section "Built-in peripheral devices"
 - In the SATA Configuration unit, find the desired string and change the mode to ACHI. Ready, it remains to get out of the BIOS, while maintaining all the changes made, and you can return to the installation of the new OS.
 Change the SATA mode on ACHI
If the change in the regime does not help, the reason can be signed in the following parameters:
- multiple disks are connected to the computer, this can cause a failure during installation, so leave only one of them and try repeating the installation again;
- the flash drive from which the installation is made was formatted in NTFS format, and not in FAT32 suitable for SSD discs. In this case, you need to reproduct the carrier and write the image image on it again;
- if nothing of the above helped, then try to install from the disk, sometimes it helps to solve the problem.
Blue screen appears during the installation.
Blue screen with text and error description occurs if the installer stumbled upon an irresistible error and cannot continue the process. In this case, it will automatically erase everything set files Updates and roll back to the moment when the installation procedure has not yet begun.
 Installation was interrupted due to the blue screen
 After the rollback is over, you can re-start the installation. Perhaps this time it will pass stable. If not, blue screen appeared again, you need to return to the system already existing on the disk and delete everything in it unnecessary applications and disable all the unnecessary devices connected to the computer. Most likely, the system cannot correctly install updates precisely because of third-party programs and devices.
If it does not help, then copy all the important information from the disk to third-party media, and go to manual installation, While you can delete all the information from the disk. So make, erase all the data from the disc partitions and install Windows 10 to the clean partition.
In the installation process, a black screen appears
If a black screen appears during the system setting, on which nothing is displayed or only the mouse cursor is displayed, there may be several reasons for such behavior of the computer:

But before you solve the problem, just wait, perhaps, the system still produces the update process in background mode. To think about how it is time to solve the problem manually, it is worth only if the black screen does not move longer than half an hour.
Driver Update
- To enter the secure mode, we will use the command line. To call it, go back to the Windows 10 installer again, to do this, turn off the computer by holding the POWER button for 10-15 seconds, and turn it on. After the program is open, use the SHIFT + F10 key combination to start the command line.
 Activate the command line with a combination of SHIFT + F10
 - Run the BCDEDITIT / SET (Default) Safeboot Network command, then the shutdown / r command and, when you are asked, confirm the action by clicking the ENTER key again. The computer will independently reboot and turn on in safe mode.
 We execute BCDEDIT / SET (Default) Safeboot Network and Shutdown / R commands
 - When the inclusion is completed, open the Device Manager, find the video card in the general list and, clicking on it right-click, select "Update Drivers". Go through the process automatic update Or, if the computer cannot find the driver itself, download them from the official website of the company that created the video card, and install manually.
 Update video card drivers manually or automatically
 - After the driver update is completed, run the command line with the administrator rights, run the BCDEDIT (Default) / DeleteValue Safeboot command to deactivate automatic start In safe mode, turn off the computer and return to the update process to Windows 10.
 We execute the BCDedit command / DeleteValue Safeboot
What to do if the installation process hangs
The installation process may hang at the following steps:
- during the appearance of the Windows logo;
- at the file preparation phase;
- right during installation when the screen displays that the process is completed by 0, 10, 99, 32% or another number of percent.
Consider that the installation process can hold on one percent to several hours if the computer is not particularly powerful or overloaded with files. Therefore, first wait at least two hours, and only if after that nothing happens, you can proceed to manually eliminate the problem.
To unambiguously say why the hanging happened in your case, it is impossible to say, so check all the options that may cause freezing, alternately:
- Disconnect all the extra devices from the computer, leave only the keyboard, mouse and monitor connected. Also remove the extra SATA cables going to the port for CDs, and USB flash drives.
- Check that the BIOS settings and the correctness of the installation media format are correct. Remember that for SSD and HDD disc, BIOS and UEFI, GTP and MBR format parameters will differ. Somewhere you need to enable ACHI mode, and somewhere IDE, somewhere to format in FAT32, and somewhere in NTFS and so on. Focusing on type and format hard disk, as well as the BIOS version, find the features suitable for your assembly and install them.
- Before updating to Windows 10, do not forget to install all available updates to the already installed operating system. You can do this through the built-in update Center, present and in Windows 7, and in Windows1, and in older versions.
- If the installation hangs when using a USB flash drive as an installation media, then try installing from a CD.
- Do not forget to make sure your computer meets the minimum windows requirements 10, they are presented on the official Microsoft website.
- If you fail to install the system on top of the old, already installed, Windows, then in step by controlling the hard disk partitions, format all the blocks and install Windows 10 to a completely clean disk.
- If you install the system not on a clean hard disk, then remove the antivirus, it can interfere with the update. Also erase all programs that make changes to the interface and other system parameters of the system.
Error "Failed to create a new section"
When manually installing Windows, sometimes an error occurs, which states that create or find existing section It is impossible. It appears, because there is no unallocated memory and partitions that could be given to the installation of the operating system. Exit this situation: Create needed sections manually. You can do this in two ways: through the deletion of existing partitions and create new or through reducing existing partitions and the distribution of the released memory.
 Error "We could not create a new one or find an existing section"
 Standard method
Delete partitions and create new you can directly in the same window in which you got a mistake.

Through the command line
Using the command prompt, you can not delete partitions, and compress them without losing the files that are on it.

Installation calls a repeating reboot of the computer
The computer reboots during installation - this is normal, it can reboot five to six times to correctly configure all the necessary items. But if this operation is repeated too many times, then you need to interrupt the process manually, go back to installed system and perform the following actions:

The installation program window does not appear.
If you are faced with the fact that you do not appear installation program, Follow the instructions from the "What to do if the installation process freezes" described above in the article.
 The installation window does not appear after loading from the flash drive
 Drivers devices not found
An error that reports that the device drivers are not found, appears when trying to install Windows 10 for the following reasons:
- USB0 flash drive is connected to port 3.0 or, on the contrary, uSB flash drive 3.0 is connected to port 2.0. Switch it to B. required port And repeat the installation.
- The system image was recorded incorrectly or was damaged initially. Reboot it. Better use non-standard microsoft program, And write an image using Ultraiso.
- Use for installation disk, not a flash drive.
Outcome: Use another media, port or image to get rid of this error.
Code errors when installing Windows 10
If there are errors during installation during installation, in the description of which there is a unique code, the best way out in this situation will be the search for solutions for this code. Focusing on a unique number, which usually looks about as 0xc1900101, you can find a solution precisely under your case. If it is not on the Internet, contact the official service microsoft support And call them this code, they will provide you with instructions for further actions.
 During installation of Windows 10, a code error may appear.
 Video: problems during installation of Windows 10 and their solution
So, if you have errors or the process during installation, it does not reach the end, it hangs or interrupts, then first need to check the correctness bIOS settings, installation media and hard disk. The next step - Check computer components and drivers to them. The best way is to clean the disk using formatting and installing the system to a clean partition using the official Microsoft program.
Microsoft software products overlook the new height. Therefore, the question is already relevant how to install from the flash drive. As usual, new technical solutions are distinguished mainly in the design and pair of functions, the remaining methods for the implementation of work remains little prone to change. So installing from the latest operating system is very similar to the installation of previous versions.
Right from the manufacturer
Microsoft finally decided to go towards the user not to torment it with the technical details of the installation and operation of operating systems. Immediately, as appeared latest version, originated windows program 10 Installation Media Creation Tool. it pure installationSo it is necessary to meet a number of requirements:
- Have;
- Buy a new license.
This program is downloaded on the official website of Microsoft. It is important not to forget about that system of which bit can be installed on the computer at all. This is either 32 bits or 64 bits. The program will propose to create a drive or install the system right now. We must choose the first.
Then it will be necessary to set the language, the discharge and version of the system that will be recorded on USB.

Finally, you should fill out the point opposite the USB, select USB cardto which the image will be recorded.

With such a USB card, a clean installation is possible.
Manual creation
This method needs a new type of UEFI download interface - it is essentially a BIOS replacement. That is, UEFI is some laying between download programs and hardware component computers. So, if a computer or laptop does not have a UEFI bootloader, then this method is unlikely to earn. How to determine? Most likely if motherboard From the genus 2 or 3 years, then it has a UEFI bootloader.
If everything is fine, there is a UEFI, then we take the image of Windows 10 and a USB card in FAT32 format (such a format required). Further:
- Mount the image in the system;
- Copy all the fals that are in the image on the USB card.

The drive is ready, so if the laptop or computer has a UEFI loader, then everything will work. You must first set the download via USB in a special Boot Menu.
Programs for recording
So, the laptop or stationary computer must have a UEFI bootloader. But if there is no such bootloader, that is special programwhich solves this problem. She writes additional fileswhich are needed to interact with the hardware components on the micro level. Her name is RUFUS.
All that you need to make the user is to stagnate the USB card to which the entry must be made. Put a tank opposite item to create boot disk And choose the image from which the operating system will be installed.

In the section section of the section and the type of system interface, you need to be guided by the following important moments:
- That computer or laptop that owns usual bios bootloaderMust get MBR for computers with BIOS or UEFI-CSM.
- That computer or laptop that owns an advanced UEFI loader, should receive a UEFI - GPT.
Then simply press the start and wait for the end of the entry.
There are others free utilities, for example, Windows 7 USB / DVD Download Tool. Here you need to perform actions such as:
- Select image installation disk And davim on Next.
- We click on USB Device to create a boot disk.
- Select a USB card from the provided list. Click on Begin Copying item.
- We are waiting when the image is recorded on a USB card.
You can download this program easily from the global network.
Another free solution is Ultraiso. This is a program that also provides the ability to create a bootable flash card to then set the operating system from it to a computer or laptop.
- Open an image from Windows 10;
- On the Self-loading tab, choose the image of the hard disk.
- With a special wizard, write to USB.

At the end, you can devote time to the WinsetUpFromusB application. Here you need to do the following:
- Select USB drive;
- Install AutoFormat IT WITH FBINST;
- Specify the path to the image with Windows;
- GO.

(Visited 2 342 Times, 1 Visits Today)
As you know, many modern laptops no longer have a DVD drive. In addition, installing Windows 10 from a USB disk occurs much faster than with optical. Therefore, in this article specifically for you is described. step-by-step instruction About, how to install windows 10 from the boot flash drive. Practically for each action is attached screenshot of the screen.
Writing on a flash drive
After selecting the USB disk, you must see the message Press Any Key to Boot from CD or DVD ... And as quickly as possible, press any key:

If after that appears windows logo 10 On a black background, it means that the installation program has begun and you all fulfilled correctly:

Installing Windows 10 from a flash drive on a computer or laptop
So, after successfully downloading from a USB media, we begin the process of installing Windows 10 from a flash drive, in which you will be directly involved.

Now Set:

Check the box I accept license terms and again Further:


If the hard disk is absolutely empty, you can just click Further. Boot and systemic sections of Windows 10 In this case, will be created automatically. And later you can, if you need it.

If the hard disk contains necessary information, format only bootable (100 MB or 350 MB) and system partitions, and do not touch the rest.
Delete separate sections not necessary!

If there are sections on the disk without important informationWe advise them to delete everything and place the Disk Nanoovo. By the way, it is desirable to select at least 100 GB under the system. Boot section The volume of 350 MB is not necessary to create manually! Otherwise, you will have two such partitions. The fact is that the Windows 10 installation program may create such a thing.
After that, the installation process will start and you can only wait:

On this screen you can configure some windows settings 10 Or select Standard Settings:

Click Proceed or Continue.:


Enter the username, password, password confirmation and prompt. After that click Further or Next:

On this installation of Windows 10 from the flash drive completed. Now you can start installing drivers, programs and configuring the operating system to your liking.
 Magnetometry in the simplest version The ferrozond consists of a ferromagnetic core and two coils on it
 Effective job search course search
 The main characteristics and parameters of the photodiode
 How to edit PDF (five applications to change PDF files) How to delete individual pages from PDF
 Why the fired program window is long unfolded?
 DXF2TXT - export and translation of the text from AutoCAD to display a dwg traffic point in TXT
 What to do if the mouse cursor disappears