How to change Windows OS on hp laptop. How to reinstall Windows on a laptop: Step by step instructions. Launching reinstallation from the recovery of licensed Windows on a laptop
When bought new computer or a laptop, I want it to work for a long time and reliably. Before buying, they check its serviceability, operability and the presence of the Windows system installed on it.
But over time, new system littered different programs, starts to slow down and freeze. Reinstallation is required. But how to do that? How to reinstall OS, because there was no DVD included with the laptop.
In fact, to restore the system and clean install it to your computer, no DVD required. ISO image operating system is located inside the computer, in a hidden partition of the hard Recovery drive.
How to install the system from a hidden partition Laptop HDD HP Pavilion, will be written later.

How to reinstall windows 7 on hp pavilion 15N211, 15N221 via BIOS.
How to install Windows 7 on an HP laptop via BIOS
Windows recovery instructions via BIOS
For HP Notebook Model 15N211, 15N221 Instruction Manual Windows recovery via bios, from a hidden partition hard Recovery disk will be next.
We turn on the laptop and hold down the F10 key to enter the BIOS.
When the BIOS boots, go to the System Configuration tab and go to Boot Options
A warning appears with options Yes-No, select Yes.
Also on the System Configuration page, in the POST Hotkey Dely (sec) item, set the value 10 instead of zero.
Show more
Then we exit the System Configuration section by pressing Esc.
And go to the Exit tab.
Here we select the Exit Saving Chandes item. When asked if we want to save, click Yes.
After that, the laptop reboots and displays the digital command code to go to the menu for working with the Recovery section... Type this code on the keyboard and press Inter.
After that press the Esc key and you should have a menu. In which there will be a command F11 - System Recovery.
Attention. If you press F11 from this place, you will installing Windows from a hidden partition via BIOS. In this case, the old system will be deleted, the disk will be formatted, all data on it will be destroyed.
Video Review: How to Run Windows System Restore on an HP Laptop.
This is how, starting with the F10 key, you can reinstall Windows from the hidden partition hard disk through bios. If for some reason you did not succeed in doing this, then you can leave a request for repair and setting up a computer in Moscow through the website lanstroy.ru.
Reinstalling operating systems on a laptop has almost no differences from reinstalling on stationary computers. Same reinstallation on laptops HP does not fundamentally differ from it for the equipment of other brands.
And it starts with the right preparation. The first thing to follow is any in an accessible way keep backups of important data from a logical or physical disk, but which will be installed with a new OS.
Then download the operating system image in .iso format and the Rufus program. Now all you have to do is get a clean removable USB-drive with a capacity of more than 4 GB, and you can start reinstalling.
Preparatory stage
Step one: Connect a removable medium to the computer to which the disk image with the operating system will be written.
Step two: Run the program Rufus and set the necessary settings:
- Select the recording medium.
- Specify the path to the system image file.
- Click "Start" and wait for the process to complete.

Step three: Restart the computer and enter the BIOS (pressing F10 while turning on the device, before loading the OS).
Step four: IN BIOS menu under the name Boot device priority, put USB HDD in the first place.

Step five: Exit the settings menu and save them.
Reinstallation itself
If the above steps are performed correctly, the installation of the operating system will begin after restarting the computer. For its successful completion, you will need to perform the following steps.
Step one:

Step two: Press the button "Install".

Step three: Selecting the version and bitness of the operating system. If we are not talking about a laptop manufactured before 2007, then you should choose the 32-bit version (x64).

Step four: A license agreement that you cannot disagree with.

Step five: Select a logical and physical partition on which the new OS will be installed. To reinstall, you must select the disk on which it was already installed and be sure to specify the option "Format" before moving on to the next stage.

The step of applying parameters and reinstalling the system
After specifying the preliminary parameters, it will take about 20 minutes (the time depends on the system configuration) to format the disk, copy the data and actually install the fresh OS.

During the installation process, the computer may reboot itself several times - this is a completely natural part of the installation process. Upon completion, you will need to perform the initial OS configuration using the installer with detailed instructions and tips.
Pre-configuration stage
Step one: Specifying the username and the network name of the computer (any values are acceptable in these fields).
Step two: Specifying the administrator password. You can skip this step and set a password after.
Step three: Window for entering a specific serial key Windows copies 7.
Step four: The level of protection, a set of parameters that are best configured for yourself while using a laptop.
Step five: Setting the date, time and time zone.
Step six: Type selection network connection(Public network).
After that, the operating system will "think" a little and start up for the first time. After that, you should restart the computer and return the boot order settings to normal. Now you can download again operating system and proceed to
With the arrival of UEFI and the imposition of Windows 8 on everyone, by preinstalling it on most new laptops, Windows installation 7 on a laptop has acquired some nuances. Fortunately, for many laptops you can still find drivers for the seven. So today a patient HP Pavilion g6-1200er was delivered to change the operating system from Windows 8 to Windows 7.
So, installing Windows 7 on an HP Pavilion g6 laptop consists of the following steps:

In this menu, we see that in order to enter BIOS need to press F10.
Not found required driver for floppy drive optical discs
During installation, an error appears stating that “The required driver for the optical disc drive was not found. If you have a floppy disk, CD, DVD, or USB flash drive with this driver, please insert this media. Note: If the Windows installation media is inserted into the CD / DVD drive, you can remove it during this step. " 
It arises due to the fact that we have installation media(in this case, the flash drive is inserted into USB 3.0), and Windows 7 does not support USB 3.0 out of the box... And we need to either insert the media into USB 2.0, or, as in this case, switch the operating mode to USB 2.0.
Like this

If you do not have the item " USB3.0 Configuration Pre-OS“Then feel free to move on.

Drivers for Windows 7 for this notebook model HP Pavilion g6-1200er, fortunately, are on the manufacturer's website, namely.
Sometimes users may have a question related to how to reinstall Windows on a laptop.
The fact is that today there are quite a few brands of computers - HP, Asus, Lenovo, Acer and others - and there is an opinion that the reinstallation procedure will differ depending on the company.
Indeed, some points may be different. But basically, the procedure is the same for everyone.
We will consider it step by step and will offer the most simple options fulfillment of each of them. You can do it your own way or suggest an alternative in the comments. We will only be glad!
Step 1. Create a bootable USB drive
Previously, Windows was installed exclusively from DVDs. When Windows 7 came out, this trend continued for a bit, but with the release of Windows 8, and then Windows 10, this idea was completely abandoned.
Now the installation of Windows occurs exclusively from a USB flash drive, without a disk. On such a small medium is recorded installation image operating system, from which it is then installed.
To create a bootable USB flash drive, you must have this very image in ISO format. So download it online or get it from one of your friends. To write it to a USB flash drive, it is most convenient to use the UltraISO program. You can get it on the official website (here is the link).
Actually, you can choose any other means for recording images in ISO format. But if your choice still fell on UltraISO, the recording procedure will look like this:
- Run the UltraISO program, click on the "File" section in the left upper corner program windows. In the drop-down menu, click "Open ...". Next, specify the location of the previously downloaded system image file.

- The image will be loaded into the program and ready for further use. Click on the "Self-Upload" section at the top. In the drop-down menu, select "Burn Hard Disk Image ...".

- In the next window, near the "Disk Drive" inscription, specify the letter of the flash drive to which you are going to write the image. Click the "Burn" button.
Prompt: To find out the letter, go to "Computer". There you will see a USB flash drive and its designation.

- Wait about 5-10 minutes for the program to do its job.
That's all, the bootable USB drive is ready. Now you need to make sure that the computer boots from it at startup.
Step 2. BIOS / UEFI setup
Let's talk about BIOS first. To get started, you generally need to go to this system menu. To do this, you need to click on one of the following buttons:
- F1-F12 (any of them);
- Enter.
Actually, after that, the BIOS will start loading. And then you need to find the item responsible for the system boot queue.
In most versions, you need to go to the "Boot" tab and find "Boot Device Priority" there. And then it will already be possible to put “ USB Flash Drive ”to the first download location.

A similar principle is used in the H2O BIOS. There you need to go to the "Boot" tab and put the "Enabled" value next to the "External Device Boot". It literally means Boot from External Device.

In AWARD BIOS, you must first go to the "Advanced BIOS Features"And set" USB-HDD "in the line" First Boot Device ".


In general, according to the interface, you can definitely find out your BIOS version and set it to boot from a USB flash drive.
As for UEFI, everything is much simpler here. Owners of laptops with this system menu need to do a few easy steps, and more specifically:
- Search for the Update & Restore menu. In the menu on the left, go to the "Recovery" item.
- In the window that opens, click on the "Restart now" button.

- Wait while options for further action are loaded. Select the "Use device" option.
- And in the next menu, just click on the name of your storage medium from which the installation will take place.

As you can see, everything is quite simple. Of course, this option is only relevant if you already have Windows 8 or 10.
If not, leave the storage medium in the slot and restart the laptop again. After that, you can proceed directly to the installation of the operating system.
Step 3. Installing the OS from bootable media
Of course, depending on the version of the operating system you are installing, the steps described below may differ slightly, but in general, the steps will always be the same.
To install a new OS, you need to do the following:
- After booting the computer from the USB flash drive, a welcome screen will appear. In most cases, you will need to click on the button "Install", "Continue", "Next" or something like that. In any case, click on this button.

- In the next window, select the "Custom ..." item. The fact is that we will need to change several parameters in the future. Although, if you do not want to do this and want the configuration of disks (their number and size), components and other data to remain as they are, select the "Update ..." option.

- If you chose custom installation, then you will need to change the disk configuration on your computer. Often a manufacturer creates 4-5 discs "just in case." In practice, they are completely unnecessary, so it is better to delete all of them and create only two - one for system data and one for user data. On the first, we, in fact, will install our OS, and on the second we will throw photos, install games, and so on. To do this, click on each disk and click on the "Delete" inscription at the bottom.

- Then click on the inscription "Create" in the same place, below. In the window that appears, set the letter, size and other parameters of the disk. As we said above, make one smaller, about 100 GB in size, and the other larger - the entire remaining volume of your hard drive. Click Next.

- In the next window, select the drive on which the OS will be installed. Click Next. In our case, this is the same small disc with a volume of just under 100 GB.

- Then follow the instructions of the installer. Usually, after that, the system itself is sequentially installed, then its components, software and updates.
This completes the reinstallation process. Below you can see all the same clearly.
If you are a laptop owner HP Envy M6 running on a new operating system Windows 8, - You are definitely looking for an answer to the question: how can reinstall more familiar and stable Windows 7 instead of a very crude and incomprehensible Windows 8? And, if you are at a dead end in search of a worthy answer to this question, then you have come to the site you need!
Let's look at the main points using my laptop as an example. HP Envy M6 1151sr .
We must first correctly set up the operating room Windows system 7 ... Laptops latest models, as you may have noticed, are equipped with a fundamentally new interface-intermediary between the equipment and the system called UEFI... You can read what it is on the Internet. I will only dwell on a few points. New interface — overcomes limitations imposed by the system BIOS on the amount of memory (both physical and operational), processor power, etc. One of the new features - support hard drives more than 2 TB ... This is achieved using a new format for placing partition tables on the disk: to replace the main boot record MBR comes the so-called GPT... GPT allows the system to create a protected, separate from the rest of the partition that will contain Windows bootloader.
Usually, during installation, the system creates local disk volume of 100 MB specifically for the bootloader. In the case of GPT, two partitions will be created - a 100 MB bootloader and a kind of "limiting line" - a disk that separates boot partition from other local drives. All of this is supported by Windows 7, but problems may arise after installation. If you are the owner licensed Windows 7 , - there is nothing to worry about. Just install it on the disk and activate it. Otherwise, activation existing methods , will be impossible due to the fact that boot partition locked... And as a result, upon expiration of the 3-day activation period, you will receive non-working system .
To avoid a similar problem the best thing - convert disk to MBR using an external boot Windows flash drives 7. This operation WILL DELETE ALL FILES ON THE DISK! Don't forget to do backup... Boot from the USB stick and click on the Start button. Enter in the search field "Computer Management" and open the corresponding program. Next - go to the "Disk Management" section. Right-click on the hard drive icon and select the menu item "Convert to MBR Disk"... Follow the steps as in the screenshot below, but my disk is already in MBR and the menu item looks like "Convert to GPT disk".
Thereafter remove all partitions from the disk - you will create them after installation.
The next important step is to boot correctly from the installation disk. without UEFI... The fact is that in UEFI, by default, the GPT mode is enabled for the hard disk, and we need the MBR. Therefore, when turning on the computer, press F9 and select "Boot from internal CD / DVD-Rom" or something like that. In no case do we select "Boot from CD / DVD (UEFI)", since the disk will be converted to GPT again during system installation.
Which system to install is up to you, but my advice is to use original images Windows disks 7 ... Since laptops HP Envy M6 are processor-based Intel Core i3, i5, i7 with 64-bit architecture, as well as the number random access memory exceeds 4 GB, - accordingly, we must set Windows 7 x64, I advise SP1- it is more stable. Another tip - when installing, do not set aside a lot of space for system disk... Limit volume 50-60 GB.
So, we have successfully coped with the installation. The second problem you will face is device drivers ... The fact is that on the official website HP the manufacturer has provided for providing the laptop with drivers only for Windows 8... And if you, like me, hate "fake" drivers and "All-in-One" driver packages, then I will try to tell you how to find native drivers for Windows 7 on the Internet.
First of all, open Windows Device Manager: Computer (right click) -> Properties -> Device Manager ... In the window that opens, some devices will be identified, some will have a yellow question mark. They are what we need.

There is only one in the picture unidentified device, but you will have more. The first thing we have to do is to create text file with hardware identifiers... We perform the following action for all devices with a yellow question mark: right-click -> Properties -> Details and select a property from the list - Equipment ID... Copy to the first line in the list that opens below and paste it into a text file:

After the list is compiled, we pay attention to the lines that contain VEN_8086 Is the manufacturer's identifier Intel... CPU, motherboard, controllers in laptops HP Envy M6- production of the company Intel.
The procedure is as follows:
1. In the search for the drp.su site, drive in the equipment identifier string;

2. Copy the device name from the search results;
3. We are looking for a device driver in search engine Google.Com pointing search query in this format:
Device name Windows 7 x64 HP.com

4. Find the driver page on the official hp website in the search results and go to this page;

5. Download the driver.
Next, we are looking for drivers for all other devices. I'll tell you right away - drivers WiFi, Bluetooth, Sound Cards, Fingerprint Devices, Card Reader and TouchPad fit from the driver package for Windows 8. Simply go to the HP website under Support -> Download Drivers, select your laptop from the list, and download the specified drivers for Windows 8.
Switchable drivers graphics adapters can be found this way:
1. Go to the download page of drivers for your laptop on the official HP website;
2. In the "Graphics" section, copy the name of the driver, for example: "Graphic AMD driver High-Definition (HD) ";
3. Search Google for the driver using the above method.

Here is the link for the driver that fits the laptop HP Envy M6 1151sr: http://h10025.www1.hp.com/ewfrf/wc/softwareDownloadIndex?cc=ru&lc=ru&dlc=ru&softwareitem=ob-98292-1.
Concerning other devices, - if the search results for any driver in Google do not give any results from the official website of HP, then you should use the search on the site driver.ru... In the search bar, you need to specify not the name of the device, but its identifier which we copied earlier.
I did all this work earlier for a laptop. HP Envy M6 1151sr... You can download drivers for this model here in. And before performing all the above steps to find drivers, check their availability among my drivers.
After all device drivers are downloaded, install them one by one with MANDATORY REBOOT after installation, in the following order:
1. Chipset (motherboard drivers)
2. Intel MEI
3. Intel USB 3.0
4. Intel Rapid Storage
5.HP 3D Drive Guard
6. Drivers for graphics (switchable graphics);
7. TouchPad
8. Network
9. All other drivers.
This is the only way to get a fully working Windows 7 system. Thank you for your attention!
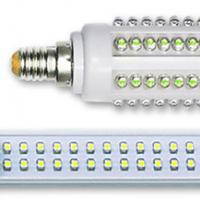 AC LED lighting fixtures are finding their niche and possibly going beyond
 Requirements and prices for laying cables in the ground Scope, definitions
 Automotive strobe from laser pointer
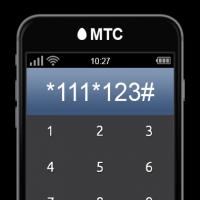 Order 20 UAH to your account. How to borrow money for mts. Additional information on the service
 How to check account replenishment
 How to get a loan on Tele2?
 Responsiveness of SSD on a Miniature Board Which SSD to Buy