Optimization of wine 7 under SSD. Optimization of the SSD disk in Windows. Disabling Memory Management.
Now many users conduct an upgrade of their personal computers and laptops by installing SSD discs on them - solid-state drives. Compared to already installed HDD, solid-state drives really have a significant advantage of speed in operating systems and working with data.
Many people have a completely natural question - is it necessary to make additional configuration of personal computers and laptops when installing a new SSD? We will try to consider in detail in our article work with SSD in the two most popular operating systems - Windows 7 and Windows 10 (those actions that we will produce in the "dozen" are suitable for use and on Windows 8).
In notes, we note some of the features from SSD manufacturers, as well as some nuances to work with SSD in laptops. So how is the SSD setting for maximum returns to the modern equipment being purchased and installed by us?
Microsoft, while creating the Windows 7 operating system, initially assumed the compatibility of this system with SSD solid-state drives, and when such drives are detected, the system settings will occur automatically. However, it is better to manually check all the computer settings for maximum return when working with SSD.
AHCI mode
To perform your functions, the system is necessary for the SATA controller to work in AHCI mode. To do this, in the BIOS you need to find the SATA configuration menu (Cohfigure SATA AS). Customly configurations are located in the Main section, and translate them to AHCI mode. Check in the system can be conducted simple way: "Start menu" - "Control Panel" - Item "System". Select the "Device Manager" and find there Ide ATA / ATAPI controllers. If this item is present, then reveal it and find there in the lists of controllers with AHCI in the names. In case the names of AHCI we find, then our system works in the mode we need. If there are no such names, the system is not switched to work in AHCI mode. Naturally, it is necessary that the BIOS itself supports work in this mode.
TRIM team
After we have verified that the system is translated into AHCI mode, you need to check if the Trim command is connected. Trim improves the performance of the system on solid-state drives due to the fact that this command reports to operating systems which of the previously recorded data blocks are no longer needed, because the data in them is deleted or formatted. Simply put, the Trim team "removes garbage" and significantly speeds up the work of the SSD drive, being a replacement for defragmentation on familiar HDD.
Notes:
* To work SSD in the Windows 7 operating system, it is best to combine on SSD and HDD computers. This will allow us improved high-speed indicators to combine with the reliability of HDD.
* The operating system is naturally preferably to put on SSD, like all the main programs
* About 20 percent of the total volume of the solid-state drive when installing the operating system, it is desirable to leave unnecessary. With natural wear, SSD will take clusters from there for their work.
Optimization in Windows 7 to work with SSD
Disable system protection
To limit unnecessary recording operations and return accessible space on SSD, we turn off the "System Protection" function as follows: Press the right mouse button on the My Computer icon and select the "Properties" item in the drop-down menu. In the window that opens, we find the "System Protection" tab and go to it. Click the "Configure" button and select the "Disable System Protection" item.
Some experts warn that "System Protection" over time can worsen the operation of the SSD disk and negatively affect the Trim function due to its nature of the data record.
Disable disc indexing
Due to the high performance SSD, the disk index function is not useful to us, because Disk indexing was designed specifically to speed up the HDD. To do this, on the My Computer icon, we call the drop-down menu by the right mouse button and again select the item "Properties". In the "General" section, you remove the check mark in front of the item "Allow index the contents of files on this disk in addition to the file properties."
Turning off the paging file
In the event that you have 64 discharge operating system and volume random access memory exceeds 8 gigabytes, it will be advisable to disable the function of the paging file. To do this, again call the drop-down menu by pressing the right mouse button on the My Computer icon and select the item "Properties". In the "Property" window, we will find the "Advanced Settings" tab, then the "speed" item, then the "Parameters" item, select the option "Advanced" and find the "Virtual Memory" section. We celebrate the option "without paging file," click "Set". When working with the paging file, you need to remember that with some applications using a large number of RAM resources when you turn off the use of paging file, difficulties may occur.
Disable hibernation
Hibernation is designed to work on the computer that you produced could be resumed almost instantly. So, when you turn on the hibernation function, all the contents of the RAM is reset to hDDAnd then, when waking, immediately read. When working with SSD in this feature, there is no need, since the resumption of work and so fast enough. Thus, we save a precious place on our SSD.
Turn off the function as follows: In the search bar, you type the CMD command in the Start menu and call the command line utility. After that, in the command prompt, type the command: PowerCFG -H OFF and press the "Enter" key.
It is worth noting that it is not always necessary to disable hibernation. For example, on laptops, the hibernation shutdown will lead to the fact that the computer will have to start over every time after its closure.
Disabling Memory Management.
The SuperFetch feature enabled caches the most common data used, and the prefetch feature is responsible for the pre-loading of frequently used applications. In the case of work on an SSD disk, due to the high speed of access to these functions, these functions do not need more and we will be able to free up memory and give work to our drive only when it takes. To turn off, perform the following steps: In the Start Menu in the search bar, type the REGEDIT command, thereby causing a window of working with the registry. We sequentially and choose the registry items: HKEY_LOCAL_MACHINE \\ SYSTEM \\ CURRENTCONTROLSET \\ CONTROL \\ SESSIONMANARER \\ Memory Management.\\ Prefetchparameters. Then right-click the submenu on the EnableSuperfetch and EnablePrefetcher items alternately. Select the item "Change" and change the values \u200b\u200bto zero.
In the same way, change the values \u200b\u200bfor zero and in the ClearPageFileatshutdown and LargeSystemCache parameters. The largeSysystemCache parameter indicates the size and frequency of dropping the cached page to the disk, and the ClearPageFileatShutdown parameter clears the paging file when the PC is disconnected, which leads to additional recording operations that we do not need now. Path to the parameters: HKEY_LOCAL_MACHINE \\ SYSTEM \\ CURRENTCONTROLSET \\ CONTROL \\ SESSIONMANAGER \\ MEMORY MANAGEMENT. Select ClearPageFileatshutdown and LargeSystemCache points, go to their menu with the right mouse button and, choosing "Change" in each of the items, set the zero parameter.
After that, reboot the computer.
Disable Windows Recording Caching
Since SSD is much superior to the speed of the traditional HDD, the included caching function of the record of special advantages does not give us, so you can deactivate it. But, in turn, the SSD Intel manufacturer warns that the refusal of this function will negatively affect the work of the solid-state drives produced by them. Disconnect the Windows Recording Function as follows: In the root folder of the Explorer's "My Computer" of the right mouse button, call through the "Properties" item "Device Manager". Select the "Disk Devices" item and right-click on our SSD, thereby causing a submenu. In the submenu, select the "Properties" section and in the properties window on the "Politics" tab, take a tick on the "Allow record caching for this device" item. After that, press the OK button.
Disable Windows Search
The search for Windows creates indexes of individual files, documents and folders on the hard disk. The index is stored in a separate Search folder on a C drive and takes up to 10% of the amount of indexed documents so that when searching to load a part of the index into memory and significantly accelerate it. In the case of SSD, again, this function of noticeable increase in speed will not give us. But the location on the solid-state accumulator indexes occupy, and the enabled function can actually negatively affect the operation of SSD. Therefore, we turn off the Windows Search function as follows: in the search bar in the Start menu, type the Services.msc command and click Enter to call the Local Service list. Find the Superfetch item in the list and right-click on it, calling the service menu. In the "Startup Type" dropping menu, select "Disabled" and click OK. Then find windows service Search and click on it with the right mouse button, select "Properties" and click on the "Stop" button, and then select the option "disabled" and click OK.
Transferring Temp folders
To free up an additional space on SSD and excessive overwriting to transfer folders with temporary files to another disk. To do this, go to the "Control Panel", select the "My Computer" icon, then section "Advanced System Settings" and in the "Advanced" tab, go to the "Variables" menu, where you press the Change button, and change the end address of the folder folders with temporary storage data to new ones.
Transferring custom folders
To perform the same task as in the previous paragraph tolerate all custom folders On another disc (including "Video", "Audio", "Downloads", "Favorites" and Others). Create a separate user folder on another disk and in the "folder properties" that call, by right-clicking on the selected folder, on the Location tab, press the Move button and specify a new place for portable folders.
Turn off NTFS logging
You can also disable journaling nTFS systems. To do this, in the Start menu, you type the CMD command in the search string and call the command line. In the command prompt, type: FSUTIL USN DELETEJOURNAL / D C: and press "input".
Turn off regular defragmentation
As mentioned above, the defragmentation function is designed to work with HDD and when working with SSD, we do not need. Therefore, disconnect it as follows: In the "Start" menu, in the search bar, type "Defragmentation" in the search bar, select the disk defragmentation program, we find the "Schedule" tab and remove the checkbox at the "Scheduled Scheduled".
Setting energy consumption
For the best performance of your SSD, you need to manually configure its power scheme. To do this, call the "Control Panel", we will find "Power" and set the following parameters: in "Setting the Power Plan" in the parameters, select "High Performance" and click "Apply". Go to "Setting up the power plan" and in the "Change additional power options" item, select the "Hard Disk" item, subpact "Disconnect the hard drive through" and set the parameter "Never", that is, "00 minutes".
Optimization in Windows 10 (8) to work with SSD
When working with the Windows 10 (8) operating system (8), it is best that all items related to Windows 7 are executed. The fact is that the "dozen" independently contributes some changes when a solid-state drive is detected. Here is a list of standard automatic system optimizations:
- Disabling defragmentation;
- Connecting the Trim function;
- Turn off the ReadyBoost function;
- SSD power optimization;
- Enable the SuperFetch parameter.
All other optimization items will have to be performed manually. You can act according to the scheme with the Windows 7 operating system proposed by us above.
There is another option. You can download free utility SSD Mini Tweaker, run it, mark it in it with checkboxes necessary to execute items and apply changes. It is recommended to mark all the optimization menu items offered by the SSD Mini Tweaker program.
Notes:
* For maximum recoil when working with SSD, it is recommended to connect it to SATA 3 ports operating at a speed of 6 gigabits per second.
* Do not forget to periodically check on the manufacturer's website of your solid-state update drive for its firmware and install them.
As we see from the article, optimizing the system for working with a solid-state drive requires some settings. And if Windows 7 will have to be closely configured manually, then in Windows 10 and 8 operating systems, some settings are used automatically when the system of solid-state drive is detected during installation, as well as adjustment to work with a SSD disk in the system can be made using a specially designed free utility. SSD Mini Tweaker.
If you decide to purchase solid State SSD. Drive, then this may be several reasons:
- You are not satisfied with the speed of your HDD.
- You need fast work Windows and certain types of applications, games.
However, to install CDS into a computer or laptop, and then fill it with information not enough. It is also necessary to optimize its work with the operation of your OC.
Consider the main methods of optimizing SSD disk.
Ahci Sata.
Technology that allows you to use the Trim function for various solid-state drives. Its inclusion is made at the BIOS level of your PC or laptop.
Enabling AHCI SATA:
- Open the command line combination of the Win + R keys.
- Enter the command: "REGEDIT" (access to the registry).
- Go along the next way: HKEY_LOCAL_MACHINE → System → CurrentControlSet → Services → Storahci.
- Change the value of the ErrorControl subsection to 0 (by default 3) by calling the context menu and pressing the "Modify" parameter.
- Go to the branch with the name "StartOverride" and change its value to 0 (by default 3).
- Restart your PC (laptop), go to the BIOS / UEFI (how to go to the BIOS, see separately for the model of your laptop or motherboard PC). In the "Storage Configuration" section, and in the SATA Port subsection, set AHCI or in the SATA RAID / AHCI Mode section, set AHCI (for different versions BIOS, its sections and subsections).
- Check the functionality of the function in Windows. Go to the next way: Control Panel → Device Manager → IDE ATA / ATAPI Controllers. In the last subsection, the device should appear: "Standard SATA Ahci Controller".
Trim feature
By default, this feature is enabled on Windows 7 and above, however, it is better to manually check whether this function works. The meaning of Trim is that after deleting files, Windows transmits the SSD to the drive information that a specific disk area is not used and can be cleaned for recording. (in HDD Data The recording remains "over" existing). Over time, if the function is disabled, the performance of the drive will occur.
Trim check in Windows:
- Run the command line by pressing the Win + R keys combination.
- Enter the command: "FSUTIL BEHAVIOR QUERY DISABLETENOTIFY".
- If the message is displayed after entering: "disabledeletenotify \u003d 0", then the Trim function is enabled if "disabledeleteNotify \u003d 1", then Trim does not function. If Trim does not work, enter the command: "FSUTIL BEHAVIOR SET DISABLEDELETITIFY 0", then repeat items 2 and 3.
Defragmentation
This feature helps to optimize and speed up the HDD operation, but for SSD, it has a detrimental effect. For SSD, the "Automatic Defragmentation" function is disabled by default. To check whether it is necessary:
- Press the combination of Win + R.
- In the command line window, enter the command: "DFRGUI" and click "OK".
- In the window that opens, select your CDD and look at the "Optimization Scheduled" item. For our solid-state drive, it must be disabled.
Indexing
Windows feature that helps perform a quick search for files on the disk for large amounts of information, however, increasing the load on the SSD record. For its disconnection:
- Go to section "This computer", "My computer", "computer" (for each OS differently).
- Choose your SSD and select "Properties" in the context menu.
- In the window that opens, remove the checkbox next to the parameter: "Allow indexing the contents of files on this disk in addition to the properties of the file."
Search service
Its function creates a file index, thanks to which finding a variety of files and folders is performed faster. However, the SSD speeds are quite enough to refuse it. To turn off it is necessary:
- Go to the following address: Control Panel → System and Security → Administration → Computer Management.
- Go to the tab: "Services".
- Find the WINDOWS SEARCH service and select "disabled" in the "Startup Type" tab.
Hibernation
The mode that allows you to save the contents of RAM on the hard disk, making information and open applications from the previous session upon subsequent inclusion.
When using the SSD, the meaning of this function is lost, as the drive and so quickly starts. And "Hibernation", creating "recording-overwriting" cycles, reduces the life expectancy of the SSD disk.
Disabling hibernation:
- Run again cmd.exe combination of Win + R keys.
- Enter the command: "PowerCFG -H OFF".
Record caching
This feature improves the performance of your solid-state drive. When it is turned on, the NCQ recording and reading technology is used. NCQ - takes several requests at the same time, and then organizes their execution order in such a way as to achieve maximum performance.
For connection it is necessary:
- Call a command line with a combination of Win + R
- Enter the command: "Devmgmt.msc".
- Open "Disk Devices", select SSD and select "Properties" in the context menu.
- Go to the "Politics" tab.
- Put the "tick" opposite the parameter: "Allow caching records for this device."
Prefetch and Superfetch.
Prefetch. - Technology with which frequently used programs are loaded in memory in advance, thereby accelerating their subsequent launch. At the same time, the file of the same name is created on the disk space.
Superfetch. - Technology similar to Prefetch with the difference that PC predicts which applications will be launched, loading them in memory in advance.
Both functions do not have use when using SSD. Therefore, they are best disabled. For this:
- Call the command line with a combination of Win + R keys.
- We perform the command: "Regedit" (transition to the registry).
- Go along the way: HKEY_LOCAL_MACHINE → System → CurrentControlSet → Control → Session Manager → Memory Management → Prefetchparameters.
- Find several parameters in the registry subsection: "EnablePrefetcher" and "EnablesUPERFETCH", set their value to 0 (default 3).
SSD MINI TWEAKER utility
All of the above actions can be performed manually, but programmers' hands were created - tweaks, the purpose of which customization of Windows OS, as well as its separate components with several clicks. One of these programs is SSD Mini Tweaker.
SSD Mini Tweaker. - A program, a type of tweaks, allowing you to optimize your SSD without much effort.
Benefits:
- Complete Russification.
- Works on all OS starting with Windows 7.
- Free.
- Understandable interface.
- Does not require installation.
other methods
Such manipulations like transferring the browser cache, paging files, Windows temporal folders, a system backup with an SSD disk to HDD (or disconnecting this feature) are useless, since although they increase the life expectancy of the SSD, but limit the potential of its use.
Thereby, after performing the above-mentioned manipulations from your OS, you can extend the life of your drive, as well as configure it to maximum performance.
» How to configure SSD to improve the performance of Windows 7?
How to configure SSD to improve the performance of Windows 7?
Setting up SSD under Windows 7
Introduction
Solid-state drives, as manufacturers declare, work significantly faster hard disksMechanic based. Of course, their cost is much more expensive. Although the performance indicators of SSD discs are high, many users say that they can be raised. Only the corresponding optimization and SSD optimization is required under Windows 7. The most effective ways in this article will be considered:
- Inclusion AHCI and TRIM
- Disable system protection
- Turning off the paging file
- Disabling hibernation mode
- Disabling Windows 7 caching
- Disable Super Fetch and search for Windows 7
- Settings for power consumption options
Inclusion AHCI and TRIM
Before you start performing optimization, you must make sure that the SATA controller can operate in AHCI mode and the Trim function in Windows 7 is activated.
During the start of the system, press the Delete key and see what AHCI mode is activated in the BIOS for your SATA controller. This mode is required to support Trima on SSD. Also, this can be verified by following the following steps in the system:
- In the start menu "Start" Select the "Control Panel" item
- Choose "System" and switch to the classic view (Little and large icons mode)
- Go to "Device Manager"
- Search Item with ATA / ATAPI list and IDE controllers
- In the case of this item, your system is already loaded with the AHCI mode

If the operating system was installed with the IDE mode, then you need to switch to the AHCI mode in the BIOS, provided that the "motherboard" supports this functionality.
- Check that TRIM support is activated
- Check the Trim so that the mode commands are guaranteed to be sent by the Windows 7 operating system on the SSD disk.
- In the Start Application Run menu, type [CMD] on the keyboard to search for a command stitch system.
- Put on it right key Mouse, choosing "Startup on behalf of the administrator"
- In the command line you should write [FSUTIL BEHAVIOR QUERY DISABLE DELETE NOTIFY]
If the Disable Delete Notify parameter is 0 - the Trim function is activated. With a value equal to 1 - disabled.

When entering the command, do not use brackets.
The SATA - TRIM protocol command will inform the OS, which blocks from the data recorded before the SSD will never be required in the future due to deleting files or formatting the disk.
Disable system protection


The "System Protection" feature is worth disabled to limit the number of recording operations on SSD disks, as well as to return the released, by shutting down, place back to the solid state drive.
Disable disc indexing
Description of the deactivation process:

The appearance of a pop-up window that reports an error in the application of attributes to files is possible, which is normal situation. When choosing the "ignore all" option, continue your actions.

The disconnection value of the disk indexing is reduced to the following:
- Disk indexing was developed for mechanical devices in order to ensure quick access to information. Considering the fact that the response time of the SSD disk is approximately 0.1 ms, there is no need to include this technology.
- Eliminating unnecessary read-write operations on SSD, get minimal effect. But note that actions that allow you to limit the number of cycles of entries on SSD will help increase the service life of the solid-state drive.
Turning off the paging file
- Press the right mouse button on the "My Computer" icon
- Choose the item "Properties"
- Choose the "Advanced" tab
- In the "Performance" point, push the "Parameters" button
- Select the "Advanced" tab and click the "Edit for Virtual Memory" button
- Remove the "Chekbox" "Automatically select the size of the paging file"
- Agree to accept changes, confirming the system to restart, and turn off the swivere for your SSD disk.

Podchock file is windows functionalitywhich is designed to help the physical memory of the computer in the case of its insufficient capacity, which allows moving a part of the information from the "RAM" to the hard disk to exempte the available RAM volume. Turning off the PageFile function will release the reserved space on the hard disk.
Disabling hibernation mode
The shutdown of the hibernation mode is released 2 GB (maybe more, depending on the volume of the installed RAM) of the SSD disk space. This functionality will not provide significant advantages due to fast loading.
Description of the deactivation process:
- In the "Start" search menu, type [CMD] in order to search for the Windows 7 utility
- Press the right mouse button on the CMD program and start it from the administrator
- In the command line, type [PowerCFG -H OFF]

Hibernation promotes rapid restoration Work in the system after inaction. When it is used, the information contained in the operational memory is recorded on the disk, and then read when awakening.
Disable Windows Record Caching
Description of the deactivation process:
- Press the right mouse button on the "My Computer" icon, choosing "Properties"
- Select Device Manager
- Select "Disk Devices"
- Press the right mouse button on SSD, choosing "properties"
- On the "Politician" tab, remove the "Chekbox" from the "Allow Cause Records on this Device" item.

The functional of caching records in Windows 7 can access high-speed RAM and accumulate commands that will then need to be performed on the SSD drive. SSD discs exceed the speed mechanical hard drives, therefore, the speed gain when using cache not get.
Disable Superfetch and search Windows
Description of the deactivation process:
- Click Windows Key + R to enter the application launch dialog.
- Vide and press the ENTER button.
- Scrolling "Scrollbar" to the "Superfetch" item, click on it with the right button, choosing "Properties"
- From the "Startup Type" drop-down menu by selecting "disabled", click OK.
- Scrolling "Scrollbar" to the "Windows Search" item, press it with the right button by selecting "Properties"
- Press the "Stop" button, then by the "Type of Start" and select "Disabled".

The Windows Search Function creates the index of some folders, files and additional objects on your devices. It is located in the Program Data Microsoft Search folder on Trima: / disk and takes about 10% of the content of indexed information. When searching for any file, parts of indexes are loaded in memory. This will provide a fairly speed search. This functionality will not have a large value, as well as it can negatively affect the performance of the SSD disk.
Disable Clear Page File at Shutdown and Large System Cache
Description of the deactivation process:
- Dial in the "Start" menu
- Choose the HKEY_LOCAL_MACHINE SYSTEM CURRENT CONTROL SET CONTROL SETEM CURRENT CONTROL SET CONTROL SESSION MANAGER MEMORY MANAGEMENT
- Press the right mouse button on the "Clear Page File AT Shutdown" and "Large System Cache"
- By selecting "Edit", change the value from 1 to 0, and then restart the system.

This functionality OS is intended to clean the paging file. This leads to an increase in the number of read-write operations. Since the paging file was previously disabled, there is no reason to use the reasons for cleaning, as there is nothing to clean.
The Large System Cache parameter suggests whether the operating system supports the standard cache size or enlarged, and is also responsible for the processing frequency of cached data. Enabling the Large System Cache mode will reduce the amount of physical memory available to applications and services.
Setting Energy Options:
- Open your "Control Panel"
- Choose in it "System and Security"
- Select the power settings item
- Checkbox "High Performance", applying it by the OK key
- Select "Power Plan Settings" for your High Performance Plan
- Click on the change in additional power parameters.
- In the Hard Disk Point, set the "Never" mode in the drop-down menu
- Click OK to save the setting.

Conclusion
The SSD setting under Windows 7 may affect the performance of the system, both in a positive side, and adversely affect it. Suppose there is no need to enable record caching when using Intel X25M / G2, since increasing productivity in this case, as it can usually not achieve. So is it necessary to fulfill the actions considered in the article?
One important factor in the SSD optimization is the gain of the storage capacity.
This will give an indisputable advantage if operating instrument is installed on SSD windows system 7. The possibility of installing more software, games and other software is the possibility. If you disable the protection of the system, the disc indexing, the paging file and the hibernation mode will take a small productivity gain, but the free container of the solid-state drive will increase significantly.
The most discussed issue among SSD disks users is shutdown, transferring or saving the paging file. There is no unambiguous opinion and supporters of various options. If you plan to disable the paging file, you need to check the amount of Windows 7 used. Make sure that the amount of installed memory is half larger than the most used as possible. In this case, the paging file can be disconnected without loss of PC performance. Alternatively, its size can be reduced or moved it at all.
Disabling unnecessary operations when reading-write data on an SSD disk effectively affects the service life of the device. Given the cost of solid-state drives, this is an important advantage.
As a result, the user itself decides whether it needs to configure SSD under Windows 7 or not. This OS from Microsoft is already very well working with SSD, but with the help of additional operations on optimization, the possibility of a small gain in improving performance in comparison with the work on "default" settings appears.
More recently, all computers worked with HDD, with low speed and low efficiency. But they replaced the new generation of drives, the so-called SSD, working much faster than their old analogues. Like all new devices, at first they were expensive, and their volumes did not differ in great capacity.
But over time, manufacturers began to increase their volumes, and due to competition, the cost went to the decline. It would seem that you still need an ordinary user? But they have one person
lucky: Excessive overwriting data can completely disable it. But avoiding trouble will help configure Windows 7 for optimal work With SSD, and this will lead to an increase in the solid-state drive.
Why do I need an OS setting?
All flash drives have their memory, it is based on chips. They lack moving parts, which is on HDD, and therefore they are not afraid of any blows. SSD memory consists of a variety of cells that can wear when large quantities Rewash.
And a very important point is to configure the OS, to transfer data to the flash drive, since calling some services and operations from the drive is slow, if you do not configure Windows.
The setting will reduce the use of space, appeals to it, which will certainly lead to an increase in the service life of the removable media. If SSD is used in normal mode, it may be enough for a decade, and if you use it actively, then the term is reduced to 2 years.
To install Windows for a drive, you need to prepare the system. Check:
- we go to the manufacturer's website of the computer or SSD, check the relevance of versions. If you intend to reflash it, you can erase all the data, and you should know about it before installing the OS. Find update information, download it to the computer;
- we translate the launch of the system in configuring the BIOS on AHCI, that is, set a removable drive first. Use newest modesotherwise it will work with glitches;
- removable media must be formatted. You can use Windows tools, it can cope with this task;
- you should check the system load from the removable media, connect it, create logical partitions on it. If it was previously divided, then update them, remove the former breakdown, and again divide. Now set the latest version of the disk controller driver, in advance downloaded from the manufacturer's website.
Video: Optimization SSD discs
Disable services and functions
The default set of services and functions in Windows 7 is very slow down to start the system from SSD, we will tell you how to disconnect them correctly, and which services are not rational. Since working services consume many computer resources, their shutdown will speed up the start, and the work itself of the removable media.
Indexing and caching
To disable cache recording, do the following:

The option to create a write cache in Windows 7 is constantly referred to the RAM of the device, and records the most sought-after commands, and then they will be executed on removable media. But SSD is much more speedy than HDD, and this option is superfluous.
Indexing is useful only for system operation with HDD, but for removable media it is not effective: this will not affect the speed, and the disk will be much smaller, because the index data will be updated.
Disabling this function will not affect the database, and therefore the shutdown operation will pass unnoticed to start the system:
- my computer;
- storage device;
- properties.
In the window that opens, remove the checkbox from the "Allow indexing" option, and if the system is issued to the error warning, you do not need to return all back, and still remove the checkbox.

Defragmentation
Disconnect defragmentation in automatic mode, this function is not needed, it will only reduce its capabilities.
We perform:

Hibernation
Windows has useful energy saving functions: sleep mode and hibernation. These functions are designed specifically for laptops, for which the energy saving mode is relevant.

Hibernation is to save the computer data when switching to sleep mode, Windows writes them and saves in the Hiberfil.sys folder on HDD. When leaving this mode, all data is discharged, and the computer starts to work from the place where it was stopped.
If you disable this mode, you can significantly increase the place, and if you run the system from it, then there is no need for them.
The system will be significantly faster, and you can disable it from the Start menu:

You can run the service from the computer administrator, right-click, command line opens: enter:

After these actions, the service will be disabled.
System Restore
With this feature, you can roll back the system if some glitches began. Windows creates recovery points, writes all in separate filewhich takes a lot of space. You can disable this feature, but it will be better if you limit the file for the system recovery.
To do this, open the "My Computer" folder:

Prefetch and Superfetch.
Superfetch is responsible for caching the most sought-after files, and to run from the drive, this service is not needed, and it should be turned off.
The Prefetch service is responsible for downloading programs in the computer's operational memory, and in our case it is useless, and turn it off:

Video: Disc Setup
Moving Podchock file
It is advisable to do this if the OS is 32-bit, the paging file must be moved to another place, a number of commands should be executed:
- Control Panel;
- System;
- Additionally;
- Speed;
- Parameters;
- Additionally;
- Virtual memory

If the 64-bit Windows is installed on your computer with more than 8GB rates, you can safely disable the paging file option:

Is Trim function enabled?
The TRIM OS team transmits important SSD information about unused data blocks that can be cleaned by themselves. Since the formatting option and deleting files can lead to low drive performance, this feature allows you to reduce the number of unnecessary files, and clean it.
This is one of the most major teamswhich must be included, otherwise the recording level will be low, which will lead to a decrease in functionality disk space.
To make sure this feature is enabled:

Setting up Windows 7 under SSD disc, SSD Mini Tweaker
If you are not a computer genius, but to transfer OS to SSD, then use the small utility SSD Mini Tweaker. The program does not occupy a lot of space, but copes with your task quite quickly, and relevant for those users who are going to move the launch of the Windows 7 of the bit 32 and 64 on the SDD.
The window of the running program looks like this, and you can immediately configure the necessary parameters.

Many functions for transferring Windows are not needed, they can only slow down the process itself:

The program will help configure about 13 parameters that will increase the speed if it starts with SSD. The purpose of optimization is to reduce appeals to the removable carrier, which extends its performance.
You can activate your operating system if you run it from a SSD disk, and Windows 7 is perfectly adapted to start from a solid-state disk. Even if you have sets a lot of energy-intensive programs, with proper optimization you can debug it to start with SDD, paying particular attention to the Superfetch / Prefetcher and defragmentation.
If you have a big operating memory, it is even better: you can successfully optimize it, which will only lead to speed and long service life of the removable media.
Every day, solid-state drives are cheaper, and hope that this trend will not change.
Many new models of computers already contain this type of drive, manufacturers themselves optimized the operating system for efficient work from a solid drive.
Of course, you need to choose a way to optimize yourself, and we only gave the most important tips, how to do without losing important data when transferring the SSD system.
compsch.com.
How to configure SSD drive under Windows 7
For many users, the replacement of the hard disk to the SSD solid state drive is the most efficient PC upgrade. In terms of reading information, the SSD drive is many times faster, therefore, the computer performance significantly increases. But have one disadvantage - a restriction on the number of overwriting cycles, characteristic of flash drives.

SSD configuration under Windows 7 is necessary, since it is necessary to minimize unnecessary recording cycles in the flash memory cell to increase the service life of the solid-state drive.
If you have Windows 10 installed, it already automatically defines SSD drives and makes its own adjustments to their work to achieve maximum performance. Therefore, on Windows 10, the SSD configuration is not as important and performed at the level of the operating system.
Disable disk defragmentation
In the process of defragmentation, logically related data blocks that are scattered throughout the carrier are located in a single sequence. SSD drives do not need to be defraganizing. If the HDD hard drive defragmentation can increase efficiency at read speed and thereby speed up the PC operation, then in the case of SSD, this process can only harm.
Turning off the Perfetch and Superfetch function
The Perfetch folder is designed to speed up Windows loading and running programs. The folder contains information about frequently used programs on the computer and stores them in the initial (system) part of the hard disk.
The SuperFetch service controls the programs that you often use and downloads them when you start a computer into RAM (RAM), as a result, when accessing them, they start faster. Thus, when you run a program, the computer starts to read its files from RAM than from a hard disk.
But given the high speed of reading solid-state drives, these functions are superfluous.
To turn off, go to the editor windows registry with administrator rights.
In the HKEY_LOCAL_MACHINE directory, find the System / CurrentControlSet / Control / SessionManager / MemoryManagement / PrefetchParameters key and change the value to "0" to "Enable Prefetcher" and "Enable Superfetch".
Disable ReadyBoot.
ReadyBoost speeds up the work of Windows and work together with the Superfetch service. If the SuperFetch loads the files of the programs used in RAM (RAM), then readyboost involves a flash drive as a memory cache for a slow hard disk.
To disable ReadyBoost you need to perform the following steps:
- Start;
- Control Panel;
- System and safety;
- Administrative tools;
- Performance monitor;
- on the left side, expand the section "Data Colmber Group" section and select "Start Event Tracking Sessions";
- double click on "ReadyBoost";
- Tracking sessions;
- delave next to the inscription "Inclusive".
Disabling or moving the paging file to HDD hard drive
Switch file increases computer cache size. In the case when there is not enough physically memory RAM, the Windows operating system moves a part of the data from RAM and, thus prevents software errors or system.
If the computer is equipped with a small SSD volume and traditional HDD, then the paging file can be placed on SSD. In the case when you have installed Windows X64, the paging file can be turned off.
Trim feature
In the Windows 7 operating system, it is important to check whether the trium function is involved. Note that this feature informs SSD Drivewhich area on the disk is no longer used and can be cleaned. If the function is disabled, it can lead to a decrease in the performance of the solid-state drive.
In order to check:
- go to the command prompt on behalf of the administrator;
- enter the command "FSUTIL BEHAVIOR QUERY DISABLETENOTIFY";
- if disabledeleteNotify \u003d 0 appears after execution, then the service is enabled.
Disable sleep mode (hibernation)
The hibernation function explicitly reduces the time you need the Windows operating system to run from the hard disk. SSD drives in comparison with hard drives in time reading information much faster, which makes the startup process much shorter. Therefore, the hibernation mode in computers with SSD does not bring tangible advantages and can be turned off.
When switching to sleep mode, all data from the RAM is saved to the hard disk in the Hiberhil.sys file, which has a pretty decent size. Especially relevant for small SSD volume, the disconnection of the sleep mode frees the valuable space on the SSD storage.
To turn off, start using the Win + R keys command prompt on behalf of the administrator and type the "PowerCFG -H OFF" command.
AHCI mode
For full-fledged work The SSD drive, including the Trim function, you need to enable AHCI mode in the BIOS. If you simply change the mode, then after turning on Windows loading, it may be interrupted by an error (blue screen).
For correction:
- go to the Windows Registry Editor on behalf of the administrator;
- find the record "HKEY_LOCAL_MACHINE / SYSTEM / CURRENTCONTROLSET / SERVICES / MSAHCI" or "HKEY_LOCAL_MACHINE / SYSTEM / CURRENTCONTROLSET / SYSTEM / CURRENTCONTROLSET / SERVICES / LASTORV";
- twice CLY CLOCK TO "START" and change the value to "0";
- make a reboot of the computer;
- change the SATA controller on AHCI in the BIOS.
Instcomputer.ru.
Setting up Windows 7 for optimal work with SSD drive
Here I will not tell what SSD is and what it is better / worse than the usual hard disk. I recommend first to get acquainted with previous articles on this topic, talking about a combination of SSD and HDD drive for a setproof computer and recommendations for installing MS Windows 7 on SSD. If you listened to the Soviets in these articles - Windows 7 should already "fly" on your PC with SSD. You can't speed it up even more, even after optimizing many system functions, the results of which are carrying on a lot of greater positive effect for HDD than new SSD. These capabilities are speaking in 4 parts of the article "Setting up Windows 7 from A to Z". In the same article, I want to describe those manipulations that are designed to extend the life of your solid-state drive (by reducing the load on it) and release about 5-10 unnecessary gigabytes of the place, which in our case is very important. Today, all changes are made by handles. If the process is not important to you - download the SSD Tweaker (Pro) program, which will follow the steps of 3,5,6. And much more ... What are we going to do today? Here summary:
- 1. Move the paging file to another disc (HDD)
- 2. Disconnect the creation of system recovery points
- 3. Turn off the indexing function
- 4. Disconnect the defragmentation service
- 5. Turn off the hibernation function
- 6. Disconnect Prefetch and Superfetch
First. Transferring a paging file will increase the amount of free space on SSD precisely as much as this file itself weighs. Let it be better on the HDD, where the places are much more (especially since the paphone file is used only with a lack of RAM and requires 5% of applications). We pass along the "Start" path - the right click on the "computer" - "properties" - we select "Advanced system parameters" and look at the following three screenshots (stole from another article): As a result, our swap file will be fixed size, which will prevent its constant fragmentation; and will be stored on another disk (not SSD).
Second. Disabling the creation of a recovery point system. I do not know who, how, but I was always easier to roll back the latest operating system from the image than guess at what point of recovery it was 100% working. But in the case of SSD, everything is much categorical. The recovery dot creation feature needs to be disabled. Approximately a year ago it became known that when the recovery points are enabled, the work is blocked vital for SSD "Trim". Due to which, over time, the gradual degradation of the speed of the drive occurs. Well, two auxiliary factors - as a result, reducing the load and increase the amount of free space on SSD. We pass through the previous path: "Start" - right click on the "computer" - "properties" - on the left choose "System Protection" and see the following screenshot:
Third. The indexing function was created to speed up the search in Windows. Its work is that during inaction, the operating system checks, updates and stores indexes for all files on your disks, so that the results of the possible results are faster search queries. Thereby, the load on the disk increases (the load time increases rather) and the index files themselves occupy a certain place on it. I powered by Windows I do not use it at all, and thanks to the high speed of the SSD response, there simply makes no sense in this function. Open the "Explorer", make the right click on SSD - "Properties" - remove the check mark on the "Allow index the contents of files on this disk"

Fourth. Defragmentation service - on SSD is unnecessary (thanks to a completely different work mechanism than on HDD) and contraindicated (NAND memory, which is used in SSD, limited number of overwriting cycles). If it happened that Windows 7 left this feature included (usually when installing the operating system on a solid-state non-stitcher, the defragmentation service is turned off by default) - We pass along the path: "Start" - "Run" - enter "Services.msc" (without quotes) We are looking for in the Disk Defragmentation service list, we make a double click on it, in the "Start Type" field, select "Disabled", click on the "Stop" - "Apply" - "OK".
Fifth. Hibernation. This feature is needed only when using HDD and is mainly used on laptops. This is a kind of "deep sleep mode", in which all contents from RAM is written to the disk to speed up the further loading of the system. For SSD, this is not relevant and in addition, the hibernation disabling will free on the disk about 2 GB of the place ... Press "Start" - "Run", enter the text "CMD" (without quotes), in the window that appears, write the command "PowerCFG -H OFF "(Without quotes), click the" ENTER "button.
Sixth. Prefetch - Preloading frequently used applications and libraries in RAM. When using SSD, productivity growth is not felt. When disconnected, the location is released in RAM and the number of requests for the drive is reduced. Superfetch - Frequently used file caching. SSD is absolutely useless. To disable both functions, we pass "Start" - "Run" - enter "regedit" (without quotes), in the Windows Registry Editor We pass along the way: HKEY_LOCAL_MACHINE \\ SYSTEM \\ CURRENTCONLSET \\ CONTROL \\ PREFETCHPARAMETERS Make the right click on each items : "EnablePrefetcher", "EnableSuperfetch", choose "Change", enter the number "0":

rapidsoft.org.
Setting up SSD under Windows 7 - Optimization, Program, Trim
Windows 7 was originally designed to work on SSD. Since they appeared, Microsoft has released numerous updates designed to improve the operation of the OS on solid-state disks. However, it is necessary to carry out additional optimization manually, which gives a significantly more effect.
SSD drive
Solid State Drive (Solid State Drive) is a storage device based on flash memory and control controller.
They are widely used in computing technology and have some advantages over NJD:
- high speed;
- impact resistance;
- heat resistance;
- small sizes and weight;
- silent.

In Windows 8 and above, they work stably and quickly, but under the control of older OS, problems with wear and speed are inevitable. To avoid this, you need to optimize the parameters, which this article is dedicated.
What gives optimization
Windows 7 has several services that increase the performance of conventional hard drives. But with SDS, they not only do not benefit, but prevent work and significantly reduce the service life of the device. Setting up windows 7 on the CCD negates, all attempts to destroy it, and allows you to achieve greater productivity.
Even if we compare the maximum read / write speed declared by the manufacturer, then the difference will be huge.
Linear speed of solid-state drives above 3-4 times.
An ordinary hard drive rarely can demonstrate 180 MB / s reading speed. At the same time, it does not spend time on moving the head, but focuses on reading data.

For the usual SCD, such as Kingston SKC380S3, the limit is 550 MB / s. For reading and 520 for recording. In linear read mode, it uses all channels and reads data by large blocks. However, if you have a deeper performance analysis, the superiority of solid-state drives will be even more impressive.
When the test speed test is 512 kB (small files), the gap becomes even more. The SSD does not spend much time on the search for the unit, as a result of which its speed still remains within 500 MB / s. The hard drive spends more time to move the head than to read the files. Its speed decreases three times and averages 60 MB / s, which is 8 times slower than CED.

Photo: Test of reading arbitrary blocks size 512 kb
If you still deepen into tests and check the speed on the blocks of 4 kb, then the SCED will cost 50 times. OS boot, copying documents, minor images and program launch - All this corresponds to such an operation mode. In addition, solid-state discs can simultaneously work with several requests, and NGMD is single-threaded.
Video: How to configure the system to work correctly
Setting up SSD in Windows 7
This process requires patience and includes the following procedures:

Setting up Windows 7 for SSD begins with a storage firmware. All manufacturers regularly release new software versions for their devices that eliminate errors and weaknesses. previous versions. You can download it from official brand sites. Included, also usually uses instructions for installing and updating the firmware.
Ahci and Trim.
SATA interface It has many features that accelerate the exchange of data. In order for them to become available, you need to turn on the AHCI controller, as most PCs are still configured by default to work with an outdated ATA controller. You can switch to AHCI both automatically and manually.
Automatic switching:

During the next launch of Windows 7, the rest of the work itself. If for some reason the utility does not work, then you can do everything manually.
Manual switching:

As a result, after rebooting, the AHCI controller will be visible in the device manager.

With Ahci, the TRIM team is finished. It helps the OS notify the CZD about what data the file system does not contain, and which drive can delete. That is, this team cleans the garbage and does not allow it to reduce the level of performance.
TRIM can be enabled if the following conditions are met:
- the solid-state disk controller supports this command;
- sATA mode is enabled: AHCI.
If the conditions are met - you can go to the inclusion of TRIM:

Disable system protection
The instruction is pleased with:

It is important to understand that by turning off the protection, the OS will not make control points of the recovery and when Windows fails to recover, it will be impossible. Therefore, it is worth useing the software of other developers, to provide a recovery function, for example, Acronis True Image.
Disable disc indexing
Indexing is carried out only in order to speed up the process of searching for a hard disk. Given the multithreading SSD and its speed, the indexing and search service is not needed.
Turn off the search so:

Indexing turn off like this:
- open the "computer";
- click right key on the section -\u003e Properties;
- at the very bottom of the opened windows, we remove the "Allow index ..." checkbox;
- apply and close the window.
Along the way, you can also turn off defragmentation, which is useless on SSD drives due to quick access to cells.
You can do it:

Turning off Podkachka
The paging file is required for the work of programs in need of a large amount of memory. If the RAM is missing, the temporary data is loaded into this file. It is possible to disable it only if the computer is installed on the computer (at least 8 GB) on the computer. Otherwise, it is better to transfer the podach to another partition, that is, to a hard disk.
Disconnection:

Disable hibernation
Hibernation or deep sleep sleep was invented microsoft. In order for the computer to not spend a lot of time on startup. This feature allows you to turn off the power of the computer without closing the applications. With the subsequent awakening, the work of all programs continues.
At the same time, when the PC is immersed in a dream, a large amount of data is written to the drive and the SSD is faster. Also for many hibernation is not needed, as PC with solid-state disk Loading very quickly.
If you decide to disable hibernation, then you can do this:

SSD TWEAK UTILITY.
To optimize the system to use the CCED drive automatically, you can use the SSD TWEAK Utility utility. The program allows you to quickly and simply do everything outlined above, except for the AHCI mode. The program is published with a different set of tools.

there is free version With a basic set of functions:
- disabling defragmentation;
- disabling recovery;
- stop indexing.
Other features are available in the paid version of Tweaker Pro:
- enabling and disable services;
- setting up the hibernation parameters;
- check and experimental TRIM command optimization.
The program is possible and deeper configuration, which includes much more parameters. After starting the program on the right side of the window, you can see a detailed description and tips for setting up the system.

To start optimization, it is enough to press a large button in the middle of the program window - the autotune configuration. The utility itself will configure the basic parameters and will provide a report.
Setting up and optimizing Windows 7 under SSD - the process is not a quick, accompanied by several reboots of the system and visits in the BIOS. However, if you do not configure, do not disable unnecessary services, then after a few months, the once fast SPE can exhaust its supply of recording cycles and stop working.
Need a USB WiFi Adapter for LG TV? Learn how to choose here.
What if the laptop does not see WiFi? All answers here.
proremontpk.ru.
How to optimally configure SSD drive under Windows 7

In this article, we will talk about configuring the SSD drive under the Windows 7 operating system. What needs to be done and for which it is possible to customize the SSD devices in Windows 7.
So, quite recently, my friend bought powerful computer. And for greater speed, it was decided to establish a SSD process to install the operating system on it.
Let's figure out what is different SSD from the usual HDD. As Wikipedia tells us:
SSD is a hard drive (eng. SOLID-STATEDRIVE, SSD) - a computer non-mechanical storage device based on memory chip. In addition to them, SSD contains a control controller.
Unlike SSD, HDD is a rigid drive magnetic disks or NGMD (Eng. Hard (Magnetic) Diskdrive, HDD, HMDD), Hard disk, in a computer slang "Winchester" - a storage device (information storage device) of arbitrary access based on the principle of magnetic record. It is the main data storage in most computers.
The main advantage of SSD in front of the standard hard drive is the lack of mechanical (moving) parts, which increases its reliability. Also, the advantage of SSD is a high speed of work, it is less heated and does not make any sounds when working. But SSD, in addition to many advantages, there are disadvantages. The main disadvantage of SSD is a limited number of recording / overwriting cycles. Normal (MLC, Multi-Level Cell, multi-level memory cells) Flash memory allows you to record data about 10,000 times. More expensive memory types (SLC, SINGLE-LEVEL CELL, single-level memory cells) - about 100,000 times. In order to reduce the number of appeals to the SSD to the drive and, accordingly, to extend his life is necessary for its fine tuning. Well, another drawback is incompatibility with the old OS (below Windows Vista).
Next, we consider what it is specific to configure a solid-state drive under the Windows 7 operating system. T. To. When I set up a friend SSD, I did not do the screenshots, I will do these settings on my old computer with the usual HDD.
So let's go.
Point first: Disconnect hibernation. It is necessary to disable it for the reason that every time the computer is switched to this mode, a large amount of information is written to the hard disk, and I always turn it off, because sometimes it is difficult to get out of this mode. In addition, disabling hibernation, we will release a space on the system disk approximately equal to the amount of RAM. The hibernation is needed to quickly download the operating system, but since we have a SSD drive, then Windows and so loads in just 5-10 seconds. To disable hibernation, launch the command line (start - execute here we write the CMD command). In the command line we prescribe PowerCfg.exe / Hibernate off. After rebooting the computer, you will see the vacant disk space.

Or go to "Start" - "Control Panel" - "Power" - "Setting the Power Plan" - "Change Power Parameters" - we find the item "Sleep", reveal it, Item "Hibernation after" enter the value "0".
The second item: Transfer the folder to store temporary TEMPs to the usual HDD.
To do this, click on the "My Computer" icon - "Properties" - "Advanced System Settings" - the "Advanced" tab - the "Wednesday" button - and change the path of the TMP variable and temp to another folder (I created it in advance on the disk D: \\).

Point Three: Disconnect the "System Protection".
To disable the system protection by pressing the right mouse button on "My Computer" - "Properties" - "System Protection" - "System Protection" tab - "Configure" - "Disable System Protection".

When the system protection is disabled, in the event of its failure, we will not be able to recover from the backup, but it is not necessary for us, because the system is set for some 10-15 minutes.
Item Fourth: Transfer the paging file to the second Winchesteer. To do this, press "My Computer" - "Properties" - "Advanced System Settings" - the "Advanced" tab - the "Speed" section - the "Parameters" button. Here we change the parameters as in the figure (depending on the free space on the disk D: \\ you can specify more volume).

Point Fifth: Disabling indexation.
Indexing is necessary to speed up the disc. But, for example, I never used the search, besides the search for SSD and it works quickly. Therefore, this option can be safely disconnected. To do this, go to "My Computer", press the PKM to disk C: \\, the plot of the "Properties" drop-down menu. In the General tab, remove the checkbox from the item "Allow indexes the contents of files on this disk in addition to the properties of the files."
Or you can remove indexing for all disks, disabling the WindowsSearch service. To do this, we go to the "Administration panel" - "Administration" - "Services" - we find our service and click on it twice - select the startup type "manually" and click the "Stop" button.
Point Six: Disconnect Preftch and RedyBoot.
Prefetch is a technology that allows you to speed up the boot of Windows by proactive reading data from the disk. It is not needed for SSD, because SSD and so has a high speed of random data reading.
To turn off the Prefetch, launch the registry editor (start-run - write regedit and press ENTER). Next, open the registry branch:
HKEY_LOCAL_MACHINES \\ SYSTEM \\ CURRENTCONTROLSET \\ CONTROL \\ SESSION MANAGER \\ MEMORY MANAGEMENT \\ PREFETCHPARAMETERS
and change the Enable Prefetcher key to "0".
RedyBoot is an addition to Prefetch. To disable it go along the way:
HKEY_LOCAL_MACHINES \\ SYSTEM \\ CURRENTCONTROLSET \\ CONTROL \\ WMI \\ AUTOLOGGER \\ READYBOOT
Here we change to "0" the value of the START parameter.
Seventh mesh: Transfer of application caches. Here, first of all, it is due to the transfer of the browser cache to the second hard disk. How to do this I will not describe, because for each browser your own way. Therefore, if you decide to transfer the cache to the second Winchester, then google to help. But I would not do this at all, because SSD we installed to speed up work, and the transfer of cache to the second HDD speed We will not add. In general, you decide.
You still need to disable defragmentation, but for Windows 7, unlike Vista, defragmentation, when installing on an SSD, the drive is turned off automatically (the same is written about the prefetch and redyboot, but they have not been exhibited on "0", so check) .
That's all. On the Internet you can find other SSD optimization tips under Windows 7, but they are no longer as important as these. However, even without such a setting, the SSD will last for quite a long time, but if you want to extend your life as much as possible, I recommend to perform the above items. Plus, we will break the place on the system disk slightly, and considering the cost of gigabyte memory for SSD, it is quite justified.
Hello!
After installing the SSD disk and transfer to it copies of Windows with your old hard Disk - OS must be adjusted accordingly (optimize). By the way, if you installed Windows "from scratch" to the SSD disk, then many services and parameters will be configured automatically when installing (it is for this reason, many recommend when installing SSD - install "clean" windows).
Windows optimization under SSD will allow not only to increase the service life of the disk itself, but also slightly increase the speed windows work. By the way, about optimization - tips and recommendations from this article are relevant for Windows: 7, 8 and 10. And so, perhaps, let's start ...
1) Does Achi SATA mode enabled
how to enter BIOS -
Check in what mode the controller works can be quite simple - see bIOS settings. If the disk works in ATA, it is necessary to switch its operation mode in ACHI. True there are two nuances:
The first - Windows OS will refuse to load, because She does not have the necessary drivers for this. You need to either install these drivers before, or simply reinstall Windows OS (which is preferable and easier in my opinion);
The second nuance - you in the BIOS may simply not be a mode of ACHI (although, of course, this is already a few outdated PCs). In this case, most likely, you will have to update the BIOS (at least to explore the official website of the developers - is there any opportunity in the new BIOS).

Fig. 1. AHCI mode ( BIOS laptop Dell)
By the way, it will not be superfluous to go to device Manager (You can find in the Windows Control Panel) and disclose a tab with IDE controllers ATA / ATAPI. If the controller is in the name of which there is "SATA ACHI" is - it means everything is in order.
AHCI operation mode is required to support normal operation. Trim SSD disk.
REFERENCE
Trim - the ATA interface command necessary for Windows to pass the drive to the drive about which blocks are no longer needed and you can overwrite them. The fact is that the principle of deleting files and formatting in HDD and SSD disks is different. When using Trim, the speed of the SSD disk is increasing, and uniform wear of the disk memory cells is ensured. Support Trim OS Windows 7, 8, 10 (if you use Windows XP - I recommend to update the OS, or buy a disk with hardware Trim).
2) whether TRIM support is enabled in Windows
To check whether the Trim support is enabled in Windows - it is enough to run the command line on behalf of the administrator. Next, enter the command and press ENTER (see Fig. 3) .
If disabledeleteNotify \u003d 0 (as in Fig. 3), it means TRIM is not needed to enter anything more.
If disabledeleteNotify \u003d 1 means TRIM is turned off and you need to turn it on with the command: fSUTIL BEHAVIOR SET DISABLEDELETENTITIFY 0. And then check again as a team: fSUTIL BEHAVIOR QUERY DISABLEDELETENOTIFY.
Windows optimization (relevant for 7, 8, 10) under SSD disk
1) Disable file indexing
Moreover, when this function is disconnected, the number of records on the disk is reduced, which means that its service life increases. To disable indexing - go to the SSD disk properties (you can open the conductor and go to the "Computer" tab) and remove the checkbox in front of the "Allow the indexing of files on this disk ..." (see Fig. 4).
2) Disable search service
This service creates a separate index of files, so that finding certain folders and files accelerates. SSD disk fast enough, moreover, very many users do not use almost this opportunity - and therefore it is better to turn it off.
First open the following address: Control Panel / System and Security / Administration / Computer Management
3) disabling hibernation
When using a SSD disk - this function slightly loses its meaning. First, the Windows system and so starts fast enough with SSD, which means there is no point in keeping its condition. Secondly, unnecessary recording cycles on SSD disk - may affect its work.
Disable hibernation simply - you need to run the command line on behalf of the administrator and enter the PowerCFG -H OFF command.
4) disconnecting auto-defragmentation disk
Defragmentation is a useful operation for HDD disks that helps somewhat increase the speed of work. But this operation does not make any benefit for the SSD disk, as they are somewhat different. Access speed to all cells in which the information on SSD disk is the same! And this means that where they would not lie "pieces" of files - there will be no difference in access speed!
In addition, moving "pieces" of a file from one place to another - increases the number of recording / overwriting cycles, which shortens the service life of the SSD disk.
If you have Windows 8, 10 * - I do not need to disable defragmentation. Built-in disk optimizer (Storage Optimizer) will automatically determine
If you have Windows 7 - you need to go to the disk defragmentation utility and turn off the autorun ona.
5) Disable Prefetch and Superfetch
Prefetch is a technology due to which the PC speeds up the start of frequently used programs. Does it he, loading them in memory in advance. By the way, a special file with the same name is created on the disk.
Since SSD discs are fast enough - it is desirable to disable this feature, it will not give any increase to speed.
Superfetch is a similar function, with the only difference that the PC is predicted which programs you will most likely run, loading them in advance (it is also recommended to disable it too).
When you open the registry editor - go to the next branch:
HKEY_LOCAL_MACHINE \\ SYSTEM \\ CURRENTCONTROLSET \\ CONTROL \\ SESSION MANAGER \\ MEMORY MANAGEMENT \\ PREFETCHPARAMETERS
Next, it is necessary in this registry subsection to find two parameters: EnablePrefetcher and EnablesUPERFETCH (see Fig. 8). The value of these parameters must be installed in 0 (as in Fig. 8). By default, the values \u200b\u200bof these parameters are 3.
Fig. 8. Registry editor
By the way, if you install on SSD windows disk "From scratch" - these parameters will be configured automatically. True, this is not always happening: for example, failures can be observed if you have 2 types of disks type: SSD and HDD.
Utility for automatic optimization of Windows under SSD disk
You can, of course, manually configure all of the above in the article, but you can use special utilities for thin setting Windows (such utilities are called tweakers, or tweaker). One of these utilities, in my opinion, will be very useful for the owners of the SSD disk - SSD Mini Tweaker.
SSD Mini Tweaker.
Excellent utility for automatic setting Windows to work on SSD disk. Settings that changes this program allows you to increase the operation time SSD an order of magnitude! In addition, some parameters will allow slightly to increase the speed of Windows.
Benefits SSD Mini Tweaker:
- fully in Russian (including tips to each item);
- works in all popular Windows 7, 8, 10 (32, 64 Bits);
- no installation is required;
- completely free.
PS.
Many recommend to carry your browser caches, paging files, Windows temporary folders, system backup (and so on) with SSD disk on HDD (or turn off these capabilities). One small question: "Why then need SSD?". To start the system for 10 seconds.? In my understanding SSD, the disk is needed to speed up the operation of the system as a whole (the main goal), noise reduction and the grincling, the hanging time of the laptop from the battery, etc. And performing these settings - we are thereby, we can reduce all the advantages of the SSD disk ...
That is why, under the optimization and disconnection of unnecessary functions, I understand only what really does not speed up the system, but may affect the time of the "life" of the SSD disk. That's all, all successful work.
 How to pay a domain name
 Domain zone of tokelau islands
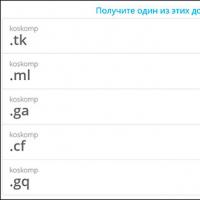 What is domain what problems may be
 Yandex Wordstat: detailed instructions for using the service and grouping operators and a complicated request
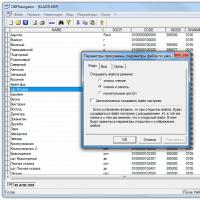 Editing DBF files
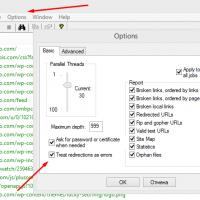 Xenu Link Sleuth - What is this program how to use the Xenu program
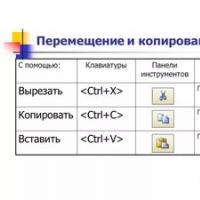 Methods Copy and insert text from keyboard without using mouse