Creating a windows restore point 8. Windows System Restore. Resume using the installation disc
How to create a restore point in Windows 7, 10 or 8 often arises after the bitter experience of data loss, but we will tell you how to make a restore point!
This happens in automatic mode... Windows also does this when it detects major changes in its work - for example, when you install updates for the OS, driver, or some software.
These points represent the saved state of all files and registry settings - you can use them to run at any time. If at some point you need to undo some changes, you can quickly return the OS to the time period when these changes were not yet made.
System Restore uses Windows function called "System Protection". This function regularly creates and saves information about system files of the computer, registry settings and previous versions of files. Reverting the OS to an earlier state affects system files Windows, installed programs, registry settings, changes to scripts, batch files and other types of executable files - but does not affect the user's personal files.
Create System Restore Point Wimdows
To create it manually, right-click on the "Computer" icon on your desktop, select the "Properties" item in the context menu, and in the "System" window, click on the "System Protection" link.

In the Properties window, click on New. The "Protection" window will open.

Enter any name (name) and click on the "Create" button.

The process you started will take less than a minute.

When the process completes, you will see a message that the process completed successfully.

Click Close. Now, at any time, you can return the computer to this or any other point in time.
Restore Windows to a Previous State
If your computer is experiencing problems, you can return your PC to its "normal" period of state, and this is done in the following way. In the Properties window, click the "Restore" button.

Alternatively, you can open the recovery window using the Run dialog. Press Win + R on your keyboard, type rstrui.exe and press Enter.

The "Recovery" window will open. Click Next.

Choose the point to which you want to return your computer and select "Next".

Now you need to click on the "Finish" button, and then confirm the start of the process by clicking on the "Yes" button.

The process also includes restarting the computer. After restarting, you will see a message confirming that your computer was successfully restored.
More details in critical situations.
Have a great day!
System protection function is designed to undo unwanted changes in the system and restore previous versions files. Using System Restore, you will be able to fix problems in Windows that occur after installing programs, drivers, or after changing registry settings.
The operating system itself periodically creates restore points when installing programs, drivers, updates. You can also create a restore point manually at any time, before installing any program that you are not sure of, before changing the registry, before changing others. important settings computer. Access to the creation of restore points and restore in occurs through the system function "System protection".
Configuring system protection
There are many different ways to go to the system protection parameters:
■ Open.
This computer Properties System protection.
System System protection.
Execute

In this window, clicking the button Tune... You can:
■ Enable or disable system protection
■ In the section Usage disk space
you can specify the maximum amount of disk space used by the system protection function. As it fills up, old restore points will be deleted to make room for new ones.
■ Also from this window you can delete all previously created restore points from your computer by clicking Delete

After making changes in this window, click the button OK
Create a restore point in Windows 8.1
In the window System properties, on the tab System protection press the button Create…

Next, a window will open System protection in which enter a description for the restore point you are creating. You can write any text in this field. The date and time this restore point was created will be added automatically.
After entering the description, click the button Create

The operating system restore point creation process begins. Windows systems 8.1

After completing the process of creating a restore point, the system will inform you that the restore point has been successfully created.

System Restore
There are many ways to start the system restore process:
■ Open Control Panel → System → System Protection.
■ Right-click on the icon This computer on the desktop and in the appeared context menu select Properties, and then in the window that opens, click System protection
■ Press the key combination + X, in the appeared context menu select the item System, and in the window that opens, click System protection.
■ Press the key combination + R, and in the window that opens Execute enter (copy and paste) the command:
rundll32.exe shell32.dll, Control_RunDLL sysdm.cpl, 4
■ Press the key combination + Pause / Break, and in the window that opens, press System protection
In the opened window System properties, on the tab System protection press the button Restore…

A window will open System Restore, press the button Further

The next window will show the last restore point.

Check the box next to the item Show other restore points to display all available restore points on your computer. Here you will see the date and time when the restore point was created, its description, and the type of restore point. The restore point type displays information about how it was created - automatically by the system, manually by the user, or before by installing the program

Select the required point, and then click on the button Search for affected programs... In this case, you can familiarize yourself with background information which will provide you operating system.

The process of scanning your computer for affected programs and drivers will begin.

After completing the scanning process, a window with the received information will open. Here you can find information about which programs and drivers will be removed from the computer, since they were added to the computer after the creation of this restore point, and which programs and drivers may be restored.
After reading this information, click Close

After the required system restore point is selected, press the button Further

In the window Confirming a restore point, read the information about the selected restore point, click the button Ready... Before doing this, close all programs and save open files.

The system will issue a warning about the impossibility of interrupting the recovery process, press the button Yes


After loading the operating system, a window will open with information about the successful completion of the Windows recovery process. Your computer will be restored to the date the restore point was created.

Canceling a system restore
You can cancel last recovery system, if you accidentally chose the wrong point, or the restoration did not bring the desired results. This is possible due to the fact that before recovery, the operating system creates a checkpoint.
To cancel System Restore, run it again.
The system will prompt you to cancel System Restore or select a different restore point.

Sooner or later, many users think about how to roll back the system to an early state. True, many understand different things by this action. Someone just wants to cancel a few recent changes that were added during the installation of the utilities. Someone wants to return Windows to its original clean state. This article will describe several ways of how to undo the changes made to the system.
Using restore points to roll back the system
This method is used by users most often and helps in most cases. When rolling back to a restore point recovery is in progress changed system data. Information about what data was changed and what exactly will be restored is stored separately at each point. A big plus of this method is that the user himself can create such points before performing any serious manipulations with the PC. However, they are also created automatically when you install programs and drivers. This can come in handy when the computer starts to crash or glitch after installing the application.
To roll back to a saved point, you need to perform a pair simple actions... First you need to go to the control panel, and then select recovery. In this window, you should click on the launch of system recovery, after which, you should select from the points presented the one to which you want to reset the changes.
Here you can also look at those utilities that will affect the OS reset. Don't worry about documents, changes touch only programs and system files.
Roll back Windows updates
This option should be used when failures began to occur after a system upgrade. There is multiple methods reset: via update center, via command line and using third-party programs.
The easiest way to uninstall is through the update center, which is located in control panels... After it is launched, you need to select the item " Installed updates
". In the list that opens, you will see all packages along with the date of their installation. If the problem began to occur on a certain date, then you can easily find the source by sorting updates by it. 
After that, all that remains is to select the one you want and click on the button " Delete».
How to reset Windows 8 settings
This method should only be used if all others are ineffective. To start, you need to go to the right panel and go to options, after which you should go to changing computer settings... Then you have to choose Updating and restoring and then, directly, restoration. 
Then you need to activate the item that is shown in the picture. After that, it remains only to wait for the end of the process.
Using the image to restore the system
This image is sewn by default on all laptops that come with a pre-installed OS. If it is not there, then you can create such a partition yourself, or, you can make a disk with a backup copy... It is better to make it right after all the drivers and programs are installed, and also the initial setup... Such a drive will help roll back the system in initial state, but the user will be able to avoid the hassle of setting up and downloading the software. 
In the first case, recovery can be done directly from the OS. To do this, you need to follow the same route as in the previous chapter, however, the final point should be the same as shown in the image.
In the second case, to use the image, you will need boot from disk recovery or with installation disk.
A restore point will help you roll back the system, if it starts to freeze and slow down, to a working state. Such points are created either automatically by the system through certain time, or automatically when System Restore detects changes to the configuration of your computer: install new program or driver.
The user can also create a restore point manually. If your operating system is working perfectly, then naturally it makes sense to create a restore point. Later, when the system starts to work incorrectly, it will be possible to return it to working condition.
It is also better to create a restore point if you are going to install an unfamiliar program or new drivers on your computer. If, after installation, the operation of the system changes for the worse, then it will be possible to return it to the state when it was fully functioning. In this case, the system will return all system files and Windows settings that were at the time the restore point was created. This will help you get rid of incorrectly working drivers, programs, downloaded viruses or unsuccessful experiments with the registry.
Please also note that all programs that were installed after the creation of the restore point will be removed from your computer.
First, let's figure out how you can create a restore point... Move the mouse cursor to the lower left corner, and when the "Start" box appears, press the right mouse button. A window will open with the most frequently used commands, select from the list "Control Panel".

Here we will be interested in the item "Configuring System Restore".

A new window will open "System properties" in the tab "System protection"... Here, note that opposite that section hard disk, on which the OS was installed, in the "Protection" section it was indicated "Enabled". Only in this case it will be possible to roll back the system to the desired restore point.

If you have it written "Disabled", click on the "Configure" button, then mark the item with a marker "Enable system protection" and click Apply, OK. In the same window, just below, you can see the maximum allocated volume on the hard drive for recovery points and how much space they take now. In the event that the allocated volume runs out, the system will delete old restore points by date and create new ones.

To create a system restore point, click on the "Create" button. A window will appear "System protection"... In the field you need to enter a description for the point and click "Create". It is not necessary to write the creation date and time, since the system will do it automatically.

Then wait for the system to complete the process and the following window will appear.

Now you can carry out the necessary actions with programs, drivers and any other components of the system.
In case of an unsuccessful experiment, consider what needs to be done to roll back the system to working condition.
Go in "Control Panel" – "Recovery". In this window, select the item "Start System Restore".

A window will appear, which will clarify that all user data will not be affected during recovery: photos, music, videos, but the last installed programs or drivers can be removed. Click Next.

If you have system restore points created automatically, then you need to select the item "Choose another restore point" and click "Next".
A list of available points will open, select the one you need. When in doubt, press the button Find Affected Programs... The system will analyze and show which programs and drivers will be removed after recovery. When you are determined, select the desired restore point and click "Next". Wait for the process to finish. Then the computer will restart and the system will return to working state.

Now you know how you can create a restore point manually, and if you find problems with the computer, roll back the system to a working state.
Watching the video on how to create a restore point:
We are watching a video on how to restore the system from a checkpoint:
Rate article:
 Full description of the streaming service
 How to create a WebMoney wallet Detailed instructions for registering in webmoney
 A program for optimizing and speeding up Windows
 Increasing the cache in the Yandex browser How to increase the cache in the Mozilla
 How to email a file or folder
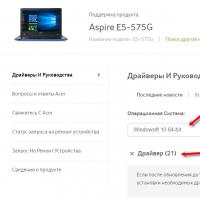 Driver for Wi-Fi and LAN for laptop Acer
 Register VKontakte new page