How to protect a cell from changes in Excel. Setting a password for files in Microsoft Excel How to password-protect a sheet in Excel
As I said, Excel is a very complex and functional program. There are many functions here, both simple and confusing. Not without data protection functions. You can configure both protection against accidental / incorrect input, and protection of the entire sheet or book with a password from other users. Read on how to protect Excel from editing?
You should start with a simple way - "protection from the fool" ie from incorrect data entry.
from editing. Checking information in a cell
When a value other than the conditions cannot be entered into a cell (for example, more than 1000 or fractional numbers). To use this function you need to select the desired range and in the top panel, select Data, and then the Data Validation item (Excel 2003, the Data item, then click on Validation, then Parameters and select what type of data can be entered into cells). In the window that opens, make the settings

Those. you can set conditions so that the data in a cell is only whole, only a temporary format, and so on. In the Other option, you can specify the formula

Using the "Message for Input" tab, you can specify the messages that appear before input,
Using the Error Message tab, you can specify error messages.
How to make a check from a list of cells, read the article "How to do it".
Controlled deny changes in Excel
You can also partially or completely impose a prohibition on changing cells in a sheet. (unlike the first method, it will not be possible to change at all)... Follow these steps:
Select cells not requiring protection and right-click... In the menu that appears, click the Format button cells (you can immediately use a combination)... In the Protection tab, uncheck the Protected cell option. The cells from which you unchecked the checkbox will be available for input and modification data, the rest are not. For Excel 2003 and older, you need to open the Tools tab in the top menu, then Protect and click on the Protect sheet item in the Review item.
Now, as shown in the first picture, let's go to Review - Protect Sheet. All unchecked cells, as shown above, will be closed for editing. You can also specify a password that will be needed to remove protection, and you can specify exceptions for applying protection.
For example, to leave the user the ability to change cells, you need to click on the first 2 checkboxes. You can also allow user access to sorting options, autofilters and other features.
Conveniently, if there is more than one user, you can set the sheet protection to different cells with different passwords. In this case, each of the users will have access only to the part of the page he needs.
How to quickly remove password protection (if you forgot) .
You can also protect the sheets of the book (for example, from moving). Click Protect Book (the button next to the panel in the Review tab - see the first picture).
The article about protection is indirectly related to protection against changes, they are even in one tab on the toolbar - Changes.
How to protect Excel from editing, protect file with encryption
Need to protect Excel file more thoroughly? Use file encryption for protection.
This algorithm, in special cases, will be able to protect the entire book using RC4 encryption algorithms. To use this function in the menu File (round button) select the command Save as in the window save the file, find the Tools - General Options button. In the new window we
In the window that opens, enter the required password and do not forget it.
Share our article on your social networks:Microsoft Excel implements several levels of protection and security that allow you to control access to MS Excel data: cell protection, sheet protection, workbook protection (structure and windows protection) and protection of the entire file from viewing and modification. Let's consider these protection methods in more detail.
How to protect cells in Excel from being changed?
A file created in Microsoft Excel with a worksheet as its main constituent is called a workbook. Thus, all Excel workbooks are composed of worksheets. A book cannot contain less than one sheet. Worksheets, in turn, are composed of cells organized in vertical columns and horizontal rows. Worksheet cells contain various kinds of information about number formats, alignment, display and direction of text, title, style, font size and color, line type and border color, background color and finally about protection. All this data can be seen if in the context menu, which is invoked by the right mouse button, select the item "Format cells". In the dialog box that appears, on the "Protection" tab, there are two options: "Protected cell" and "Hide formulas". By default, all cells are checked in the Protected box and the Hide Formulas check box is unchecked. A selected checkbox in the "Protected cell" field does not mean that the cell is already protected from changes , it only means that the cell will become protected after the sheet is protected.
You can protect not all cells, but only a part of them, while leaving the opportunity for other users to enter and change data in unprotected cells. In order to make some of the cells unprotected, select the required range of sheet cells and right-click in the area of selected cells, then select the "Format cells ..." context menu item. In the window that appears with the name "Lists" or "Format cells" (depending on the version of Excel) go to the "Protection" tab, and uncheck the "Protected cell" field.
In the same window, you can hide formulas and display them back for viewing. Hiding formulas means not only hiding the formulas themselves, but also displaying any cell contents in the formula bar.
When selectively setting or clearing the "Protected cell" and / or "Hide formulas" properties, when, for example, you need to remove protection from one group or range of cells and leave it for another group or range, it is convenient to use the standard Excel tool to select a group of cells, which is on the Home tab, in the Editing group of buttons, in the Find and Select button menu, the Select Cell Group item. There are also additional convenient tools for installing and removing the protection of cells .
How to set protection of sheet (sheet items) in Excel?
In order to restore full access to the elements, it is necessary to remove the sheet protection. Before displaying hidden rows and columns, you must also first remove sheet protection, then the hidden columns and rows are displayed as usual.
Protecting individual elements of an Excel workbook (structure and windows)
All of the security layers discussed are complementary, but not intended to protect sensitive data.
Attention! If the Protect Sheet and Protect Book buttons are grayed out, meanson the Edit tab, the Allow multiple users to edit the file at the same time check box is selected. In order to uncheck the box, you need to go to the menu item Service / Access to the book ... (if the work is carried out in Excel 2003) or on the "Review" tab, in the group of "Changes" buttons, click the "Access to the book" button (if work is being done in Excel 2007/2010/2013).
Password protect the entire Excel workbook file from being viewed or modified
This method of protecting data in Excel provides optimal security by limiting access to the file and preventing unauthorized opening of the file. The file is protected with a password, the length of which must not exceed 255 characters. Any characters, spaces, numbers and letters can be used, both Russian and English, but passwords with Russian letters are not recognized correctly when using Excel on Macintosh computers. Only users who know the password have access to password-protected books. You can set two separate passwords for opening (viewing) the file and for making changes to the file. Password protection for opening and viewing the file uses encryption. The password for making changes to the file is not encrypted.
There are two ways to set a password to open a file in Excel 2007. In the Office menu / Prepare / Encrypt Document

after clicking the "Encrypt document" button, the "Encrypt document" window appears, in which the password is entered

You can also set a password to open and modify a file when you save the file. To do this, in the "Saving document" window, press the "Service" button and select the "General parameters ..."

after that a window with the name "General parameters" will appear, in which you can separately enter the password to open the file and the password to save the changes made in it.

You can set a password to open a file in Excel 2010 on the "File" tab in the "Info" group on the "Protect Workbook" button menu by selecting "Encrypt with a password"

The password window looks exactly the same as the one in Excel 2007. Just like in Excel 2007, you can enter passwords for opening a file and for making changes to them with separate passwords when saving the file.
When entering a password, it is not displayed on the screen, instead of password characters, dots are displayed. It is recommended to use complex passwords, which consist of a combination of both lowercase and uppercase letters, numbers, and various symbols. Passwords that do not contain a combination of these elements are weak. To avoid accidental mistakes when entering a password, a password confirmation window appears. Excel does not have standard tools for recovering forgotten passwords. To prevent the loss of passwords, it is recommended that you either design them in such a way that you can remember them, or keep the recorded passwords in a safe place.
In this article, I will explain how to protect cells in Excel from changes and editing. Cell protection may mean that users who open your file will not be able to edit the cell values, as well as see the formulas.
Before we figure out how to set up protection, it is important to understand how cell protection works in Excel. By default, all cells in Excel are already locked, but in fact, access to them will be limited after you enter a password and conditions for restricting access in the sheet protection settings.
How to protect all cells in an Excel file
If you want to protect absolutely all cells in your Excel file from editing and changes, do the following:
- Go to the “ Peer review"On the toolbar => in the subsection" Protection"Click on the icon" Protect sheet “:
- In the pop-up window, make sure to check the box next to ““:
- Enter the password in the ““ field if you want only those users to whom you have provided the password to remove protection:
- Select from the list and check the box the actions with the cells of the sheet that will be allowed to all users:
- Click “ OK “
If you have set a password, the system will ask you to re-enter it.
Now, all users who try to make changes or edit cell values will receive a message like this:
In order to remove the installed protection, go to the “ Peer review “, And in the section“ Protection"Click on the icon" Remove sheet protection “. After that, the system will ask you to enter a password to remove protection.
How to protect individual cells in Excel from changes
Most often, you may not need to protect the entire sheet as a whole, but only individual cells. As I wrote at the beginning of this article, all cells in Excel are locked by default. In order for the blocking to occur, you actually need to configure sheet protection and set a password.
As an example, consider a simple spreadsheet with data on income and expenses. Our task is to protect against cell changes in the range B1: B3 .
In order to block individual cells, we will do the following:
- Select absolutely all cells on the Excel sheet (using the keyboard shortcut CTRL + A ):
- Let's go to the “ home"On the toolbar => in the section" Alignment ”Click on the icon in the lower right corner:
- In the pop-up window, go to the “ Protection"And uncheck the box" Protected cell “:
- Let's click “ OK “
Thus, we turned off the Excel setting for the cells of the entire sheet, in which all cells are ready to be protected and locked.
- Now, select the cells that we want to protect from editing (in our case, this is a range of cells B1: B3 );
- Let's go to the “ home"On the toolbar and in the subsection" Alignment ”Click on the icon in the lower right corner, as we did earlier.
- In the pop-up window, on the “ Protection"Check the box" Protected cell “:
- Let's go to the tab “ Peer review "On the toolbar and click on the icon" Protect sheet “:
- In the pop-up window, make sure to check the box next to “ Protect sheet and contents of protected cells “:
- Let's enter the password in the “ Password to disable sheet protection “So that only those users to whom we have given the password could remove protection:

For various reasons, there are situations where Excel users want to protect cells in their Excel spreadsheets. Someone wants to protect all cells without exception, while someone needs to set selective protection exclusively on cells with filling or with formulas.
Someone wants to protect data from himself, so as not to accidentally delete something important, but someone needs to protect cells from others, for example, not very experienced users who can replace the formula with an intermediate calculation in a cell with their value and put thus questioning the final result. At the same time, finding such an error will be quite problematic.
Installing and removing protection of cells using standard Excel tools
Cell protection is performed in two stages, in order to protect cells from changes, it is necessary:
Stage one - select cells and make them protected;
To do this, after selecting the cells, press the key combination Ctrl + 1 or right-click in the area of selected cells, select the item "Format cells ..." from the context menu, go to the "Protection" tab and check the boxes in the "Protected cell" and / or "Hide Formulas".
The presence of checked boxes does not protect the cells, but only says that the cells will become protected after setting sheet protection. You can change the format of cells both in the entire selected range and in a group of non-adjacent cells. By default, in every new workbook and every new worksheet, all cells are securable and all cells do not have a checkbox in the Hide Formulas box.
Stage two - to establish the protection of the sheet.
Worksheet protection in different versions of Excel is dedicated to separate publication, here it should be recalled that you can set the protection of a sheet in Microsoft Excel 2003 in the menu Service / Protection / Protect a sheet, and in Excel 2007/2010/2013 the sheet is protected on the "Review" tab, in the group of "Changes" buttons by clicking the "Protect sheet". If necessary, you can check the permissions for users and enter a password.

Using the add-on allows you to:
1. With one click of the mouse, open the macro dialog box directly from the Excel toolbar;
2. choose at your discretion one of the four data processing modes;
3. At the user's choice, set or clear the "Protected cell" and "Hide formulas" property according to seven conditions (for empty cells, for cells with numeric and text values, with formulas, with notes, with fills and frames).
video on installing / removing protection of cells

 macro (add-on) for custom setting and unsetting the "protected cell" property
The issue of data protection is especially relevant today. The network is full of intruders who can easily take over unprotected information. In addition, it is not uncommon for a user to simply want to protect it from prying eyes, for example, if several people use the same computer. In general, now we will not find out the motive for such a desire, but rather talk better about how to password-protect an excel file. In this article, Excel 2007 and 2010 turned out to be targeted, because the principle of setting a password will be the same for them. So, for everyone who wants to protect an Excel document, I suggest using one of two methods. Which ones? Find out further!
Method one
In fact, both methods are extremely simple and equally functional, so it doesn't matter which one you choose. It's just as simple. So, let's start with the algorithm for executing the first method:
- Let's imagine that the required document is ready, all that remains is to password-protect it. To do this, press the large "Office" button in the upper left corner of the program.
- In the context menu that opens, click "Save As".
- A new window will open, your task is to pay attention to the small "Service" button located next to "Save" and "Cancel". Click on it, and a small menu drops out, select the line "General parameters".
- Then you can set passwords for two cases: to open a document and change it. Enter the required code and click "OK". From now on, every time a document is opened, each user will be prompted to enter the set password. It is better to write down passwords somewhere differently, if you forget, you will have to rack your brains.
Method two
In addition to the above, I can offer another option for setting a password for an Excel document.

Adhering to these simple rules, you can install protection on any Excel file in no time. Note that this feature is based on AES 128-bit encryption, which is considered the standard file protection method.
Video to help
 Full description of the streaming service
 How to create a WebMoney wallet Detailed instructions for registering in webmoney
 A program for optimizing and speeding up Windows
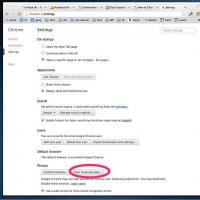 Increasing the cache in the Yandex browser How to increase the cache in the Mozilla
 How to email a file or folder
 Driver for Wi-Fi and LAN for laptop Acer
 Register VKontakte new page