Writing to a disc using Nero. Burn audio CD (Audio-CD) in Nero. Multifunctional utility for recording devices
Many inexperienced users try to create a bootloader using the standard copy that your operating system's burning wizard offers. However, the result of such an operation will disappoint you - it is impossible to install Windows directly from the BIOS from the resulting bootloader. The dedicated Nero Burning ROM program will help you solve this problem, and this guide will explain how to burn Windows to disc using Nero.
Nero is considered to be one of the best programs of its kind, it is used by both professionals and amateurs. Nero's interface is quite simple, so you can even figure out how to use it yourself.
First you need to find the installation version of Windows. All versions can be obtained from the World Wide Web.
So, you have a Windows image on your computer. Usually the size of such a file is about 3 GB, which means that the file will not fit on a regular CD-carrier, so you will have to burn the image on a DVD-medium. If you plan to keep the bootloader, you can burn Windows to a DVD-R disc. If you are unlikely to need to reinstall Windows in the future, and you need to burn something more important to a CD, use a DVD-RW. Then you can burn important information to DVD-RW over the operating system image immediately after installing it on your computer.
How to burn Windows to disc with Nero? Step-by-step instruction
- Insert blank DVD media into the drive.
- Open Nero Burning ROM. At the bottom, in the window that appears, select "Open" and look for the necessary image that we will record. Typically, such a file has the extension ".iso".
- The recording menu appears in front of you. Check if the option "Burn" is selected, "Finalize disc" - this option prohibits rewriting to this disc. Check "Check Recorded Data" - this is a check option for recording quality. We choose the average recording speed. At maximum speed, sometimes broken files appear that cannot be read.
- To start the recording process, click on "Burn", after which a window pops up, in which you can track the current percentage of the task completion and see its characteristics, such as speed and buffer loading.
- When the recording indicator shows 100%, it will start checking the recorded data. If "Verification" shows unreadable files, the recording went wrong, it should be repeated. If the recording is positive, the drive with a heated recorded disc will open and a corresponding window will pop up with a notification about the successful completion of the operation.
- The created boot disk is ready to use. You can put it back in the drive, restart your computer, and begin the Windows installation process.

What if the recording was unsuccessful?
Separately, it is worth telling how to act if copying went wrong. In this case, you can repeat the procedure.
To do this, either rewrite the DVD-RW or insert a blank DVD-R disc. When using a new CD, simply repeat all the above steps to copy the image to the media.
If you are rewriting a DVD-RW, the first step is to find the "Recorder" section in the menu bar and select "Erase Rewritable Disc". In the window that opens, the characteristics for erasing the disk are indicated, it is better not to change them. That is, the settings should look like this:
- Erase Method - Quickly erase RW disc;
- Erasing speed - Max.
We click "Erase" and observe the progress of the operation in the window that opens. At the end of the procedure, a corresponding notification will pop up, and the drive with a now blank DVD-RW will open. To record the necessary information again, you should repeat from beginning to end all the points described in detail above.
Conclusion
Now you know how to create a Windows boot disk through Nero. It should be said that it is better to use the original version of the operating system for the installation disc, rather than various assemblies from unverified sources. We hope this guide will help you develop your custom skills. Good luck!
Hello! In this article, we'll talk about how to burn a disc using the program Nero.
Technological progress is moving at a tremendous speed. I believe that soon the disks will not be needed, since now they are actively using usb drives. But while they are in demand, let's consider how to burn a disc.
You can use the standard Windows disc burning tools. But in this article, we will learn how to burn a disc using Nero(I recommend using Nero 7, I consider it the most stable).
Start the program (Start »All Programs» Nero »Nero StartSmart)

After launching, we see the action selection window. ProgramNero has good functionality. In addition to high-quality disc recording, she can play video (using the built-in player), edit images, video, record sound. You can also create CD covers and stickers. Since now we need to burn a disc, let's do the following:
Open additional settings (arrow on the left side of the program window)

- Select the "Data" tab
- Hover mouse cursor on the "Create Data CD" or "Create Data DVD" tab
- On the left, under "Open with", select " NeroExpress"And check the box" Use as standard application "
- Click the green arrow button
These steps are done once, at the first start.

You may ask - Why did you have to do the manipulations described above? Why not use the default one?
The answer is simple and obvious - it is cumbersome and not as easy to use as NeroExpress.

It is difficult for a beginner to navigate in such a window, so I suggested a more convenient option.
V NeroExpress there are no difficulties, click on the "Add" button (1), in the window that opens, select the file or folder you want to write (2), in the same window, click "Add" (3).

It is also easy to add by simply dragging and dropping them from the explorer (for example, drag the file from either My Computer or the convenient Total Commander program) onto the Nero workspace.

Do not forget to follow the scale at the bottom of the window, as you add files, it shows how much the disk will be full. In the image above, you can see that the project uses a regular 700MB disk, if you exceed this value, then can't write it down... I recommend reading the article "", in which you will familiarize yourself with the sizes of discs, formats, capacity, and find out which disc to choose for recording your project.
Did you add the wrong file by mistake? Don't worry, select it and click on the "Delete" button (or "Delete" on your keyboard), which is located immediately below the "Add" button. When all the files you need have been added, click "Next" in the lower right corner of the program.
In the next window, select your CD or DVD burner drive (1), assign a name to the disc (2), open additional settings (3), select the write speed (4), I recommend setting it to no more than 8x so that no errors occur. You can also check the box if you want to check the disk for errors after burning (5). The item "Allow adding files" (5) will allow you to add something to the disc without erasing the previously recorded files. I do not recommend using this item, as after these manipulations the disc may not work.

If you change your mind and want to write some other files to the disc, return with the "Back" button, if everything is in order, click the "Burn" button (6). Wait while the disc is being written (the speed of execution depends on the amount of MB of information).

Finally, you will see the following window:

Click "OK", then you can close the program window. When closed, you will see the following window:

If you record a project once, then there is no need to save it, so click "No".
Now you will say with confidence: I can burn disc withNero!
The process of "burning" discs in Nero is very simple and accessible even to a novice user - now you will see for yourself. Let's burn a disc with your favorite mp3 music in Nero. Free download it, fortunately, can be done by anyone.
Two steps away from the goal
First, insert a blank CD-R / RW or DVD-R / RW disc into the optical drive of your PC or laptop. You can immediately select the destination drive and give a name to the recordable disc. In our case, this is "Music".
The first is by using the + Add button, the second is by simply dragging and dropping files and folders into the Nero workspace. Pay attention to the bar at the bottom - it shows the maximum possible amount of data written to the disk and the current amount of files "thrown" into the program for further recording.
Before you start, check the write speed mode - minimum, safe, automatic or maximum - and you are ready to go. It remains to click "Record".
Other features of Nero
Also, Nero's program allows you to copy data from disk to disk. To do this, insert blank media of the above types into each drive. To the source drive, the drive from which the data will be copied, and to the destination drive, the destination drive for copying. In this case, the volume of such a disk should be at least equal to the amount of data copied to it. Ready? Then click "Copy" and have a coffee! Nero will do everything herself.
The developers have not forgotten about the "one-drive" users. For them, when copying, you first need to insert into the drive the disc from which you will copy, and click "Copy". Nero will create a temporary image that will be burned to the disc that you insert into the drive next.
In addition, as with other versions of Nero, you can create disc images in .nrg format. The recording scheme is the same: add the necessary files to the compilation field and select Image Recorder as the destination drive. Determine the folder to save the image and get a new image in .nrg format.
Nothing complicated
Burning discs with Nero is simple, as is the free program itself, called Nero Free or Nero StartSmart Essentials. This program is distributed free of charge and allows you to perform only basic operations of burning and copying discs. The program does not take up much disk space and does not boot the system.
Install Nero Free and understand how to use Nero, even a beginner will understand. Moreover, all the functionality of Nero Free is concentrated in the left column of the interface in the form of buttons for writing data and copying discs.
First there was Fire ...
In July 64 AD, ten of the fourteen quarters of ancient Rome burned with a bright flame. According to the legend, the initiator of the Great Fire - this is how history remembered this tragedy - was the emperor and ruler of Rome Nero himself. Not knowing compassion and brutally killing his mother, aunt, teacher and closest associates, he set fire to Rome in order to admire the extraordinary beauty of the city blazing with a fiery glow from the high Maecenas tower. The history of Ancient Rome has always been famous for "kind" people ...
Hello dear readers. Today we will talk about a question that interests many novice users, namely, how to burn a disc? I must say right away that there are a great many programs for burning CD and DVD discs. You can even burn a disc using standard Windows functionality. But in this article we will learn how to burn a disc in Nero Burning ROM. I consider it the best in terms of convenience and functionality. True, there is only one drawback - this program is paid.
So let's get started. The first step is to install Nero on your computer. The Nero package includes many programs for (for example, using), video, graphics, but we are only interested in Nero Burning ROM. Therefore, you can do a custom installation and install only this component. After installation, from the menu Start we launch our program for burning discs.
Burning a data disc
The first step is to learn how to burn an ordinary data disc. When you start Nero, the following window will appear:

In the drop-down menu on the top left, you need to choose which disc we are going to burn - DVD, CD or Blu-ray. Let's say we have a DVD.
Further, on the left side of the window, you need to indicate that we are writing exactly the data disc. To do this, select either DVD-ROM (UDF) or DVD-ROM (ISO). UDF and ISO are file system format specifications for storing files on optical media. The difference between UDF and ISO is that UDF allows you to record files larger than 2 GB, that is, there is no limitation on file size, as is the case with ISO.
In the tab Multisession I have an opportunity start multisession disc... This means that another time it will be possible to add some more files to this disk. If without multisession- then nothing else can be written to the disc.
The next tab is NeroDiscSpan available only for UDF projects with disabled multisession. This feature allows you to automatically distribute large files (over 4.7 GB when burning a DVD) across multiple discs (you can learn how to split large files into several parts using Winrar).
In the tab UDF (ISO) I recommend leaving the default values.
Tab Label allows you to set a name for the future disk. By default, the drive name is New.
Well, the last important tab for us is Recording... Here we set the write speed. The default is - Maximum, but we are not satisfied with this. I recommend setting the speed as low as possible. Thus, it is more likely that the disc will be written without errors and will be read normally on all possible media.

Now all the settings are set, you can proceed to the next stage. Push the button New... The working window of Nero Burning ROM will appear in front of us. This window is conventionally divided into two parts. On the left - the files on our disk (so far empty), and on the right - all the files that are on the local computer.

Now, the files that we want to write to disk, drag from the right side of the screen to the left, holding down the left mouse button. You can create folders on disk to somehow organize their storage.
I would like to draw your attention to the strip at the bottom of the screen. It displays the fullness of the disc. Let me remind you that for a regular DVD, the usable volume is somewhere around 4.5 GB. Therefore, pay close attention to this bar - as long as it is green, the disc can be recorded.
After the selection of files for recording is over, you can go directly to the recording. To do this, press the button Recording, check the settings again, and then click.

That's all, the program will complete the recording by itself and open the floppy drive with the ready-made disc.
 Skype free download Russian version Install Skype application
 How to recover a photo on Android after deleting it?
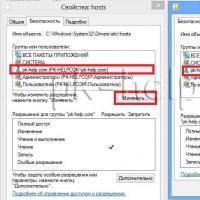 Original hosts for Windows operating systems What should be in a Windows 7 host
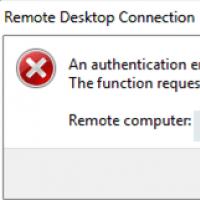 An authentication error has occurred
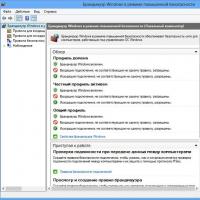 Open the following ports at the client's workstation
 How to hide all VKontakte friends in the new version?
 Hide friends on VKontakte