Accounting info. Accounting info 1s 8.3 initial setup of the program
The next topic that I am going to devote to several series of articles is working with the "1C: Enterprise 8" program, since recently fundamentally new configurations have appeared and users often contact me with questions regarding working with these products.
The complaints that one hears sound something like this: “I’m not comfortable when the menu is on the left”, “I don’t see which windows are open in my program”, “I cannot find ...” and so on.
But developers can't please everyone equally. What some users like, others take hostility. But developers can give users the ability to customize the interface for themselves. And in the case of Taxi, users got a choice that they had never had before.
The first thing I always do when starting to work with a new configuration is to activate the display of the "All functions" command. For newbies, this option is especially useful as it allows you to quickly find any configuration object. Document, journal, register, processing - whatever. For "1C: Salary and HR 3.0" (ZUP 3.0), this is all the more relevant, since this configuration is still being actively refined, and therefore it also happens that some functions are moved to another section after the next update. The command "All functions" allows you to access the desired object directly.
In order to make this command active, you need to go to the settings, and in the "Service" subsection, select the "Parameters" item.
In the window that opens, check the box "Display command" All functions "and accept the changes.
The activated command will appear at the very bottom of the settings.
My second mandatory step is to activate the open windows control panel, which can be disabled by default. To do this, go to View> Customize Panels.
The panel editor will open in front of us, in which we can customize the appearance to our needs.
To change the interface, just grab the desired element with the mouse and drag it to where you would like to see it. I take the Open Panel, which is currently not active at all, and drag it to the bottom of the interface. Now I can always see which windows I have open, as well as quickly switch between them.
This is quite enough for me. This is how I used to work. But you, perhaps, will be more accustomed if in the interface "Taxi" 1C 8.3 the section panel is at the top. Let's move it there and see what happens.

The accounting parameters are used to set the accounting settings in the program. In versions 8.3, 3.0.43.162 and the newest, almost all parameters are configured using special forms that are located in the section of the same name in the program settings on the "Administration" tab.
Setting up the chart of accounts in the 1C program can still be done from the setting of the same name on the "Main" menu tab in the "Chart of accounts" section.
Here you can enable or disable the subconto in the analytical views of the accounts. To go to changing the parameters, click on the link itself:
There is a possibility of setting:
Accounting for VAT amounts on purchased valuables - initially the default setting “By counterparties and invoices received” is indicated, cannot be disabled. The parameter is the manager of the subconto of accounting 19 account.
Inventory accounting - by default there is a predefined setting "By item", it cannot be disabled. If necessary, you can set "By lots", "By warehouses". Also, for warehouse accounting, you can specify "By quantity and amount" or only "By quantity". Settings for inventories accounts help to see the subconto "Parties" and "Warehouses".
Accounting of goods in retail - there is a predefined parameter "By warehouses", "By VAT rates", "By item" is also available. Determines the movement of the subconto on accounts 42.02 and 41.12.
Cash flow accounting - the main predefined parameter is "By current accounts". It is also possible to include accounting for cash flow items 50, 51, 52, 55, 57, on which the subconto “Cash flow items” appears.
Accounting for settlements with personnel - you can set "Consolidated" or "For each employee". Determines the movement of the subconto for accounts 70, 76.04, 97.01.
Cost accounting can be set to "By department" or "By entire organization". It is possible to set up a sub-account for BU accounts 20, 23, 25, 26.
Salary settings can also be found on the "Salary and personnel" tab, then the "References and settings" section.
General settings - indicate "In this program" or "In external" accounting is kept.
The procedure for accounting for salaries after clicking on this link we find ourselves in the form "Settings for accounting for salaries":
The form has several tabs:
Salary;
Taxes and contributions with payroll;
Vacation reserves;
Territorial conditions.
It is necessary to carefully fill in all the information in accordance with the regulations of the enterprise according to which the records are kept.
Salary calculation - when accounting for an organization with a staff of no more than 60 people, the program can take into account: vacations, sick leave certificates and executive documents, the inclusion occurs by checking the corresponding field. It is possible to automatically configure the recalculation of the "Payroll" document, go to the "Accruals" and "Deductions" directories, which can be viewed or filled in.
- through the links you can go to the directories "Methods of accounting for salaries" and "Cost items for insurance premiums."Personnel accounting - either "Full" (the necessary personnel documents are formed) or "Simplified" (without the formation of documents, an employee card is used to print the order).
Classifiers - the parameters for calculating insurance premiums are set, the type of income and deduction for personal income tax is also indicated.
"Buyers' Payment Terms" and "Suppliers Payments Deadlines" - sets the default timeframes, unless otherwise indicated.
Printing of articles - printing forms of documents are configured.
To set the Income tax parameter, go to the References menu tab, then the Taxes section:
In 1C programs of early configurations, setting accounting parameters is available on the "Main" menu tab, the "Settings" section, the "Accounting parameters" item.
After the "1C: Accounting 8" program is installed on the computer, it is necessary to correctly configure 1C before use. This requires a certain amount of time to identify the checkboxes in the necessary places. How you set everything up exactly in the 1C: Accounting 8 program depends on how, in the future, the accounting at the enterprise will be. Setting up the program should be taken seriously and set all parameters in accordance with the Accounting policy block in 1C.
Setting up accounting parameters in "1C: Accounting", the first step - "Setting up a chart of accounts"
To configure, we find 1C on the desktop, in the "Administration" section, select the "Accounting parameters" block, there are four groups in it:
- Setting up a chart of accounts;
- Printing of articles;
- Buyers' payment terms;
- Terms of payment to suppliers;
- Salary settings;
- The type of target prices.
When setting the parameters in the program in the "Settings" section, the sub-account is selected in the accounting accounts, such as:
- Accounting for VAT amounts on purchased valuables;
- Cash flow accounting;
- Inventory accounting;
- Accounting for settlements with personnel;
- Accounting for retail goods;
- Cost accounting.

In the first paragraph, "Accounting for VAT amounts on purchased valuables", sub-kontos are indicated, which:
- Can't be changed;
- You can change (add).
If the checkbox cannot be unchecked in the parameters, it indicates that this position cannot be changed in this configuration. But there are parameters that have a window on the left side, you can add or uncheck the box in it - this indicates that this parameter is subject to change, but you must remember that it is set in accordance with the accounting policy section in 1C.
For example: in the item "Accounting for VAT amounts for purchased valuables" there are positions that cannot be changed - these are for counterparties and invoices received. And there is an item that can be added by putting a tick in it - this is "By accounting methods."
Remember that if you entered documents into the 1C program before defining the accounting parameters, and then changed or added a parameter, a message with the following content will appear “Changing this setting may lead to data loss”. This message will be displayed if this parameter was enabled in the previously entered documents into the 1C program. After such a message, it is advisable to make a backup copy of the "1C: Accounting 8" edition 3 "Taxi" interface to compare the data after changing the parameter.

Sub-account data is used mainly in the formation of reports (for example, the balance sheet of the account, account analysis, card account, and others).
Setting up accounting parameters in "1C: Accounting", the second step - "Printing articles"
In this group, you need to set the parameters for specifying additional data on the name in the printed form of the document.
Additional data is reflected in the printed form of the document, for example, in the invoice in the form of bargaining-12, separately from the name, a column is indicated with:
- Article number;
- By code.
If you do not additionally check the boxes, then in the printed form of documents, these columns will be empty.

Setting up accounting parameters in "1C: Accounting", the third step - "Terms of payment by buyers"
Buyers' payment terms are required to:
- The management of the enterprise, for taking measures to eliminate overdue debts;
- Reflection of data in the reporting (for example, "Explanatory note to the balance sheet").
This group sets the period at which the buyers' debt is considered overdue, and it is necessary to take into account the terms specified in the concluded contracts.
If the overdue debt is not repaid within 45 days, then it is considered doubtful and it is necessary to create a reserve for doubtful debts for it, provided that this item is indicated in the accounting policy block in 1C.

Setting up accounting parameters in "1C: Accounting", the fourth step - "Terms of payment to suppliers"
Supplier payment dates are also needed to:
- The management of the enterprise, to resolve issues related to debt repayment;
- Reflection of data in the reporting (for example, "Explanatory note to the balance sheet".
This group sets the term for payment to suppliers, after the specified period the debt is considered overdue, provided that another payment term is not specified in the contract.

Setting up accounting parameters in "1C: Accounting", the fifth step - "Setting up salary"
At the very beginning, when setting parameters for payroll and personnel accounting, it is necessary to determine the main parameter - this is where payroll will be carried out in an external program or in this program.
When setting the sign of accrual in the external program, you must additionally specify such parameters as:
- The procedure for accounting for salaries;
- Wage accounting methods;
- Insurance premium cost items.

When establishing the sign of payroll in this program, it is necessary to indicate, in addition to the above, such parameters as:
- Payroll preparation:
- Automatically recalculate the document "Payroll";
- Keep records of sick leave, vacations and executive documents.
- Accruals (list of types);
- Retentions (list of types);
- Personnel accounting (abbreviated or full);
- Classifiers (insurance premiums, personal income tax).
Editing parameters such as:
- Personal income tax codes;
- Amounts and types of personal income tax deductions;
- Sizes of rates of insurance premiums;
- Other
it is not installed in the 1C program, the data on them are changed in accordance with the current legislation and are loaded into the database when the configuration is updated.

Setting up accounting parameters in "1C: Accounting", the sixth step - "Type of planned prices"
The target price is indicated, which will be used in production documents:
- Purchasing;
- Wholesale;
- Retail.

Setting "1C: Accounting", the seventh step - in the menu "Main"
Setting up 1C enterprise, in the "Main" menu, is divided into five groups:
- Functionality;
- Organizations;
- Accounting policy;
- Chart of accounts;
- Personal settings.
If the company will be engaged in several or one type of activity, then it will be more convenient for work to limit the functionality.
If the enterprise is going to develop and include new types of activities, then it is better to include the full functionality of the program, so as not to look for the disabled block of documents in the future.

The accounting policy of the organization in 1C is located in the "Setting up 1C" section, first of all it is set:
- Application period;
- Taxation system (general or simplified).
When choosing the taxation system of the enterprise "General" tabs open for filling in:
- Income tax;
- UTII;
- Stocks;
- Expenses;
- Reserves;
- Bank and cash desk.

On each tab, the parameters are set that are in effect at the enterprise in accordance with the types of activity and the specifics of the enterprise.
When choosing the "Simplified" taxation system, tabs open for filling in:
- UTII;
- Stocks;
- Expenses;
- Reserves;
- Bank and cash desk.

Errors found later when working in the "1C: Accounting 8" program will indicate that the parameters are configured and defined incorrectly.
2016-12-01T13: 37: 17 + 00: 00Correct configuration of the list of users and their access rights to the 1C: Accounting 8.3 (revision 3.0) database is necessary for any number of people working with the program. Even if only you are working with it!
This setting allows you to further answer questions such as "Who made certain changes to the database", "How to give the database view-only access for the reviewer", "Who allowed the assistant to change the accounting policy settings" and the like.
In the third edition, such a setting, in my opinion, has become simpler and more intuitive. Today I will tell you how to better configure users and their rights. I will try to consider the most general case.
So, we will configure the following users:
- Administrator : a user who has full rights to the base and has no restrictions. You do not need to use this user for your daily work. The administrator password should be given to programmers and administrators who set up or update the database for us. Since only they will work under this user, in the future we will always be able to separate their changes in the database from the work of other users in the registration log. This is useful in case of "debriefing".
- Chief Accountant : a user who has rights not less than the administrator, but is an independent role with its own password. You yourself will work under this user.
- Accountant: If you have assistants or other accountants in your subordination, then this user is the right one for them. What restrictions does this role impose:
- Prohibition on changing accounting parameters.
- Prohibition on changing accounting policies.
- Prohibition on changing the chart of accounts.
- Prohibition of editing the list of users.
- Prohibition on setting up item accounting accounts.
- A ban on deleting items marked for deletion.
- Prohibition to change the date of prohibition of data change.
- Reviewer : this user will only have the rights to view the database. He will not be able to change anything in it.
1. Go to the "Administration" section and select the "Users and rights settings" item ():
2. In the panel that opens, select the "Users" item:

3. By default, the "Administrator" user should already be in this list. Double click on it to open its settings.

4. Make the settings as shown in the figure below. Think of the password yourself - you need to repeat it two times. I draw your attention to the fact that each of the users must have their own password. It remains to click "Save and Close". Ready!

Chief Accountant


4. In the rights settings window, select the checkboxes next to the "Administrator" and "Chief Accountant" items. It remains to press the button "Write". Ready!

Accountant
1. Return to the list of users and click the New button on the toolbar.
2. A window with a new user will open. Specify the settings as shown below, just create your own password.

4. In the rights settings window, select the checkboxes next to the "Accountant" item. It remains to press the button "Write". Ready!

Reviewer
1. Return to the list of users and click the New button on the toolbar.
2. A window with a new user will open. Specify the settings as shown below, just create your own password.

After installing a new software product, the primary task is to correctly configure it. Setting the program 1C 8.3 and 8.2 is an important component in the automation of management and accounting, and is also necessary for any configuration. The main goals of setting up a 1C enterprise- this is minimizing the likelihood of errors in the future operation of the system, the convenience of the user, as well as advising the user on the correct use of the program in order to minimize possible user errors in the future.
1C setting can be conditionally divided into several types:
- General setup of the 1C enterprise (accounting policy, general settings, setting the operating mode)
- Setting up a computer (server) to work with the database
- Customizing the user interface in the program
- Setting up user roles in 1C (user rights)
- Setting up synchronization between databases (typical and non-typical exchange between configurations)
Setting up an enterprise 1C 8.2 and 8.3 according to your requirements
If you are just starting to work with the program, or you have recently been given a new configuration, then the first task that is set before the user is to do this correct setting of 1C 8.2 and 1C 8.3 of the enterprise... Our experts will help you effectively set up 1C, they will explain everything and clearly show with examples! This setting includes:
- Filling out all the necessary reference books
- Filling in the accounting policy of the enterprise
- Filling in the required constants
- Configuring general program settings
Our company keeps up with the times, so we try to work with versions of modern programs, today these are platforms 1C version 8.2 and 8.3... If your version of the program is lower than 8.2, then we strongly recommend that you first update the program to version 8.2 or 8.3, and then set up 1C .
Personal configuration of the 1C server for your business

The database can work in two main modes, this is the file mode of the database, and the client-server mode. We will not consider the pros and cons of both options here, since this issue deserves a separate article, we will focus on the client-server option. The success and quality of this method directly depends on the correct setting of the 1C server... Our specialists carry out competent and correct server configuration, which is optimal for the convenience of users with the system. Now let's talk about what you will get in cooperation with us and ordering 1C server settings from us:
- Server assembly according to customer requirements
- Installing the Server in a Rack and Connecting the Necessary Hardware
- Server installation on Windows and Unix operating systems
- Setting up routine tasks performed on the 1C server
- Backing up databases from the server
- Configuring Load Balanced Failover Servers
- Server audit
- Server administration
- Diagnostics of server hardware and the server itself
Besides 1C server settings, we are also engaged in setting up and installing user workstations for working with 1C, this includes:
- Computer diagnostics
- Fix windows errors and clean the registry
- Virus removal
- Network configuration
- Replacing computer components
We always try to do our job as efficiently as possible, to optimize all business processes so that people work less and work is done faster and more comfortably.
Individual customization of the user interface in 1C for each employee
Each employee of the company has certain habits, these habits are manifested not only in life, but also when working with the 1C program. A vivid example from life, it is convenient for the administrator Sergey when the program interface is extended with many different parameters and settings, and for the manager Elena, on the contrary, it is more convenient for the interface to display a minimum of information. We comply with the wishes of each employee and we carry out individual customization of the user interface in 1C according to the personal requirements of each employee of the company.
Our employees conduct individual courses and training in the 1C program. In the course of training, you will receive a lot of new and useful knowledge, learn how to solve complex problems, your working efficiency will grow up to 78%!
Setting up user roles (access rights) in 1C

The larger your organization, the more users work in your program. Each employee has clear responsibilities and it would not be bad for some employees to have large access rights in 1C, than others. Let's look at an example from real life, storekeeper Evgeny should see only warehouse documents and background information that is necessary to work with the warehouse, but not the accounting documents of the chief accountant Tatyana Ivanovna! That is why in such a situation it is advisable configure roles (access rights) 1C so that each user sees only what he is entitled to. Our experts will FREE OF CHARGE identify all your needs and draw up a technical assignment, which will contain clear instructions on what needs to be done. We guarantee that setting up roles (access rights) in 1C will be executed exactly in accordance with the terms of reference, which means that you will get exactly the result you wanted!
Setting up data synchronization in 1C using the example of the Accounting and UT configuration

If you have several different configurations, then you most likely need to set up data exchange between these configurations. The program already contains some typical data exchanges, there is, for example, a typical 1C data synchronization template between the configurations "Trade Management" and "Enterprise Accounting" and many other templates. Of course, in order for this mechanism to work correctly, you need to do setting up data synchronization in 1C... After completing this setting, you can exchange documents and reference information automatically without your participation. The program will do everything for you! Our experts will identify all your requirements and set up data synchronization in 1C as efficiently and quickly as possible!
Full customization of the 1C base "turnkey"

Our company is engaged in full customization of 1C "turnkey", this includes a full range of all services for setting up the 1C software product:
- Database backup setup
- Setting up automatic database backup
- Configuring loading of various classifiers and reference books
- Setting up printed forms of documents
- Setting up a typical exchange between configurations
- Setting up data exchange with your site on "Bitrix"
- Interface customization
- Setting up user roles (access rights)
- And much more...
I order this service You save not only your time, but also MONEY! After all, we have special conditions for customers who ordered 1C "turnkey" setting... The specialists of our company are ready to help you at any time and in any situation! If desired, we will also make the necessary changes to your database, which will shorten your working hours and increase your income, and in the meantime you can spend your saved time on any other business!
Favorable offer for remote configuration of 1C
Quite often it happens that the client is far from us and to get to him it is necessary to spend a lot of time, such a situation is not beneficial to both the client and our company. In this regard, for those who are used to saving their time and money, we make a unique offer, the price per hour of work remotely REDUCED BY 15%! Specialists of our company carry out remote configuration of 1C, on more favorable terms in comparison with the departure of a specialist.

 Skype free download Russian version Install Skype application
 How to recover a photo on Android after deleting it?
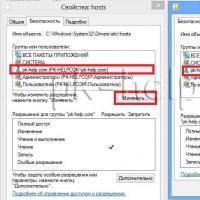 Original hosts for Windows operating systems What should be in a Windows 7 host
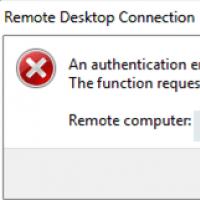 An authentication error has occurred
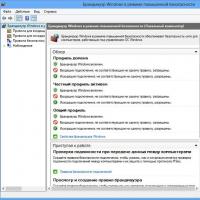 Open the following ports at the client's workstation
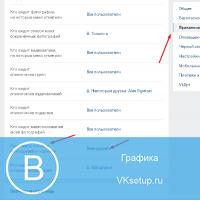 How to hide all VKontakte friends in the new version?
 Hide friends on VKontakte