DMDE flash drive recovery. Restore the remote partition using the DMDE program for Windows. Restore remote section
- Hello Admin! I ask you, explain to me how to recover remote Disc
(D :) On the laptop, the DMDE program, the fact is that I had two sections on the laptop (C :) and (D :) and an hour ago, I accidentally deleted the disk (D :) with all my data, after that I immediately turned off the laptop . It is very good that I still have a simple computer, now I am writing with him.
Made a call to the familiar computer, he advised me to remove from a laptop hDD, then connect this hard disk through the adapter to another computer with the installed free program DMDE, then scan this program with my hard disk with remote partitions and maybe this program remote disk will restore.
But first, I have no idea how to remove a hard disk even on a simple computer, not that on a laptop, and secondly, I also work on a disk (C :) why I can't install DMDE and scan the part hard diskwhich was the section (D :)? Deniska. - Admins, question! I just brought me a screw, where all sections were demolished completely, and there were three (C :), (F :), (G :) and the first operating system was installed on the first, there were data files on other sections. Launched the DMDE program and it found almost everything files, in short, they can be restored, but the developers of DMDE so all the cunning arranged that free version files are restored one by one, inconvenient in short, it will be necessary to jump on the clave until the morning and I thought to make the move by a horse, just take and restore all sections in the time, because the program can not, but I will not find the instruction anywhere, but I'm afraid to experiment anywhere Suddenly, the data that almost already restored will disappear, I will not suffer this damn. I asked this question in the comments, but you don't cope, you want to write an article to write, well, write too faster. I know you have an article about TestDisk, in this program you can also restore the sections for free, but there is arskaya command lineI do not like her damn, because blind half. In short, cut out.
With respect, blind drink.
How to restore remote disk
1) How to restore a remote section The hard disk of the DMDE program, on a laptop that has a new standard for hosting tables of GUID sections (GPT).
2) How to restore several remote sections at once Hard disk DMDE program on a simple computer.
Note: If you want, we also have such an article, go on the link and read. There is also an article about the undoubtedly reader who wrote the first letter can be understood, because you agree, it is quite difficult to disassemble the laptop, to get a hard disk, connect it to another computer through a special device and restore the remote partition. And how to be? - You ask.To understand how to restore the remote DMDE disk, take my long-suffering laptop (which I copied for several years) and delete a disk on it (D :) Together with all my files! If you suddenly restore the DMDE program, you will restore it another program.
Friends, warned you from such experiments, just read the article and take a note if you accidentally delete the section of the hard disk, then it can be restored in this way.
So, we go to the "Disk Management" of my laptop and see several service sections without the letter, it is impossible to touch them. Next we see the disk (C :) with installed windows 8 and unsuspecting the disk (D :), with files, remove it,
We see a warning "Tom removal destroys all the data on this volume." Yes.

The disk is removed, now it is an unallocated space.

We go to the DMDE website,

Download it and run. In this window, select the only rigid disk of the laptop and mark the item "Physical devices" and approx.

There is a search for remote sections on our laptop.

In the window that appears, you can see existing and remote disks of our laptop, file system, the volume of sections, indicators (showing the presence of the appropriate structure), the first and last sectors. In order not to repeat, you can familiarize yourself with the detailed help located on the official website. dMDE programs.
http://dmde.ru/manual/partitions.html#addpartition
In our case, everything is relatively simple and our remote section (D :) can be seen by the unarmed look, the name, the volume, file system, the same remote disk is marked with favorable BCF indicators. We can not be wrong in this window, since if we choose a recovery partition incorrectly, then at best the DMDE will not restore it, and in the worst it will restore, but then we will get an unnecessary section and chances of restoration necessary section Fall. We highlight it with the left mouse and click on the "Paste" button.

In this window, we must choose the type of section, as the hard disk on our laptop has newest Standard GUID (GPT) Choose it and click OK.


Before the program restores a remote partition, save the data to roll back to the file, save this file on a flash drive or a different hard disk. Yes.

Save the file.

That's all, our disk is restored.


Our disk appears from non-existence (D :), but for some reason without a letter.

Click on it with the right mouse and choose "change the letter of the disk or the path to the disk ..."

Add.

Select the letter of the disk (D :) and click OK.

Now our disk (D :) is exactly in place and all the files are in it, too.


For example, take my computer. Note, in my system block two hard disk, respectively, two hard disks are also displayed in "drives". On the second sAMSUNG disk (Volume 120 GB) There are three sections: the first service section of 100 MB, the second section with the Windows 7 operating system and the third partition with personal files.

I delete all three sections. All sections are not, now the space of the second hard drive looks like "unallocated space". Let's try to restore them.

Run the DMDE program, mark the "Physical Devices" item and highlight the second hard disk with the right mouse, then click OK.

The DMDE program is looking for remote sections.

In the window that appears, you need to be attentive. As we can see the program found 9 sections, of which three sections that we need to restore, the rest of the sections existed on this hard disk for a long time and we are not needed.
The very first partition, among the program found, is our hidden section without a letter of 100 MB, restore it, highlight it with the left mouse and click the "Paste" button.

All three remote sections were the main, the program determined it automatically, click OK.

Apply.

Save the data file to roll back, click Yes.

All, the first section is restored.

We go to "Drive Management" and select "Action" "Update",

Our section appears, you do not assign the letter, as it did not have it, this section is service and hidden.
IMPORTANT: Friends, let us remind you that we recover the partitions on the hard disk, where the Windows 7 operating system was installed. The section (without a letter) was installed, and so that the operating system is loaded it should be "active", click on it with the right mouse and choose In the menu "Make the section Active" command


We restore the second section.
By volume, the second found section is suitable, having the BCF indicators, and highlight it with the left mouse and click on the "Paste" button


Apply.


The second section is restored. We go to "Disk Management" Select "Action" and "Update".

The disk appears (f :), but also without a letter. We click on it with the right mouse and choose to change the letter of the disk or the path to the disk ...

Add.

Select the letter of the disk (F :) and click OK.

Now our disk (F :) is in place and all the Windows 7 operating system files.


We restore the third section
In terms of volume, the name, fits the penultimate found section, highlight it with the left mouse and click on the "Paste" button

All our three sections were the main, click OK.

Apply.

We save data to a rollback file. Yes.

The third section is restored.

We go to "Disk Management" Select "Action" and "Update".

The disk appears (G :), but without a letter. We click on it with the right mouse and choose to change the letter of the disk or the path to the disk ...

Add.

Select the letter of the disk (G :) and click OK.

Now our disk (G :) is in place and all the files are on it until removal too.
I will be sincerely glad if someone helped!
The DMDE program is designed to recover files stored on memory cards, Flash drives, etc. In this article, consider how to restore data after formatting using DMDE.
- To use the utility recommended purchase licensed key. The free version contains a number of restrictions, although they cannot be called substantial.
2. Before starting work, it is necessary to consider that it is necessary to restore the data on another drive.
3. Log files are recommended to maintain that in the future not to lose time on the execution of a similar task. Next, you can reconstruct or repeat the scan of the current file system. The second option is useful if you want to obtain more detailed results, but it requires more time in comparison with the first scanning procedure. Reconstruction in the found section is not recommended, since it does not give proper effect - the data turn out to be inevitably damaged. Results Show files found by signatures and folder Root. It will appear the data to be recovered.
4. DMDE. Does not give an ideal result, especially if you want to remove the calculation of the volumes to speed up the scanning process. However, this software It often helps in cases where other utilities cannot restore data after formatting. In the free version you can restore the files one. Therefore, in some cases will have to repeat the scanning procedure several times.
Video: Data recovery after formatting in DMDE
There are many programs to restore remote files or partitions on the disk. Some are distinguished by an attractive interface, but cannot cope with the damaged file system. Other utilities restore all data by saving a bunch of file debris on the computer. The DMDE program is deprived of both drawbacks: with its help you can quickly return the lost data even after formatting, without tormenting with manual dissemination of file fragments.
Loading and installation
DMDE does not require installation. The only limitation in the free version - files can be restored only one by one. You can download the utility on the official website of the developers DMDE.ru. After launching the DMDE.EXE file, a language selection window will appear.
Then you will be invited to agree with the terms of the license agreement - put the appropriate mark and click "Accept". The main program window will start - you can now understand how to use DMDE.
Work with utility
The instruction is not attached to the DMDE program, although for most users it would be by the way - not every day you have to restore remote files or partitions on the disk.
The first step is the selection of the carrier from which the data was deleted. Mark the section "Phys. Devices "and select the drive from which you want to restore the information. Look for disc By volume and title. 
After clicking "OK", the selection search will be launched. Upon completion of the operation, a window appears with detected partitions on the selected disk. You need to select the section from which the data was deleted, and click the "Open Tom" button. 
To display a list of detected data, click on "All Found + Reconstruction" twice. Specify the parameters of the virtual reconstruction and click "OK". 
All files detected on the disk will appear on the right. You need to find the necessary data, mark them with checklocks, click the right mouse button and select the "Restore Object" item. 
The last stage is the choice of folder into which the detected data will be saved. This directory should not be on the disk from which you have restored information, so choose any other media or partition.
Advanced Search
If fast recovery The necessary files are not found due to damage to the file system or formatting, try running the advanced search.

Pay attention to the "Compliance" column. You will need to open the volume that has more matches. After the advanced search is completed, a familiar window will appear, where you need to click on the "All Found + Reconstruction" item and run the virtual reconstruction of the files.
If the MFT read error appears during the reconstruction, click OK. Data recovery will continue, after which you will see all the files found.
Sometimes the DMDE "Cops" is too deep, issuing information during the extended search, remote several months ago; Files, erased recently, are not detected. If you encounter such a situation, try to run in-depth scanning again - usually it helps.
Restore remote section
One more comfortable feature DMDE - Restore remote sections. If, as a result of an error or failure, one of the sections turned into an unbalanced area, you can quickly correct this failure.

The type of partition will be determined automatically. You will only have to click "OK", and then apply the changes made. The program will suggest saving a file to roll back - select the folder where it can be put.
DMDE (DM Disk Editor and Data Recovery Software) - powerful professional utility that performs search, edit and restore information on the most common types file Systems Fat and NTFS.


Allows you to work with disks inaccessible to the Windows operating system. DMDE has a free version that has the same basic functionality as paid similar software versions.
Since it has more extensive settings than other known analogues, as well as the ability to edit, is suitable for advanced computer users.
Features free version:
- disk editor;
- section management;
- work with disks;
- rAID control;
- restore information (limited to 4 thousand documents from the current directory with one command).
DMDE portable and will not require installation to the user's computer. You just need to download, unpack and run it. An interface will appear in response to select the language used. After it is proposed to get acquainted and agree with the terms of the license. You must put a tick in a marked place and click "Accept".
The main application window will start, to recover data in which it is necessary to mark the item "Physical devices". Next, you need to select the device with which you have to work. After you need to select the section on which the required lost documents are located, and click the "Open Tom" button. In the left part of the window we find the string all found + reconstruction and double-clicking on this line launch the search for remote data. You must specify the parameters of the virtual reconstruction and click "OK".
Download DMDE It is possible in the assembly of the Russian version from the official site on the link below for operating systems Windows 10, 8 and 7.
Since in using the free version of DMDE, restore the entire folder with files at once or several folders will not work. To restore information, you will have to enter each folder and celebrate each file "Bird" separately, you should not forget about 4000 documents. At the end of the choice, you click the right key of the mouse and select the submenu and select the "Restore Files" item. In the window that appears, we are determined with the storage location for recovered documents and wait for the end of the process using the indicator scale that appears.
Thanks to a special DMDE analysis method, files are able to restore files and in difficult cases, such as partial overwriting on top necessary information, formatting, etc., and in simple - quickly and without in-depth search. DMDE is able to work with disk images, and view, edit and move through various disk structures on a recoverable data media.
Since the program has a lot of functionality that has not been calculated on an ordinary user, with the difficulties that have arisen better appeal to the instructions, the benefit of it in Russian. The crew of the program is supported by Windows 7, 8 and 10. The latter was the Russian programmer Dmitry Sidorov.
Hello everyone in this video, let's restore the data from the formatted flash drive in the DMDE program, the program is paid, but the restrictions of the free version are not so significant that is, most of your video documents can be restored and in the free version of the license Download the DMDE program from the official DMDE site. EN In this and in the other video recovery videos, the same flash drive in FAT32 format containing 50 different photo files, video and others that will be formatted from FAT32 format to NTFS after which an attempt to restore data I have already downloaded DMDE.EXE The program does not require installation on a computer simply unpack the archive and start opening this window Here you select the physical devices and the drive from which you want to restore the data after formatting after deleting or after the remote file system is possible Section and so on, click OK and first of all we see the next window here you can see not as I have a specific one section allocated by the usual color, but a translucent section. This suggests that this is some kind of lost recently remote partition that can be restored immediately by clicking the Restore button which will be here and if the remote section is lit. it will be labeled with a red cross, you can also quickly restore it without performing a full scan and first opening looking at what There are your files and after that restoring right to the same drive from which it was lost. In my case, such sections are not visible so I choose the full scan. With full scanning, choose preferably the physical device itself, that is, in my case Drive 2 This is my flash drive Press the full scan Here you select the scan settings In my case, I know that my files were stored on the FAT32 section so NTFS RAW Recommend to leave it allows you to search for files by type That is, the program performs an additional search by file types Also as part of this video, I will take off these marks to speed up the video recording because without calculating the volumes, scanning is much faster than the result is not too different and reluctant just three hours write video. Click Scan and wait as a result. We see that he found a single basic result for FAT file tables if you suddenly find it, it is advisable to pay attention first to them found files on JPEG and PSD singing and PSD FAT file system If you have found the main results, you choose the section there that probably corresponds to the partition to your lost remote, formatted in my case, this is therefore selecting Section 1 From this list clicksting open volume. It offers you to save the scanning log In order to continue it can not be retelling and continuing the opening of the volumes and recommend that you recommend saving the text log file. Here we leave the default reconstruction. You can select the current file system to actualize the results at the end of the scan. Pay attention to the panel on the left. Here the root folder indicates the root of that partition that was found. Please note whether there is something in the root of something from what you were looking for that is, for example folder, the name here in this case is not restored from the folder and see the set of some JPEG files in my case are photos that were really lost something additional from what was on the flash drive as we did not see if we need to restore these files then we Follow with one of the limitations of the free version of the DMDE Restriction This: You can restore only the files that are in the right panel of the files, not folder, that is, for example, we need to restore all these jPEG files To do this, we enter as follows. Choose the left folder that contains all these files, the right click to restore the object and select the files in the current panel that is, only files in the current panel can be restored. Here you specify the path where they need to be kept clicking OK. As a result, we look at what we did. As you can see there is a set of files My photos But at the same time, pay the attention of the files I had much more than this set of files that was found in this section. In the left pane, we can also look into the RAW section where the files are built by type and see what he found thirty-two graphic files in fact, and restore them in the same way. Unfortunately, file names are not restored. Nevertheless, the restoration itself will work. Now a second, I will delete the files that he already found and restore the files in the current panel in the same way and restore its JPEG from the RAW folder and also look at which this time there are 31 file. Checking here they are all in place plus additional files appeared that is, pictures with robots in addition to photos from the camera. And so on the results. According to the results found one photo Photoshop Of the two who were on the flash drive found 31 jPG file Of the 35 which were on a flash drive, with a strange way yesterday, when I tested the same thing on a completely different flash drive, but with the same contents and in the same formatting, he found two more video files and also restored them, and the same parameters were used. I do not know what it is connected with. Here in general, it is still back to the limitations of the free version: it allows you to restore up to 4,000 files from the right pane. That is, if they are no longer able to restore them. In any case, this is what the official certificate I did not try myself. In general, the program works and high enough, the reviews are exceptionally positive, and I showed enough such basic things in fact much more opportunities. That's all, thanks for your attention. Good luck!
 Lighting devices based on alternating current LEDs find their niche and may come out beyond its limits.
 Requirements and rates for cable laying in Earth Scope of application, Definitions
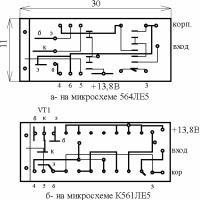 Automobile stroboscope from laser pointer
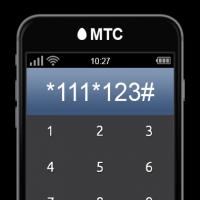 Order 20 UAH to the account. How to Borrow on MTS. Additional information on the service
 How to check the account replenishment
 How to get a loan on tele2?
 Responsiveness SSD on a miniature board What SSD Drive Buy