Restoring R Studio How to use. Data recovery using R-Studio. Video: R-Studio - Restore Remote Files
Many PC users have one and the same problem with time - they include their computer and see that it does not boot. One thing happens only once, others have two or more. The hardware part of the computer works properly and the operating system is possible to recover from the system recovery disk. But all the messages arising from this tell the user that this can lead to a complete loss of its data - family photos, films, musical collections, important financial documents.
Yes, this situation is indeed quite real. However, before this happens, you can use the boot disk (CD / DVD, USB or another removable disk) containing a tool for recovering files.
R-STUDIO EMERGENCY is the best solution in such situations. Consider how this utility allows you to save the user files over which the threat of loss.
Let's study the step-by-step data recovery procedure using R-Studio Emergency on a typical example of a portable computer of the following configuration: hDD 100 GB consisting of two logical disks: C: (system, NTFS file system, System label) and D: (FAT32 file system, DATA label). In this case, the system disk is damaged, and the computer does not load.
Check hard disk
The goal is to identify possible hard disk hardware faults. The following symptoms of hard disk damage are possible:
- Hard disk is not recognized operating system or recognized under any atypical name.
- The hard disk operation is accompanied by atypical sounds, click, it works very slowly.
- The hard disk constantly appear faulty sectors.
- Hard Status Assessment Programs disc Smart A messages about significant malfunctions of its hardware are issued.
Attention! If you think that your computer's hard disk is defective, then use the R-Studio Emergency utility only to create its image. Do not undertake any actions with your disk! Do not attempt to run the scanning or file recovery process. Do not attempt to use any other data recovery programs. Remember that any incorrect actions with such a disk will cause even more damage to the data. It is best to use the services of the Data Recovery Lab specialists, otherwise you risk at best to incur more large financial costs, and at worst - finally lose your files. Take the disc to those specialists: they have special equipment and, most importantly, the required level of knowledge to work with such discs.
If hard disk hardware malfunctions was not detected, then you can go to the process of data recovery.
Preparation for data recovery
To recover data, you will need:
1. A computer connected to the Internet. It is necessary to create a R-Studio Emergency boot device and getting an activation key to register R-Studio Emergency. If this computer is in one local network with damaged, then its hard disk can be used to store recovered files. Below will be explained how it can be done.
2. Place for storing recovered files and other information (disk images, scanning information, etc.): For this you can use:
- Format USB flash drive - best choiceIf the size of this disk is sufficient to store recovered files.
- External USB hard drive formatted in NTFS or EXT2 / 3FS.
Note:
a. Hard disk NTFS Must be appropriately extracted from a computer from a Windows OS via a safe removal of device panel and disks icon, and not just disconnected from the computer. If it was not fulfilled, then in R-Studio Emergency this disc It will be defined as read-only reading. In this case, you should once again connect it to a Windows computer and remove it accordingly through the above taskbar icon.
Also, a computer that does not have Windows installed can be determined as read-only or not read files on these disks.
b. For EXT2 / 3FS hard disk, some additional file readers are needed if it is connected to a computer with a different Linux OS (for example, a Windows or Mac computer). - . Below we will explain how to connect a network drive this computer In R-Studio Emergency.
And always remember the most important rule: Never save Restored files / folders to the original disk !!! Otherwise, you can get unpredictable results and fully lose your data.
3. If you have already purchased R-Studio, then order information (order ID, e-mail, R-Studio registration key, etc.). You will find this information in sent after purchasing a product to your email email.
However, the chances of recovering files using R-Studio Emergency can be assessed in the demonstration version of the program, before purchasing it. In this mode it is possible to check any functionality of the utility (including erasing data from the disk or partition), with the exception of the network and save the recovered files. It is also possible to view the contents of the files to evaluate the chance of recovery (using the built-in file viewing module).
Creating a boot device R-STUDIO EMERGENCY
If your computer has a recordable CD / DVD drive, you can load directly from the R-TT site ISO image R-Studio Emergency for users of Macintosh, Unix, Linux and Windows (Intel compatible computers) and create a boot disk using any program iSO records Image on the CD / DVD disk.
Windows users can also use the R-Studio Emergency Startup Media Creator utility. It is used to create such boot devices such as CD / DVD discs, formatted in FAT / FAT32 removable disks (including USB flash drives) or a floss kit. A detailed description of this process can be found in the R-Studio On-Line Help :.
The necessary files can be downloaded either from the registered user console or CO.
Loading a computer using the boot device R-Studio Emergency
Check that the R-Studio Emergency device is installed bootable in your computer's BIOS settings (more information can be found in the computer documentation). Most likely, the computer will automatically boot from the disk located in the CD / DVD drive of your computer.
After that, turn on the computer. On the computer screen you will see the Startup Options interface
Select R-Studio Emergency Gui GUI (Graphic Mode) to run R-Studio Emergency in graphic mode. In this mode, R-STUDIO EMERGENCY has the same functionality as R-Studio, with the exception of some restrictions when viewing graphic files. Almost all controls in R-Studio Emergency are similar to R-Studio controls. So if any questions and misunderstandings you can always contact.
Select R-Studio Emergency GUI TUI (Text Mode) if you have any problems when you start R-Studio Emergency in graphic mode. In this mode, R-STUDIO EMERGENCY also has a graphical interface, but it consists of alphanumeric characters and uses standard graphic modes supported by all video cards. This mode has more limited functionality, but also allows you to perform most of the data recovery operations, the mouse is also supported in this mode. In TUI mode, for example, graphic files are not supported. Additional information About the operation of R-Studio Emergency in text mode can be found in the R-Studio On-Line Help :.
After starting R-Studio Emergency you will immediately see the R-Studio Emergency Demo Activation dialog box. 
Click on the image to increase it.
Enter the activation key (Activation Code) If you already have it, or click the Cancel button to work with R-Studio Emergency in the demonstration mode and evaluate the chances of recovering data. If you have already purchased R-Studio Emergency and want to immediately get an activation key (Activation Code), then read the section.
Checking a damaged computer
When running R-Studio, the main window (user interface) of the program opens. In this window, you can see the computer hardware resources and try to determine which data on the hard disk is damaged. 
Click on the image to increase it.
In our case, it can be seen (drives panel (drives)) that the computer has two hard disk.
| The internal hard disk of the computer on which the lost files are located. | |
| External hard disk to save recovered files, scanning information, etc. |
There are two partitions on the internal hard disk: the first section with a damaged file system (partition1) and the second serviceable partition with the FAT32 file system (partition2). Would be shown as Empty Space objects.
Note: Sometimes it remains small free space when creating partitions on the hard disk in Windows. It is such a free place and is an Empty Space7 object.
Restoring files
In our case, you must perform two file restoration operations:
1. Restore files from an existing logic disk (Partition2)
2. Restore files from a damaged logic disk (Partition1)
Restore files from an existing logic disk / partition
Let's start recovering files from an existing logic disk Partition2.
Double-click the left button along the existing logical disk from which you want to restore files. R-Studio will begin to re-read the disk files and will continue to show the partock structure / partition file. 
Click on the image to increase it.
Put files and folders for recovery.
Recovery files and folders for recovery will be shown in R-Studio.
Folders Panel
| Remote folder | |
| Love folder (all the daughters of this folder are marked) | |
| Partially labeled folder (some subsidiaries of this folder are marked) | |
| Cross remote folder (FAT folder containing data belonging to other FAT folders) | |
| Unreliable remote folder (found R-Studio FAT folder with knowingly incorrect content) |
Content Panel (Contents)
| Remote file. | |
| Marked file. It will be restored when you click on the Recover marked button. | |
| Selected file. It will be restored when you click on the Recover button. |
To find and mark files for recovery, you can use the following methods:

The path to the files will be shown in the Content panel (Contents), if you select the appropriate Path (PATH) View menu (View column) -\u003e Content Columns (Contents View Columns).
Also using the Find / Mark dialog box (Find / Mark), you can find and mark certain files for recovery. Click Find / Mark (Find / Mark), set the file (files), search options (labeling) and select the necessary action. 
Click on the image to increase it.
You can search for either certain files, files with any extension or all files with defined conditions. Experienced users can use regular expressions.
| If this parameter is selected | then R-Studio processes the entered expression as |
| Files (Files) | File names. Can I use file masks (symbol "?" (Question mark) is used to specify one indefinite symbol, and "*" (asterisk) - an unlimited number of uncertain symbols). |
| File Extensions | File expansion. |
| Regular expressions (Regular Expressions) | Regular expressions. |
| All Files (All Files) | Extra options ADVANCED OPTIONS) will be applied to all files. |
After that, you need to specify the search parameters.
| If you are checked (radio button), | |
| Coincidence (Match Case) | R-Studio will search for register. |
| Deleted Files (Deleted Files) | R-Studio will search for remote files / folders. |
| Existing Files (Existing Files) | R-Studio will search for available files / folders. |
| View files (Look At Files) | R-Studio will search for files. |
| Look At Folders | R-Studio will search for folders. |
| Direction (DIRECTION) | Specifies the search direction from the current position. The parameter is only available when the Look In :) parameter matters from the current folder (from Current Folder). . |
| Look In): | Specifies that R-Studio does with found files. Search is possible: on the entire disk (from Current Folder), on the current folder and subfolder (in the Current Folder and Subfolders) and only in the current folder (Current Folder Only). If the parameter is selected from the current folder (from Current Folder), it is also possible to specify the direction (Direction) of the search from the current position in the current folder. |
| Find all match files (Find All Matched Files) | R-Studio searches all matching files. Search results will be presented on the Search Results panels (Find Results). |
| Find the first matching file (Find First Matched File) | R-Studio will stop the search by finding the first file. |
| Mark Match Matched Files | R-Studio will mark all the files found. |
| Remove the mark from matching files (Unmark Matched Files | R-Studio will remove the mark from all the files found. |
Please note that every time looking for and marking / removing the mark from files, R-Studio does not take into account the previous state of files (marked / not marked). For example, if you first marked all files with the DOC extension, and then all files with the TXT extension, then the files with the DOC extension will also remain marked. To remove the mark from them, you must once again specify the DOC extension and in the Search / Mark mode drop-down list (Find / Mark Mode) select Remove the mark from the matching files (UNMARK Matched Files).
If you did not find the files you want to restore
Sometimes R-Studio can find files and not find the full path to them. Such files will be placed in the Advanced Found files folder (Extra Found Files). Try search your files there. If this does not help, then search for all disk.
On the Advanced tab, you can set the size and time characteristics of the search files. 
Click on the image to increase it.
Additional information can be found in R-Studio On-Line Help :.
If you select all matching files in the search / label mode (Find All Files), then the search results panel will appear after searching the search (Find Results); It can also be displayed by selecting the search results item (Find Results) View Menu (View). 
Click on the image to increase it.
On this panel there is a context menu with the main teams To restore files. To call it you need to right-click on the required file.
To assess the chances of recovering files, you can use the built-in graphic viewer. To do this, just double-click the file (remote or existing). The viewer supports most graphic file formats. 
Click on the image to increase it.
If you found all files and are satisfied with the results of viewing, you can immediately activate the R-Studio Emergency (if you work in demo mode). This will not affect the already found data - you can continue to restore files immediately after entering the activation key of the program. For more information, see the R-Studio Emergency Activation section.
Poster the files you need to restore, click the Recover Marked button (Recover marked). After that, the Recover dialog box opens: 
Click on the image to increase it.
Set the recovery settings. Below in the table shows the most important of them. You can also leave the default parameters. Additional information can be found in R-Studio On-Line Help :.
| If you are checked | Then R-Studio will restore |
| Restore Folder Structure (Restore Folder Structure) | The full path to the selected object. |
| Restore FROM ROOT | The full path to the selected object from the root folder of the disk. |
| Genuine Folder Structure (Real Folder Structure) | The genuine structure of folders / files on the disk for the files sorted in this way. This check box is applicable only when the files are sorted by extensions or date. |
| Ignore the file mask (Ignore File Mask) | All contents of the selected folder, ignoring the specified file mask. |
| Skip Files with Faulty Sectors (Skip Files WITH BAD Sectors) | R-Studio will miss when recovering files with faulty sectors and display their list in the Files with defective sectors dialog box (Files with Bad Sectors). After the recovery process is completed. Next, you yourself can decide how to do with these files. If this checkbox is not set, then R-Studio is trying to read the sector data several times (the number once is specified in the Settings / Bad Sectors dialog box) and if you can read the sector data, it fills them with a sample that is specified in The same window. Information about such files will be displayed in the Log pane. Additional information can be found in R-Studio On-Line Help :. |
Then you need to select a place to save the recovered files. Click the Select button. 
Click on the image to increase it.
You can choose either external USB disk (C :), or a network drive. At the same time pay attention to the MODE column. For the ability to save files, there must be RW (Read and Recording (Read and Write)).
Select the NET_DRIVE_1 disc and on it folder. / Recovered_Files /.
If you want to save many files at once, you need to set some parameters on the Advanced tab (Advanced) Recover dialog box (Recover). 
Click on the image to increase it.
File already exists (File Already Exists): These parameters allow you to select an action if the file with the found name already exists.
| In this case, R-Studio will offer the user to choose an action. Before receiving the response, the recovery process will be interrupted. | |
| Add ID to File Name (Rename) | In this case, R-Studio will add an ID to the file name. If the file with this name and ID already exists, the number will be added to them. |
| Overwrite | In this case, R-Studio will record a new file to the place of the old. |
| Skip (SKIP) | In this case, the R-Studio will skip all files with the same name when recovering. |
Invalid name File (Broken File Name): These parameters allow you to select an action if the name of the found file is incorrect.
| If this radio button is installed | |
| Suggest action (Prompt) | In this case, the standard File Name dialog box (Broken File Name) will be open for each file with the wrong name. Before receiving the response, the recovery process will be interrupted. |
| Change all incorrect characters on: (Rename and Change All Invalid Symbols To :) | In this case, all incorrect characters in the file name will be replaced with the specified characters. |
| Skip (SKIP) | In this case, R-Studio will skip all files with the wrong name when recovering. |
Hidden Attribute: These parameters allow you to select an action if the file is restored has hidden attributes. Such attributes may not allow the user to view the files in Windows Explorer.
Setting the recovery parameters, click OK. R-Studio will start recovering files, showing the course of this process (progress). 
Click on the image to increase it.
In the Log pane (LOG), file recovery results will be displayed.
We finished recovering files from an existing logic disk Partition2
Restore files from a damaged logical disk / partition
Continue recovery and restore now files from a damaged logical disk Partition1.
First you need to scan the section using R-Studio to determine which information remains on the disk. After the R-Studio scan, it will show one or more partitions found, from which you need to select only one correct and restore files from it, as described in the Recovery of files from an existing logical disk / partition.
To scan the section,
Right-click on the disk, select Scan (Scan) Context Menu and then specify the necessary scan settings in the Scan dialog box (SCAN). 
Click on the image to increase it.
By default, R-Studio offers to scan the entire object. This is the optimal choice in the case of scanning files of known types (KNOWN File Types (see below).
File Systems ( File System.): Determines the file systems of objects whose search is produced.
Currently, R-Studio supports the following file systems: FAT, NTFS, EXFAT, EXT2 / 3 / 4FS, HFS and UFS.
Please note if you need to scan the disk with HFS file systems, HFS + or HFSX, then you must install the Advanced File File Types check box (Extra Search for Known File Types), since when you delete files on file systems data on the computer is completely deleted. All file information and the only way are to use the option to further search for well-known file types (Extra Search for Known File Types). Additional information can be found in R-Studio On-Line Help :.
In our case, choose NTFS and FAT file systems.
Save Scan Info to File Save: If you set this check box, the R-Studio will save the scanned file, which can then be discovered. Please note that as a result of this operation, no data on the disk is saved, but only information about the data structure on the disk obtained by scanning.
It is recommended to always save scanned, as there are often cases when it is necessary to temporarily interrupt the data recovery process and turn off the computer. The saved file with scanning information may be discovered later, which will save you from the need to re-scan the disk.
After you have installed the Save Scan Info to File checkbox (SAVE SCAN INFO TO FILE), you will see the following warning: 
Click on the image to increase it.
Click on the Continue button and select a place to save scan information. For example, it may be a file on an external USB disk.
This may cause complete loss of data.
Leave the remaining scan settings without changing. Additional information can be found in R-Studio On-Line Help :.
Scan files of famous typesThis is a very useful feature when recovering files from damaged or reformatted sections. When scanning R-Studio can set to which specifically the type of files belongs to the data. This will allow R-Studio to find large quantity files. After scanning, such files will be placed in the Advanced files found files (Extra Found Files) scan results.
By default, R-Studio is trying to install all the supported file types specified on the Known File Types tab (Known File Types) of the Settings dialog box (Settings), however, the scanning time increases significantly. You can shorten the scan time by selecting only the necessary file types. Click the well-known file types ... (Known File Types ...) and select the necessary file types in the File Types dialog box.

Click on the image to increase it.
This selection will be applied only to the current scan session.
Setting the scan settings, click Scan (SCAN). R-Studio will start scanning. After the end of the R-Studio scan, sections found on the disk. 
Click on the image to increase it.
R-Studio will show these sections in various colors depending on which partition elements were found.
| Existing logical disk or section. | |
| On this section, both boot records and files were found. | |
| Only files were found on this section. | |
| On this section, only boot records were found. | |
| Free object space. |
To successfully restore files, it is necessary to find exactly the one that correctly corresponds to the real logical disk on which lost files were located. For this, there are no certain rules, but it is necessary to take into account the following:
- If you want to restore files from a disk with a damaged file system, then most likely it will be a found green section.
- If you want to restore files from a previously remote or reformatted partition, then most likely it will be a found yellow section.
Also always check the file system, the beginning and size of the found partition. These characteristics must match the found partition and the real logical disk / partition. If you doubt, try to view a pair of files from the found partition. If you succeed, then you have chosen the right section.
In our case, we only have one found section Recognized0, so we have no choice.
Double-click on the RECOGNIZED0 item. R-Studio re-read the files found files and show the files found and folders. 
Click on the image to increase it.
Mark files for recovery, as you did when recovering files from an existing logic disk.
If you could not find the files on the found section Recognized0, then return to the drives panel (Drives), double-click the optional files Found Files (Extra Found Files) and select those file types you want to restore. You can view graphic filesTo make sure they are correct and can be restored. 
Click on the image to increase it.
Please note that when scanning files of known types of R-Studio does not restore the names of the files, and can also be successfully restored only non-jugmented files.
After that, click the Recover Marked button, set the recovery options in the Recover dialog box (Recover), as you did when recovering files from an existing logic disk, and click OK. 
Click on the image to increase it.
Please note that in our example we have chosen folder / Recovered_Files / on an external USB disk to save the recovered files.
R-Studio will start restoring marked files. 
Click on the image to increase it.
After the end of recovery, its results will be shown in the Log pane (LOG).
Turning off the computer
After the file recovery is completed, remove the CD / DVD or USB disk and turn off the computer.
If you want to restart the computer, select Exit (DRIVE) menu and then press the OK button dialog box to disable a computer. 
Click on the image to increase it.
Your computer will be rebooted.
To save the image file, you will need a free disk space greater or equal to the size of the object. Never save images or recovered files / folders to the original disk !!! Otherwise, you can get unpredictable results and fully lose your data.
The image can be opened in R-Studio and files can be restored from an open image in the same way as from the original object.
How to create image
1. Select an object on the R-Studio panel disks (Drives) and click the Create Image button. 
Click on the image to increase it.
2. Set the image parameters, name and location of the image file in the Create Image dialog box. Please note: To save the image file, you will need free disk space more or equal to the size of the object. 
Click on the image to increase it.
| Image Filename | Specifies the name and location of the image file. To save image files, both local and network drives can be used. For the connection of network drives in more detail, see section. |
| Uncompressed image (byte to byte image) | If this parameter is selected, the R-Studio will create an exact copy of the object. This image format is compatible with formats previous versions R-Studio. |
| Compressed image (compatible image R-DRIVE Image) (Compressed Image (R-Drive Image Compatible)) | If this parameter is selected, the R-Studio will create a image file that can be compressed, divided into several parts and is password protected. Such an image file is fully compatible with images created by the R-Drive Image program, but incompatible in the images of previous versions of R-Studio. |
| COMPRESSION RATIO) | You can compress image data to save disk space. This parameter is available only when you create a compressed image (compatible with the R-DRIVE Image image). |
| Estimated Size (Estimated Size) | Shows the estimated size of the image file. The actual size of the image depends on how much free space is available on the selected section and how type files are there. This parameter is available only when you create a compressed image (compatible with the R-DRIVE Image image). |
| Image Size (Image Split Size) | You can set this parameter automatically (Automatic), while the size and separation of the image file will be defined in Windows automatically. Mainly it depends on file System The disk on which the image file is saved. You can also explicitly set the size of the image file (fixed (Fixed)) or select the template size of various removable media. This parameter is available only when you create a compressed image (compatible with the R-DRIVE Image image). |
| Password (Image Password) | You can protect the password image file. Note: This parameter provides an average degree of image file protection from unauthorized access. This parameter is available only when you create a compressed image (compatible with the R-DRIVE Image image). |

Click on the image to increase it.
| READ Attempts (read attempts) | The value of the value of V / B attempts, which determines how many times the R-Studio will try to read the faulty sector. |
| Sample for filling out faulty blocks (Pattern to Fill Bad Blocks) | The template with which R-Studio will fill the faulty sectors in this image. This template can be specified in ANSI or HEX data formats (Six.). Attention: R-Studio never modifies anything on the disk from which the data or the image of which is created. This template fills faulty sectors only in the image. |

Click on the image to increase it.
R-Studio will begin to create an image showing the course of this process (progress).
How to open image
1. Click Open Image (Open Image): 
Click on the image to increase it.
2. Select required file. Image: 
Click on the image to increase it.
The object image will be opened in the disks panel (Drives): 
Click on the image to increase it.
Image files can be processed by the program as a regular disk.
Activation R-Studio Emergency
To save the recovered files, you need to activate your copy of the R-Studio Emergency. Without activation (if you click the Cancel button in the Activation dialog) R-STUDIO EMERGENCY will work in the demonstration mode. In this mode, you can perform any operations, except for the network and save the recovered files. But you can view files to assess the chances of recovery.
To activate your copy of the R-Studio Emergency, write down the hardware code of the computer (Hardware Code). note that this code It is unique for each computer. That is, if you start the R-Studio Emergency on another computer, the hardware code will be different.
To get an activation key, use the R-TT website. With the help of the computer connected to the Internet, open the registered user console (registered user "s Console), enter the required data and click the Submit button.

Click on the image to increase it.
You must fill in at least three fields to enter the registered user console (Registered User S Console).
After that, press the R-STUDIO EMERGENCY Activation Key button (R-Studio Emergency Activation Code).

Click on the image to increase it.
Enter your hardware code Computer (Hardware Code) and click Submit. It can be administered without registering.
Click on the image to increase it.
Note that the R-Studio Corporate license is limited to the device on which it is installed softwareAnd you have the right to get an activation key only for it. The license is not allowed to transfer to another computer after the product has been installed or running and registered. Therefore, in the appropriate field of the registered user console, enter the hardware code (Hardware code) of only that computer for which the license is purchased.
Click on the image to increase it.
Write down and save the activation key in a safe place. The best place for this is most likely there will be a CD / DVD disk. Each time you launch R-Studio Emergency You will need to enter it during activation.
You can enter an activation key while running R-Studio Emergency in the R-Studio Emergency Demo Activation dialog or while working by selecting the Help Activate item. 
Click on the image to increase it.
R-Studio Emergency will show that the activation process was successful: 
Click on the image to increase it.
Now you can take advantage of all the features of R-Studio Emergency.
Network configuration
You can automatically (via DHCP) and manually configure the network to get the IP address of the computer on which R-Studio Emergency is running.
To configure the network, select Network Configuration (Network Configuration) Tools (Tools) menu.
After that, the Network Configuration dialog box opens, and R-Studio will start automatically requesting the network address. In the Log pane (LOG) there will be a message Network Adapter Configuration Started. 
Click on the image to increase it.
To cancel this process, install the CONFIGURE MANUALLY radio button. After that, you will need to enter the IP address manually. If your computer has several network interfaces, then you need to choose which one will be used
After receiving the IP address will be shown in the dialog box and in the Log pane (LOG) there will be a message Network Adapter Configuration Completed.
If R-Studio fails to receive the IP address, then the Network Adapter Configuration Failed message will be received in the Log panel. In this case, you must either enter the IP address manually, or eliminate possible network problems.
After that, select a place on the network to save your data. Select Connect to the Disk on Network (Map Network Drive) Tools menu (Tools). The Map Network Drive dialog box opens. 
Click on the image to increase it.
Enter the necessary data and click OK. In the Log panel (LOG) there will be a message Mount Network Drive Started. After connecting the network disk in the Log pane (LOG), there will be a message Mount Network Drive Completed.
If R-Studio fails to connect to the disk on the network, then the Mount Network Drive Failed in the Log panel. You will need to fix network problems and try to connect to network disk again.
R-Studio how to use right not to complicate probably already complex situation In which you got.
Please listen to a small course of a young fighter to work with similar programs, without this you can make a lot of mistakes and instead of returning your remote data, you will even lose them worse.
R-Studio how to use
The first error is an excitement that is accompanied by the consequences arising from here, for example, rapid actions, calm down, read the article to the end, think calmly, and then act. By the way, if you accidentally deleted from your hard disk Photos, then we have a very simple article that I am sure you will help you. You can still come in handy articles: how to restore remote files with free programs, and paid - ,.
When we are, my dear, I accidentally delete the file, without which our further existence on the planet Earth will not be a joy, know that it has not been physically removed from the hard disk, but you can always lose it by writing any information on top of it. Therefore, even if you read how to use R-StudioBut experience as such you do not have, we immediately turn off the computer and better in emergency. We do not produce anything more with your hard disk, then our chances of successful success increase.
- Note: Many times people came to me with similar problems And they could not remember what actions they undertake before contacting the technical service. They could not even really call the exact name of the program that they tried to save their data, and most importantly, after removing their files, for example, past the basket, they actively used the computer (sometimes a few days), which cannot be categorically done, only then they still went In service and demanded a miracle.
After we turned off the computer, take system unit And we go to professionals, your data 90% will be saved, naturally you will take a little money, how much, it is better to know right away, but if the money ask for a lot, read on.
Now I am writing this article, and in front of me there is a system unit, it is a hard disk, it is randomly formatted, that is, they deleted everything that it was on it, let's try to restore lost files using R-Studio, and at the same time we learn to use this good program .
First of all, we need to evacuate the victim, in other words to remove the formatted hard drive and connect to my computer, I do it always, because it is impossible to save the information being restored to the same medium from which the files were deleted.
If it is hard for you, then at least not to restore the files to that section of the hard disk from which they were deleted.
Note: Friends, the most important rule when restoring information sounds like this: the number of appeals to the hard disk with remote data should be minimized. So, before working with R-Studio, it is desirable to make an image of a hard disk with lost data and restore information from the image. How to make a sectory image of a hard disk and restore information from it is written in.
So, we will begin, there are a lot of folders with family photos and videos on our victim from formatting Winchester and video, we need to return them.
We launch R-Studio, the program has an intuitive English-speaking interface, but we are not accustomed to, I am sure that using her once, you will remember her forever.
The main window of the Device View program "View disks" in the left part of it is shown almost all drives in the system: hard drives broken into logical partitions, USB drives, DVDs, flash cards, the right window provides full information About the drive chosen to us, starting with the name and ending with the size of the clusters.

Choose our disk (n :) and click Open Drive Files (Open disk files),

we are now using the easiest way to restore remote files, we have several folders with a tree structure, we reveal everything starting from the first, warning, do not wait for the usual names of your files, in our case a photo of sons, etc. We can tell us lucky, in the window there are folders crossed
with a red cross, it means they were deleted, we look at the name: Chapter 01, 02, etc., these are the folders you need with the lectures of the university professor, the fact is that before such restoration operations, I carefully ask people about the names of remote files and their extensions This is necessary in special launched cases to search for mask, etc. You can not score your head for the first time, at the end of the article we will use the extended scanning method (SCAN) and will restore everything that was on Winchester, it will certainly take time compared to simple way Ten times more. And now we put the ticks everywhere and then Recover,

we choose where to restore, by default to the personal folder of the R-Studio in my documents and the offer to change the default recovery settings, we leave everything as it is clicking OK.

File recovery process

This window may occur, the content of which I transferred to you in Photoshop, I think nothing will be for it, a window with a warning, which is the attribute hidden, R-Studio will offer to remove this attribute from all such files, we agree, put Tick, where it is necessary and continue.

After the recovery process is completed, we go to the My Documents folder, then a personal folder R-Studio, it is called R-TT and see the result, the folders with the very necessary video Chapter 01, 02, as well as several folders with personal photos, is no longer bad But this result does not suit us.

Full search and restore remote files
To search and restore other remote data, we use the feature of the full disk scan (SCAN).

In this window, we put a tick search for well-known file types, and select the detailed scan and click SCAN.

I suffer patience, the operation is quite long, in the right window in the form of multi-colored squares, the process of process is displayed, on this moment Scheduled only 13%.

We are waiting, almost half of the Winches space scanned 43%

55% my patience ended, as it passed almost an hour, and I stop the process, click on Stop


In the program window shown below, you can see the file systems recognized by the program and, accordingly, the information or data that can be restored.
RECOGNIZED 0 or RECOGNIZED 1, RECOGNIZED 2 - LET green colorHere there are data that can be restored almost 100%.
Extra Found Files - marked with yellow and red, the data that the program could not recognize and compare any file system, to restore them most likely not to succeed, and if it will restrict, it will not be readable to expect information from such files, Need a hex editor, but this is another topic that requires not one, but several large articles.
Just little chance of recovery from Recognized 0 marked with yellow.
Recently, several letters have come to support service at once, where users report that they do not know how to work with the program R-Studio..
In this lesson, I will give an example of working with this program.
R-Studio is designed to recover data – remote files or files from a damaged disk.
It is suitable for work and with flash drives and with ordinary discs. The main thing is that the disc itself is visible in the OS, so that the program can work with it.
Sometimes it happens that the files accidentally removed by the basket; sometimes fails in system regions Disk and then all files from the disk stop being available for the user.
If the disk area where the files themselves are recorded is not damaged and not changed, then the files can be tried to restore.
The main thing is to try to do it immediately after the "missing" files. If after the "missing" files were made formatting or disk defragmentation, the probability of successful recovery was very small.
Another important point - It is necessary to restore files to another disk, or, in the extreme case, the disk section, but not there, where they were before.
In the article I will give such an example: create a test folder on one disk with different files, then delete all the files, and then try to restore the files to another disk.
The first stage.
Create a folder on the section "R" With different files - Presentation (PPT), 2 pictures - small and medium volume (JPG), Excel Table (XLSX), Music Music, 4 text - in different format and volume (TXT, DOC, RTF).
For example, I took the frequently used types of small volume files.
Stage second. I delete all files.
Not in the basket, but completely. For an inexperienced user, they can be said irretrievably lost.
Stage Third. Running the R-Studio program.
I found version 5.2 of this program in English. On this version, I will show the basic elements and their translation so that users can navigate both in English and in Russian versions.
Also remind you that the administrator rights are needed to work this program from the current user of the OS, the program should be launched in Windows on behalf of the administrator.
Here is the R-Studio window after starting:

The program has an understandable interface. At the top of the menu and the basic actions buttons. The central part is divided into two areas.
On the left list of storage PC ( Drives.) With basic information about disks and sections. If you choose any partition, it will be visible to the right detailed information (Properties.).
At the bottom of the Log region ( Log.) where the results of actions are displayed.
Stage fourth. I'm looking for deleted files.
To do this, I choose the section "R" And double clicking it. The program immediately scans the entire section. If the disk is damaged, then it will not be seen on it, and the program scans the entire disk.

In the area of \u200b\u200bthe log ( Log.) Two entries appeared - on the start and completion of the scanning section "R".
On the left side appeared a list of directories / folders ( Folders.), in the right - list of contents ( Contents.).
After that, I choose a folder "Test" in the list of folders.
If the folder name is unknown, then to search for files, you need to go through all the folders in turn and even look in folders that do not have a name, but only a question mark (?).
When you select the folder you need to right, I saw deleted files. Among them, there was even a temporary file from the MSWORD work - this file that the name begins with the "Tilda and Dollar" icon (~ $).
Above the log area ( Log.) There are configuration of file sorting ( Sortedby:): « real » - Actual (as I understood the alphabet of file names), " extensions »-by extension, " creationTime »-time of creation, " modificationTime »-Time change, " accesstime »- Last access to the file.
This setting can be useful, for example, if a file is known or an approximate file deletion time.
In the right area, I highlight all files for example. After opening a disk or partition in the buttons panel, such buttons appear:

These are the buttons to restore all the contents from the right pane ( Recover.) or only marked files ( Recover marked).
I press the second button and see a new window - recovery settings ( Recover.).
The appointment of some settings I did not quite understand, perhaps they are needed in cases of more complex failures, and they use more advanced specialists.

The very first setting is a folder for recovered files ( Output Folder.). It must be chosen on another disk that I did - chose « H: / Test» .
Below are two bookmarks - basic settings ( Main.) and extended ( Advanced).
On the Bookmark of the main settings ( Main.There are such items:
- cONDENSE SUCCESSFUL RESTORATION EVENTS - This is a compression of messages about successful recovery, i.e. Successful recovery messages will not be shown in the log area. When the checkbox is installed in the log, only error messages will be;
- restore Folder Structure. - Restore folder structure. This setting is needed when restoring nested folders so that it does not interfere with the files, but the source view of the folders. Subparagraphs allow you to configure the actual structure of the folders and the structure starting from the root directory;
- recover MetaFiles. - Restoration of metafiles. In my example, this setting was inactive;
- recover Alternative Data Streams - restore alternative data streams, this setting is associated with file nTFS system;
- recover Security - restore security settings. If on files initially had any security settings (for example, access for different users), this setting can restore them;
- recover Extended Attributes. - Restore additional attributes as far as I understand - this is the attributes " hidden», « systemic», « for reading" etc.;
- skip File WITH BAD Sectors - skip files with damaged sectors. This setting is needed when physically damaged or wear the disk plate when you need to quickly restore, which is still possible to read.
At the very bottom there is a setting " ignore File Mask."- ignore the mask of files. What her effect I did not understand.

On the advanced settings tab ( AdvancedThere are such items:
- file Already Exist.- The file already exists in the specified folder. In this case, you can configure such actions with the file: " prompt "rename »- transfer, " overwrite »- overwrite, " skip »-miss;
- broken.filename. - Damaged file name. In this case, you can configure such actions with the file: " prompt "-In the user all other actions, " rename and Change All Invalid Symbols To: "- Rename and replace all wrong characters to a new character that is specified in the input field. skip »-miss.
- hiddenAttribute.- Hidden file attributes. Or refers to only one file attribute - "hidden". You can configure such actions: " prompt "-In the user all other actions, " rEMOVE »- Attend the attribute, " keep »- Save the attribute.
I install such recovery settings, as indicated in the pictures above and the "OK".
There is a recovery process. During this process, I saw such a message:

Just now the MSWORD temporary file (whose name begins with the "Tilda and Dollar" icon (~ $)) has an attribute " hidden" (in English hidden.).
Because I installed a tick opposite item " prompt.", Then the program and issued me a request for what to do next with this file.
There are two options: " rEMOVE » - Delete the attribute, " continue »- Save the attribute.
You can also put a tick so that the action is automatically used in the event of a further occurrence of such a question.
I choose an attribute deletion option.
Recovery occurs quickly. Its result is visible in the field of the log:

The last record means that 10 files are restored successfully, 0 files could not be restored, i.e. All files specified by me are restored.
Here are the contents of the folder « H: / Test »:

I checked all files - everything opens, and the data within them is not damaged.
IN this example Files were restored immediately after removal, so the recovery was successful.
From his little experience to recover data and at home, I noticed the following:
- it is best restored by small files, because They occupy less clusters on the disk, and the likelihood of them to "collect back" more;
- type files "Jpg." or " doc " can recover, but then they cannot be viewed or image / text will be distorted;
- excel (XLX) files are most often recovered.
Well, finally, we can say that data recovery programs can help, but it is better not to be lazy and not forget to do backups All important data.

The worst for any user, whether he is an avid photographer, Meloman or a kinoman - an unexpected damage of data on a computer. This can happen for various reasons - obsolescence and malfunctions, software errors or user care. What a disorder comes to us when at one fine moment we learn that something happened to our files.
One of them is R-Studio.
The program is available in reading mode to the following file systems:
- Microsoft Windows: Fat and NTFS, including FAT12, FAT16, FAT32, EXFAT, NTFS, NTFS5.
- Apple Mac OS: HFS, HFS + (HFSX).
- FreeBSD, OpenBSD, NetBSD, Solaris: UFS1, UFS2.
- Linux: EXT2, EXT3, EXT4.
- Windows 9X / ME / NT4.0 / 2000 / XP / 2003 / Vista / Windows 7, 8, 10 on an Intel compatible platform.
- Minimum 32 MB of RAM (depending on the OS version), mouse and sufficient disk space to save the required information (files, disk images, etc.).
- Administrator rights are needed to install and launch under WinNT / 2000 / XP / 2003 / Vista / Windows 7, 8, 10.
- Network connection (to restore data on the network).
- Restore remote files based on service entries.
- Recovery by signatures.
- Reconstruction of the file system.
- Work with software and hardware RAID arrays.
- Support recovery over the network.
- The ability to create a physical disk file, partition or part of it.
- Built-in hex editor.
- Creating an auto-loading disk to recover data.
- Opportunity thin setting Recovery.
Interface
This program has a clear instruction in Russian, where all functions are described in detail. You can download the program on the Internet, for example, on the site RSLoad.net.Run R-Studio. with administrator rights. On the left you see the list of drives connected to the system with partitions located on them (hereinafter the drive selection interface). If you select the device or partition, then its status and properties will be displayed on the right side of the interface. At the bottom of the screen, there is an operations log output area and error, in the top you watch the toolbar.
The buttons are implemented in the form of icons, the type of which varies from the version to the version. Find out what icon means you can visit the cursor on the button and waiting for the appearance of the pop-up tip. You can also start scanning or open the section from the drop-down menu after clicking the right mouse button on the drive or partition icon.
Since the tasks of recovery are individual, we will not consider a specific example, and we define an exemplary algorithm for using this program.
Example data recovery algorithm on R-Studio

In the case when, as a result of the actions, part of the data could not be restored, or the recovered files contain incorrect information, then in the drive interface, you open another option of the card (from "green" or "yellow") and repeat the operations described in paragraphs 5-8 .
If a R-Studio. Gives reading errors, it may mean the presence of unreadable sectors. Perhaps the loss of data and was caused by their appearance. The more, the slower will be scanning and reading information. With a large number of BED sectors (\u003e 50), we recommend to reduce the number of read attempts. To do this, select the hard disk in the drive interface, select the "I / O Tries" parameter in the list that appears on the right side of the screen and set it in 1. As a fundamental solution to this problem, you can also advise an appeal to a specialized organization - there as The rule, there are software and hardware complexes specifically designed to perform this kind of work.
Purpose: Restore information when damaged the file system, deleting files, deleting or re-create partitions, reinstall OS, assembly and data recovery from RAID-0, RAID-5, RAID-6, JBOD arrays, virtual virtualization platforms (VMware, VirtualBox, QEMU).Supported File Systems: Fat12, Fat16, Fat32, NTFS, NTFS5 (Created and used in Windows 2000 / XP / 2003 / Vista / 7, ExFat, Refs (New File System, Presented Microsoft in Windows 2012 Server), EXT2 / 3 / 4FS (created in Linux or other OS), HFS, HFS +, HFSX, AND UFS1, UFS2, UFS Bigendian (used in FreeBSD, OpenBSD, and NetBSD).
Example of practical use R-Studio
Consider how to restore the data on specific example.
Given: USB-Flash SanDisk Ultra 32GB.
Symptom: Windows When you try to open the disk asks it to format, below the screen shot.
In the disk properties, the file system is defined as RAW.

It is important to note that the flash drive itself is working, but the section is damaged. The section or volume is the concepts exclusively logical, volume is a broader concept, may consist of several physical carriers, but, nevertheless, it seems like a single space.
And so, run the program. The example uses a demo version with a limit on the size of the files recovered.
IN windows Environment Vista and older program must be run on behalf of the administrator even if your account Has administrator rights.
In the Drives window, we see a list of devices and sections. On the right, in Properties, the properties of the selected device or partition. You can scan for searching for file systems and data as an entire device and existing partitions or you can set the scan area manually.

But now it is not necessary for us, clicking the right mouse button on our flash drive and choose SCAN.

The following window opens with scan settings.

Disk Size shows us the volume of the drive in bytes and sectors. If in this row and the Size column, the Drives window is specified 0, then the drive is physically faulty (since it does not define its volume). In the Start and Size entry fields, you can specify the beginning and the length of the scan area, the full disk volume is default there. The Change button at the end of the File Systems string allows forced to set the file system type to search - this reduces the memory-held memory program when scanning, can be useful when scanning large highly filled discs. It is applied if you know exactly what file system has been stored on a disk, if there are doubts - leave the entire list. The Extra Search for Known File Types option allows you to search for information on characteristic features of file types, all files in this mode will be restored without names and structure. Scan View sets the number of information on the scanning process.
- SIMPLE - Displays only the progress indicator of the scanning
- DETAILED - information about the found boot sectors, file systems, document files, if EXTRA SEARCH is enabled
- None - no clarifying scan information is displayed.

The process went ... On the map location map on the disk, the color shows which data structures are found. Below, under the map shows decryption. To complete data recovery, it is necessary to scan the entire surface of the drive. In this example, there is little information on the flash drive, it is located in the first half of the flash memory and then it makes no sense, so Stop was pressed. After preprocessing, the scan result will open.

Search results are shown in the form of a tree with a root in our device. The color shows the completeness of the file system restore.
- Green - Found File System and Boot Sector - The Best Option
- Orange - File system found, but no boot sector, is often present in several variants that differ in the number of restored data
- Red - only the boot sector without a file system is found, and there may be many of them, as a rule, interest does not represent.

At the end of this process, we will see the restored structure, as in the conductor. Left will be folders, on the right files and subfolders. You can open any file to the built-in trip. To do this, highlight the desired file and select Preview in the context menu.

If the built-in visor supports the selected file type and it can be fully read, then we will see the contents of the file. Example below.

Now it remains only to rewrite the found information to another carrier. To do this, you need to mark the necessary files and folders or allocate everything by putting a tick near the root element. And in the context menu, select Recover marked.

A dialog opens with information saving options.

Output Folder - you need to specify where to save the data. The rest can be left as it is.
Attention! Never save data to the same disc from which you restore them. Otherwise, the recovered files will be recorded in the location of the files restored, which will result in their irreversible damage.

Some parameters should be changed in the Advanced tab.
File Already Exists option - what to do if such a file is already
- prompt - Ask for each case
- rename - Rename automatically
- overwrite - overwriting
- skip - skip (it is worth choosing to not increase the volume of the data).
- rename and Change Invalid Symbols To - rename, replacing invalid characters on a given symbol.
- skip - just skip (choose, often with a pervavile name, the content is also damaged).
- prompt - ask every time
- remove - delete (choose).
 Privazer program for cleaning the computer for the benefit of performance and in order to notice tracks of activity
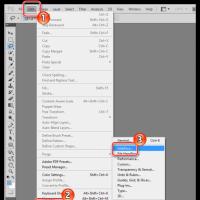 How to change Adobe Reader in Russian How to put Russian in Adobe Reader
 Professional video shooting on smartphone
 Free SAMSUNG KIES drivers in Russian for computer with OS Microsoft Windows
 How to create a channel on YouTube and make money - step by step instructions
 How to completely remove Yandex browser
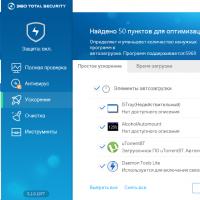 Free Update Anti-Virus 360 Total Security do not put vulnerabilities