Call recorder from clover settings. How to record phone conversations on Android smartphones. Appliqato Call Recorder
- Android application Call Recorder Unlock, version: 3.0 beta07.1, price: 399 rub.
There is also a demo version of this application (limited time of use, not functionality):
- Call Recorder Android Application - SKVALEX (Trial), Version: 3.0 beta07.1, Price: Free.
I confess that my memory does not always make me happy. I can forget something important that someone said just a moment ago, and there are reasons for that, which, perhaps, within the framework of this review should not be discussed, because it is much more important to find out how to deal with certain inconveniences with which you , dear readers, you can also encounter every day.
For myself, I decided that I need a softphone that will automatically record all conversations without exception, both incoming and outgoing. After all, personally, unfortunately, I never know exactly what information I will forget. These can be various working moments, or, for example, requests to buy certain goods in a store. You can, of course, call the interlocutor back, but this is not always convenient - in some cases I would prefer not to do this at all.
And it was here that the Call Recorder software - SKVALEX began to come to my aid, which I came to use after testing other applications that for various reasons did not suit me. Moreover, thanks to the hero of the review, I understood the root of some of the problems that I encountered in other recording software. But first things first.
To begin with, I should mention that I am currently using an ASUS ZenFone 4 Max (ZC520KL) smartphone, my review of which you can find. Only now I purchased the 3/32 GB version, and even if there are more interesting mobile devices for 9000 rubles, but I decided that the main thing is the comfort that I fully felt during the writing of the review. So, in my new smartphone, initially during a conversation, there is a button for recording a conversation, and it would seem that you can just press this button with every call and you will be happy. But this is not my way - don't forget about my memory problems ☺.
Then in the settings standard dialer I found the auto-recording feature that always worked flawlessly. For a while, I decided that the problem was fixed, but then playing back the recordings, I heard an overload that was unpleasant for my ears, making it difficult to perceive the information. No, this will not work! Moreover, the quality settings practically did not change anything, on the contrary, it could only be made worse. By the way, here is an example of a recording made on a standard ASUS ZC520KL dictaphone, and, as the topic of discussion of a smartphone on w3bsit3-dns.com showed, the sound does not suit not only me.
Starting to study third party applications, I, by chance, first of all tried to establish an ACR call recording for myself, which, despite the good functionality and a large list of recording methods, could not "absorb" at least one word from those that the interlocutors told me on the other end wires.
Then I turned to the Total Recall Call Recorder, which already perfectly recorded all the conversations. The overload disappeared, but over time, problems reappeared. So, when using headphones and after automatically locking the display, they began to disappear from the call screen somewhere virtual buttons, designed to stop and resume recording (this is the functionality of the application). There was also absolute silence in some sound files, which, of course, is unacceptable, because the dialogue was not conducted at the telepathic level ... You can, of course, mention the not very pleasant interface, but this, against the background of the previously described problems, rather looks as a subjective nagging that does not affect anything.
Sometimes an important conversation needs to be recorded. Especially if there is no way to remember to the end information, without which responsible work is impossible, for example, collecting news from news agencies to the editorial office of a newspaper, calling the authorities for instructions, and the like. Or you just need to record the call to have any proof. They will help you with this. special applications for devices based on operating system Android.
Manufacturer's technical limitations of recording telephone conversations
In some countries, recording telephone conversations is illegal. Manufacturers, instead of setting up each of the smartphone or mobile models imported into a particular country, erase the software components of the Android operating system responsible for recording telephone conversations... If none of the applications for recording a telephone conversation work, change the firmware and the Android kernel or the gadget itself.
Android apps for recording phone conversations
There are many call recorder apps for Android, the same in a simple way is the use of the internal resources of the smartphone.
Call recording without additional applications
Built-in call recording function is suitable for one-time call recording.

This method is the simplest. The resulting records can be converted to any sound format Using third-party audio converters not included with the built-in Android phone recorder.
Video: Record Phone Calls on Android
Call Recorder
The Call Recorder application is configured as follows:

 Play, save, erase - all these functions are available
The application keeps a history of recorded conversations, allows you to add the "recorded" person to the list of prohibited for recording - or, conversely, take this person on "auto-listening" (recording with him is turned on immediately, regardless of whether he called you or you yourself "Typed": you do not need to press the record button).
The program takes a photo of this person's call.
 The photo will also be saved - and shown in the recording history
Convenient storage of records allows you to find each of them very quickly.
 Listening to recordings from history
The app has a button bar on the desktop android desktop- as similar applications for recording video from the screen. You can enter the call history after the end of the conversation by clicking on the "tube" icon.
 Click on the "tube" icon to view the recording history
Automatic Call Recorder Program
- The Automatic Call Recorder application will ask you to set the visual style at startup.
 The Automatic Call Recorder application will ask you to set the visual style at startup
 - Set up your Dropbox accounts and Google drive for Reserve copy records. The app is able to "listen" to your conversations better so that you don't miss a word - this is called the recording level.
 Set up your Dropbox and Google Drive accounts to back up your recordings
 - You can start recording your conversations. Call yourself or take an incoming call. There is a setting that allows you to turn off the microphone on your gadget: only the voice of your interlocutor will be recorded. The recording will start by itself. The red marker at the top left means that the recording is in progress.
 The red marker at the top left means that the recording is in progress
 - At the end of your conversation, you will receive a message about a successfully recorded conversation. Click on it and go to the call history to listen to this conversation on your mobile.
 Click on the notification to listen to the call recording
 - Click on play to listen to the current recording. You can save the entry made to the "cloud" Dropbox or Google Drive, save it separately, send it to another gadget or computer, edit it, erase and return to the log of records of other previously received or made calls.
 Many operations can be performed on a recorded conversation.
Video: Automatically Record Calls with Auto Call Recorder Pro
Call recording with Total Recall Call Recorder
The Total Recall Call Recorder program worked even on the "ancient" gadgets that have one of the most early versions Android. There is a panel with buttons on the desktop.
How to use this program:
- Launch Total Recall Call Recorder and press the General button.
 Launch the Total Recall Call Recorder program and press the "General" button
 - Interestingly, when connected bluetooth headset the recording may not be made. Saving the recording can be requested separately - the developers do not want problems with the law on recording telephone conversations.
 Customizing the application for the needs of the user
 - When you dial or receive a call from the interlocutor, the recording will turn on immediately, the application will take a screenshot of the interlocutor from the screen.
 When you dial or receive a call from the interlocutor, the recording will turn on immediately, the application will take a screenshot of the interlocutor from the screen
 - Call history can be viewed immediately after the last call.
 The list of conversations recorded in the application is available in history
 - The search for previously committed records can be carried out by date and time, by subscriber number and by keyword in the notes.
 Enter the attributes to find the record you want
 - Also available are protection of records with an access code, access levels for recording conversations with certain people from the list, numbering of the list of records by contact names, etc.
 Customize everything, including app security
The app also supports switching between AMR and WAV recording formats.
Video: Recording with Total Recall Call Recorder
Call Recorder Program
Another good program for recording mobile calls with a simple name is Call Recorder.
- Launch Call Recorder app after installation. Open the main settings.
 Launch Call Recorder app after installation
 - Enter the recording settings.
 Enter recording settings
 - Please select best method records. The difference between the standard one and the rest is that the recording is simplex (only what you say into the microphone, the interlocutor may not record from the earpiece). The rest of the methods (CAF, ALSA and MSM) - make the recording better and deprive it of the "simplex" of a telephone conversation, but you need to "patch" (make changes) the Android kernel and get Root rights on the device.
 Select the one you need if you have Root
 - Select the recording format. WAV is considered the best - it can be uncompressed (maximum audio stream speed).
 Click on any of the items in this menu
 - The developers paid a lot of attention to security settings in Call Recorder. If you lose your password, the records of your conversations on the smartphone protected by it may turn out to be unreadable.
 First of all, safety when recording conversations
 - Additional options, such as auto-start recording when the talk timer is activated, may not work on some devices. It is necessary, again, not only to have Root privileges, but also to "patch" the kernel Android firmware on the device.
 Call Recorder app gives accurate answers with some settings
 - Set up the storage of conversation recordings, improve their classification and archiving in a folder by attributes. It is best to save your recordings to an SD card.
 Install optimal parameters for maximum convenience in the application
 - Set up the playback of the recorded recordings.
 Set up the playback of the recorded recordings
 - Please be careful when entering your password if you use password protection from strangers listening to your conversations on the line.
 Enter your password to keep your calls private
 - So, the settings are complete, you can call. A green dot during a conversation means that recording in this moment performed. The application will also take a photo of your call, if the subscriber has been assigned a photo in contacts.
 A green dot during a conversation means that the recording is currently being performed
 - The recording will be available immediately after the end of the current call.
 Select any of the recordings to listen to
Call Recorder, despite its high cost, is a great program. Even "treating" your smartphone, if something was missing in it, is worth it for the sake of this application.
Other applications for recording calls on mobile
There are dozens of applications for recording telephone conversations. Several more of them have the same name - Call Recorder. They all work from the built-in drivers and libraries of the Android operating system. It is thanks to this opportunity that the recording of mobile conversations from an Android gadget is available.
You will not be able to record conversations if the manufacturer has erased the drivers and libraries from the Android system kernel from the smartphone - you need to install the "custom" (custom) Android kernel before changing the firmware.
All programs for recording telephone conversations are available at PlayMarket.
Recording a conversation is not a problem, given the capabilities of modern gadgets. For this, there are both third-party programs and the capabilities of Android itself. This function is useful when you need to remember a large amount of information. The main thing is not to violate a person's right to make personal calls.
The beauty of Android is that even if your smartphone is not endowed with some of the features you need, you can simply expand the list of its functions using the store. What can you not find there! How about recording your talks? During a conversation, it may slip through important information that you have not been able to remember or even hear, and it may be convenient to be able to listen to the recording.
As you might have guessed, this is possible with Android. Please note that in many countries it is illegal to record telephone conversations unless the other person is warned that the conversation will be recorded. Now that you are informed, you can follow this link in Google play Behind the Automatic Call Recorder app.


This app doesn't just record calls. It has enough features to keep you comfortable. For example, you can automatically save recordings not only locally on your device, but also to Dropbox or Google Drive. This is convenient if you want to access recordings from other devices. Three audio formats are supported: 3GP, AMR and WAV.


Time to talk about how the application works. After you finish the setup, it will automatically start and start recording as soon as you make or receive a call. In order for you to understand that the recording is in progress, a red indicator will light up in the notification area. As soon as you finish speaking, you will receive a notification that the recording is ready. By clicking on the notification, you can add a note to the recording, save it, listen to it, or delete it.
That, in fact, is all. Automatic Call Recorder performs exactly one function, but the way it is implemented in the application makes it one of the most elegant and convenient methods of recording conversations.
Based on materials from PhoneArena
Quite often, users are faced with a situation when it is necessary to record an important conversation. For example, this is important for business workers, salespeople, consultants, because then you can listen to everything again without any problems.
But how to enable recording of phone calls on Android, what is needed for this, what changes came with new versions of the operating system? GuruDroid. net invites you to familiarize yourself with useful information, and find answers to your questions.
How to enable call recording on Android 6, 7, 8
From version 6, a built-in call recording function has appeared on Android devices. She is also present atNougat 7 andOreo 8 , but not everything is so easy here. The fact is that manufacturers often block this option, and you cannot enable it by any fraud. This usually happens on budget Chinese phones, companies simply do not want to waste time expanding functionality due to the low cost of the product.
Fortunately, on well-known brands such as Xiaomi, Meizu, Sony, etc., you will not run into a similar problem. Samsung smartphones usually 100% support system call recording.
Now let's look at how to turn it on, and at the same time check the very presence on the device:
- Go to "Telephone", we dial the number we need or open it from "Contacts";
- As soon as the challenge begins, click on the image of the ellipsis... It is usually located on the right side of the screen;
- An additional menu appears in which we select "Start recording"... Now the conversation will be continuously recorded, and to stop it, just repeat the above steps and click Stop Recording.
The same should be done for incoming call... If you do not see the recording function, it means that it is not provided on the smartphone. Only third-party applications will help here, which we will talk about below.
Pros:
- Clear sound, no interference; your voice, like the voice of the interlocutor, is heard perfectly, which, unfortunately, not all recording programs can boast of.
- It does not take up additional space on the internal memory, as does the recording program. Easy enough to turn on / off.
Minuses:
- Quite poor functionality, there is no way to change the file resolution, quality, volume. Also, there is no automatic recording stop at a certain minute of the conversation.
- It is impossible to sort calls by date, name, add notes to them, mark important conversations. After recording, the file can only be found through the explorer or in music player, from where it does not lend itself to any special tuning, but simply turns into ordinary audio intended only for listening.
- It is not available on all smartphones, if not, it is even problematic to turn it on.
1 Do not want to constantly repeat the same procedure, but do you need to record all incoming and outgoing calls? Then automatic call recording is the ideal solution., because on Android it is very easy to enable it.
2 Communicate with large quantity people, but recording is required only for certain subscribers? So, configure the "Favorite contacts" option, and do not worry anymore that you forgot to activate it again during an important call. 3 You already know what call you will make, you need to record it, but quickly turn it on this function during the conversation itself do not feel like it? In this case, in the settings, easily set a one-time entry, and on the first call, it is activated by itself.We have described three possible situations, and now we will find out what algorithm of actions they have. First, go to the "Contacts" settings, at the very bottom of the list we see the "Call records" option.
- For situation # 1: just move the slider to the mode "Included" against "Auto Record Calls"... An additional small menu appears, where we put "All contacts".
- For situation number 2: reactivate "Auto Record Calls", but now we choose not "All contacts", a "Chosen"... Next, we are invited to mark these numbers. The quantity is usually not limited.
- For situation number 3: click on the second item Call records and choose "Disposable". Made.
Note! This setting is only possible if the smartphone officially supports the built-in recording function. If you have achieved this with the help of root-rights, special programs, instruments - it is unlikely that there will be a positive result.
The 3 best apps for recording phone calls
 Have everyone already faced such a situation when the system function is absent, and you just need to record a conversation? Do not despair, there is a solution, and quite good - special applications for recording.
There are hundreds of applications that are radically different in support options, quality and availability. Most of it is free utilities, but there are also paid ones that provide the user with maximum comfort.
Appliqato Call Recorder
One of best apps , which won the favor of thousands of users, and was distinguished by excellent working functionality. We are immediately greeted by a rather banal, but laconic design and a clear interface.
On the home page there are only two folders "Inbox" and "Saved". All recorded conversations are in the "Inbox", and if you wish, you can save them, that is, move them to the second folder. The only drawback is advertising, but its easy can be disabled in the paid version, which adds a few more useful little options.
The application has three modes of operation: "Log All", "Ignore All", "Ignore Contacts". In the first case, by default, absolutely all conversations are recorded, in the second - only the numbers assigned in the settings, in the third - calls from unknown numbers, that is, not saved in "Contacts".
CallRec
Another decent application that allows for more flexible call recording. The main advantage is the built-in editor, thanks to which you can easily apply filters to the conversation, add comments, send to another user.
Also, the user can customize the duration, start and end of the recording. For example, disable recording of short conversations, activate the recording start at 1 minute or end after 3 minutes.
There are also sound notifications informing about the end of autorecording, automatic deletion or an error that has occurred. There is one more bonus: the presence of a voice recorder application. It can be accessed almost instantly, the recording pleases high quality and lack of interference.
Auto Call Recorder (formerly CallX)
Too good program, considered one of the best in 2018. Allows you to customize the sound quality, select audio formats and their size. You can enable automatic recording conversation or manual during the call itself. Also pleased with the stylish updated design and intuitive interface.
There is an interesting feature: as soon as you shake the device, the conversation will be recorded. Synchronization with cloud storage is possible, free transfer of files to the sd card.
The volume of records is not limited, the only obstacle is the memory of the phone itself. Works perfectly on all popular phones, not the slightest hindrance or error was noticed.
By default, files can be found using the explorer program, For example, ES Conductor(you can learn more about this application in the article ""). We pass in internal memory , click Audio – Recorder... The path may differ slightly depending on the brand and specific model.
If you recorded the conversation using third party program, which means the files are stored in it. Usually these are the Inbox, Outbox, Saved folders.
In case of instant transfer of audio files to cloud storage, look for materials there.
V Lately popularity Viber, Skype, Whatsapp and other similar applications has increased markedly, because users are offered free communication from different parts of the world, the ability to correspond, call up without spending a penny. And more and more often there is a need to record such conversations, but the system recording or some programs may not work.
 Skype free download Russian version Install Skype application
 How to recover a photo on Android after deleting it?
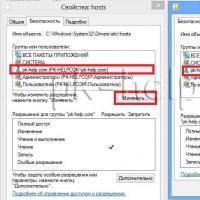 Original hosts for Windows operating systems What should be in a Windows 7 host
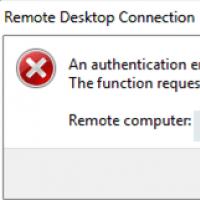 An authentication error has occurred
 Open the following ports at the client's workstation
 How to hide all VKontakte friends in the new version?
 Hide friends on VKontakte