How pio dma modes switch. Unexpected HDD slowdown, why and how it was cured. Fight against PIO mode. Possible modes of hard disk operation
Hello to all blog readers. In this article, we'll talk about how to restore system performance. Often users have a problem very slow work computer, especially when recording and at reading disks, or simply unreasonable "brakes" of the system during operation or loading. Why the system freezes read
There can be a great many reasons for this, today I propose to consider a fairly common one - this is the wrong mode of operation CD / DVD - ROM or hard drives
, that is, let's talk about PIO and DMA.How to check HDD for errors and eliminate them read
What is the essence and difference between PIO and DMA.
PIO and DMA- these are two modes of operation of hard drives, in the general case of any drive.
PIO (Programmable Input / Output)- already outdated mode, for operation it needs
engage central processing unit, which leads to a significant loss in performance.
DMA (Direct MemoryAccess)- a modern method that bypasses the processor and
appeals directly to RAM, this allows you to significantly increase productivity and get rid of annoying "brakes".
DMA mode has been used in operating rooms for a long time in various variants. Windows systems 7, 8, and also at 10, however in Windows XP, often there is a situation in which DMA automatically switches to PIO and you will not be able to bring it back using the usual methods. What is causing this situation?
In Windows XP implemented mechanism error control if reading from hard disk or another drive, errors occur too often, the system automatically switches to a slower mode, where their percentage is less. But, Windows XP can put a normally operating device into such a mode.
How to fix errors
Windows read
And so, let's check the operating modes of all drives so that the system does not slow down ..
1 ... Launch the console "Computer Management"- right click on "My computer"

in the drop-down menu, select the item "Device Manager", or through
Control Panel. Or Start - Run - devmgmt.msc
2. We choose " Device Manager", choose IDE ATA / ATAPI controllers,

several lines with controllers will open - we are interested in :
Primary and Secondary channels IDE→ we go one by one to properties these channels (right-click on the channel, the line “ Properties"), To the tab" Extra options» ,
two groups are distinguished here "Device 0" and "Device 1", each has lines
"Transfer mode"- should be selected in it DMA if available", Then the line "Current transmission mode", should be something like Ultra DMA mode: 4,

if there is "PIO Mode" here, then this is ours case and we will fix it.
If everywhere there is a regime ultra DMA, then everything is in order for you and further actions do not need to be continued.
3. First, let's try to fix it manually - in each line "Transfer mode" set "DMA, if available", click "OK" and restart your computer. After switching on again
we look at the operating modes of the channels, if there is DMA everywhere, then everything is in order, if there is PIO left, then we continue further.
4. Find again Primary and Secondary IDE Channels and delete them (right-click on each channel, select "Delete"). Fear not, everything will work fine.
Restart your computer again - Windows XP will find controllers and will put them into fast mode, i.e. in DMA... Check the result, there should be a mode everywhere DMA.
5. If all of the above did not help and you again display “ PIO Mode ", then it will be necessary rearrange drivers for motherboard- reboot
and check the result again.
6. Well, the last point, if after all the suffering the regime PIO has not disappeared, then you will have to edit in registry. I want to note - perform any operations with
registry very carefully and carefully, any wrong action can lead to the complete inoperability of your system. It is best to make a copy of the registry ahead of time.
How to customize Windows XP using the registry read
First, try disabling the error control system.
To do this, in the registry branch:
HKEY_LOCAL_MACHINE \ SYSTEM \ CurrentControlSet \ Services \ Cdfs \,
create a key ErrorControl and set its value to 0.

After that, reboot and follow the point №4.

in it you can manually set the mode DMA.
Several folders are located here - 0000, 0001, 0002.
0000 - is responsible for the controller himself;
0001 - responsible for Secondary IDE Chanell;
0002 - responsible for Primary IDE Chanell;
Open the folder for the channel we need. It contains
several keys, first select:
MasteDeviceTimingModeAllowed
SlaveDeviceTimingModeAllowed
and set the value equal to 0xffffffff.
After that, we set the value of the following keys:
MasterDeviceTimingMode
SlaveDeviceTimingMode
according to the following data, depending on
supported by UDMA - modes:
UDMA Mode 2 - 0 × 2010
UDMA Mode 4 - 0 × 8010
UDMA Mode 5 - 0 × 10010
UDMA Mode 6 - 0xffff
After that, reboot and check the result - everything should work fine.
How to speed up and recover Windows performance 10, read
What is the transfer rate of information in computers, read
I hope this article will help you to correctly set the modes. PIO and DMA and improve the overall system performance.
If the computer starts to slow down, then most of the users, first of all, begin to sin on the processor, RAM or a video card, but they absolutely forget that the hard disk is an equally important part of the computer and in many cases the problem of slowing down the speed of work operating system associated with him.
Possible modes of hard disk operation
The HDD has the ability to work with data in two modes: the older PIO and the newer DMA. They are fundamentally different in the principle of their work and, accordingly, in the speed of data processing. So in PIO mode, all data is processed using the processor, which heavily loads it and, as a result, leads to a drop in the overall performance of the system. But the DMA mode is already hardware data processing in which various accelerators are used and the CPU does not participate in this process.
Spontaneous switching of Windows to PIO mode and signs of this
Windows by default works with HDD in high-speed DMA mode, but sometimes, due to specific errors, it automatically switches to PIO mode. And it's very problematic to turn DMA back on and do it standard ways almost impossible. Typical signs that Windows has switched to working with a hard disk in PIO mode are:
A drop in the speed of working with HDD several times;
Slow system speed during disk operations;
Excessive processor load (80-90%) when working with a hard disk;
The system began to "slow down" abruptly. That is, an hour ago everything was normal, and then problems suddenly appeared.
On the this moment a hard disk is the weakest point of the entire system and a drop in its speed of work, even two times, leads to catastrophic consequences. In order to make sure that Windows has really switched to working with the hard drive in slow PIO mode, you need to do the following:
1. Click on the "My Computer" icon with the right mouse button and select "Manage";
2. Expand the controller branch and find the channel to which your hard drive is connected;
3. Click on it right key mouse, go to "Properties" and switch to "Advanced options";
4. Look at the Current Transfer Mode line. If it says "DMA Mode", then everything is fine, but if "PIO Mode", then you will have to do a few simple operations and return the disk to the preferred mode of operation.

Turn on DMA mode
In fact, this can be achieved in two ways. The first one is quite simple and you just need to remove the malfunctioning device and then restart your computer. After that, Windows will automatically reinstall it and the device mode will switch back to DMA.

If for some reason you are unable to enable DMA in the first way, then you will have to put a little more effort and use the registry editor. Do the following:
- Press Win + R and type the command in the line that appears regedit;
- Navigate the path HKEY_LOCAL_MACHINE \ SYSTEM \ CurrentControlSet \ Control \ Class \ (4D36Е96A-Е325-11CE-BFC1-08002BE10318);

- Find the line MasterDeviceTimingModeAllowed.
- If in the column the value of this line is written 0x00000001f, then this means that your hard disk is really working in PIO mode;
- Change the value to 0xffffffff and restart your computer.
After that, your hard drive will switch back to DMA mode, and its speed and overall system speed will increase significantly.
To transfer data between the hard drive and PC memory, two main modes are used:
programmed input / output (PIO) mode;
Direct Memory Access (DMA) mode.
Pio mode
In PIO mode, each byte of information from the hard disk is first read by the central processor and only then written into the RAM. Depending on the duration of the read cycle and the number of sectors transferred per one access to the disk, the modes PIO (PIO Mode 0), PIO1, PIO2, PIO3, PI04, PI05 are distinguished.
Dma mode
PIO modes are used in single-tasking operating systems where the computer's processor reads or writes data to buffer memory an IDE or EIDE hard disk drive, and then this data is transferred to RAM. In multitasking operating systems, it is advisable to use Direct Memory Access (DMA) modes. Data input / output in this mode is carried out into the PC RAM without the participation of the CPU. This process takes place under the control of the storage controller on hard drives in pauses between CPU calls to RAM, which somewhat slows down the data transfer rate, but saves processor time. To implement DMA modes, unlike РЮ, both special controllers and drivers are required.
DMA modes are classified into Singleword and Multiword modes, depending on the number of words transmitted in one cycle of operation with the system bus.
Serial ata (sata)
A further increase in the data transfer rate through the parallel ATA interface caused technical difficulties. In addition, PC manufacturers were not comfortable with the wide 40-wire (or 80-wire) cable, which impedes air circulation inside the case and is limited to 46 cm in length.
Therefore, in 1999, the Serial ATA Working Group was formed to create the Serial ATA (SATA) Serial ATA interface. The interface was introduced in 2001 and demonstrated a data transfer rate of 150 MB / s.
Also, for connecting multiple devices (HDD, CD-ROM drives, DVD-ROM, etc.), not a star topology (when each device must be identified as Master or Slave), but a point-to-point topology, when each device is directly connected to a host adapter (like SCSI- devices).
SCSl (Small Computer System Interface) is a more versatile and efficient interface than IDE. However, its hardware implementation is significantly more expensive than the IDE interface implementation. SCSI has clear advantages when working with video, as well as when using a CD-ROM drive in a multitasking operating environment or as a network storage device.
Communication between the SCSI device and the I / O bus (such as ISA, PCI, VLB) is carried out through the external bus using the Host adapter. Devices connected to the SCSI bus do not communicate with each other directly, but through the built-in SCSI controllers.
As you know, Windows 7 has received more significant improvements in boot time and system response compared to its predecessor Windows Vista ... Significant changes were made to prevent the system from wasting all system memory at opening a large number explorer windows, system services and processes are optimized.
In this article we will look at:
- optimization of the start menu
- optimization work hard disk in Windows 7
- optimization of the speed of copying and moving files in Windows 7
- optimization of work with Windows drivers 7
- time optimization Windows boot 7
- speed up the process of viewing thumbnails of images
- acceleration completion Windows work 7
Please note that some of the discussed methods of speeding up work Windows 7 are based on disabling any kind of tasks, simplifying or improving the functionality of the system for more convenient use. Those. you are essentially choosing between convenience and performance.
Windows 7 Optimization Ways
1. Speed up the start menu.Definition recently installed programs and it takes some time for the system to highlight these recently installed programs each time you open the start menu. You can save this time.
To do this, you need to go to the start menu setting: in properties Taskbar and Start Menu(to activate, go to the control panel Windows 7: Start -> Control Panel). Go to bookmark "Start Menu" and click on the button "Tune".
 Figure 1. Configuring the Start Menu
Uncheck the box Highlight recently installed programs and then press Apply.
 Figure 2. Disabling highlighting of recently installed programs
In order to reduce the pause, when the start menu window appears, go to the registry editor (command "Regedit" in dialogue Find programs and files).
 Figure 3. Launching Registry Editor
After starting the registry editor ( regedit.exe) go to branch HKEY_CURRENT_USER -> Control Panel-> Desktop(fig. 4).
 Figure 4. Selecting the required registry branch
Change the key value MenuShowDelay With "400" on the "50"... The pause will be significantly shortened.
 Figure 5. Changing the pause when the window is displayed
2. Optimizing hard drive performance in Windows 7
This option has been familiar since the times Windows XP but if in XP it was originally included, then in Windows 7 optimization of hard drives was considered unnecessary and by default it is disabled. Now we will look at the method of enabling this option.
Go to Start -> Control Panel -> Device Manager -> Disk devices-> (select your hard drive) -> Properties -> Policy ... and put a checkmark in front of the item there "Disable flushing cache buffer Windows entries for this device ".
 Figure 6. Disable flushing the Windows write cache buffer
Now in the same "Device Manager" we open another branch - "IDE ATA / ATAPI Controllers (IDE ATA / ATAPI Controllers)", after which in the properties of all channels ATA (ATA Channel 0, ATA Channel 1 etc.) in the tab « Additional settings(Advanced Settings) " check if there is a check mark on "Enable / Enable DMA (Enable DMA)".
 Figure 7. Enabling DMA Mode
If the checkbox is not checked, check it.
3. Speeding up copying and moving files in Windows 7
Windows 7 received another interesting feature - remote differential compression.
On the one hand, this option calculates and transfers the difference between the two objects, minimizing the amount of data transferred, but on the other hand, it takes time for the calculation.
You can disable this feature. To do this go to Start -> Control Panel -> Programs and Features -> Turn on or off Windows components-> Remote differential compression (must be unchecked).
 Figure 8. Disabling differential compression
4. Disable check digital signature drivers
This action can also slightly increase the speed of the system (when installing new drivers). To disable this option in Windows 7 do the following:
Run in "Start" gpedit.msc.
 Figure 9. Launching the administration panel
Then go to the following path:
User Configuration -> Administrative Templates -> System -> Driver Installation -> Digital Signature of Device Drivers... In this window, you must select the mode "Disabled".
 Figure 10. Disable driver digital signature verification
5. Acceleration of loading Windows 7
We can win a few more seconds, although this advice applies to those users who work on multi-core processors with Windows 7 as an operating system.
So, follow these steps:
Enter MSCONFIG in the menu search box "Start" and press the key "Enter".
In the window that opens, go to the tab and click on the button "Advanced options".
 Figure 11. Additional system optimization parameters Check the box next to the item "Number of processors" and in the drop-down menu under this item select maximum number your cores (2 or 4).
 Figure 12. Setting the number of processors for systems with multi-threaded processors
Click on "OK" and reboot the system to see a rather noticeable difference in boot speed Windows 7.
6. Acceleration of viewing of thumbnails (thumbnails).
You can increase the speed of viewing thumbnails (thumbnails) in Windows 7... To do this, you need to follow these steps:
Enter regedit(without quotes) in the menu search box "Start" and press the key "Enter".
Go to the branch "HKEY_CURRENT_USER -> Control Panel -> Mouse".
 Figure 13. Selecting the required registry branch to optimize the pause when displaying thumbnails
Double click on the parameter MouseHoverTime and change its value to 100
.
 Figure 14. Setting a new value
7. Reducing time shutdown windows 7
Completion time Windows 7 can be significantly reduced. However, this is a rather barbaric way: we reduce the time allotted to the process for the program termination, after which the program will be terminated forcibly.
Enter regedit in the menu search box "Start" and press the key "Enter".
Go to the branch HKEY_LOCAL_MACHINE -> System -> CurrentControlSet -> Control.

Figure 15. Selecting the required registry key
Change the parameter value "WaitToKillServiceTimeout" from the meaning 12000
(12 seconds) on 2000
(2 seconds).
 Figure 16. Changing a value.
Secondary Master
options-menu assignment to each of the possible four hard drives (E) IDE-interface of the optimal PIO-mode (Programmable Input / Output). Possible values: "Auto" (default), "Mode 0", "Mode 1", "Mode 2", "Mode 3", "Mode 4". Modes 0 ... 2 refer to regular IDE disks (ATA standard), 3 and 4 - to EIDE (ATA-2), mode 5 - to ATA-3. It is clear that in automatic mode the system will select the best data transfer speed for each disk. But we must remember that automatic installation PIO-mode is made in accordance with the ability to auto-detect the functioning of the hard disk and the amount of information received from the device. If the user has doubts about the correctness of the autodetection of the PIO mode, then according to the documentation on the hard disk, the user can change the PIO mode for any of the disks. The BIOS in "Auto" mode may also incorrectly identify the PIO mode of the EIDE disk, and the latter is not recognized. Modes 3 and 4 require the use of EIDE discs in the system.
Similar (four!) Options may also be called " IDEPrimaryMasterPIO" etc.
Option " Fast Programmed I / O Mode (s)"offers the following values:" Disabled "," Auto detected "," PIO0 ", ..." PIO4 ". An option with the same name unexpectedly suggested the values" Disabled "and" Auto Detected "(default). The first leads to the installation speed characteristics less than optimal, "Auto Detected" sets the maximum possible speed.
The option may also be called " Mode PIO Transfer Data" or " Transfer Mode". The last option offered this set of values:" Auto "," Default "(equivalent to" Fast PIO 1 ")," Fast PIO 1 "," Fast PIO 2 "," Fast PIO 3 "," Fast PIO 4 "," FPIO 3 / DMA 1 "," FPIO 4 / DMA 2 ". It is clear that it comes each time about the parameters of four hard drives, or two for older systems. In this case, the options may be called " IDE Master PIO Mode" ("Master Drive PIO Mode") and " IDE Slave PIO Mode" ("Slave Drive PIO Mode").
PIO (Programmable Input / Output) is carried out by the central processor and works by transferring data to specific I / O addresses (see the Ports subsection). PIO modes determine how quickly data can be transferred between the disk and the controller. When using them, registers are involved central processing unit systems. But that's not all! The PIO, or DMA modes, determine the size of the transmitted information packets, the way they are encoded, the speed and sequence of transmission, all the time characteristics of the exchange cycle. Depending on the modes, different cycle times are set, so the transmission rates can vary over a very wide range (see table).
When the "Identify Drive" command is received, the drive returns, along with other parameters, information about the supported PIO and DMA modes. These parameters can also be determined using special utilities... The transfer mode is set according to the value of one of the registers - SC (the register of the sector counter of ATA devices). Through one of the operating modes of this register, the exchange mode is controlled.
ATA-2 modes (PIO 3 and PIO 4) use hardware flow control. To be precise, the Enhanced IDE includes an operation called "IORDY flow control" that allows the disk to enable burst mode for 100% use of the bus bandwidth. The flow control mode transfers the initiative to the device (disk) and allows you to get rid of ineffective "blind" PIO modes by setting the controller bandwidth in accordance with the capabilities of the hard drive. This means that in cases where the entire bandwidth is available, the hard drive will control the exchange of data with the host adapter.
What is this signal? "IORDY" (Input / Output Ready) - a signal from the EIDE-hard drive confirming the completion of the exchange cycle with the controller. Other names are "CHRDY", "IOCHDRY". Using "IORDY" allows the high-speed hard drive to tighten the exchange cycle with the controller when it does not have time to receive or transmit data. This makes it possible to reduce the standard duration of the exchange cycle to a minimum, increasing the speed as much as possible, and, if necessary, lengthen individual cycles using "IORDY". For this, the signal must be supported by both the hard drive and the controller. Disk-side flow control is enabled by the controller using the "Set Features" command, so this exchange is supported by both the disk and the controller at the same time. Controllers that do not support "IORDY" may result in data loss when using fast modes PIO; in this case, use less speed modes. Some sources mention mode 5, but it has not received widespread distribution and is not standard.
If it is impossible to program the exchange modes individually for each of the devices in the system and when devices that work optimally in different modes are connected, the system will establish an exchange at the speed of the minimum of the modes. Hence, and the standard recommendation is not to connect a hard disk and a CD-ROM to the same channel.
Programmable I / O modes are only effective enough in single-tasking environments. For multitasking operating systems, DMA modes are preferred. It should be remembered that the high-speed DMA modes are implemented by the operating system drivers. The driver's software configurability defines the flexibility to control DMA modes.
 Skype free download Russian version Install Skype application
 How to recover a photo on Android after deleting it?
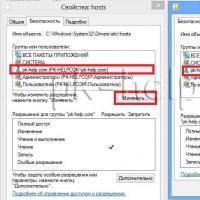 Original hosts for Windows operating systems What should be in a Windows 7 host
 An authentication error has occurred
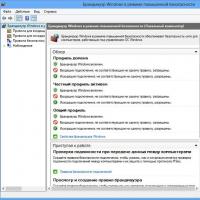 Open the following ports at the client's workstation
 How to hide all VKontakte friends in the new version?
 Hide friends on VKontakte