Setting up D-Link routers- 192.168.0.1
D-Link manufactures its Ethernet routers for several years. The most magnificent ones are DIR-300 and DIR-615 routers. These models have won its popularity primarily due to low prices and a good functional for this money.
During these few years, the DIR-300 bestseller has been released with dozens of hardware versions and 4 version of the firmware. And on it, in fact, all software platforms for the remaining D-Link routers were running. Therefore, in this instruction, I will be considered as an example DIR-300 and DIR-615. If you have a different model of the router D-LINK, then you can still use this instruction and it will be 100%.
I will consider the setting of D-Link routers starting from the most modern option.
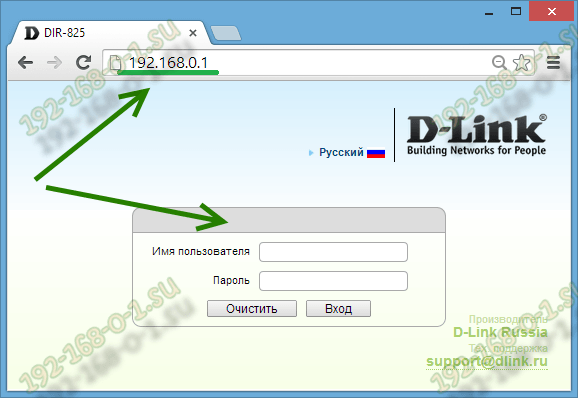
To access the device settings interface, you need to type the address http://192.168.0.1 in the browser address bar:
After that, you need to select the section on the left menu Network \u003e\u003e\u003e WAN:
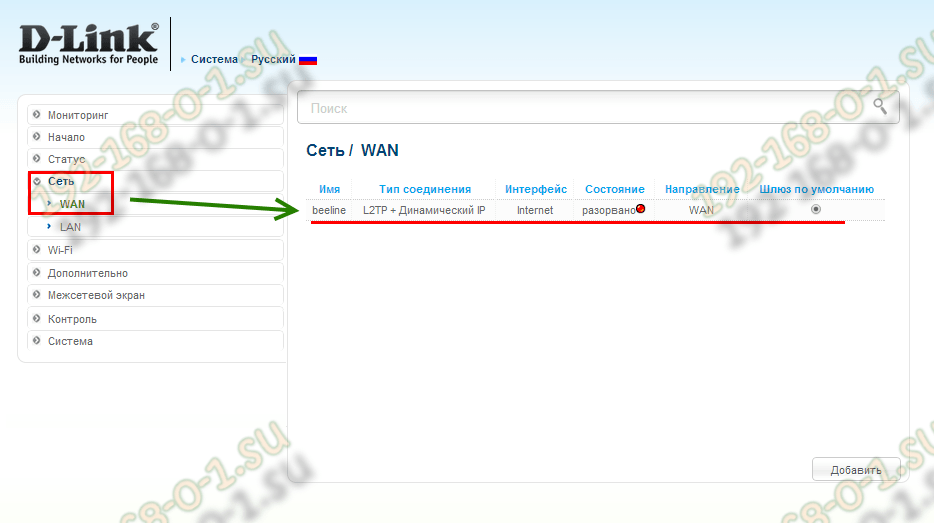
You will be taken to the section where all your external connections are displayed. Before creating a new connection - you need to delete already available. As a result, there should be no records in the table. After that click the button Addand create a new connection.
Setting up Dynamic IP (dynamic IP) on the D-Link DIR-300 and DIR-615 router:
This connection type goes on long-standing routers as the default used. That is, if your provider uses the type of connection "Dynamic IP", then after connecting the device to the provider's network, it is enough to configure WiFi to full-fledged work.
If you create a re-connection connection, then in the "Connection Type" list, you need to select "Dynamic IP":
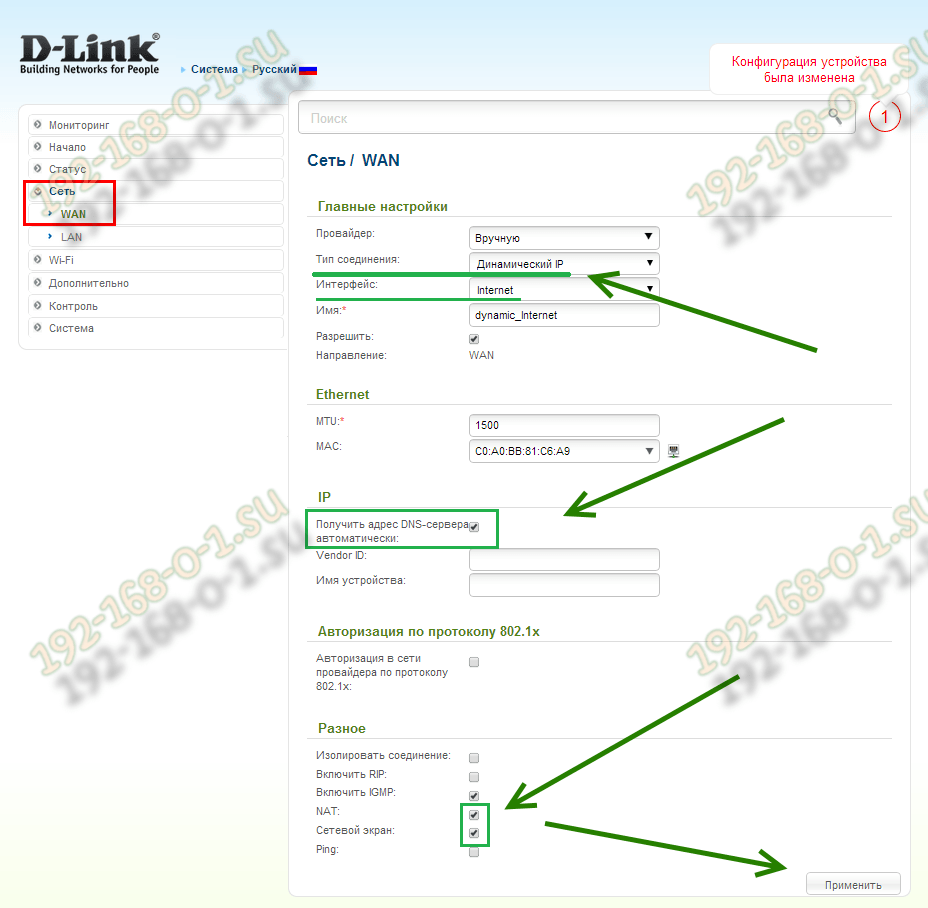
Be sure to check the check mark "Allow the WAN Direction". Receiving DNS servers addresses is better to leave in automatic mode.
It remains only to put the checkboxes "NAT" and "Network Screen" and click on the "Apply" button.
PPPOE setting on D-Link DIR-300 and DIR-615 router:
This protocol is used in the mortality of most Russian, Ukrainian and Belarusian providers - in particular, Rostelecom, Dom.ru, Stork and Tattelecom.
In order to configure PPPoE on a long-time router you need to select a corresponding value in the "Connection Type" list:

Galken "Allow the WAN Direction" must be installed.
Then you need to enter the login and password to access the Internet that the provider issued you.
Tick \u200b\u200b"NAT" must be installed, "Network screen" - preferably.
Click on the "Apply" button.
Configuring VPN L2TP on the D-Link DIR-300 and DIR-615 router:
The L2TP protocol is relatively common and is mainly used by the Beeline provider and a number of small providers.
As a rule, the VPN connection rises over the connection iPoe, so in the "Connection Type" field you need to select L2TP + dynamic IP:
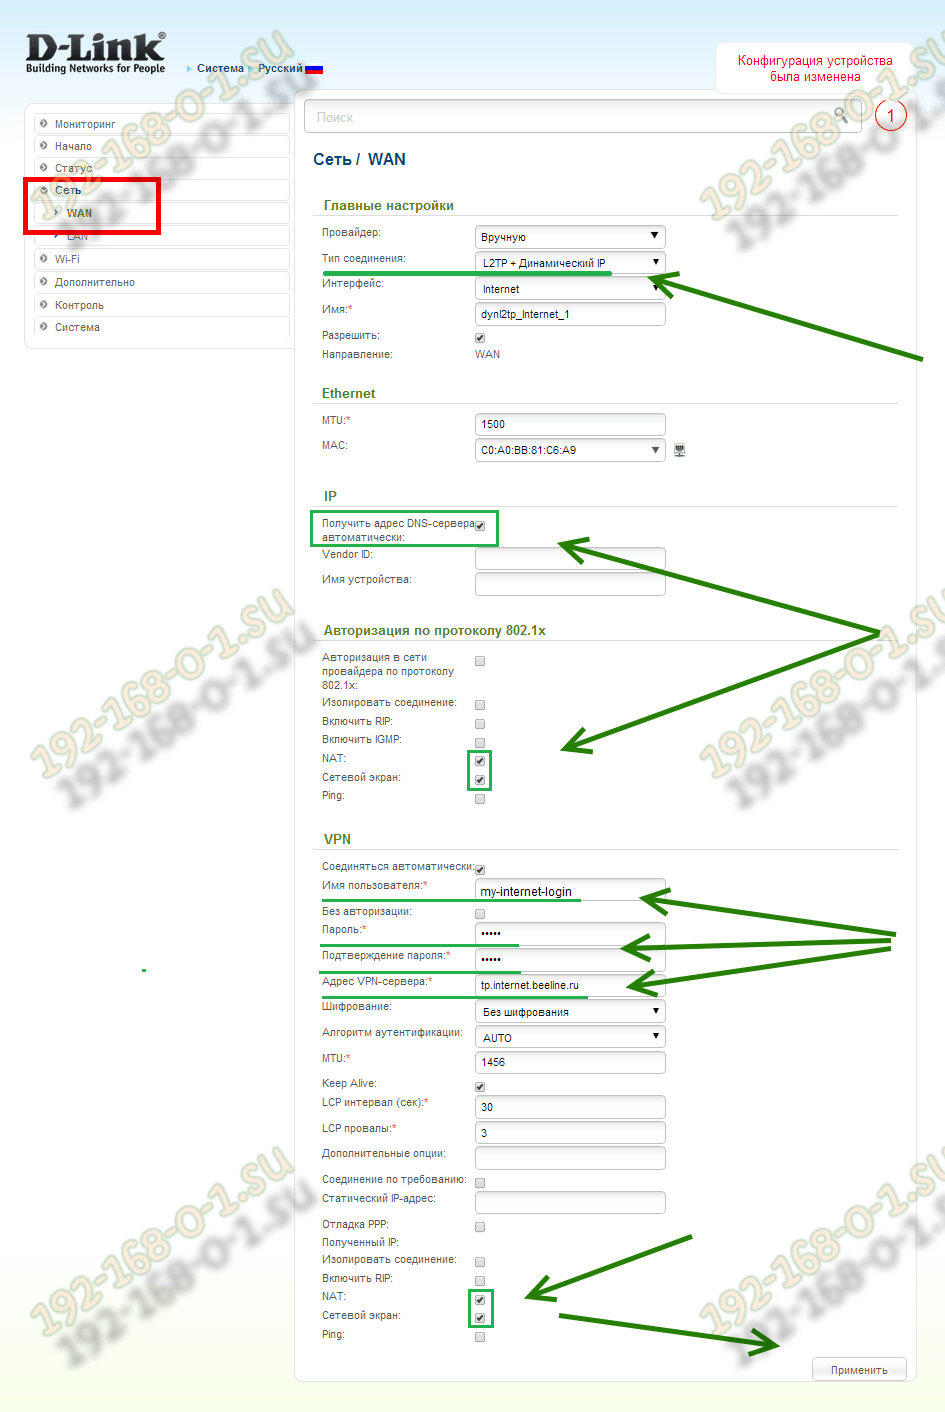
Follow the checkboxes "Allow the WAN Direction" and "Receive the DNS servers automatically" addresses. Tank "NAT" and "Network screen" and in the connection of Dynamic IP and in the VPN connection. In order to connect to the provider server, you need to enter the username, in the "password" and "password confirmation" field in the "password" field and the authorization data that you were issued when connected to the provider. In the VPN Server Address field, you need to enter an IP address or host provider server. You can find it in technical support.
Click on the "Apply" button to save the settings.
Setting up LAN LAN:
All the basic to configure the LAN parameters on the long-standing router are collected in the section \u003e\u003e\u003e LAN:
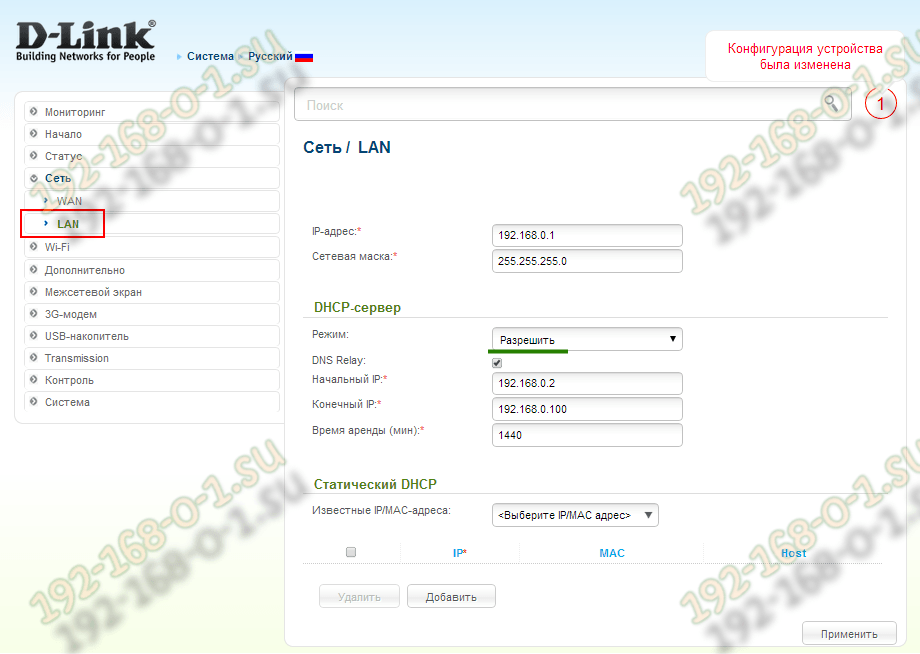
Here you can change the IP address of the device with a standard 192.168.0.1 to any other, for example - 192.168.1.1.
Here you can enable or disable the DHCP server, as well as reserve for the desired computer, laptop, tablet or smartphone, a sharp address, adding to the table of its Mac.
Configuring WiFi Wireless Network on the D-Link DIR router:
All necessary parameters for the configuration of the wireless network on the length are collected in the Wi-Fi section. First you need to select the "Basic Settings" subsection:
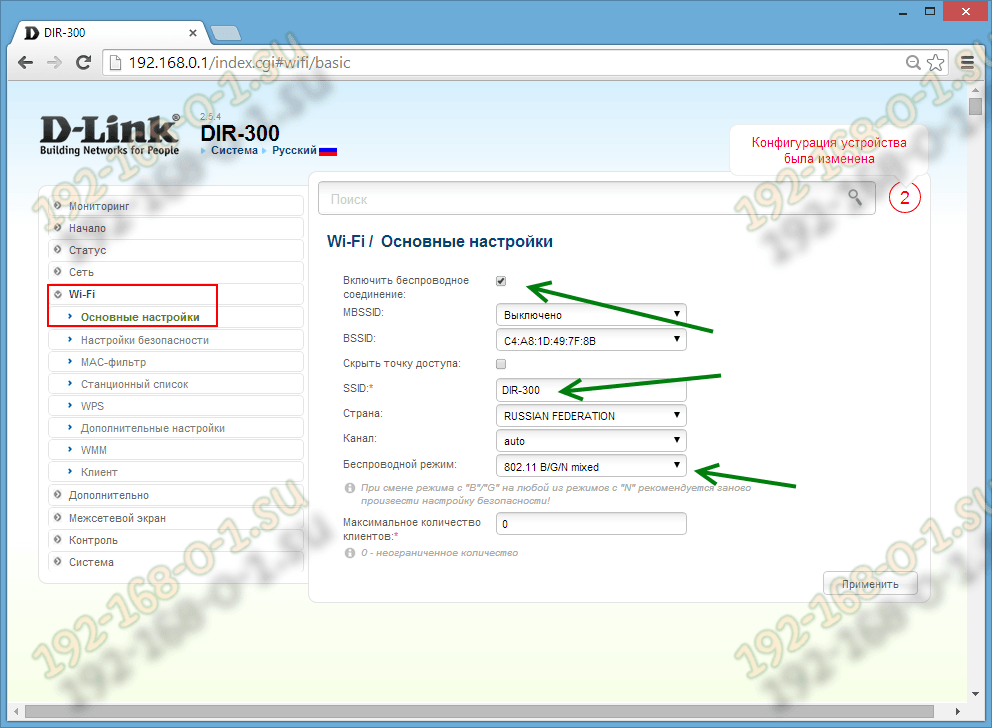
We put the checkbox "Enable Wireless Connection". After that, in the SSID field, you must enter the name of the Wi-Fi network. In his quality can act any word in Latin layout. Cyrillic router is not used, so SSID in Russian is unacceptable. In the Wireless Mode list, you need to select the option 802.11 b / g / n Mixed or 802.11 b / g mixed. Apply settings.
Now go to the "Security Settings" section:
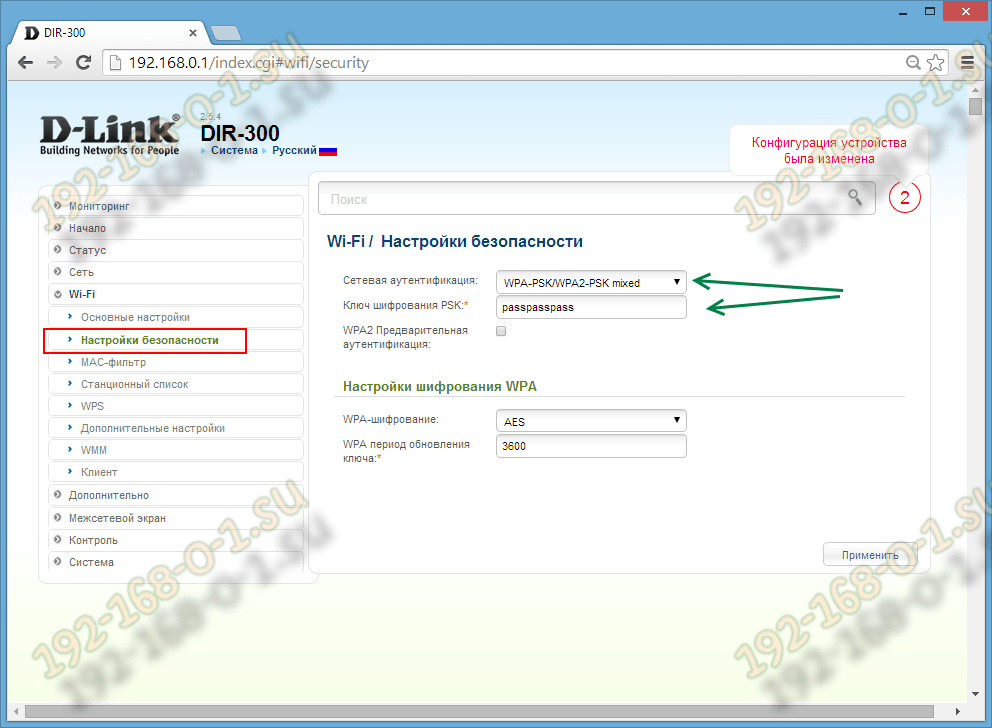
In order to fully protect your Wi-Fi network from intruders, you need to set the "WPA2-PSK" or "WPA-PSK / WPA2-PSK Mixed" in the "Network Authentication" field. It remains only to enter a wifi password in the PSK Encryption key. As a password, it is best to use mixed phrases from numbers and letters of the Latin alphabet. The length of the password is the larger, the Lucche. But do it at least 8 characters.
 How to make an emergency restoration of the firmware of the ASUS router
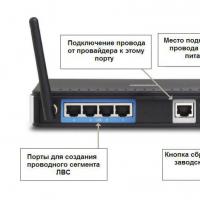 How to set up a D-Link DIR 615 router: Step by step instructions with photos
 How to enable bluetooth (Bluetooth) on a laptop in Windows 7
 How to set up a Wi-Fi router D-Link DIR-615 yourself
 On Android does not turn on Wi-Fi: possible failures and methods for eliminating
 How to transfer the Internet from the phone to the computer in modern conditions
 Distributed the Internet from a laptop, Wi-Fi network is there, and the Internet does not work?