D-Link Router: Wi-Fi Setup. Configure D-Link routers yourself
Routers under the D-Link brand - among the most popular in Russia. Their main advantages are low price, reliability, ensuring sufficiently high access velocity.
D-Link Dir: 620, 2640U, 320, 615, 300, equipped with Wi-Fi module purchased special popularity in the Russian Federation. In turn, the D-link DIR 2500U device is popular from wired devices. How does the D-Link DIR router be configured depending on the modification? Are distinguished differences in working with devices of different series?
It may be noted that, regardless of which specifically, the modification belongs to the Router released by the D-Link, the device setting is carried out for similar algorithms. At the same time, the installation of the desired options when working with almost any modem D-Link series is sufficiently simple procedure. However, there are private features for each device. And therefore, we explore them by studying the specifics of working with each device of the marked series.
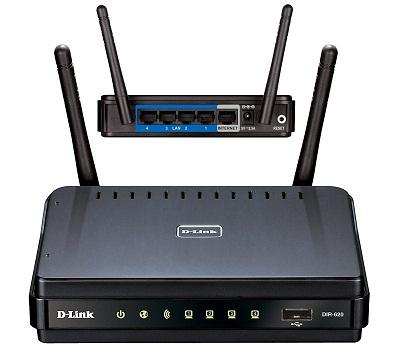
Router D-Link 620
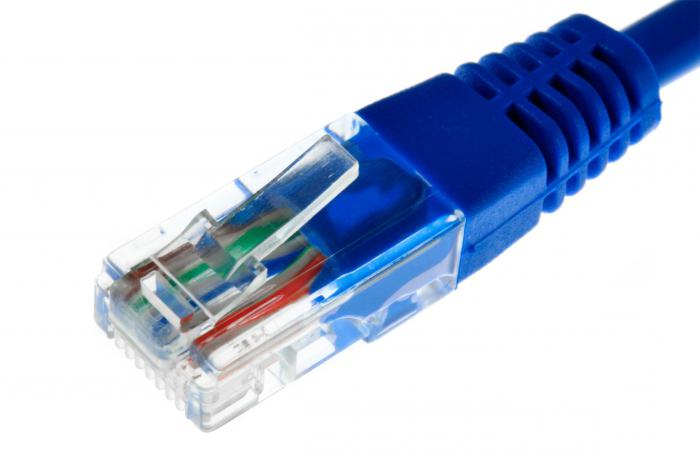
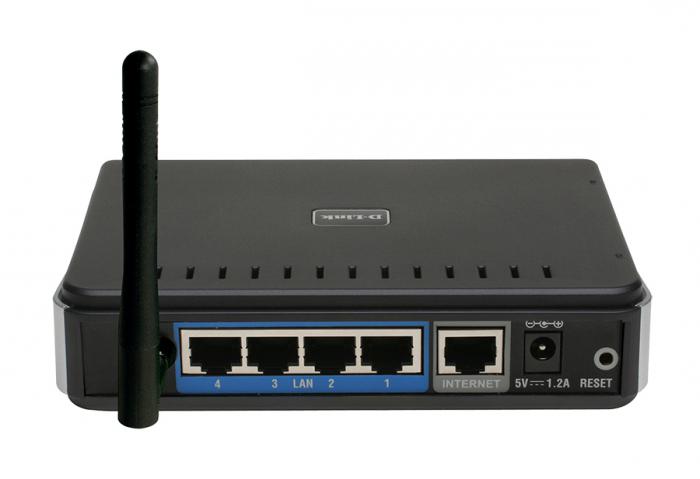
Consider how the D-Link 620 router is configured. As part of this manual, we will connect the Internet, access to which is carried out through the Ethernet channel. First of all, in this way, connect the corresponding cable to the port suitable for it on the router.
Next Step - Settings Software Connection Interface on PC. To do this, log in to the "Control Panel" of the Windows operating system, then select "Network Connections". Then we find a network card (or choose the one that is used to connect to the Internet), press the right mouse button, select "Properties". Next - click the left button on the TCP / IP Protocol item. Select "Properties". Test settings "Automatically" in all points.
The next step is connecting the PC network card and one of the free ports of the router using an Ethernet wire (this type of cable is typical when connecting to the Internet via a network card).
Next, open the window of any browser, for example, Internet Explorer, Opera or Google Chrome - not fundamentally, the functionality of the required interface does not depend on the type of program used. We enter the following command to the address bar - 192.168.0.1, press the Enter key. After that, the user falls into the router control window. You will need to enter the username and password. In most cases, when the D-LINK router is configured, you need to enter admin in both fields. This is a universal programmed at the factory, login and password for the type of type under consideration.
After entering the router control area, select a tab called "Network". Next, click on "Connections", after - on the WAN connection icon. On that page that boots after clicking on the WAN, you will need to make sure that the checkboxes on the receipt items and the IP are standing. In general, nothing to change on this page is needed. Most of the modern Russian providers do not require that this configuration of the D-Link router is somehow adjusted. Rostelecom, for example, among them.
Next, we return to the "Network" and "Connection" tab. Click "Add". After that, you will need to enter the settings that the provider must provide the provider working in a particular city (moreover, they may vary for houses located in different parts of the settlement). Entering the desired values, click "Save".
Specificity Wi-Fi settings
As a rule, if the D-Link router is configured, WiFi can also be activated. In order to use a wireless device module, you must again select the "Network" tab, then "Wi-Fi". In the window that opens, enter the network name - any convenient for the user, Latin letters. You can also set the maximum number of devices simultaneously connected to the router ("Customer"). For example, if a person uses three devices - say, a PC, a laptop and a smartphone, then you can enter a digit 3.
Next, select the Safety Settings tab. We establish authentication through the WPA2 / PSK Mixed standard - it is considered one of the most reliable. Select the encryption TKIP + AES, as this option is recognized by many IT experts optimal in terms of network protection. After - fit the password. Its minimum length - 8 characters. However, IT experts recommend to enter the password longer. He should also be, if possible, difficult - so that it is difficult to guess. With a password, you can control access to the Wi-Fi network, telling it only to those people who are entitled to use the Internet to which the owner of the router is connected.
Note that the Wi-Fi setting, the main nuances of which we noted, in general, is carried out according to the same principles also when working with other routers of the series under consideration.

After all settings, click "System", after - "Save and restart". This configuration of the D-LINK 620 router is complete. After a few minutes you can start using the Internet. If something does not work, it is advisable to contact the provider's support service.
As a rule, if the network connection was successful, then once recorded router settings should ensure the operation of the entire system and subsequently. At the same time, in some cases, technological upgrades can occur on the side of the Internet provider, which may predetermine the need to adjust the operation of the router. In this case, the user probably has to communicate with the service provider to identify the most optimal device settings.
Setting up D-Link 2500U device
Consider now how the D-Link 2500U router is configured, another popular device. From the point of view of working with Windows software interfaces, the algorithm of action is the same - you must make sure that in the settings of the network card, there are ticks opposite the items on obtaining the DNS address and IP automatically.
As well as in the case of the previous router, we connect all the wires, after which we introduce into the browser line 192.168.1.1. Name and password will be Admin. In most cases, the router menu of this brand is English. To start configuring the connection to the Internet, click the WAN tab. Select the Add button ("Add"), after which I actually come to the settings page. Here, as well as in the previous case, we will need data from the provider. Values \u200b\u200band VPIs, and VCIs may vary, therefore, not only between different cities, but also between the districts of one settlement. After the user entered the necessary settings, you can press Next.
On the page that opens, select the correct type of network protocol, also consulting the provider. For many Russian Internet access service providers, PPP Over Ethernet mode is typical of Encapsulation Mode ("encapsulation format") - LLC / SNAP-Bridging option. Click Next.
The next window, of course, will also require knowledge of data that can only be provided by the provider is a login and password. The remaining options on the page, as a rule, do not need to be adjusted (if the provider's support service does not advise other). Click Next.
Setting up the D-LINK router under consideration of the series usually does not require adjustments to the items on the page that opens, but it will not prevent consultation on this issue with the provider. If specialists from technical support will not give any recommendations, click Next. After switching to the next page - Apply ("Apply Settings"). After loading the following interface, press the Finish button, wait until the device restarts. A few minutes you can try to use the Internet. If something fails - call technical support.
Despite the fact that this router is not equipped with a Wi-Fi module, in many experts, it is recognized as reliable and easy to use the device. At the same time, as well as in the case of many other D-Link devices, in the event of a change in the technology of providing Internet access by the provider, the user may need to learn new settings directly from the Supplier of communication services.
Working with Modem D-Link 2640U
Let us now study how the D-Link 2640U router is configured. The first steps in working with this device will be the same as in the case of the previous devices - install the Windows operating system automatic receipt of the DNS address and IP through the Windows Control Panel.
Further, as when setting up previous routers, we enter the modem settings panel through the browser. The address will look like this - 192.168.1.1. Login and password will be the same - admin. The router setting interface in this case is likely to be Russian. Select "Network", and then - "Connections". Press the "Add" button.
The most likely "connection type" is PPPoE. Much less often uses the connection in the Bridge format ("Bridge").
Next, we prescribe the VPI and VCI settings - we are, as in previous cases, we learn from the provider. Similarly, I request a login and password from the service provider (by the way, they are often indicated in the subscriber contract - they can be tried to find there). It is recommended to activate the Keep Alive option. Regarding the LCP indicators, it is also recommended to find out the optimal values \u200b\u200bof the provider. But, as a rule, in the "Interval" paragraph optimally set the number 15, in the "Dips" option - 2. Also, activate IGMP. Press the "Save" button.
Now go to work with another most important function that the D-Link router is set to WiFi. To do this, press, respectively, the Wi-Fi button, hereinafter - "Basic Settings". We write the desired network name, then set the encryption standard - as well as in the case of the D-Link 620 modem, it is WPA2-PSK, enter a password for the network. Save settings. After pressing the "System". Next - item "Save and restart". After a few minutes we try to use the Internet.
Setting up the modem D-Link 320 and 300
We will study how the D-Link 320 router is configured. It is noteworthy that the model with an index 300 is configured in an almost similar way. The first steps - as usual, connect the wires, in the Windows settings, set the automatic receipt of the DNS address and IP. We open the browser, enter 192.168.0.1 in the address line. Login and password, as in previous cases, the same - admin, we get into the web interface of the router control panel. As a rule, it is immediately proposed to change the password set by default at the factory, to the user. Optionally, you can make an appropriate replacement.
Next, select the menu item "Network", then - "Connections". Click "Add". The Main Settings window opens. We choose the desired connection type (usually PPPoE). In the PPP Setup item, you enter the login and password, which, as in previous cases, can be requested from the provider or, as an option, to find in the subscriber agreement. The MTU value will also need to be clarified by the provider of services of the network access, in many cases this indicator - 1492. In general, these are all the settings that need to be made. Save parameters.
Next, we need to configure Wi-Fi. Select the corresponding point in the menu. We enter the desired name of the wireless network, configure security. As in the previous cases, select the WPA2-PSK encryption standard, enter the password. Click "Change". After selecting "System", then - "Save". As we have noted above, the configuration of the D-Link 300 router is performed in almost the same algorithms. This device and D-Link 320 is actually the same ruler devices.
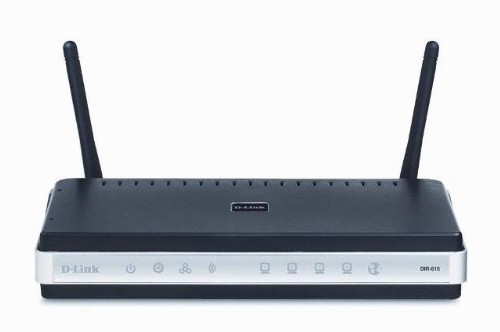
Setting the D-Link 615 modem
Consider how the D-LINK router is configured. First, we first do everything as when working with previous modems: We connect wires, install the automatic receipt of the DNS address and IP in Windows interfaces. Next - we go to the browser, fit into the address line 192.168.0.1. Enter in the "Login" and "Password" fields Admin. The system may propose to change the relevant data - if you wish, we replace.
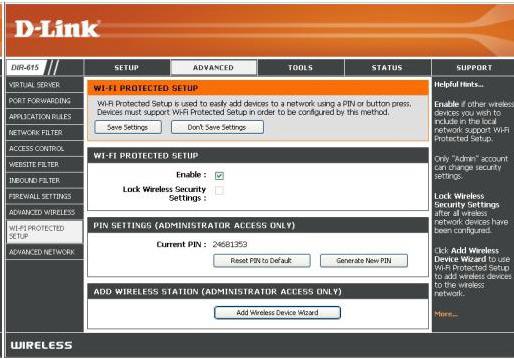
Distinctive specificity, which is characterized by a given, released D-link Router - the configuration of the wireless connection is desired primarily. To implement it, you need to press the SETUP button in the start menu of the device control panel. Next, select Wireless Settings ("Wireless Settings"). After - Manual Wireless Connection SETUP ("Installing a manual wireless connection").
This is further important to set the correct parameters of the wireless connection. So, regarding the Protected Setup item, it is desirable to remove the checkbox from the Enable option ("included"). However, you should make sure that the check mark on the ENABLE Wireless and Always options ("permanent mode") is installed. In Network Name, enter the name for the network. Expose Mixed - Mixed - type for communication protocol 802.11. Regarding security settings, Security Mode, optimally set the WPA-PERSONAL parameter. In Cipher Type, select AES. Next, enter a password (Pre-Shared Key) for a wireless network. After checking the correctness of all parameters, save the settings by clicking the "Save" button.
By configuring a wireless network, you can proceed to work with options that are related to the Internet connection. Press the SETUP button further - Internet, after - Manual Internet Connection Setup. In the menu that opens, we have to specify the communication protocol used (most likely it will be PPPoE), login and password (requiring the provider, we look at the subscriber agreement). You can also configure the optional parameter by clicking on Clone Mac Address. For the Connect Mode Select item, you must install Always ON mode. The recommended MTU value should be found from the provider, most likely, it will be equal to 1472. After checking the correctness of the settings, press Save Settings, after which the router will save the settings and reboots. After a few minutes you can try to start using the Internet.
Features D-LINK Modems Settings
If at our disposal the router released by the D-link, setting up this device, as a rule, is performed within the framework of very simple algorithms, in general, similar to all device models. What features can be allocated for the configuration of the devices considered by us?
First of all, we note that no less utility, along with the knowledge of the router setting algorithm, will be available for us from the provider - and this is the main feature of working with devices. Step-by-step configuration of the D-Link router in any modification requires relevant data. If they are not at hand, it will be problematic to connect to the Internet, since the scatter of indicators that determine the technological specifics of the connection to the network, in practice it is very large, guess the desired is not easy. Knowledge of the specifics of the standards used by the provider is an extremely important aspect, the correct configuration of the D-Link router is difficult without it. Beeline, Rostelecom, other major suppliers, as well as various operators can be characterized by tangible differences in technological approaches. But, as a rule, the support service provider is open to communicate with the user. Her specialist usually always reports the desired settings.

What other features has a router-released D-Link brand? Configuring the devices within the framework of the series we considered, as we found out, in the very first stages of working with devices require login and password. They are usually standard, sound like admin. But it may well be so that the user will be at the disposal of the device with modified login and password settings. Which he may not know. But it's not a problem.
Reset
It is enough to carry out the hardware "reset" of all router settings. To do this, click the RESET button, which is located in the rear of the housing. That is, there, wherees and connectors for connecting cables. Before pressing it, you must definitely disable the power of the device. After pressing, you should wait about a minute before working with the device. After the user reset the D-Link router settings, the factory login and password - admin - must come.
It should be paid to the fact that when you return the factory parameters using the RESET button, all settings are canceled, including, in particular, those that are responsible for accessing the wireless network. Therefore, if, for example, in the process of restoring workable options, the user will install a new password on Wi-Fi, then it may need to tell it to people who used the network before, knowing only former. Also, for example, to the device connected via Wi-Fi devices such as a TV with SMART TV support or TV prefix, then the corresponding settings in them will also need to be updated if the password in the router is installed new.
Saving settings
The devices of the series under consideration have a useful function of saving settings (with the adjustment of their subsequent recovery in case of failures). To do this, it is necessary to set correct settings via the router web interface and make sure that the Internet works with them. Next, you can save these parameters. To do this, in the main menu of the router control panel, select the Tools button, hereinafter - System. To save the settings to the file on the computer disk, you should press Save Configuration, and then select the desired location in the file system. It is also useful to make a copy of the saved file on another media, for example on a flash drive. To, in turn, restore the settings, in order to enter the same area of \u200b\u200bthe router control panel, click the "Overview" button (if the version of the operating system is Russian), and then specify the file with the settings, which before it was recorded on the disk or On the USB flash drive. After - click Restore Configuration Settings. Then you need to restart the router by clicking the reboot button. Also, through this interface, you can restore the factory settings by clicking on the Restore Device button - the effect will be the same as when you press the RESET button on the device case.
Reboot is needed
The feature of the devices of the series under consideration is that when settings change, the device must necessarily restart each time. That is, if, for example, some important file is downloaded from the Internet, and the connection is unwanted - the connection of the router settings is better not to produce, but wait until the desired information is loaded. Also, it may be found out that any other person is connected to the network via Wi-Fi, and it may also be undesirable forced internet disabling. Therefore, we wait until the router is free from use, and only after that we carry out the necessary adjustments in the settings.
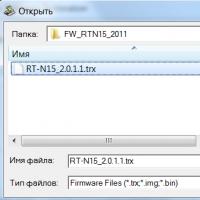 How to make an emergency restoration of the firmware of the ASUS router
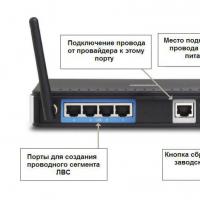 How to set up a D-Link DIR 615 router: Step by step instructions with photos
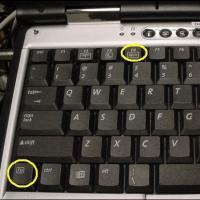 How to enable bluetooth (Bluetooth) on a laptop in Windows 7
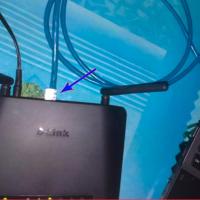 How to set up a Wi-Fi router D-Link DIR-615 yourself
 On Android does not turn on Wi-Fi: possible failures and methods for eliminating
 How to transfer the Internet from the phone to the computer in modern conditions
 Distributed the Internet from a laptop, Wi-Fi network is there, and the Internet does not work?