What is a samba server. SAMBA and Windows file server for Windows network. Secrets of Samba optimization
And maybe just interest and curiosity pushing users to search for various suitable software. SAMBA refers to such software. You need to know how to configure Samba to Ubuntu Server if you wish to make a database or file storage from your computer.
Installing Samba on Ubuntu Server makes it possible to create a database.
If you thought the page is devoted to the study of dance, you are slightly mistaken. Samba - Free Software Disseminated. It implements access to printers and files. And does it on different operating systems.
What is needed for?
In comparison with other software packages, the samba has several advantages and features.
- Allows you to connect a UNIX-like system to each other, i.e. any system on Linux, and Windows. And not only Windows. The program is very "omnivorous": MacOS, Solaris and other OS different degrees of popularity.
- Samba allows Windows users to use computers to Ubuntu as a server. That is, use the files to which access is established, as well as part of the connected devices.
- Supports the NT Domain domain structure, manages NT users, supports participant functions, primary controller.
Probably, for many, the main thing from this is a connection with the machines on Windows. In this case, they act as a client, and the computer on Ubuntu is as a server. On the other hand, Ubuntu user can also access Windows network folders.

Samba has already been made since 1992. And that the main thing, the new versions come out so far. The latter was released on the seventh of March 2017. Every year, developers are trying to establish compatibility with a large number of different versions of operating systems, but the main chip is the connection of Linux systems with Microsoft. In comparison with Windows Server Samba, it may give to it due to the lack of support for the part of the protocols and the infrastructure of the nodes. However, many argue that the speed of samba is much higher.
Customize Samba.
Before configuring directly, the program must be installed. The SAMBA installation is performed in the same way as in the case of other programs - using the command to the terminal:
sudo Apt-Get Install Samba

Immediately note: all actions that will be described, including the installation of the program, can be performed both on a simple Ubuntu and on Ubuntu Server. Only the latter is available exceptionally text interface.
After installation, you should make a configuration file backup:
$ sudo mv /etc/samba/smba/smb.conf.bak
$ sudo vi /etc/samba/smb.conf
Either edit an existing one. This file contains basic samba server settings. To figure out what we will do next, you need to understand what different lines mean.
- Workgroup is a working group. The value of this parameter will also often be a WorkGroup, since the Domain of the Working Group does the default domain look like that.
- NetBIOS Name - Name computer Ubuntu.which see Windows users. Here you can enter the value to your discretion.
- Security - user authorization mode. The default is user, that is, the user-level authentication. So far, it is better to leave.
- OS Level - Specifies the priority that Samba has over other clients (PC) in the local or Internet network.
- Name Resolve Order - Opelness of the permission of IP addresses on the NetBIOS name.
- Read only - the privilege of reading or record directory. The value may be "Yes" - exclusively reading, "NO" - recording.
Create a user
This is the simplest action from which you can start working with sump.

Add a user in OS itself:
$ USERADD -M -L -S / SBIN / Nologin Username
Create a password for it:
Let us bring our user to the samba base:
$ SMBPASSWD -A UserName

Using the $ SMBPASSWD command, you can perform other different actions:
- $ SMBPASSWD UserName - Password Change
- $ SMBPASSWD -X UserName - User Delete
- $ SMBPASSWD -D UserName - user
The server must be restarted if you make changes to the configuration file. This is done using the team:
$ SystemCTL Restart SMB
This is the basic SAMBA settings. Now you can try to apply the program in practice.
Access to the folder
First, let's try to create a folder, access to which will be opened to all users, even to those who are not authorized in Samba.
Create a folder with which we will then work on two computers:
$ sudo mkdir -p / samba / access
Now we make advanced access for this folder so that any client of our local network can open it:
$ CD / SAMBA
$ sudo chmod -r 0755 Access
$ sudo chown -r nobody: Nogroup Access /
The owner according to the code is Nobody.

Now in the server configuration file you need to make two partitions: the first containing the basic information:
workgroup \u003d Workgroup
server String \u003d Samba Server% V
nETBIOS NAME \u003d SRVR1
security \u003d user.
map to Guest \u003d Bad User
name Resolve Order \u003d BCast Host
dNS Proxy \u003d No
#==============
And the second containing data about the Access folder:
path \u003d / Samba / Access
browsable \u003d Yes.
writable \u003d Yes.
guest Ok \u003d YES
read only \u003d no
Follow the sections with each other in the same order.
Update server change:
$ Sudo Service SMBD Restart
Actions with a computer on Windows
On Windows also requires some actions so that you can easily open a new common folder and edit it.
- Open the command line. It is advisable to do this with extended rights, i.e. on behalf of the administrator.
- We execute the command:
- notePad C: \\ Windows \\ System32 \\ Drivers \\ ETC \\ HOSTS
- The file in which we enter the following line are open:
- 168.0.1 srvr1.domain.com SRVR1
Thanks to her, the folder will become available. - You can open it using the "Run" string. Click Win + R, enter: After that, we will open the folder.

Closed folder
The configured Samba server can also be used to create network folders with limited access. Such a folder also need to first create, and then add to the SAMBA configuration.
We make a folder called "Closed":
$ sudo mkdir -p / samba / allaccess / closed
We make a special group that can have access to this folder:
$ sudo addgroup securedgroup
Create special rights for different groups:
$ CD / SAMBA / Access
$ sudo chown -r richard: secredgroup closed
$ sudo chmod -r 0770 closed /
Also, as in the case of an open folder, add information to the configuration:
pATH \u003d / SAMBA / Access / Closed
valid Users \u003d @SecuredGroup
guest OK \u003d NO
writable \u003d Yes.
browsable \u003d Yes.
Restart the server.
How can I understand, we made the folder closed inside Access. Thus, Access can open each user of a local network, but to watch and edit closed, you need to have special rights.
To make sure that everything works exactly as we asked in the command file, you can perform a few simple actions.
Create a user and add it to our closed group:
$ sudo usermod -a -g SecureDGroup Winston
Our name is your name, like a pack of cigarettes (or British Prime Minister).
We do for Winston Password:
$ Sudo Smbpasswd -a Winston
After that, we will be offered to enter new passwordTo come back under the just created account. Do not forget to reboot after that. Now you know how to configure the server through Sambu in Ubuntu.
Of course, Samba features are not exhausted only by creating simple folders. But these simple instructions and examples show that you can do with this program. It will be the first step towards understanding the essence of server PCs and their control.
Linux is an excellent operating system, but we are not going to go from Windows and it is from us too. Windows will always surround us - be it home, corporate network or Internet cafe. We are constantly dealt with documents with Windows computers - after all, not all users prefer to work in Linux. Having at its disposal a server onLinux In any case, there will be a need to interact with Windows-computers, so we are talking about connecting Linux To Microsoft.
Installing samba.
For sAMBA installations We need to install Samba and Samba-Client packets. It is also desirable to install the SMBFS package. In addition, the system will raise the Samba-Common package, which is already installed in the system. All my manipulations will be held onUbuntu. 10.04, the main differences from other distributions is the installation method. ForUbuntu. Thr a console, so:
$ sudo APT - Get Install Samba
Or using the Synaptic package manager, which I did, this option was more convenient for me, because you could choose from the list those packs that I needed, it was:
samba.
smbclient.
samba-Common.
If you once used another Linux distribution, then probably familiar with the Linneighborhood program. This is a graphic program that allows you to view Windows network resources. In Ubuntu, there is no need. First, the staff of GNOME allows you to view Windows networks. And secondly, the Linneighborhood program from one of the repositories Ubuntu was installed for the sake of interest. It turned out that this program found Synaptic is generally not suitable for use (problems with localization). Well, okay, the point of understanding, if there are excellent standard funds that are already working.
Basic SAMBA Setup
At this stage, we assume that the utility is installed. The main configuration file samba - /etc/samba/smb.conf. It must be opened and change several parameters. First thatworkgroup - He sets the name (on your choice) of the working group or domain NT:
Workgroup \u003d Myhomegroup
You can also set the COMMENT parameter - this is a description of your computer:
comment \u003d My Linux Computer
Set the Security parameter. If the network is client / server, then you need to choose sERVER Parameter, what ifpeer-to-peer network (i.e. network without a selected server), then you need to select User or Share:
security \u003d Share.
Install the name of the guest account as follows:
guest Account \u003d Guest
You also need to configure encodings:
client Code Page \u003d 866
cHARACTER SET \u003d UTF8
In order for Samba to work faster, set the following options:
socket Options \u003d TCP_NO DELAY SO_RCVBUF \u003d 8192 SO_SNDBUF \u003d 8192
dNS Proxy \u003d No
The Interfaces parameter specifies the interfaces on which the Samba service should work. You must specify those interfaces that link our machine with Windows networks:
interfaces \u003d 192.168.0.22/24
Setting up common resources
Now it remains to configure the resources that we want to provide in total use, this is a section [public].
# General catalog
comment \u003d Public Directory
# way
path \u003d / Var / Samba
# not only reading
read only \u003d no
# Allow recording
writable \u003d Yes.
# Allow guest access
guest Ok \u003d YES
# Allow viewing directory content
browseable \u003d Yes.
In this case, the shared resource of our computer will be the / var / samba directory (it needs to be created, because by default there is no such directory in the system). In it, other users will be able to record their files (read only \u003d no, writeable \u003d yes), of course, they will be able to read them (browseable \u003d yes). Checking the username and password to access the resource is not needed (Guest OK \u003d YES) - the so-called guest access is used. Comment "Public Directory" will see other Windows network users when viewing the resources of our computer.
If there is a need to provide shared access ("split") to home directory users, then we go to the section;. We unconsume all rows commented by a point with a comma to a string; T. e. The following should happen:
comment \u003d Home Directories
browseable \u003d No.
valid Users \u003d% s
writable \u003d No.
create Mask \u003d 0600
directory Mask \u003d 0700
Now custom directories will not be visible in the list of shared resources, you can contact them at \\\\ server \\ username user . For example, \\\\ Server \\ Petya. If you want user resources to be viewed, then set the value of YES for the Browseable parameter:
browseable \u003d Yes.
After all changes, save the configuration file and run (or restart - restart) samba:
$ sudo /etc/init.d/samba start
View Windows network resources
You can view Windows network resources using the Smbclient program, but it works in text mode, so it is not entirely convenient to use. It is much more convenient to use the file browser to view network resources. You can do it using the menu Transfer | Connect with the server ...
Secrets of Samba optimization
Now let's talk about how to make Samba work a little faster. If you open the SMB.CONF configuration file, you will find the Wide Links parameter in it. Never install it inno. ! So we will significantly reduce the performance of Samba. On the contrary, it is necessary to install it in YES (if the WIDE Links parameter has been disabled), which will significantly increase productivity.
The Wide Links parameter determines how Samba will follow symbolic links. If Wide Links \u003d NO, Samba will not follow symbolic links outside the exported area. First, Samba follows the symbolic link, and then performs the so-called Directory Path Lookup (the system call that determines where the link completed). This operation implies 6 system calls more than if Wide Links \u003d YES. Considering that such operations are done a lot, the WIDE Links shutdown reduces the performance of Samba by approximately 30%.
Samba. - a program that allows you to contact network disks On various operating systems using SMB / CIFS protocol. It has a client and server part. Is free software, issued under the GPL license.Samba. Works on most UNIX-like systems, such as GNU / Linux, POSIX-compatible Solaris and Mac OS X Server, on various BSD options, in OS / 2, Windows. Samba. Included in almost all Distributions GNU / Linux, including, of course, in Ubuntu.
Installation
To make a shared folder in Ubuntu Desktop. It is enough to climb the right mouse button on the folder and select the menu item "Publish the folder". There are no configuration files to edit any configuration files. Everything described below applies only to manual configuration, for example, in the case of creating a file server.
To install, just open the terminal and enter:
Sudo Apt-Get Install Samba
The application will be automatically loaded and installed.
Setting
With the help of the terminal do backup Primary configuration file:
Sudo cp /etc/samba/smb.conf(,.bak)
Now you can edit the /etc/samba/smb.conf settings file, to do this, open it in any text editor With superuser's rights. For example, so:
Sudo Nano /etc/samba/smb.conf.
In general, generally speaking, just one specific scenario of using Samba, and in a huge amount of cases everything is configured absolutely wrong. The article needs to be corrected by focusing on the capabilities of Samba, and not only on the application of this program as file storage with local authorization. An example with a file store is better to endure in a separate detailed article.
An example of the SAMBA setting as a standalone file server with authorization:
; Global server settings; General Server Settings; The name of the computer that will be displayed in the network environment of NetBIOS Name \u003d Main-Server Server String \u003d; Workgroup working group Workgroup \u003d Workgroup Announce Version \u003d 5.0 Socket Options \u003d TCP_NodeLay iptos_lowdelay SO_KEEPALIVE SO_RCVBUF \u003d 8192 SO_SNDBUF \u003d 8192 PASSDB BACKEND \u003d TDBSAM Security \u003d User NULL Passwords \u003d True; USERNAME MAP \u003d ETC / SAMBA / SMBUSERS NAME RESOLVE ORDER \u003d HOSTS WINS BCAST; WINS Support is installed in YES if your NMBD (8) in the samba is a WINS server. Do not install this option in YES If you do not have several subnets and you do not want your NMBD to work like WINS server. Never install this parameter in YES more than one machine within the same subnet. WINS Support \u003d NO; Printing printer support \u003d Cups Printcap Name \u003d Cups; Log file log file \u003d /var/log/samba/log.%M syslog \u003d 0 syslog only \u003d no; Setting the binding to interfaces to which listen, if not listens to all interfaces; interfaces \u003d lo, eth0; bind interfaces only \u003d true; ; ; path \u003d / var / lib / samba / printers; browseable \u003d yes; Guest Ok \u003d YES; read only \u003d yes; Write List \u003d root; Create Mask \u003d 0664; Directory Mask \u003d 0775; ; ; PATH \u003d / TMP; printable \u003d yes; Guest Ok \u003d YES; browseable \u003d no; ; ; path \u003d / media / cdrom; browseable \u003d yes; read only \u003d yes; Guest Ok \u003d YES; Hard disk ball; The name of the balls is visible from customers; Path to the shackled Disk Path \u003d / Media / SDA1; Is it possible to view browseable \u003d yes read only \u003d no guest ok \u003d no create Mask \u003d 0644 Directory Mask \u003d 0755; Binding to a specific username or group, names via space; Force User \u003d User1 User2; Force Group \u003d Group1 Group2; Another hDD, By analogy with the fact that above Path \u003d / Media / SDE1 browseable \u003d yes read only \u003d no guest ok \u003d no create Mask \u003d 0644 Directory Mask \u003d 0755
Now you have to deal with users.
Samba uses users who already exist in the system, take for example the username, let's say that it is already in the system, you need to enter it into the SMB database and assign a password to access the shared resources, make it a team:
SMBPasswd -a user.
You will be prompted to enter a password, the user will be added to the database, now it is necessary to enable this user.
SMBPasswd -e user.
Next, create a pseudonym for the user name User to facilitate access to Windows Machines On which we have for example a user named Admin, for this we will create and edit the / etc / samba / smbusers file:
Sudo Touch / etc / Samba / Smbusers Sudo Gedit / etc / samba / smbusers
Enter a pair of lines to file
# Unix_name \u003d SMB_NAME1 SMB_NAME2 User \u003d Admin
On this setting is completed, restart Samba.
Install the easiest GUI for Samba by the command:
Sudo Apt-Get Install System-Config-Samba
He starts the team:
Sudo System-Config-Samba
All changes it writes to the SAMBA configuration file.
For remote administration Samba as a Web interface for Samba is perfectly suitable
 How to pay a domain name
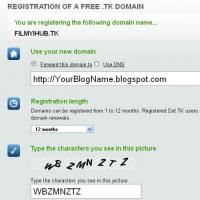 Domain zone of tokelau islands
 What is domain what problems may be
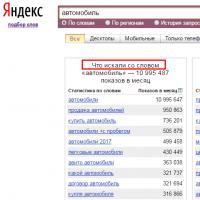 Yandex Wordstat: detailed instructions for using the service and grouping operators and a complicated request
 Editing DBF files
 Xenu Link Sleuth - What is this program how to use the Xenu program
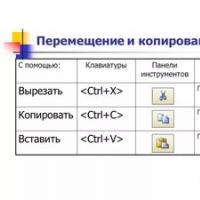 Methods Copy and insert text from keyboard without using mouse