Self-configuration and connection ASUS RT-N12
Let's figure out how to connect the ASUS RT-N12 router, configure the connection to the Internet. We also specify how to organize access to settings through a PC and log in to the web interface of the router. Consider the process of changing the password of network access and settings. We learn how to reset the current parameters in case of unsuccessful tuning and update the firmware.
Indicators and router connectors
The ASUS RT-N12 device has a usual appearance for most routers. The front panel is equipped with indicators of work, on the rear panel there are connections and control buttons, on the bottom of the case, the sticker with the basic parameters and data to enter the web interface.
Indicators are represented by the next set, from left to right.
- Turning on / off. If the indicator does not burn, then the device is turned off, slow flashing is characteristic of loading the system, the constant light is ready to use.
- WiFi indicator. If it does not burn, then the network is disabled. Flashing means using the access point, the smooth light signals the readiness of the system to work.
- WAN indicator, connection to the Internet provider. It has two positions: burns when everything is in order; Disable if there is no connection to the Internet.
- LAN 1-4 signals the presence of a local connection. It does not burn if no connection is lit, when the cable is connected, but the connection is not used, flashes at the time of data transmission.
On the rear panel there are the following elements, from left to right.
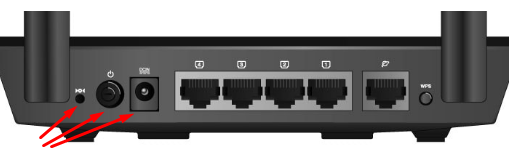
- Button for resetting current parameters to factory. Activated by a long press.
- Power on and off button.
- Connector for power cable.
- Four LAN connectors for a network connection using a cable.
- WAN connector for the provider's Internet cable.
- Authorization button via WPS.
This is the entire list of indicators and connectors on the router housing.
Instructions for connecting to a computer or laptop
To begin with, the ASUS RT-N12 router must be connected to a computer or laptop to perform the desired settings. You can do this using a network cable that comes with a device or using a WiFi connection. Both options are suitable, but we advise you to use the cable for the primary setting.
Through cable
Connecting and configuring the ASUS RT-N12 router via a network cable is more preferable. To do this, take the wire and insert one end to one of the LAN connections in the router. The second end of the network cable must be stuck in the network card connector in a laptop or PC.
The main Internet cable of the provider should be connected to the router to the WAN connector. Before setting, do not forget to turn on the device.
Via wifi.
You can connect asusrt-H12 via WiFi and perform all settings from any mobile device. To do this, it is enough to connect to the open point of ASUS access, which will appear immediately after turning on the router.
Setting up router
Go directly to the process of adjusting the ASUS RT-N12 router. It is performed through a special web interface.
Reset
Do not be afraid to configure the router yourself. If after setting the parameters something went wrong, the router can always be reset to factory settings. To do this, on the case of the device there is a special button, it is necessary to press it with a thin object (clip or rod ballpoint) and hold 7-10 seconds.
All indicators should simultaneously light up, after which the device will restart and return to the initial settings. The same method is suitable if the user installed his own pair to authorize in the settings interface, but forgot it.
Login to the web interface
The device is connected to the PC, now it remains to answer the question of how to configure the ASUS RT-N12 router. All parameters are set through a special interface. To enter the settings section, you must select a convenient browser (Chrome, Yandex, etc.) on the computer and in the address bar Register 192.168.1.1.
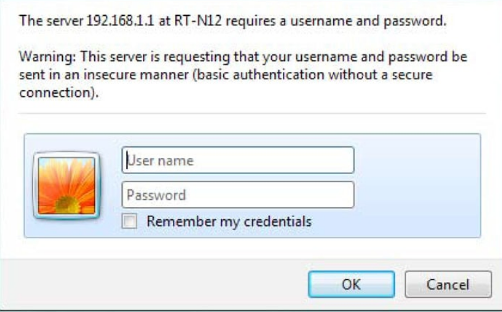
In the User dialog box sees the authorization form. For a new device, use a pair of Admin / Admin. If authorization does not pass over the router settings and try again.
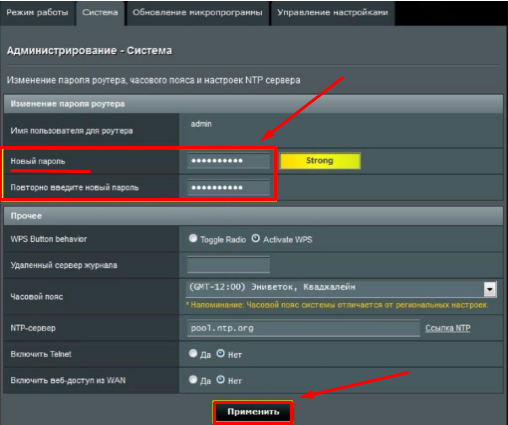
Changing the password to enter the web interface
To eliminate the ability to change the ASUS RT-N12 configuration settings by other users, the router owner can change the password to enter. To do this, open the Administration section, enter the System tab and specify the new password.
Dynamic IP.
Configuring the ASUS RT-N12 router depends on which type of connection is used by the provider. When choosing this value, it is necessary to clarify the data in the service contract or call the provider.
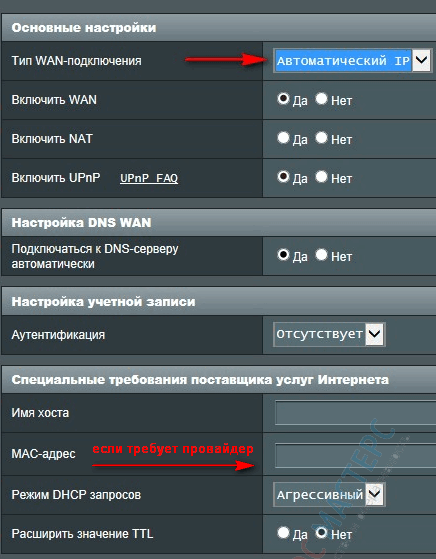
This type of connection provides automatic receipt of the IP address. Save the changes.
Static IP.
The connection type uses a fixed address that you often need to register manually. The parameters are specified in the contract with the provider, you can clarify by calling the maintenance service.
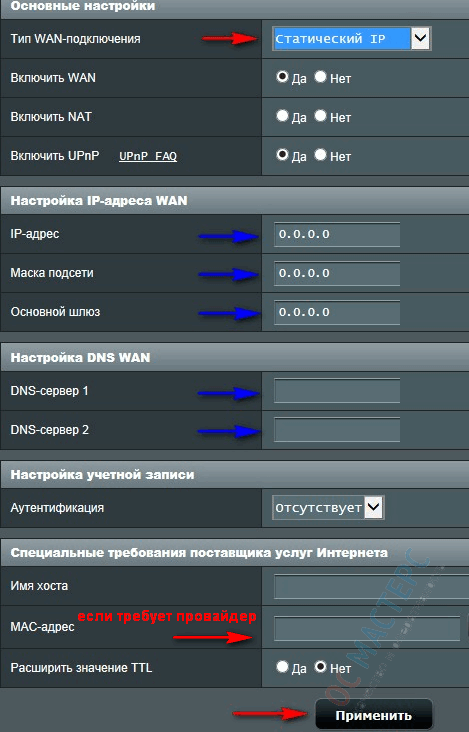
Fill in the fields in the following data:
- IP address 192.168.0.49;
- Subnet mask 255.255.0;
- Main gateway 192.168.0.1;
- DNS server 1 192.168.0.1.
Values \u200b\u200bcan be changed, you should compare with the data provider.
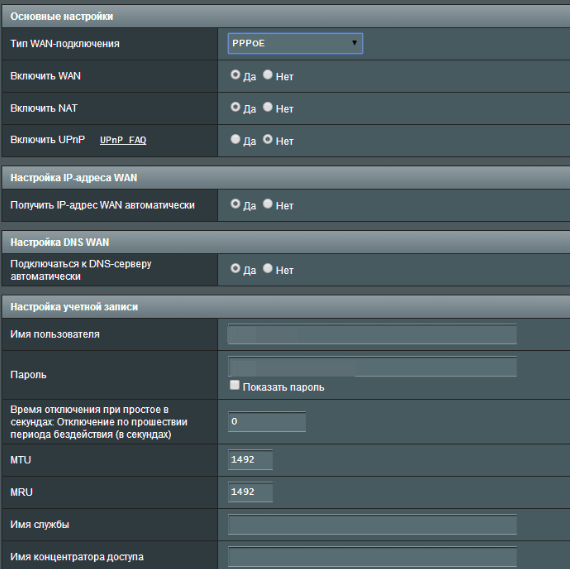
PPPoe
If the PPPoE connection type, then ASUS RT-N12 will require the following settings.
L2TP
If the provider supports this type of WAN connection, the settings that need to be executed are in the "Internet" section of the Connection tab. In the Enable WAN, NAT and UPNP set "Yes" parameters. The IP and DNS setting also receives the "Yes" parameter.
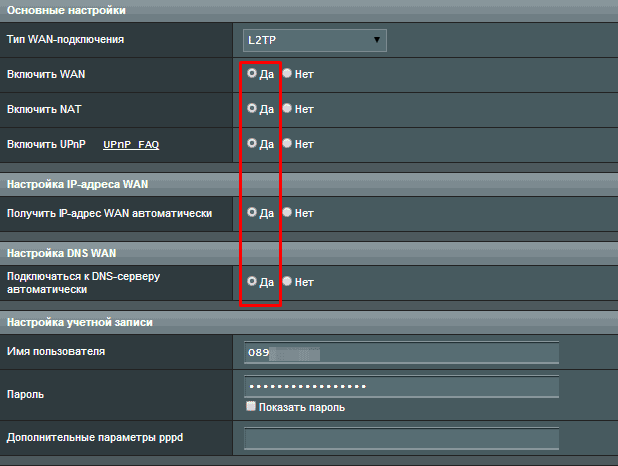
Be sure to save the changes and wait for the router to restore the connection to the Internet. It may take a couple of minutes.
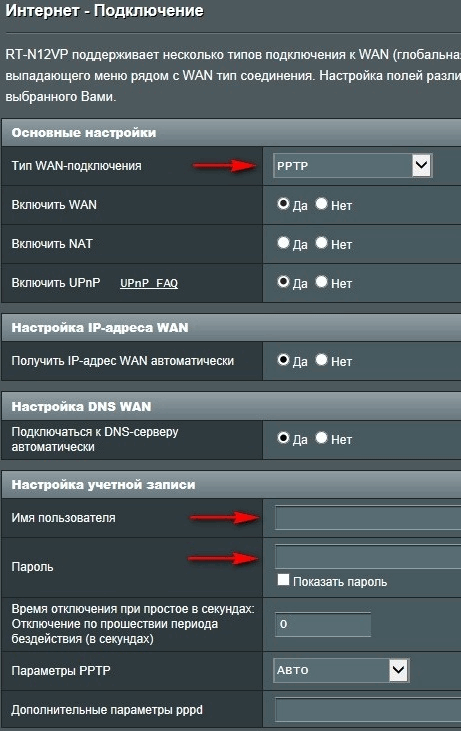
PPTP.
If the provider requires this type of connection, you must specify the username and password for connecting to the Internet and the name of the VPN server from the service contract.
WiFi.
The ASUS RT-N12 router settings will continue to install the parameters for WiFi. Open the Wireless tab and write the following fields.

The remaining parameters remain unchanged. In the WPS tab, configure the ability to connect to the network by means of this technology.
IPTV.
Settings To be able to view the television through IP TV are performed in the Local Network section. Select the appropriate tab and turn on multicast routing and IGMP Snooping.
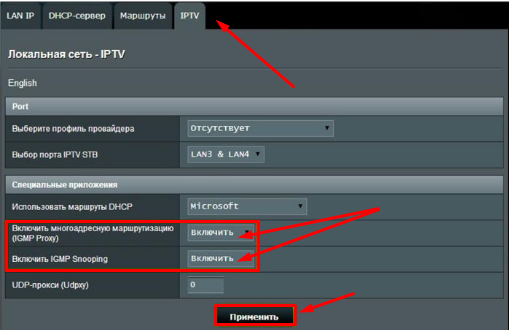
Other adjustment parameters do not require. Be sure to save the changes to the "Apply" button.
VPN server.
We will analyze the configuration of the VPN server. On the main settings page, locate the optional section and select VPN. Turn on the PPTP server to make the check box with the "Yes" value and set the name and password. Then open the "More details" tab and in the Broadcast Support parameter, set the LAN TO VPN Client value, and in MPPE Encryption Slide checkboxes for all parameters.
 How to make an emergency restoration of the firmware of the ASUS router
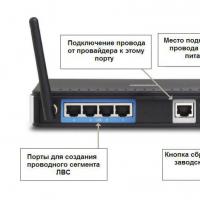 How to set up a D-Link DIR 615 router: Step by step instructions with photos
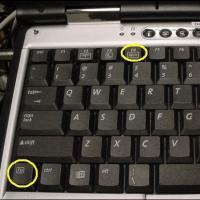 How to enable bluetooth (Bluetooth) on a laptop in Windows 7
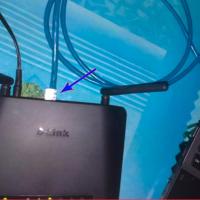 How to set up a Wi-Fi router D-Link DIR-615 yourself
 On Android does not turn on Wi-Fi: possible failures and methods for eliminating
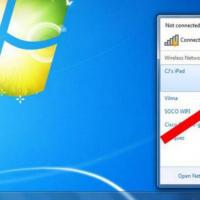 How to transfer the Internet from the phone to the computer in modern conditions
 Distributed the Internet from a laptop, Wi-Fi network is there, and the Internet does not work?