Nokia phone does not connect to wifi. Wi-Fi connection on phones and smartphones. Public hotspots
Mobile operating system Windows Phone now it is developing very actively, and it is difficult to argue with that. I also have a Windows Phone ( Nokia Lumia 925), and I am very pleased with it. To be honest, Android is bored, I want something new. But this article is not about my Lumia, or which OS is better. Phones on this operating system work stably, and in terms of Internet access via Wi-Fi, everything is just as good.
For example, for several months I have not noticed a single problem in which Nokia Lumia would not want to connect to Wi-Fi, or the Internet would not work.
But, as I noticed, different questions appear about the problems that still arise when trying to connect a Windows Phone phone to Wi-Fi, or after connecting. Typically, these are problems when the connection to the wireless network is established, but sites on the phone do not open. Or, for example, when Nokia Lumia does not see the Wi-Fi network. And he does not see only one, desired network, and sees the neighboring ones.
In this article, we will try to figure out why there may be problems connecting your Windows Phone to wireless networks, and how to solve these problems. On this moment, version WP 8 (I'll show with this version as an example), an update to Windows Phone 8.1 is coming soon. Perhaps there will be some changes in the work with wireless networks.
Windows Phone connects to Wi-Fi, but the Internet does not work
This is probably the most popular problem. And as a rule, it is not the smartphone that is to blame for this problem, but the access point itself (router). You connect the phone to the network, as I wrote in this article, it connects (status: connection established), but when you try to open the site in the browser, an error appears: “The page cannot be displayed”... Applications such as VKontakte, Twitter, Skype cannot go online.

How to check what's the matter?
Everything is very simple, if you connect other devices to your router via Wi-Fi, and the Internet works fine on them, then the problem is most likely in the phone (Nokia Lumia). But, if the Internet on other devices also does not work, then the problem is in the router. It may not be configured correctly. In this case, see this article "Without Internet access" - we solve the main reason. Configuring Wi-Fi router to work with a provider. Or they just forgot to pay for the Internet.
How do I fix the problem?
First, restart your Windows Phone smartphone, and a router.
If the problem persists, then it is worth checking if you accidentally turned on on your phone manual settings proxy servers. This problem occurs very often on Android devices.
Go to Wi-Fi settings and click on your network. In the menu, select the item “ Change“. Make sure that the function “ Proxy server”Was turned off.

Try connecting your phone to a different network and see how it works with it.
Problems connecting Windows Phone to Wi-Fi
Most often, problems appear even when trying to connect to a wireless network.
Another popular mistake is the incorrectly specified password from the wireless network. Immediately I advise you to remember the password in one of the ways from this article. If, when connecting, you enter the password incorrectly, then at first the connection will take a very long time, and then a message will appear that to connect to the network, you need to enter the password again.

It may also be that your phone does not like the type of security that is set in the settings of your router. You can try changing your password and other security settings, here's the instruction.
When the smartphone cannot get the IP address
Usually, routers distribute IP addresses themselves, they have DHCP server... But it happens that DHCP is disabled for some reason (when, for example, IP is manually registered on devices). To be honest, I have not found how to manually register an IP address on Windows Phone 8. I think that in Windows Phone 8.1, this problem will be fixed.
If your phone cannot receive IP, then you will most likely see an error, something like: “The phone cannot connect to the Wi-Fi network because the network is not responding. Please try again later ”... Or, next to the name of the network, there will be just an inscription "Protected".

You need to check if the DHCP server is enabled in the router settings. If not, turn it on. How to do this, I wrote in a separate article. Look after the heading “Check if the DHCP server is enabled on the Wi-Fi router”.
Also, you can try to change the mode of operation in which your wireless network works. Try, for example, only n, or g.
Nokia Lumia does not see Wi-Fi network
When I write Nokia Lumia, I have to enter any phone on Windows Phone, you get the idea.
I highlighted on some forum the problem that Lumia (I don't remember exactly which model) did not see the home wireless network. It simply wasn’t on the list of available networks. The problem is not uncommon and can occur on any device.
I even wrote a separate article on this issue The laptop (phone, tablet) does not see home wifi network (sees neighbors), read.
So, in the case of Microsoft's operating system, I would also advise you to change the channel on which the router broadcasts your wireless network. How to do this is described in detail here. Since it is the interference on the channel that usually causes similar problems... Try some kind of static link, not Auto mode. And don't put the channel higher than 12th.
Afterword
It seems to have written about all the popular problems. If you are faced with any other problem in the Internet via Wi-Fi on Windows Phone, or you know some new solutions to the problems described above, then you can share useful information in comments. Don't be lazy
The hot-spot network is conquering megalopolises at a very high rate. In the modern world, interest in a Wi-Fi-based service in terms of earnings is presented in various public places, such as computer clubs, restaurants, airports, libraries, shopping centers. Access to such networks is paid and free, the difference between them is in the quality of services and in the connection speed. In this review, you will learn a lot of useful things, namely, how to connect wifi on nokia.
With the help of technology such as Wi-Fi, it is possible to:
- When playing a game, connect, for example, not one, but more games.
- Get access to the computer system.
- Connect to Windows, Linux.
- Connect to the Internet.
- Download files.
- View video and music files.
How to set up wifi on nokia
There are two WLAN connections:
- In an open access point (hotspot).
- At home or at work.
Each network has its own name. It is correctly called the SSID. If you have access, in other words, an Access Point device (later we will call it as an AP), which every 10 times a second gives the devices a signal about the network. A device that can receive such information, in principle, has the ability to connect (more on security below).
Joining a public hotspot with Nokia is not difficult at all. Use both the built-in and the add-on program. In order to check whether you have Wi-Fi, the connection manager is suitable, in the "Available WLANs" item of which the found networks are shown, and the protected points are shown by pictograms with a lock.
In general, everything is not so complicated: the phone caught the AP signal, then displayed on the screen what the network is called, having made a choice, then you can use the Internet, provided that the AP administrator did not confuse the configurations.
If the hotspot is paid, then when you try to join you will be prompted to enter a password, which you need to find out from the Internet owner. Naturally, if you do not enter it, then there will be no Internet connection.
With a Nokia phone, there are three ways to see the network:
- We connect in the WLAN settings. With this connection of the setting, a symbol will be displayed, where there will be four squares. Sometimes, to see which network and what its name is, it is possible with the second method.
- We go to the menu and look for the connection manager, where the WLAN input is located. It will show which network, signal strength, protection, speed.
- When we enter the network, the question is asked about the use of the access point. In the menu there is a Search for a WLAN network, having made a choice, we get access to the list of networks.
When the network is in frequent use, it is not worth searching for it and entering security keys. We add the WLAN network as a regular access point.
Given that the network is wireless, radio waves are used in this case. Different devices, working side by side in different networks, allows a range of 11 channels. These channels, where the AP is doing work, can be changed. The channels used do not affect the network, everything happens automatically. There are two points to note:
- The networks that are on the adjacent channel sometimes introduce interference.
- Different devices have different sensitivity, which is determined by the quality of work. As a rule, the devices receiving the signal are set to work on the sixth channel, that is, the average. This, on the first and eleventh quality work the network is slightly worse.
To easily and quickly turn on / off WiFi, we advise you to download the ConnectivityShortcuts program from the market.
In addition to Wifi, this program switches to flight mode and Bluetooth.
We hope we helped you set up wifi on your nokia phone.
Enjoy using the wireless Internet!
WLAN modules Nokia for the first time began to embed in smartphones based on the third edition Series 60 platform. What opportunities does it provide to the user this technology on a mobile device? What is the standard software capable of and what programs from third party developers should I install for full use of WLAN on my smartphone?
Public hotspots
 |
 |
The hot-spot network is developing quite rapidly in large cities of Ukraine. Of course, Kiev is the leader here, and today Wi-Fi coverage in restaurants, hotels or universities of the capital is far from uncommon. Among the access points there are both paid and free ones, they differ in the quality of services and connection speed.
Connect to a public hotspot using Nokia smartphone very simple. To do this, you can use both the built-in software and complementary programs... For example, to check for Wi-Fi coverage, the standard connection manager will do, on the tab Available WLANs of which the found networks are displayed, and the points with protection are indicated by an icon with a lock.
Then choose the desired network and you can enjoy high-speed Internet. Note that if the hotspot is paid, when you try to connect to it, you will be prompted to enter a password, which you need to find out from your service provider.
To find out if there are networks nearby WLAN, also use the standard software. To do this, enter Settings → Compound → WLAN → Show availability... Next, specify the scan time - 1, 2, 5, or 10 minutes. In the presence of Wi-Fi connections its icon will appear in the upper right corner of the screen.
The capabilities of other similar programs are not great. One of them is the WLAN wizard. it free app is available on the official Nokia website in the phone support section, and in some smartphones it is built into the firmware (for example, Nokia N80 IE). When launched, the utility searches for available Wi-Fi networks. Unfortunately, it does not have the function of periodic scanning. But this program has one useful feature - it can create a point Wi-Fi access automatically when a network is detected. Moreover, the key entered to connect to closed network, the next time you select this hotspot, you no longer need to enter it.
Another program in this category is Psiloc's Hot Spot Finder. It cannot boast of outstanding functionality -
 |
 |
the application scans for available Wi-Fi networks, and notifies with a sound signal that it is detected.
Home hotspot
If you have a computer connected to the Internet, you can organize a wireless network at home. To configure it, you should use either the native Windows program to set up a Wi-Fi network, or by the application that comes with the router.
We write any network name (SSID), type - peer-to-peer, encryption - WEP, set the access key (if you don't want to make your network open to everyone), IP address - 192.168.0.1, subnet mask - 255.255.255.0. The gateway and DNS depend on the settings of your ISP. Now connecting a smartphone to a home network is no different from that in the case of a public hotspot.
Note that the Nokia PC Suite application, unfortunately, does not provide the ability to connect a smartphone to a PC using Wi-Fi.
File exchange between smartphone and PC
 |
 |
 |
 |
To accomplish this task, you need to install the SymSMB 1.10 program on your smartphone. After configuring it, you can work with any terminal folder (including drives D and Z) as with a regular network drive, and you do not need to install any third-party software on your computer. In addition, the application is able to automatically connect a smartphone to a wireless network when accessing a network drive, which is very convenient - there is no need to perform any preliminary actions before connecting, as is the case with a USB cable and Bluetooth.
Let's take a closer look at the program settings. In the Accounts menu, enter the domain names, username and password. In this case, the domain is the name of your computer (which can be viewed in My computer → Properties → Computer name). Tab Name and the password matches the one with which you logged in. So, if the computer name is Comp and the account name is Admin then our account will be Comp / Admin... Next, you need to configure the third menu item - Shared folders... We create a new account, give it a name (for example, Disk_E), we determine the folder that needs to be connected, and it is more convenient to immediately select the entire disk (in our case - E). Then we specify access ( Permissions), that is, we assign the previously created account the rights to work with the folder, mark Read and Write. Next, third, tab - Connections (Connections I am). Everything is simple here: select the connection name (in our case Smart) and the access point ( home network), and also indicate whether auto-connection will be used. We activate the connection - inscription Not connected will disappear, and the IP address assigned to the smartphone will appear instead. The configuration of the program is completed.
Now you need to map a network drive to your PC. In any folder in the menu Service choose Map network drive, then assign it a free letter and enter the name of the folder network drive... The latter should look like this: connection name network folder... In our case, it is SmartDisk_E... In the next window, we indicate the username and password, and the name is the name of our account ( Comp / Admin), and the password is the same as for the Windows login.
That's it, now you can work with your smartphone like any other disk on your computer. The speed, however, is not high and is approximately equal to that of an Internet connection (a little over 1 Mbps), but you will forget about problems with connecting via cable or Bluetooth.
A smartphone running in Wi-Fi data transfer mode runs out of battery very quickly. So if you are in the reception area with good level signal, it is worth reducing the transmission power of the WLAN module of the smartphone. This is done as follows: Settings → Connection → WLAN → Options → Advanced. parameters → Transmission power. Then lower the default value of 100 mW to 10 or even 4 mW.
The basics Wi-Fi technologies were laid down in 1997, and today it includes all standards of the LAN 802.11 family. At the moment, 802.11g is the most common. Its characteristics are as follows: operating frequency - 2.4 GHz (ISM band); data transfer rate - 54 Mbps; the range of the transmitter is 100 m indoors and up to 300 m in open areas; compatibility with all standards of the 802.11 family. However, we note that the data transfer rate depends primarily on the speed of the Wi-Fi router's connection to the Internet, the type of router and the distance to it. If these factors are not " bottleneck”, Then the maximum download speed that a smartphone is capable of, in practice, is in the range of 1–1.2 Mbps. Today, the Wi-Fi module is built into such Nokia smartphones and communicators: E60, E61, E61i, E65, E70, E90, N80, N91, N93, N93i, N95.
conclusions
Despite some limitations in functionality, the presence of built-in Wi-Fi modules is still an undoubted advantage for modern smartphones. After all, the scope of WLAN is quite wide: a rapidly developing network of hotspots in large cities of our country, home wireless networks, file exchange between mobile device and PC. And with the release of the SymSMB 2.0 program, the capabilities of "telephone" Wi-Fi will expand even more, since through the terminal it will be possible to work with computer disks. Considering all this, we can confidently say: Wi-Fi in smartphones is not a marketing "trick", but a real necessity.
About SymSMB:
Soon after this article was written, the 2nd version of this program appeared. Compared to v.1.10, this is just a huge step forward!
- Access was added in the opposite direction - from the phone to the computer.
- A built-in native file browser has been added. The program itself is now outwardly from itself and represents a file browser where you can add additional drives, for example I have added drive H: for content home computer and the W: drive for the contents of the work computer. Imagine that I may not be at home or on a robot, but use my phone to copy data from my home computer to my work one, not to mention copying between the computer and the phone.
- The speed has increased, according to my tests in different situations from at least 2 to 8 times!
- Stability. The application never "crashed" and "did not hang", even messages like "Error -34" that were encountered in v.1.10, in new version never seen.
- Added support for other operating systems on computers. I did not check this part, I had XP on one computer, W2000 on another, and the previous version worked with these systems. Now full list supported by the program OS on computers includes XP, Vista, W2000, W2003, Linux and Mac.
The documentation for the program is only in English. In general, the program may not be easy to configure for users who do not have experience in configuring the local grid, as well as setting and using "Shared folders" on a computer. Those who have this experience, they may well do without documentation, but documentation in this case still does not hurt!
For example, only there you can find out that in the "Domain" field for computers that are not in Domain, you need to enter the full computer name. Otherwise, you will waste a lot of time without documentation. Despite the fact that the documentation is in English, it is easy to read, it is not large and there are many pictures explaining the whole process of configuring and using this program.
I have only tried Wi-Fi so far, but apparently this program Should work the same with Bluetooth, GPRS, 3G, WiMAX. Although in the given time Wi-Fi is the most preferred and affordable option.
This program, in my opinion, must be included in the delivery set of every phone with WiFi, why Nokia did not do this remains unclear. Well, at least someone did and thanks for that.
The program can be a good answer for those who have long and unsuccessfully tried to find something like Samba, Gnubox, FileXchange, SYMBFS or SSH, FTP, SMB / CIFS for Nokia phones Series 60 3rd Edition.
That we just didn’t connect to Wi-Fi, but I haven’t written about how to do it on Windows Phone 8 yet. Perhaps this article will seem unnecessary to someone, due to the fact that the very process of connecting phones on Windows Phone 8 to wireless networks is very simple and straightforward. I agree with this, but it is also not difficult to connect, and the instruction has become very popular and has collected a lot of comments.
This means that users have difficulty connecting to Wi-Fi. That is why, I will now tell you how to do this on a phone that runs on Windows Phone 8. I will show you on the example of Nokia Lumia 925 (it doesn't really matter).
At the first Windows startup Phone 8, a manager of basic settings appears, during which we are offered to connect the phone to the Internet via Wi-Fi. There you just need to select a network and specify a password for it. If you did not do this during the first setup, or if you want to connect to another network, for example at home, then this can be done through the settings. As I wrote above, everything is very simple.
From the home screen (where the tiles are), swipe the screen to the left, and in the menu, select Settings... In the settings, select the item Wi-Fi.

See that the Wi-Fi network is turned on. If disabled, enable. Below, a list of available wireless networks should appear. Click on the network you want to connect to.
Enter the password for the wireless network and click on the "done" button. If you have forgotten your network password, see the article. If the network is unsecured, and the phone refuses to connect, or connects, but the Internet does not work, then go.
If all is well, the phone will connect to Wi-Fi. Your network will have the status “ connection established“.

That's it, our phone is connected to Wi-Fi. You can go to your favorite sites, install programs, etc. 🙂

How to disconnect from the network, or change connection settings?
To view the parameters of the network to which you are connected, just click on it. A new window will open in which you will see the connection IP address, mask, gateway and DNS, and MAC address... They cannot be changed. Be sure to see that “ Proxy server" was switched off... Otherwise, there may be problems that the connection to the network will be, and the Internet will not work, or some sites will not open, there will be no Internet access in the programs.
To remove a Wi-Fi network (Windows Phone 8 will no longer automatically connect to it), just click on the “ Delete“.

To reconnect to this network, you will need to specify the password again.
Strange, but I have not found a way to manually set a static IP address, or DNS. Most likely, there is no such possibility. Hopefully Windows Phone 8.1 will fix this.
Here are all the settings. In the near future, I plan to prepare an article about possible problems with connecting devices on Windows Phone 8 to Wi-Fi. Therefore, if you have any problems in the process of connecting or working, then write about them in the comments. I will be grateful.
Also, after the official release of Windows Phone 8.1, I will update the article. There they promise some changes in working with wireless networks.
More on the site:
We connect to a Wi-Fi network on a phone with Windows Phone 8. For example, Nokia Lumia 925 updated: April 30, 2014 by the author: admin
Without access to the Internet, a modern telephone probably loses half of its functions. Of course one can use Mobile Internet but, more often than not, it is too expensive and not very fast. Therefore, most advanced users exclusively use Wi-Fi. V this material, we will tell you about how Wi-Fi connects on different models phones.
How to connect Wi-Fi on an Android phone
In order to connect Wi-Fi on your Android phone, you need to open the settings and turn on the wireless module Wi-Fi connection... This is done using the blue switch, which is located opposite the Wi-Fi section. If you already have Wi-Fi enabled, then just skip this step.
After Wi-Fi is turned on, you need to open the list of available Wi-Fi networks... To do this, simply click on the Wi-Fi label, which is to the left of the switch you just turned on. After the list of available Wi-Fi networks opens, click on the network you need.

If the network you have chosen is not protected by a password, then the connection will take place immediately after selecting the network. If the network is secured, you will see small window, in which you will need to enter.

If the entered password is correct, your phone will connect to Wi-Fi.
How to connect WiFi on an iOS phone
If you have a phone from Apple, then in order to connect WiFi you need to open the settings and go to the WiFi section. This is where you need to enable WiFi. To do this, simply move the switch to the "On" position.

After turning on wireless WiFi, you need to click on WiFi network you want to connect to.

If the WiFi network is not password protected, then the connection will occur almost immediately. A check mark will appear next to the selected WiFi network, signaling that you are connected to this network.

If the WiFi network is protected, then you will see a line for entering the password. Enter your WiFi password and click on the "Connect" button.

How to connect WiFi on a Windows Phone
If you have a phone with operating system Windows Phone, in order to connect Wifi you need to open the list of all programs and find "Settings" there.
 Calculation of the stability characteristics of the operational communication system
 PDF creator software
 Discrete channel. Interference in communication channels
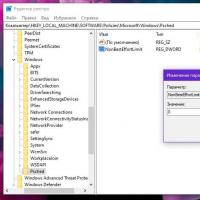 How to use QoS to ensure the quality of Internet access Where is the qos packet scheduler
 Basic Sendmail Installation and Configuration on Ubuntu Server
 Install VPN in Ubuntu Vpn ubuntu connection
 Distributed System Architecture Large Scale Cloud IoT Platform