Puppet Installation and Setup. PUPPET server Installation and configuration. Full list of BASH parameters of the original installation script
For more efficient use, Puppet needs to be understood how modules and manifestos are built. This manual will familiarize you with the work of these PUPPET components on the LAMP stack setting example on the Ubuntu 14.04 server.
Requirements
- Installing Puppet (Master and Agent). More about it -.
- The ability to create at least one Ubuntu virtual server 14.04 for servicing the Puppet agency node.
Basics of Puppet code
Resources
Puppet code mainly consists of resources. The resource is a fragment of a code that describes the state of the system and determines the changes they need. For example:
user ("Mitchell":
Ensure \u003d\u003e Present
uid \u003d\u003e "1000",
gid \u003d\u003e "1000",
shell \u003d\u003e "/ bin / bash",
home \u003d\u003e "/ home / mitchell"
}
The announcement of the resource has such a format:
resource_Type ("Resource_Name"
attribute \u003d\u003e value
...
}
To view all Puppet Resource Types, enter the command:
puppet Resource --Types.
More about resource types you will learn in this manual.
Manifesto
Manifesto is the orchestration scenario. PUPPET programs with expansion .Pp are called manifests. Puppet Manifest Default - /etc/puppet/manifests/site.pp.
Classes
As in any conventional programming language, classes are responsible for organizing and reuse the parts of the orchec.
The class definition is a block of code that describes how the class works. Having determined the class, you can use it in manifesta.
The definition of the class has such a format:
class example_class (
...
Code.
...
}
This code defines the EXAMPLE_CLASS class. Puppet code will be in curly brackets.
The class declaration is the place in the code where one or another class is called. Using the ads of the Puppet class, processes its code.
The class declaration is common and by the type of resource.
The usual class declaration is added to the code using the Include keyword.
include example_class
When declaring the type of resource, the class is announced in the resource format:
class ("Example_Class" :)
Such an ad allows you to add a class parameters to the code that override the standard values \u200b\u200bof the class attributes. For example:
node "HOST2" (
Class ("Apache" :) # USE Apache Module
Apache :: Vhost ("Example.com": # Define Vhost Resource
port \u003d\u003e "80",
docroot \u003d\u003e "/ var / www / html"
}
}
Modules
The module is a group of manifests and other files, organized in advance in a certain way, which allows you to facilitate the joint and reuse of individual parts of the orchec. The modules help to systematize the PUPPET code, since with their help code can be divided into several manifests.
Puppet modules are stored in the / etc / puppet / modules directory.
Writing Manifesta
You can practice writing manifests, modules and classes Puppet on the example of the installation of the LAMP stack to the Ubuntu server (as a result it turns out).
So, to perform the orchestration of the Ubuntu 14.04 server and install the LAMP stack on it, you need resources for such actions:
- installing Apache2 package.
- starting Apache2 service.
- installing a package mysql Servers, MySQL-Server.
- launch MySQL service.
- installing PC5 package
- creating a PHP test script, info.php.
- update the APT index before installing each package.
Below you will find three examples of the PUPPET code, with which you can get such a LAMP stack installation.
The first example will teach the basic manifests in one file. The second example will help assemble and use the class and module based on previously written manifestos. In the third example, you will learn how to use pre-assembled publicly available modules to install the LAMP stack.
Note: To test, it is better to use a fresh virtual server.
Example 1: Installing LAMP using one manifest
Puppet Manifesto can be written on agency node, and then perform it using the Puppet Apply command (for this you do not need to have a setup from the wizard and agent).
In this section, you will learn how to write manifests that will use such types of resource ads:
- exec: execution of commands.
- package: installation of packages.
- service: Managing Services.
- file: File Management.
Creating Manifesta
Create a new manifesto:
sudo VI /etc/puppet/manifests/lamp.pp.
Add the following code to it to declare the necessary resources.
Running the "APT-Get Update" command
Exec ("APT-UPDATE": EXEC Resource "APT-UPDATE"
Command \u003d\u003e "/ usr / bin / apt-get update" # command that will run this resource
}
# Installation package Apache2
Package ("Apache2":
REQUIRE \u003d\u003e EXEC ["APT-UPDATE"], # Apt-Update query before installing the package
ENSURE \u003d\u003e INSTALLED,
}
# Running apace2 service
SERVICE ("Apache2":
Ensure \u003d\u003e Running,
}
# Set Mysql-Server
Package ("MySQL-Server":
REQUIRE \u003d\u003e EXEC ["APT-Update"], # Apt-Update request postpone
ENSURE \u003d\u003e INSTALLED,
}
# Running MySQL service
Service ("MySQL":
Ensure \u003d\u003e Running,
}
# Installation Pack PHP5
Package ("PHP5":
REQUIRE \u003d\u003e EXEC ["APT-UPDATE"], # Apt-Update request before installing
ENSURE \u003d\u003e INSTALLED,
}
# Running service info.php
File ("/Var/www/html/info.php":
Ensure \u003d\u003e File,
Content \u003d\u003e "", # PHPINFO code
Require \u003d\u003e Package ["Apache2"], # APACHE2 package request
}
Application Manifesta
To use the new manifest, enter the command:
sudo Puppet Apply --test
It will output a volume result that displays all changes in the state of the medium. If there are no errors in the output, you can open your external IP address or domain name in the browser. The PHP test page appears on the screen with stack information. This means that Apache and PHP work.
Now the LAMP stack is installed on the server using Puppet.
This is a fairly simple manifesto, since it can be performed on the agent. If you do not have a Puppet wizard, other agency nodes will not be able to use this manifest.
Puppet master server checks the server status changes every 30 minutes.
Example 2: Setting the LAMP stack using the module
Now try creating a simple module based on the LAMP Manifest, which you wrote in the previous section.
To create a module, create a new directory in the Modules directory (its name must match the name of the module). This directory must contain the Manifests directory and the init.pp file. In the init.pp file, the Puppet class is specified (its name must match the module name).
Creating a module
Go to the Puppet master server and create the directory structure for the module:
cD / ETC / Puppet / Modules
Sudo Mkdir -p Lamp / Manifests
Create and open the init.pp file in the editor:
sudo VI Lamp / Manifests / Init.pp
Insert the LAMP class to the file:
class Lamp (
}
Copy the contents of the manifest from section 1 and insert it into the LAMP class unit. Now you have a definition of a LAMP class. Other manifestos will be able to use this class as a module.
Save and close the file.
Using the module in the main manifest
Now you can configure the main manifest and use the LAMP module to install the LAMP stack on the server.
On the Puppet master server, edit such a file:
sudo vi /etc/puppet/manifests/site.pp.
Most likely, at the moment the file is empty. Add the following lines to it:
node Default ()
Node "LAMP-1" (
}
Note: Instead of LAMP-1, specify the name of the host of your PUPPET agent to install the stack.
The Node block allows you to specify the Puppet code that will be applied only to some nodes.
The Default unit applies to all agency nodes that have no individual block (leave it empty). The LAMP-1 unit will be applied to the LAMP-1 agency node.
Add the next line to this block that uses the LAMP module:
Save and close the file.
Now the Agency Node Puppet will be able to download the settings from the master server and install the LAMP stack. If you want to make changes right now, run the command on the agent:
sudo Puppet Agent --Test
Modules are the most convenient way. reuse Puppet code. In addition, modules help logically organize code.
Example 3: Installing LAMP using public modules
MySQL module is used in the same way. Add such lines to block nodes:
class ("MySQL :: Server":
root_password \u003d\u003e "Password",
}
You can also pass the parameters of the MYSQL module.
Add a resource that copies info.php to the desired location. Use the Source parameter. Add the following lines to the Node block:
file ("info.php": # resource file name
path \u003d\u003e "/var/www/html/info.php", # target path
Ensure \u003d\u003e File,
Require \u003d\u003e Class ["Apache"], # APACHE class to use
source \u003d\u003e "puppet: ///modules/apache/info.php", the place where you need to copy the file
}
This class declaration uses the Source parameter instead of Content. This parameter not only uses the contents of the file, but also copies it.
The puppet: ///modules/apache/info.php puppet will copy in /etc/puppet/modules/apache/files/info.php.
Save and close the file.
Create a file info.php.
sudo SH -C "ECHO""\u003e /etc/puppet/modules/apache/files/info.php"
Now the Agency Node Puppet will be able to download the settings from the master server and install the LAMP stack. If you want to make changes to the agent's environment right now, run the command on this node:
sudo Puppet Agent --Test
This command will download all updates for the current node and install the stack on it. To make sure Apache and PHP work, open the IP address or domain node in the browser:
http: //lamp_1_public_ip/info.php.
Conclusion
Now you have basic skills to work with modules and PUPPET manifests. Try to create a simple manifest and module.
Puppet is great for managing application configuration files.
Tags:Managing a large number of UNIX systems can not be called comfortable. To change one parameter, the administrator has to access each machine, the scripts can only partially help, and not in all situations.
It should be recognized that windows administrators Networks are still in a more advantageous position. It is enough to change the settings of group policies and after a while all network computers, including the newly installed operating system "recognize" about innovation, if they certainly concern them. Looking around for a long period of development of UNIX, it can be noted that nothing like that did not fit. There are solutions like Kickstart, which help with primary installation operating systemBut further finishing will require considerable effort. Commercial solutions like BladeLogic and OpsWare, the problem of automation of settings solve only partly, their main advantage. graphic interfaceYes, and allow them to purchase them only in large organizations. Of course, there are projects offering free solutions, but for all the time of their existence they could not create a large community. For example, CFENGINE is not very popular with administrators, although other than Linux can be used in * BSD, Windows and Mac OS X. It may be due to relative complexity in creating configurations. When describing tasks, it is necessary to take into account the features of each specific system, and manually control the sequence of actions when executing commands. That is, the administrator must remember that for some systems it is necessary to write AddUser for other UseRADD, take into account the location of the files in different systems, and so on. This is an order of magnitude complicates the process of writing commands, it is very difficult to create the correct configuration with the process, and you can read the created configurations after a while practically not real. Despite the GPL license CFENGINE in fact, a project of one person who controls all changes and is not very interested in building an open society. As a result, CFENGINE is quite satisfying the developer, and for the remaining administrators it is rather an excess headache. To improve CFENGINE third-party developers Different additions were created, which often only worsening the situation. The author of several such modules to CFengine Luke Kanies in the end decided to develop a similar tool, but devoid of many CFENGINE flaws.
Puppet Features
Puppet Like CFenGine is a client-server system using a declarative, that is, mandatory to perform a language to describe the tasks and libraries to implement them. Customers periodically (by default 30 minutes) are connected to the central server and get the latest configuration. If the settings are not coincided with the system state, they will be executed, if necessary, the server refers to the operations of operations. Message Server can save in syslog or file, create a RRD schedule, send to the specified e-mail. Additional levels of transactional and resource abstraction are outputing maximum compatibility with existing settings and applications, allowing you to focus on system objectswithout worrying about differences in the implementation and description of detailed commands and file formats. The administrator operates only with the type of object, the rest of the puppet takes on itself. So the packages type knows about 17 batch systems, which will automatically be recognized on the basis of information about the version of the distribution or system, although, if necessary, a batch manager can be added forcibly.
Unlike scripts that are often not possible to use in other systems, Puppet configurations written by third-party administrators will mostly work on any other network. In Puppet Cookbook [ http://www.reductivelabs.com/trac/puppet/tags/puppet%2CRecipe] There are already three dozen ready-made recipes. Currently, Puppet officially supports the following operating systems and services: Debian, Redhat / Fedora, Solaris, SuSe, Centos, Mac OS X, OpenBSD, Gentoo and MySQL, LDAP.
Puppet. language
To go on, first should be dealt with the main elements and language capabilities. Language is one of the strengths of Puppet. With it, it is described by the resources that the administrator plans to manage and actions. Unlike most such solutions, the puppet language allows you to simplify the appeal to all similar resources on any system in a heterogeneous environment. A resource description, as a rule, consists of a name, type and attributes. For example, specify a file / etc / passwd and set its attributes:
file ("/ ETC / PASSWD":
owner \u003d\u003e root,
gROUP \u003d\u003e ROOT,
Now customers, connecting to the server, copy the / etc / passwd file and install specified attributes. In one rule, you can define several resources at once, separating them with a point with a comma. And what if the configuration file is used on the server differs from client or not used at all? For example, this situation may occur when settings VPN connections. In this case, you can specify the source directive. Here are two options, as usual to specify the path to another file, two URI of the protocol are also supported: File and Puppet. In the first case, a link to an external NFS server is used, in the second version on the Puppet server, NFS is launched a similar service, which exports resources. In the latter case, by default, the path is indicated relative to the Puppet root directory - / etc / puppet. That is, the Link Puppet: //Server.domain.com/config/sshd_config will correspond to the / etc / puppet / config / sshd_config file. You can override this directory using the Filebucket directive, although it is more correct to use the section of the same name in the /etc/puppet/FileServer.conf file. In this case, you can restrict access to the service only from specific addresses. For example, we describe the Config section.
pATH / VAR / PUPPET / CONFIG
allow * .domain.com.
allow 192.168.0. *
allow 192.168.1.0/224
deny * .wireless.domain.com.
And then refer to this section when describing the resource.
source \u003d\u003e "Puppet: //Server.domain.com/config/sshd_config"
Before the colon is the name of the resource. In the most simple cases, as a name, you can simply specify the best use alias or variables. Alias \u200b\u200bis installed using the Alias \u200b\u200bdirective. Full file path. In more complex configurations
file ("/ ETC / PASSWD":
alias \u200b\u200b\u003d\u003e Passwd
Another option to create a pseudonym is well suited in the case when you have to deal with different operating systems. For example, create a resource describing SSHD_CONFIG file:
file (SSHDCONFIG:
name \u003d\u003e $ OperatingSystem? (
solaris \u003d\u003e "/ USR / Local / etc / ssh / sshd_config",
default \u003d\u003e "/ etc / ssh / sshd_config"
In this example, we faced the possibility of choice. A file for Solaris is specified separately, the / etc / ssh / sshd_config file will be selected for all other. Now you can contact this resource as SSHDConfig, depending on the operating system the desired path will be selected. For example, we indicate that if the SSHD daemon is launched and received a new file, you should restart the service.
ensure \u003d\u003e True,
subscribe \u003d\u003e File
Variables are often used when working with user data. For example, describe the location of home directories:
$ HOMEROOT \u003d "/ Home"
Now you can contact the files of a specific user as
$ (Homeroot) / $ Name
The account name of the user will be substituted in the $ Name parameter. In some cases, it is convenient to determine the default value for some type. For example, for the EXEC type, the directories in which it must search the executable file are very often indicated.
Exec (Path \u003d\u003e "/ usr / bin: / bin: / usr / sbin: / sbin")
In fact, if you need to specify a few nested files and directories, you can use the RECURSE parameter.
file ("/etc/apache2/conf.d":
source \u003d\u003e "Puppet: // Puppet: //Server.domain.com/config/apache/conf.d",
recurse \u003d\u003e "True"
Several resources can be integrated into classes or definitions. Classes are a complete description of the system or service and are used apart.
"/ Etc / passwd": owner \u003d\u003e root, group \u003d\u003e root, mode \u003d\u003e 644;
"/ Etc / shadow": owner \u003d\u003e root, group \u003d\u003e root, mode \u003d\u003e 440
As in object-oriented languages, classes can be overridden. For example, the FreeBSD group-owner of these files is Wheel. Therefore, in order not to rewrite the resource completely, create a new class FreeBSD, which will inherit the Linux class:
class FreeBSD Inherits Linux (
File ["/ etc / passwd"] (Group \u003d\u003e Wheel);
File ["/ etc / shadow"] (Group \u003d\u003e Wheel)
For convenience, all classes can be taken into a separate file that includes an include directive. Definitions can take numerous parameters as arguments, but do not support inheritance and are used if you need to describe multiple objects used. For example, we define the home directory of users and commands you need to create a new account.
define User_Homedir ($ Group, $ FullName, $ Ingroups) (
user ("$ Name":
ensure \u003d\u003e Present
comment \u003d\u003e "$ fullName",
gid \u003d\u003e "$ group",
groups \u003d\u003e $ Ingroups,
membership \u003d\u003e Minimum,
shell \u003d\u003e "/ bin / bash",
home \u003d\u003e "/ home / $ name",
rEQUIRE \u003d\u003e Group [$ group],
exec ("$ Name Homedir":
cOMMAND \u003d\u003e "/ BIN / CP -R / ETC / SKEL / HOME / $ NAME; / chown -r $ Name: $ Group / Home / $ Name »
creates \u003d\u003e "/ home / $ name",
rEQUIRE \u003d\u003e User [$ Name],
Now to create a new account It is enough to contact user_homedir.
user_Homedir ("Sergej":
group \u003d\u003e "Sergej",
fullName \u003d\u003e "Sergej Jaremchuk",
ingroups \u003d\u003e ["Media", "admin]
Separately there are descriptions of nodes (NODE) \u200b\u200bthat support inheritance as well as classes. When you connect the client to the Puppet server, the Node stands will be seen and the settings specific only for this computer are issued. To describe all other systems, you can use Node Default. The description of all types is given in document "Type Reference" with which you need to familiarize yourself in any case, at least in order to understand all the features of the PUPPET language. different types allowed to execute the specified commands, including when performing certain conditions (for example, changing the configuration file), work with CRON, credentials and user groups, computers, mounting resources, starting and stopping services, installation, update and deleting packages, work with SSH keys, Solaris zones and so on. This is how simple can be made to update the list of packages in the distributions using the APT, daily between 2 and 4 hours.
schedule (Daily:
period \u003d\u003e daily
range \u003d\u003e
exec ("/ USR / BIN / APT-GET UPDATE":
schedule \u003d\u003e Daily
For that period, each system will be updated only once, after which the task is considered to be executed and will be removed from client computer. Puppet language supports other familiar structures: conditions, functions, arrays, comments and similar.
Installing Puppet.
Puppet will require Ruby (\u003e \u003d 1.8.1) with OpenSSL support and XMLRPC libraries, as well as the Faster library [ http://reductivelabs.com/projects/Facter.]. In the repository Ubuntu 7.04, which was used during a test installation, the PUPPY packet is already enabled.
$ sudo apt-cache search puppet
puppet - Centralized Configuration Management for Networks
puppetmaster - Centralized Configuration Manangement Control Daemon
When installing, all the necessary dependences will be installed: FACTER LIBOPENSSL-RUBY LIBXMLRPC-RUBY.
$ sudo APT-Get Install Puppet Puppetmaster
Check for Ruby Libraries by the command.
$ Ruby -ROPENSSL -E "Puts: yep"
~ $ ruby \u200b\u200b-rxmlrpc / client -e "Puts: yep"
If errors are not received, then everything you need is already included. Files in which are described by the desired system configuration in PupPet terminology are called manifests. When starting, the daemon tries to read the /etc/puppet/manifests/site.pp file, with its absence it gives a warning message. When testing, you can specify a daemon to work in auton mode at which the manifest is required
$ sudo / usr / bin / puppetmasterd -nonodes
If necessary, other files can be connected to Site.pp if you can connect. For test run to this file, you can apply the simplest instruction.
file ("/ etc / sudoers":
owner \u003d\u003e root,
gROUP \u003d\u003e ROOT,
All configuration files as servers and customers are located in / etc / puppet. File fileserver.conf about which we talked above are not required and used only when Puppet will work as a file server. Ubuntu In this file, the / etc / puppet / files subdirectory is exported. In the SSL subdirectory, certificates and keys will be used to encrypt customer connections. Keys are created automatically when you first start PuppetmasterD, you can create them by manually command.
$ sudo / usr / bin / puppetmasterd -mkusers.
Puppetd.conf and puppetmasterd.conf files are similar. They include some parameters of the demons on the CLIAN system and server. The client file is different only by the presence sERVER Parameterpointing to a computer on which PuppetMasterd is running.
server \u003d Grinder.com.
logdir \u003d / Var / Log / Puppet
vARDIR \u003d / VAR / LIB / PUPPET
rundir \u003d / Var / Run
# Send report server
In order not to print everything manually, you can create a template using the Puppetd itself.
$ puppetd -genconfig\u003e /etc/puppet/puppetd.conf
Similarly, you can create both Site.pp on the server.
$ puppetd -genmanifest\u003e /etc/puppet/manifests/site.pp
Another Tagmail.conf file allows you to specify the postal addresses to which reports will be sent. In the simplest case, you can use one line.
all: [Email Protected]
Configuration files are not enough so that the client can connect to the server. To do this, you still need to sign certificates. First, in order for the server to find out about the new computer on the client system, we enter the command:
$ sudo puppetd -server grinder.com -WaitForcert 60 -Test
info: Requesting Certificate
warning: Peer Certificate Won't Be Verified in This SSL Session
notice: DID NOT Receive Certificate
If another string is issued, you should check the server operation.
$ PS AUX | Grep Puppet.
puppet 5779 0.0 1.4 27764 15404? SSL 21:49 0:00 RUBY / USR / SBIN / PUPPETMASTERD
The firewall must allow connections to port 8140.
On the server we get a list of certificates in need of signatures.
$ sudo puppetca -list
nomad.grinder.com.
And subscribe a customer certificate.
$ sudo puppetca -sign nomad.grinder.com
Now the client can freely connect to the server and receive settings.
Unfortunately, all the possibilities of Puppet within the article show simply not possible. But as you see this functional and flexible tool that allows you to solve most of the tasks on the simultaneous administration of a large number of systems. If you have to configure several systems by nature. And the most important project managed to collect so far a small but constantly growing community. Therefore, we hope that a good idea will not give to die or go aside.
Not so long ago on the pages of the magazine, we viewed the system remote control Configuration of CFENGINE UNIX machines, which greatly facilitates life system administrator By automating actions to configure a plurality of network nodes. But no matter how convenient CFENGINE, he has many drawbacks, which is deprived of a system called Puppet.
Imagine yourself as a system administrator responsible for maintaining the performance of hundreds and other machines running operating systems such as UNIX. Each of them requires configuration, periodic updates and monitoring, while it is assumed that many of them perform similar functions.
Two thirds are workstations, several more - routers, the rest are several web servers and data warehouses. Question: How to manage this economy? The easiest answer is easy to connect to each of them using SSH and make the necessary changes. However, this method has two problems. First, it is very laborious. Secondly, the administant will constantly have to perform many monotonous actions (for example, to update OpenOffice.org on all workstations, you will have to complete the same commands of several tens of times). You can try to avoid this problem by writing several scripts that will connect to each machine and perform pre-prescribed commands. But here you are waiting for problems.
Scripts will constantly have to modify to adjust them to each task; In the scripts will have to take into account the difference in operating systems and versions, they will have to debug them before applying to working machines. In general, not Commilfo. The correct answer is to use the so-called remote control systems for configurations, the most well-known representatives of which are open systems CFENGINE and PUPPET. Such systems take on all responsibilities for bringing the configuration of machines to listening, demanding from the administrator only a description of the end state of the system in a special language (for example, a description of which packages must be installed in the OS, which rows should be added to the configuration files, which commands must be completed, etc.). After that, all the nodes themselves will receive information about the required state from the server and the system autoconfiguration will be carried out. Thanks to this mechanism, new machines can be fully configured without human intervention, and existing ones are reconfigured by adding only a few rows to the status description.
Puppet?
We have already devoted a whole article by the CFENGINE system, so today we will focus on the PUPPET system, which can be called its ideological follower. Puppet was developed by Luke Kanies, who was tired of CFENGINE restrictions and decided to create her more perfect analogue from scratch. If you have already used CFENFINE, you will probably find Puppet more convenient and powerful system. The Puppet state description language is higher-level and flexible, so that the administrator does not need to take care of such things as writing individual rules for each type of OS or detailed description performing trivial actions. Puppet allows his Mr. focuses on what he wants to do, instead of doing this (for example, to set a specific package to any of the OS system supported, it is enough to write a literally several lines speaking "install this program", instead of describing commands, necessary for its installation). Puppet written on simple language Ruby, so it is enough to simply fit under the specific task and expand the functionality (a flexible plugin system is provided).
In addition, in contrast to the CFENGINE model, which actually rotates around one person, a large enthusiast community has been formed around the Puppet, which make refinement to the code are shared by the configuration examples and write documentation.
In general, Puppet gives the impression of a more modern and well-thought-out system with a good design. Like CFENGINE, it supports almost all modern UNIX-like OS (including MacOS X), and can also work in the Cygwin environment over Windows. The list of its dependencies includes only the Ruby interpreter and the Factor tool, so there should be no problems with the installation (justice it is worth saying that the list of CFENGINE dependencies is also shorter).
Installation
Like CFENGNE, Puppet is a client-server system that consists of a control server and subordinate nodes. The server stores the description of the end states of the nodes (which in terms of PupPet is called a manifesto) and is waiting for their connection. Every half an hour (default) the client connects to the server, receives a description of the final state from it, checks it with the current and, if it and / or the described state changed, reinforcing the system, after which goes into sleep. Communication is performed through an encrypted channel, so attacks based on the status description substitution are excluded (but if the cracker will capture the server, then all the nodes will be under its control).
Puppet is included in the repository of all popular distributions, so its installation should not cause difficulties. For example, in Debian / Ubuntu, the Puppet client can be installed as follows:
$ sudo APT-Get Install Puppet
A server - so:
$ sudo APT-Get Install Puppet Puppetmaster
Customer and server configuration files are stored in the / etc / puppet directory. The most important of them is the /etc/puppet/manifests/site.pp file containing manifest.
It stores the status description and should exist only on the server. For the convenience of debugging add to it simple configuration:
Class Passwd (
File ("/ etc / passwd":
Owner \u003d\u003e root,
GROUP \u003d\u003e ROOT,
Mode \u003d\u003e 644,
}
}
Node Default (
Include passwd.
}
These rows describe the state in which the owner of the / etc / passwd owner should be root, and the access rights to 644 are set to 644. In the following section, we will consider the format of the manifest file. The second most important file is called /etc/puppet/puppet.conf. It sets the server and customer configuration, so it must be present on all machines organized in the Puppet network. In Ubuntu, this file contains the minimum necessary and in most cases sufficient settings. Below they are given with comments:
# VI /etc/puppet/puppet.conf.
# Standard ways to catalogs
Logdir \u003d / Var / Log / Puppet
VARDIR \u003d / VAR / LIB / PUPPET
SSLDIR \u003d / VAR / LIB / PUPPET / SSL
RUNDIR \u003d / VAR / RUN / PUPPET
# Location tool FACTER,
# used to obtain information about the OS
FactPath \u003d $ Vardir / Lib / Facter
# Synchronize plugins
# (installed plugins on the server - they are copied to customers)
Pluginsync \u003d True.
# Catalog with templates (read about them below)
TEMPLATEDIR \u003d $ Confdir / Templates
# Synchronization with etckeeper
# (who knows - will understand, the rest do not need)
prerun_Command \u003d / etc / puppet / etckeeper-commitpr
POSTRUN_COMMAND \u003d / etc / puppet / etckeeper-commitpost
The configuration file may include a large number of Different options whose information can be obtained by generating a default config:
$ sudo puppetmasterd-genconfig\u003e / etc / puppet /
puppetd.conf.default.
The default client config is generated using another command:
$ sudo puppet -genconfig\u003e /etc/puppet/puppetd.conf.default
Fileserver.conf and auth.conf files are used to configure the file server (read this in the File Server section) and authentication. While they make no sense. At the end of configuration, the Puppet server must be restarted:
$ sudo /etc/init.d/puppetmaster Restart
After that, he will be ready to accept customer requests. However, without a signed certificate, no client can get a manifesto from the server and configure the machine.
Therefore, we must run Puppet clients in test mode so that they can transfer their certificates to the Signature Server (by the way, simultaneously on all machines it can be done using the SHMUX tool):
$ sudo puppetd -server puppet server --Verbose -Test
We return to the server and get a list of certificates ready for signatures:
$ sudo puppetca --List
Choose a host from the list and sign it certificate:
$ sudo puppetca --sign nomad.grinder.com
Or we subscribe everything at once:
$ sudo puppetca --sign --all
Now you can run customers in combat mode. But first you need to register the name of the puppet server in the configuration file (by default its name is just puppet):
$ sudo Su.
# ECHO "" \u003e\u003e /etc/puppet/puppet.conf
# ECHO "Server \u003d Puppet-server.com" \u003e\u003e /etc/puppet/puppet.conf
# EXIT.
Run customers:
$ sudo /etc/init.d/puppet start
Status description language
As mentioned above, Puppet uses its own language description language of the final state of the operating system, with which the sysadmin indicates how the OS components must be given to achieve the desired state. This is a rather complicated language, which, however, is much easier than any programming language. If you are at least superficially familiar with the Bash script language, you can easily understand the Puppet language. The key element of the language is the resources with which the description is based on how one of the OS components should be given. For example, the next simplest resource describes the desired status of the / etc / passwd file:
# VI /etc/puppet/manifests/site.pp.
File ("/ etc / passwd":
Owner \u003d\u003e "Root"
}
Here File is a resource type. There are several dozen of them, ranging from resources that manage files, as in this example, and ending with packages and services. Row / ETC / PASSWD - resource name.
In the case of the File type, the name coincides with the path to the file, however, in some other types, the name may be arbitrary. The row of Owner \u003d\u003e "root" describes the installation of the Owner attribute to the root value, that is, it says that the owner (owner) of the specified file must be an administrator.
Each type of resources has its own set of attributes available for modifying, plus there are special meta attributes that can be used in any resource. One of the important qualities of resources is the possibility of reference to them. This can be used to form dependency chains. The following entry creates a resource / etc / group that depends on the resource / etc / passwd (dependencies are specified using the Require meta attribute):
# VI /etc/puppet/manifests/site.pp.
FILE ("/ ETC / GROUP":
Require \u003d\u003e File ["/ etc / passwd"],
Owner \u003d\u003e "Root",
}
This means that the / etc / group resource can be configured (given to the above) only if the resource / ETC / PASSWD is configured. Resources can be grouped into a collection of resources called classes. It is necessary in order to combine similar in meaning and type of task performed resources in one abstract resource. For example, for convenience, we could combine the installation and launch of the NGINX web server to one abstract resource of the same name:
# VI /etc/puppet/manifests/site.pp.
Class Nginx (
Package ("NGINX":
ENSURE \u003d\u003e INSTALLED
}
Service ("NGINX":
Ensure \u003d\u003e Running,
Require \u003d\u003e Package ["nginx"],
}
}
Here the Package resource type is used to install the NGINX package to the system, and the Service is to start the service of the same name. Using Require, we force the system to start the service only if the package has been successfully installed. The convenience of classes is that they can also be included depending on:
# VI /etc/puppet/manifests/site.pp.
SERVICE ("Squid":
Ensure \u003d\u003e Running,
REQUIRE \u003d\u003e Class ["nginx"],
}
As in real OOP languages, classes can inherit each other and override the attributes:
# VI /etc/puppet/manifests/site.pp.
Class Passwd (
File ("/ etc / passwd":
Owner \u003d\u003e "Root",
group \u003d\u003e "root",
}
}
Class Passwd-BSD Inherits Passwd (
File ["/ etc / passwd"] (group \u003d\u003e "Wheel")
}
Here the Passwd-BSD class is inherited from Passwd to override the Group resource / etc / passwd attribute (in BSD systems / ETC / PASSWD belongs to the Wheel group, so we have created a separate class for such systems). Later we consider the more correct and obvious way to select alternative attribute values \u200b\u200busing conditions.
Variables are one of the inalienable components of any programming language, and in the Puppet language, they also have. Variables start from $ mark and may contain any number, string or boolean value (True, False):
$ Want_APACHE \u003d True
$ Apache_Version \u003d "2.2.14"
One of the most powerful properties of the Puppet language associated with variables is integration with a tool for obtaining information about the FACTER machine. This utility returns all the information specific to the machine, in the form of a "key-value" pairs, which in PupPet are transformed into the variables of the same name. Together with the conditional instructions of the PUPPET language, they can be used to alteract resource attributes depending on the properties of the machine.
For example, the Passwd class described above can be easily rewritten to automatically select the attribute depending on the type of OS (the class itself is no longer needed):
# VI /etc/puppet/manifests/site.pp.
File ("/ etc / passwd":
Owner \u003d\u003e "Root",
Group \u003d\u003e $ kernel? (
Linux \u003d\u003e "root",
FreeBSD \u003d\u003e "WHEEL",
},
}
Depending on which OS will be analyzed by this fragment of the manifest, the Group's attribute value will be either root or Wheel. In addition to the conditional operator, the Puppet language supports the CASE selection operator, which can be used to create one or another resource depending on the value of the variable:
# VI /etc/puppet/manifests/site.pp.
Case $ OperatingSystem (
RedHat: (Service ("httpd": Ensure \u003d\u003e Running))
Debian: (Service ("Apache": Ensure \u003d\u003e Running))
DEFAULT: (Service ("Apache2": Ensure \u003d\u003e
Running))
}
This code defines various resource options for the service type, depending on the operating system (service names in various Linux distributions may differ, so what kind of service must run Puppet, it is necessary to specify individually for each of them).
The default variant is used if the value of the variable does not correspond to any of the previous options. In addition to previously discussed types of resources File, Package and Service, Puppet supports a large number of others, including those created by third-party resource type developers. Their detailed description, including examples, supported attributes and features, can you find in official documentation - http://docs.puppetlabs.com/references/stable/type.html. Below is a list and a brief description of the most used ones:
Popular Puppet Resource Types
- cRON - CRON job management
- exec - launch of scripts and teams
- file - File Management
- filebucket - Backup files
- group - Group management
- host - Managing Records in the / etc / hosts file
- interface - Configuring Network Interfaces
- mount - Mounting File Systems
- notify - sending a message to the Puppet log file
- package - Package Management
- service - Management Services
- sSHKEY - SSH keys management
- tidy - delete files depending on the conditions
- user - user management
- zones - Management of Solaris Zones
The second after resources is the importance of the Puppet language - these are nodes (nodes). With their help, the administrator can describe what those or other resources and classes should be applied to what machines. In other words, this is the way to specify an individual configuration for each of the machines participating in the Puppet network. The simplest example of the node is given at the beginning of the article in the "Installation" section:
# VI /etc/puppet/manifests/site.pp.
Node Default (
Include passwd.
}
This is the default default node, which includes the resource / class PASSWD. Default means "All other nodes", therefore, the resource / class Passwd, defined somewhere above, will be configured on each of them. Include keyword here is used for convenience, in fact, all classes and resources can be described directly in the site description, but it is not recommended to do this. In addition to Default, you can specify the network name of the machine in the host name (then all resources described in the node will be configured only on this machine), or an arbitrary name (then this node may be inherited by another node). To understand how it all works in conjunction with classes and resources, consider an example of a ready-made PUPPET manifest used to configure two network machines (web server and NTP server):
# VI /etc/puppet/manifests/site.pp.
# Installation and Starting SSH Server
Class SSHD (
Package (OpenSSh-Server: Ensure \u003d\u003e Installed)
Service (SSHD:
Name \u003d\u003e $ OperatingSystem? (
fedora \u003d\u003e "sshd",
debian \u003d\u003e "ssh",
default \u003d\u003e "sshd",
},
Enable \u003d\u003e True,
Ensure \u003d\u003e Running,
}
}
# Installation and Startup Apache
Class httpd (
Package (httpd: essure \u003d\u003e Installed)
Service (httpd:
Enable \u003d\u003e True,
Ensure \u003d\u003e Running,
}
}
# Installation and Starting NTP Server
Class NTPD (
Package (NTP-Server: Ensure \u003d\u003e Installed)
Service (
NTP-Server:
Enable \u003d\u003e True,
Ensure \u003d\u003e Running,
}
}
# Base knot, used only as the parent of all others
Node Base (
Include sshd.
}
# Node on which the web server will be located
Node Web.Server.com Inherits Base (
Inlude httpd.
}
# Ntp server node
Node NTP.Server.com Inherits Base (
Include NTPD.
}
This simple configuration does a lot of configuration: it leads to the installation and launch of Apache on the machine with the Web.Server.com address and the installation and launch of the NTP server by car nTP.Server.com.. Additionally, both machines install an SSH server. Such a configuration is hardly arranged at least one administrator; It will have to seriously finalize to teach the correctly configure servers, receive fresh configs and other files from the PUPPET header.
However, it clearly shows the power of Puppet. With the help of a simple config, we did so that the machines themselves install and start the necessary software and supported it in the working condition (if the server falls, Puppet itself will revaluate to bring the system to the desired state).
File server.
Many tasks remote administration Cannot be solved without copying additional files on machines. It can be pre-prepared configs, web pages for Apache, packets that are missing in the official repository, and much more. To facilitate the process of transferring these files to remote nodes, Puppet includes a file server.
File Server Settings are stored in the /etc/puppet/FileServer.conf file. To force Puppet to give customers the contents of a specific directory, you must put several lines in it:
# VI /etc/puppet/FileServer.conf.
Path \u003d / Var / Puppet / Files
Allow * .server.com.
These two lines indicate that the / Var / Puppet / Files directory must be accessible to all hosts of the Server.com domain. In addition, we can specify the full domain name of the allowed machine or its IP address, as well as cut off the deny directive. After that, any file of this directory can be moved to the client using the File resource. For example:
# VI /etc/puppet/manifests/site.pp.
File ("/etc/httpd/conf/httpd.conf":
Source \u003d\u003e "puppet: //httpd/httpd.conf",
Mode \u003d\u003e 644,
}
The httpd.conf file located on the server in the / var / puppet / files / httpd directory will be copied to the target machine on the path specified in the resource name.
conclusions
In this article, we looked at a very small part of Puppet features. In fact, this is a comprehensive system, fully described only on the pages of the book. At the same time, Puppet is very simple in setting up and accompaniment, especially since you can find a lot of examples of its configuration.
Info
- Puppet uses the HTTP protocol, so to increase performance can be running a web server.
- Puppet can be used for autoconfiguration and maintain one local machine.
- Combining Puppet, network installation OS (PXE-INSTALL) and self-assembly installation images, you can create a completely self-configurable network of machines, to deploy which it is enough to execute one command.
- Puppet uses many large companies in their work, such as Google, Fedora Project, Stanford University, Red Hat, Siemens IT Solution and SugarCrm.
Links.
- http://docs.puppetlabs.com - Puppet documentation
- http://docs.puppetlabs.com/guides/language_tutorial.html - Full description of the Puppet language
- http://docs.puppetlabs.com/references/stable/Type.html - Resource Types
When the number of servers you manage less than ten is rarely wondering about their centralized management, this may not be required. When servers dozens - centralized control of software and configurations is extremely useful. When the servers are hundreds and thousands - it is vital. There are a lot of such programs, for example: Chef, CFENGINE, PUPPET ... That's the last and will be discussed in this entry.
Puppet is considered to be one of the best solutions in this way. It uses companies such as Google, Citrix and Red Hat. This is a client-server application written in the Ruby programming language, which extends to two versions:
- PUPPET OPEN SOURCE - FULLY free version
- Puppet Enterprise is a free configuration to 10 servers, further needs to purchase licenses.
Consider installing the server and the Puppet Open Source agent, which is present in the packages of most modern distributions. Further we will go about Ubuntu 12.04 Precise Pangolin.
PUPPET server part is called puppetmaster, start installing from it:
: ~ # APT-Get Install PuppetmasterAnd now the client:
: ~ # APT-Get Install PuppetIn the client configuration file /etc/puppet/puppet.conf. You must tell about the server by adding the following section:
Server \u003d Puppet.Local Report \u003d True Pluginsync \u003d False
At the initial stage pluginsync it is better to turn off.
Let's start the PUPPET client to create a certificate request:
: ~ # puppetd --verbose --Test Info: Creating a new ssl key for linux.local info: Creating a new ssl certificate request for linux.local info: Certificate Request Fingerprint (MD5): E5: EA: AC: 5B: 22: 9A: BA: 42: B8: A1: 63: 9E: 1F: 1F: 23: 51 exiting; No Certificate Found and Waitforcert Is DisabledOn the server it is necessary to check that the certificate request is obtained and, if so, we write out the certificate:
: ~ # puppetca --List "linux.local" (E5: EA: AC: 5B: 22: 9A: BA: 42: B8: A1: 63: 9E: 1F: 1F: 23: 51): ~ # Puppetca - -sign Linux.local Notice: Signed Certificate Request for Linux.local Notice: Removing File Puppet :: SSL :: CertificateRequest Linux.local AT "/Var/lib/puppet/SSL/CA/Requests/linux.local.pem"Repeat the previous step on the client:
: ~ # Puppetd --verbose --test info: Caching certificate for linux.local info: Retrieving plugin info: Caching certificate_revocation_list for ca info: Caching catalog for linux.local info: Applying configuration version "1356278451" info: Creating state file / Var / Lib / Puppet / State / State.YAML Notice: FINISHED CATALOG RUN IN 0.02 SECONDSGreat, everything works. Go to the creation of the first manifest. Manifesto, they are described in a special declarative language. We will immediately take care of good, use the modular structure and classes. For example, we write a module that will maintain up to date file / etc / hosts On all our servers.
Check where Puppet is looking for modules:
: ~ # Puppet Apply --ConfigPrint Modulepath / etc / puppet / modules: / usr / share / puppet / modulesCreate directories for your module
: ~ # CD / ETC / Puppet / Modules: ~ # mkdir hosts; CD HOSTS; Mkdir Manifests; CD Manifests.The first manifesto, he is the main file of the module - should be called init.pp.
Class hosts (# puppet.local host ("puppet.local": Ensure \u003d\u003e "Present", target \u003d\u003e "/ etc / hosts", ip \u003d\u003e "192.168.0.1", host_aliases \u003d\u003e "puppet",) Linux.local Host ("Linux.local": Ensure \u003d\u003e "Present", target \u003d\u003e "/ etc / hosts", ip \u003d\u003e "192.168.0.2", host_aliases \u003d\u003e "linux",))
By default, Puppet is looking for a file. /etc/puppet/manifests/site.pp. To download the configuration, give it to the following form:
Node Default (Include Hosts)
Checking the manifest on the server:
: ~ # Puppet Apply --verbose /etc/puppet/manifests/site.pp info: Applying Configuration Version "1356281036" Notice: / Stage // Host / Ensure: Created Info: Filebucket Adding (MD5) Notice: / Stage // Host / Ensure: Created Notice: FINISHED CATALOG RUN IN 0.03 SECONDSOn the client:
: ~ # LL / etc / hosts RW-R - R-- 1 root root 290 Dec 16 19:10 / etc / hosts: ~ # puppetd --verbose --Test Info: Caching catalog for linux.local info: applying Configuration version "1356283380" Info: Filebucket Adding Notice: / Stage / Hosts / Host / Ensure: Created Notice: Created Notice: Finished Catalog Run In 0.04 Seconds: ~ # LL / ETC / Hosts -rw-R - R-- 1 Root Root 551 Dec 23 20:43 / etc / hostsAfter we made sure that everything works, allow the service to start the service, in / etc / default / puppet Change:
# START PUPPET ON BOOT? Start \u003d Yes.
Run a service
: ~ # SERVICE PUPPET STARTPuppet will be interviewed by a Puppetmaster server every 30 minutes for changing the configuration and, if necessary, make the appropriate system setting.
Sergey Yaremchuk
Centralized configuration of UNIX systems using Puppet
Managing a large number of UNIX systems can not be called comfortable. To change one parameter, the administrator has to access each machine, the scripts can only partially help, and not in all situations.
It should be recognized that Windows-network administrators are still in a more advantageous position. It is enough to change the group policies settings, and after a while all network computers, including with a newly installed operating system, will "recognize" about innovation if they are, of course concern. Looking around for a long period of development of UNIX, it can be noted that nothing like that did not fit. There are solutions like Kickstart, which help with the primary installation of the operating system, but further finishing will require considerable effort. Commercial solutions, like bladeLogic and OpsWare, the problem of automation of settings solve only in part, their main advantage is the presence of a graphical interface, and only large organizations can acquire them. Of course, there are projects offering free solutions, but for all the time of their existence they could not create a large community. For example, CFENGINE is not very popular with the popularity of pulpiters, although, in addition to Linux, can be used in * BSD, Windows and Mac OS X. Perhaps it is related to the relative complexity in creating configurations. Positive tasks have to take into account the features of each specific system and manually control the sequence of actions when executing commands. That is, the administrator must remember that for some systems it is necessary to write AddUser for others - UseRADD, take into account the location of the files in different systems and so on. This is an order of magnitude complicates the process of writing commands, it is very difficult to create the correct configuration from the go, and the created configurations read in some time almost unrealistic. Despite the CFENGINE GPL license, in fact, a project of one person who controls all changes and is not very interested in building an open society. As a result, CFENGINE is quite satisfying the developer, and for the remaining administrators it is rather an excess headache. To improve CFENGINE, various additions were created by third-party developers, which often worsened the situation. The author of several such modules to CFengine Luke Kanies (Luke Kanies) Vitoga decided to develop a similar tool, but devoid of many CFENGINE flaws.
Puppet Features
Puppet, like CFENGINE, is a client-server system using a declarative, that is, mandatory to execute a language to describe the tasks and library for solid. Customers periodically (by default every 30 minutes) are connected to the central server and receive the last configuration. If the settings are not coincided with the system state, they will be executed, if necessary, the server refers to the operations of operations. Message Server can save the softwarelog or file, create a RRD schedule, send to the specified e-mail. Additional levels of Transactional and Resource abstraction provide maximum compatibility with soviet settings and applications, allowing you to focus on system objects, without worrying about differences in implementing and describing detailed commands of file formats. The administrator operates only with the type of object, the rest of the puppet takes on itself. Thus, the Packages type knows about 17 batch systems, which will automatically be recognized on the basis of the information about the version of the distribution or system, although, if necessary, a batch manager can be added forcibly.
Unlike scripts, which are often impossible to use in other systems, PUPPET configurations written by third-party administrators will mostly work in any other network. Puppet Cookbook already has three dozen ready-made recipes. Currently, Puppet officially supports the following operating systems and services: Debian, Redhat / Fedora, Solaris, SuSe, Centos, Mac OS X, OpenBSD, Gentoo and MySQL, LDAP.
Puppet. language
To go on, first should be dealt with the main elements and language capabilities. Language is one of the strengths of Puppet. With it, it describes the resources that the administrator plans to manage, and actions. Unlike most such solutions, the puppet language allows you to simplify the appeal to all similar resources on any system in a heterogeneous environment. A resource description, as a rule, consists of a name, type and attributes. For example, specify the / etc / passwd file and install its attributes:
file ("/ etc / passwd":
Owner \u003d\u003e root,
GROUP \u003d\u003e ROOT,
Mode \u003d\u003e 644,
Now customers, connecting to the server, copy the / etc / passwd file and install the specified attributes. In one rule, you can define several resources at once, separating them with a point with a comma. And what if the configuration file used on the server differs from client or not used at all? For example, this situation may occur when the VPN connections are settings. In this case, you should specify the source directive file. Here are two options, you can, as usual to specify the path to the ccdrug file, as well as using the two URI protocols that are supported: File and Puppet. In the first case, a link to an external NFS server is used, a NFS-like service is launched in the second version of Puppet, which exports resources. In the latter case, by default, the path is indicated relative to the PupPet- / etc / puppet root directory. That is, the Link Puppet: //Server.domain.com/config/sshd_config will correspond to the / etc / puppet / config / sshd_config file. You can override this catalog to the Filebucket directive, although it is more correct to use the section of the same name in the /etc/puppet/FileServer.conf file. In this case, you can restrict access to the service of only sophisticated addresses. For example, we describe the Config section:
PATH / VAR / PUPPET / CONFIG
Allow * .domain.com.
Allow 127.0.0.1
Allow 192.168.0. *
Allow 192.168.1.0/224
Deny * .wireless.domain.com.
And then refer to this section when describing the resource:
source \u003d\u003e "Puppet: //Server.domain.com/config/sshd_config"
Before the colon is the name of the resource. In the most simple cases, you can simply specify the full path to the file. In more complex configurations it is better to use alias or variables. The alias is set using the Alias \u200b\u200bDirective:
file ("/ etc / passwd":
Alias \u200b\u200b\u003d\u003e Passwd
Another option to create a pseudonym is well suited in the case when you have to deal with different operating systems. For example, create a resource describing the sshd_config file:
file (SSHDCONFIG:
Name \u003d\u003e $ OperatingSystem? (
Solaris \u003d\u003e "/ USR / Local / etc / ssh / sshd_config",
DEFAULT \u003d\u003e "/ ETC / SSH / SSHD_CONFIG"
In this example, we faced the possibility of choice. A file for Solaris is specified separately, the / etc / ssh / sshd_config file will be selected for all other. Now you can contact this resource as SSHDConfig, depending on the operating system the desired path will be selected. For example, we indicate that if the SSHD daemon is launched and received a new file, you should restart the service:
service (SSHD:
Ensure \u003d\u003e True,
Subscribe \u003d\u003e File
Variables are often used when working with user data. For example, describe the location of home directory directories:
$ HOMEROOT \u003d "/ Home"
Now you can contact the files of a particular user as:
$ (Homeroot) / $ Name
The account name of the user will be substituted in the $ Name parameter. In some cases, it is convenient to determine the default value for some type. For example, for the EXEC type, the directories in which it should see the executable file are very often indicated:
Exec (Path \u003d\u003e "/ usr / bin: / bin: / usr / sbin: / sbin")
In the event that you need to specify several nested files and directories, you can use the Recurse parameter:
file ("/etc/apache2/conf.d":
Source \u003d\u003e "puppet: // puppet: //server.domain.com/config/apache/conf.d",
Recurse \u003d\u003e "True"
Several resources can be combined into classes or definitions. Classes are the completed description of the system or service and are used to be separate:
class Linux (
File (
"/ etc / passwd": ovner \u003d\u003e root, group \u003d\u003e root, mode \u003d\u003e 644;
"/ etc / shadow": ovner \u003d\u003e root, group \u003d\u003e root, mode \u003d\u003e 440
As in object-oriented languages, classes can be overridden. For example, in the FreeBSD group-owner of these files is Wheel. Therefore, not to rewrite the resource completely, create a new class FreeBSD, which will inherit the class Linux:
class FreeBSD Inherits Linux (
File ["/ etc / passwd"] (Group \u003d\u003e Wheel);
File ["/ etc / shadow"] (Group \u003d\u003e Wheel)
For convenience, all classes can be taken into a separate file to connect the Include directive. Definitions can take numerous parameters as arguments, but do not support inheritance and are used if you need to describe multiple objects used. For example, we define the home directory of users and the commands you need to create a new account:
define User_Homedir ($ Group, $ FullName, $ Ingroups) (
User ("$ Name":
Ensure \u003d\u003e Present
Comment \u003d\u003e "$ fullname",
Gid \u003d\u003e "$ group",
Groups \u003d\u003e $ Ingroups,
Membership \u003d\u003e Minimum,
Shell \u003d\u003e "/ bin / bash",
Home \u003d\u003e "/ home / $ name",
REQUIRE \u003d\u003e Group [$ group],
Exec ("$ Name Homedir":
COMMAND \u003d\u003e "/ BIN / CP -R / ETC / SKEL / HOME / $ NAME; / BIN / CHOWN -R $ NAME: $ Group / Home / $ Name"
Creates \u003d\u003e "/ Home / $ Name",
REQUIRE \u003d\u003e User [$ Name],
Now, to create a new account, it is enough to contact user_homedir:
user_Homedir ("Sergej":
Group \u003d\u003e "Sergej",
FullName \u003d\u003e "Sergej Jaremchuk",
Ingroups \u003d\u003e ["Media", "admin]
Separately describes nodes (NODE) \u200b\u200bthat support inheritance, as well as classes. When the client is connected to the Puppet server, the corresponding Node section will be selected and the settings specific only for this computer are issued. To describe all other systems, you can use Node Default. The description of all types is given in document "Type Reference" with which you need to read in any case, at least in order to understand all the features of the Puppet language. Different types allow these commands, including when performing certain conditions (for example, changing the configuration file), work with CRON, credentials and user groups, computers, mounted resources, starting and stopping services, installation, update and deleting packages, work with SSH keys, Solaris zones and so on. This is how simple can be made to update the list of packages in distributions using APT, daily between 2 and 4 hours:
schedule (Daily:
Period \u003d\u003e daily
Range \u003d\u003e
exec ("/ USR / BIN / APT-GET UPDATE":
Schedule \u003d\u003e Daily
Update for that period by each system will be performed only once, after which the task is considered to be executed and will be deleted from the client computer. Puppet language supports other familiar structures: conditions, functions, arrays, comments and similar.
Installing Puppet.
Puppet will require RUBY (starting from version 1.8.1 and higher) with OpenSSL support and XMLRPC libraries, as well as Faster library. In the repository Ubuntu 7.04, which was used during a test installation, the PUPPY packet is already enabled:
$ sudo apt-cache search puppet
~ $ ruby \u200b\u200b-rxmlrpc / client -e "Puts: yep"
| yep. |
If errors are not received, it means that everything you need is already included. Files that describe the desired system configuration, PupPet terminology is called manifests (Manifests). When starting, the daemon tries to read the /etc/puppet/manifests/site.pp file, with its absence it gives a warning message. When testing, you can specify a daemon to work offline, in which the manifest is required:
$ sudo / usr / bin / puppetmasterd --nonodes
If necessary, other files can be connected to Site.pp if you can connect. For test run to this file, you can apply the simplest instruction.
class sudo (
File ("/ etc / sudoers":
Owner \u003d\u003e root,
GROUP \u003d\u003e ROOT,
Mode \u003d\u003e 440,
node Default (
Include Sudo.
All configuration files, both servers and customers are located in / etc / puppet. The fileserver.conf file, which we have already spoken is not required and is used only when Puppet will work also as a file server. Ubuntu In this file, the / etc / puppet / files subdirectory is exported. In the SSL subdirectory, certificates and keys will be used to encrypt customer connections. The keys are created automatically when you first start PuppetmasterD, you can manually create them with a command:
$ sudo / usr / bin / puppetmasterd --mkusers
Puppetd.conf and puppetmasterd.conf files are similar. They include some parameters of the demons on the client system and server. The client file differs only by the presence of the Server parameter specifying the computer on which Puppetmasterd is running:
server \u003d Grinder.com.
logdir \u003d / Var / Log / Puppet
vARDIR \u003d / VAR / LIB / PUPPET
rundir \u003d / Var / Run
# Send report server
report \u003d True.
To not print everything manually, you can create a template using Puppetd:
$ puppetd --genconfig\u003e /etc/puppet/puppetd.conf
Similarly, you can create both Site.pp on the server:
$ puppetd --genmanifest\u003e /etc/puppet/manifests/site.pp
Another Tagmail.conf file allows you to specify the postal addresses to which reports will be sent. In the simplest case, you can use one line:
all: [Email Protected]
Configuration files are not enough so that the client can connect to the server. To do this, you still need to sign certificates.
First, that the server learns about a new computer, we enter the command on the client system:
$ sudo puppetd --server grinder.com --waitforcert 60 -Test
The firewall must allow connections to port 8140.
On the server we receive a list of certificates that need signatures:
$ sudo puppetca -list
| nomad.grinder.com. |
And subscribe a client certificate:
$ sudo puppetca -sign nomad.grinder.com
Now the client can freely connect to the server and receive settings.
Unfortunately, all the features of Puppet within the article is impossible. But, as you can see, this is a functional and flexible tool that allows you to solve most of the tasks on the simultaneous administration of a large number of systems. And most importantly, the project managed to collect so far a small but constantly growing community. Therefore, we hope that a good idea will not give to die or go aside.
Good luck!
- The site of the BladeLogic project - http://www.bladelogic.com.
- OPSWARE project site - http://www.opsware.com.
- CFENGINE project site - http://www.cfengine.org.
- Puppet project site http://reductivelabs.com/projects/puppet.
- Puppet Cookbook - http://www.reductivelabs.com/trac/puppet/TAGSPUPPET%2CRecipe.
- Faster Library -
 Error appearance during program launch
 FRIGATE plugin for Firefox
 How to show hidden folders and files in Windows
 Ways how to make a screen on a laptop brighter or darker
 How to format a flash drive, disk protection
 If installing Windows to this disc is not possible
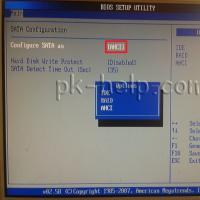 During installation of Windows "Make sure that the controller of this disc is included in the computer's BIOS menu.