Setting up satellite dish channels yourself. How to install a satellite dish yourself? Possible reasons for no TV signal
Every day more and more people are thinking about installing satellite dishes.
Many families prefer to switch to this way of watching their favorite channels, and moreover, they receive a fairly large number of additional ones in addition.
However, here, too, many people support the myth that antennas are expensive and difficult to install.
You need to find a master, negotiate, wait, pay for installation, buy equipment. How long does it take to set up channels?
But not everyone can actually install the antenna on their own.
However, installing it yourself is even easier if you know the algorithm of actions and use all the tools and recommendations correctly.
In addition, the installation of satellite dishes does not need to be coordinated with any authorities. Satellite broadcasting is free.
However, some of the digital channels are paid, and if you want to watch them, then you already have to pay.
Usually, key cards are sold for this. Remember that if you live in an apartment building, then here you still need to coordinate the issue with the Housing Office.
If the installation of the antenna was carried out on the balcony, and not on the supporting structures, then no one needs to be notified.
But the balcony is not the best place for installation, since with a strong gust of wind you can lose the antenna altogether.
If you apply for installation to a satellite broadcasting company, then they themselves negotiate with the Housing Office, otherwise, the issue will fall on your shoulders.
For private houses, the situation looks much simpler.
Principle of operation and general information
Even when installing a satellite dish on your own, you will have to buy a tuning device (tuner), the antenna itself, and mounting systems. Mounting and tuning the antenna is not the easiest task.
However, given that many digital channels are free, the installation will pay off quickly.

A satellite dish allows you to watch channels in high quality, and their large selection speaks for itself.
The operation of the antenna is based on receiving a signal from a satellite. After installation on the antenna mirror, a signal is received. It is reflected to the converter, which in turn sends a signal to the receiver device.
And through the receiver we see a full-fledged image on the TV screen.
In general, when faced with the installation, it is worth remembering that there are two types of satellite dishes:
- Offset plate. It is not set strictly in the direction of the satellite, but somewhat lower, since the signal is reflected from the dish to the converter at a certain angle. Most often, installing a satellite dish with your own hands, therefore, consists in placing the device almost vertically, which also minimizes precipitation on the surface;
- dishes with direct focus are arranged differently: the surface of the mirror is partially covered by a converter.
When buying antennas, be guided by its diameter. For convenient operation, it is enough to install satellite dishes with a diameter of about 90 centimeters.
If you yourself want to set up reception from several satellites at once, then the diameter is calculated from the degree distance of the satellites from each other.

The installation of the converter depends on its polarization. It can be circular or linear.
If it is assumed that the house needs installation on more than one TV, then the converter is bought with several outputs.
Preparing for installation: what you need to know?
Those who are wondering how to install a satellite dish should know that a suitable place is chosen for it first.
Otherwise, the device will give a bad signal and a “picture”. If a tree stands in the way of the signal, it may deteriorate. We always install the antenna to the southwest.

That is, on the spot you need to decide on the cardinal points. Of course, the orientation, and the installation itself, will be correctly carried out in sunny weather.
Because this way you can get the most accurate data, and also for reasons of convenience - installation in snow and rain is not very convenient.
No need to mount the antenna on a common rod for other devices, as well as on chimneys.
Under the roof visor, if the windows face southwest, it is also better not to install it - it will be trite to get a fuzzy signal.
In addition, for those who want to carry out the installation on their own, there are special services on the Internet that help to determine the best place for installation on the map.
Before attaching the antenna, check the signal by simply holding it in your hands. So you can understand how well the channels are broadcasting.
We mount the satellite dish correctly
To properly install, the antenna must be assembled before installation.
There is no need to worry here, buying a device (of course, not by hand), you can be sure that it comes with clear assembly instructions.
Since the number of parts is not too large, you can quickly deal with the assembly.

It is worth considering the strength of the walls, the material from which they are made. The more carefully you work out this issue, the more likely it is that the device will work for a long time and without any “shifts”.
The converters in the holder are installed with the connectors down. Remember that moisture and snow should not fall on them in any case. The cables are connected to the converter using an F-connector.
Make sure that the neck (the structure on which the antenna rests) is installed strictly vertically in two planes.
We fasten the cable and all wire components securely and firmly, for this we use ties and electrical tape.

The F-connector must be sealed during installation. We carry out insulation with tape, in two layers and along the entire length. And a layer of sealant is also applied along the tape, most often silicone.
After checking the operation, the satellite dish is installed on the bracket and all bolts and nuts are tightened. The cable to the bracket is also fastened with ties and firmly.
Adjusting the antenna for a clear reception
When the device is well fixed and the installation is completed, the installation and subsequent tuning of the satellite dish is carried out.
The direction in which to turn the antenna is chosen using a compass, and the adjustment is by monitoring the level on the receiver. A compass is also needed to set the azimuth level.

Usually the receiver already has a list of channels, or rather, the device is programmed for this list. To check, just select any channel from the list and navigate through it.
To change the reception level when setting, move the dish mirror in different directions around the reference point with smooth movements.
As a result, a quality indicator will appear in the form of a bar and a clear image on the screen: without interference and freezes.

When turning the mirror, remember that the "picture" will reach the satellite in 5-10 seconds, so it is better to pause between turns.
In the receiver menu, find the item "reception level" and activate it. You need to get the maximum score.
Adjustment should be carried out in sunny weather. If it rains and clouds, the signal, in principle, may be bad, and the setting will not be accurate.
And after all the checks satisfy you, you can fasten the nuts and firmly fix the satellite dish.

In general, a detailed description of the settings can be found in the tuner's instructions, because each device may have its own installation nuances.
Always compare the firmware version with the official one (available via the Internet).
After all, if the firmware is outdated or incorrect, you will not achieve a good signal from a satellite dish.
If the level is high, then you can individually add or remove digital channels from the list to your liking, and enjoy watching.
Selection of equipment and components
Many people think that the larger the diameter of the dish, the easier it will be to catch the channels during installation. The situation is just the opposite.
Good reception is achieved just by narrowing the diameter. Therefore, if the store recommends a “more” device to you, it is better not to agree.

Many are unsure that they can set up satellite TV themselves. In fact, many people can cope with this.
Equipment
Today, the entire connection kit costs between 2800-4500 rubles. It includes:
- Receiver (tuner). In simple terms, this is a receiver. Of the whole set, it costs the most. When choosing it, be serious, because the channels are broadcast in mpeg 2 and mpeg4 formats. The second one is better.
- Antenna. Transforms the receiving beam into focus. It is he who takes the impulse.
- Converter mounts- 2 pieces.
- Disek- its task is to switch between converters. The tuner at one time receives an impulse exclusively from one converter, it is necessary if there are more than two satellites.
- Special cable.
- F connectors.
- Mounting bracket.
Tools to help you tune your antenna:
- Extension cord (preferably 3 sockets);
- Perforator or drill;
- Wrenches for tightening nuts 13 and 10;
- Phillips screwdriver;
- Hammer;
- Insulating tape.
Choosing a satellite
We need to choose which satellite TV operator we need.
The basis of satellite television is orbiting satellites. Television stations send a signal to them, and they spread it over vast areas. Then it goes to the antenna, which reflects it to the head, it transmits it to the tuner. There, decoding takes place and we see the picture and hear the sound.
But just antennas are not enough for this. We need a whole system here.
Satellites are of two types:
- Open broadcast
- encoded
Channels are collected in packages and a card is purchased that will decode them.
Russian channels are broadcast from satellites from different parts of the world. To receive a signal from a particular satellite, it is required that the antenna be directed in its direction and set the correct frequency. If the desired satellites are nearby, then only one antenna is needed to catch it.
Satellite Yamal 201 makes it possible to view up to thirty Russian channels. There are many free-to-air broadcasters in Earth orbit.
When choosing an operator, take a look at:
- Tricolor-TV has been operating for many years and has many customers.
- NTV Plus
- Rainbow TV
All of them provide many channels.

Antenna Installation
How to choose an installation location
It will not be possible to install the antenna anywhere. They are sensitive. If a tree interferes with the signal, then the reception will be blocked partially or completely. Before installation, you need to check what objects are in the signal path. If anything, you need to either choose another place, or eliminate interfering objects.
To a specific satellite, you need to choose the right direction. It can be obtained from a sales assistant, on the Internet or in specialized literature.
 Before installation, you need to check what objects are in the signal path, if anything, you need to either choose another place or eliminate interfering objects
 Getting ready for installation
There are instructions for the plates. After assembling the antenna, you need:
- Attach the bracket to the wall
- Fix the plate
- Start setup
Now you need to start preparing the cable:
- Take a knife with pliers
- Use a knife to strip the top insulation, there will be a layer of small wires. It must be deflected to the cable.
- Next comes the foil layer. Cut it off.
- Last protective layer you need to bare and there will be a core.
- You clean it from the top layer(enamel) and put on the F connector.
- All the layers that stick out- cut.
 To a specific satellite, you need to choose the right direction, you can get it from a sales assistant, on the Internet or in special literature
 We connect
- Connect the convectors to the disc. This requires 3 cables.
- To prevent moisture from getting on the disk, hide it. But you don’t need to wrap it with electrical tape, otherwise it will be a “steam room”. Use heat shrink.
- Now you need to connect the disk to the receiver. It's simple, screw the F-ku which is on the cable to the receiver.
Setting up the heads
Let's say the plate is facing south. We connected all the wires. Now comes the most difficult stage in all this work. You need to start with the central head. If the south side is selected, then you need to tune in to Sirius.
Set the receiver speed to 27500, frequency 11766, polarization - H. Look at the two bars: the first is the connection (red), the second shows the signal level (yellow). If everything is correct, the signal level will be 40%.
Now you can adjust the signal quality, now it is 0. Let's go to the plate:

To make it easier, you can:
- Connect the power cable to the plate;
- Install a tuner from the kit nearby;
- Put a portable, small TV next to or on the roof;
- Connect and check everything by adjusting the plate.
But not everyone wants to do this, and for example, no one will raise plasma to the roof.

Setting up side converters
After the previous manipulations, it is very easy to adjust the side heads, the rest of the satellites are on the sides.
The principle is the same as the previous setting:
- For Amos speed 27500, frequency 11766, polarization H.
- Hotbird - 27500, 11034, V.
We bend the side bracket. Do not be afraid, some models are made in such a way that there is no way without it. Gently move the converter to the right side from the left, upper corner, then lower it lower and turn to the left. Monitor the signal until it becomes normal.
There will be no signal if the disk settings are set incorrectly. Check.
Finishing the setup
When you have everything set up and wound up all the wires, scan and look for channels. Find the SCAN function in the tuner. There will be a list of all available channels. Choose the ones you need.
Now often all the channels are already in the tuner settings. No need to scan and configure. Turn on the TV, watch your favorite channel. Find and press the Info button on the remote (insert batteries into the remote). Some channels may be missing, write their frequency in the editor. And pay attention to the readings of two or three scales, depending on which tuner.
Possible mistakes
- If the cable stripping is poor quality and the F connector is connected incorrectly, the tuner can be damaged.
- The cable to the tuner is connected incorrectly.
- Wrong installation location. There is an object closing the signal.
- The disk port for the satellite is not specified.
- At the time when the antenna is being tuned, it is impossible to be in front of the satellite converter.
- Once you have adjusted the antenna, do not loosen the nuts holding the tilt and azimuth too much.
- The satellite signal can be checked with special devices.
- Amos should be searched on the right, and Hotbird on the left.
Cable TV is limited to only a certain list of channels. Therefore, the satellite is increasingly being used for leisure activities. We propose to consider how the satellite dish is configured independently, what TV equipment is needed for this, as well as the step-by-step installation of channels for dummies.
The principle of operation of the antenna
A satellite dish is a dish-shaped type of parabolic antenna (multifield, Opticum AX 1000+, Maximum, Opticum X80 Premium, Orton X80, BIG BISAT) designed to receive microwaves from communication sources that transmit signals to television, radio, sometimes Internet satellites (Intelsat 15, Intel, Eutelsat 36A/36B (36°E), TT-budget S-1401 SkyStar 3, Sky tv digital).
Photo - Satellite dishThe parabolic shape of the offset dish reflects the signal to the antenna at the focal point. A device called a horn feed (Satfinder) is attached to the dish coordinator, its adjustment is fully automatic. This part is, in fact, an amplifier, the front converter heads (LNB) collect signals from the focal point and “lead” them to the downconverter block. The horn converts the signals of electromagnetic or radio waves into electrical and adjusts their spectrum.
Now another amplification technology is actively used - winding a metal mesh or additional turns of wire on a plate (see photo). This setting helps to increase the absorption capacity and sensitivity of the antenna even to weak signals.
 Photo - Antenna amplifier
 Modern dishes intended for use in home television typically range in size from 43 cm to 80 cm in diameter, and are tuned in one position to receive Ku-band from one orbital position. Prior to the existence of live satellite services, home users typically used a motorized C-band dish up to 3 meters in diameter to receive channels from various satellites. Excessively small plates can cause problems in the network, but they have a longer shelf life, are easier to set up and last longer.
Video: choosing a satellite dish installation site
How to set up a TV antenna
You can use a special device to tune a direct-focus satellite dish (Amos-Amos, ASTRA, Raduga, Sirius-Sirius, SkyStar USB 2 HD CI TechniSat, Supermax, Golden Interstar, Eurosky, General Lumax DV-728 FTA, STV), for example, this is a satellite dish tuner, they are very easy to install with your own hands. Consider the easiest and safest installation method, step by step instructions:
- Prepare the antenna mount. For this purpose, you can use a double suspension, building mounting brackets (for areas with strong winds);
The double suspension of the motor suspension is equipped with two telescopic rods that can be moved. They are optimized for receiving VHF signals. At that time, they are not the best solution for good reception on TVs or on a computer, because. are known for their ability to interrupt the signal.
 Photo - Satellite dish on the roof
 Sometimes you can install the antenna on a rotary beam. In this case, reconfiguration will be carried out quickly and easily - it will be possible to connect from one satellite to another.

Note: if you live far from the city or the village center, then you need to purchase the largest possible antenna, with a diameter of 80 or more centimeters, otherwise the signals will be interrupted.
- Use the rotor for polarization. If in your area the type of signal reception is such that one channel broadcasts from the north and the other broadcasts to the west, then you may need an antenna rotor to make a dual connection, thereby expanding the range. If there is no rotor, then you can take a compass;
- It is also recommended to use a receiver (HD Continent-CHD-04, changhong dvb-s9000n, C-band, DRE, DRS, Globo 7010C-1CI, SVEC) to amplify signals;
If the angles differ slightly, or the platform is fairly close, then you can do without the rotor. If the angle of satellites ABC (ABS, ABC) is more than 30 degrees, then you need to use a catcher. In addition, with the help of such a device, switching between satellites can be done without leaving home.
 Photo - Offset antenna
 - Determine where the antenna is connected and tuned to a TV, laptop, computer or other receivers. For a laptop, phone and TV, this will most likely be a USB compartment, while for TVs it will be the so-called "tulip". It will probably be what is called connector F (DVB). There are older styles of connectors, such as the Belling Lee connector or the flat-cut connector.
note A: If you have an old type connector, you need to visit the radio market or local TV store to get the correct adapter. Digital TVs have a dedicated input for digital reception (EUSTON 0.75 m), usually labeled "DTV" or "DTT". They will not be able to connect directly to legacy connectors.
- Connect the antenna to your TV using RF coaxial cables (also known as "F" wire). There are two installation options: screw in with a threaded connection and plug in like a normal adapter. It should be noted that the threaded method is more reliable and practical.
- Set up your TV, you can do it yourself here. You will need to use the remote control, the TV settings menu (how to enter it in certain models is described in the products of any company). The entry point is most likely labeled "Antenna", "Air" or "Air" in most Chinese TV sets.
Some TVs have multiple inputs: make sure you select the correct input during the procedure. If you have a cable and multiple inputs, you can set one input for the projector (as an option) and the other as an antenna input.
 Photo - Antenna tricolor
 - Adjust the antenna. For signal purity and transmission quality, it is necessary not only to adjust the polarity, but also to select the correct coordinates. You will need to scan through the channels with your TV tuner to see which channels are within range. If you see a fuzzy image, reposition the antenna until the signal clears up. Some antennas are motorized, saving you the hassle of climbing up to the roof to tune. Remember, some channels require special codes, we recommend that you get them from the service provider, or by directly contacting the press center of a particular channel (you can do it by mail or online chat).
Depending on which continent is needed, you can set the "manual" tuning, the antenna will automatically find the signal according to the specified parameters, depending on the range and power, you can change filters. But before you start watching movies in this case, be sure to save the channels, check their operation and fix the antenna.
- Find local online broadcast locations. The broadcast location map of each channel (latitude, longitude, angle parameters) is easily found in Yandex or Google Maps. If all channels are in the same direction (azimuth within 20 degrees +/- 1 degree), then it is easier to correct the directional antenna.
- The sun can do a disservice, especially in the Crimea, Kazakhstan, Israel and other sunny areas. You need to make a special shading.
In case you need different settings to get different channels, then:
- Write down not only how many channels are selected according to the results of the test, but which of them are called, as well as their parameters.
- Carry out a manual scan with appropriate settings, add all channels in your TV menu, install an antenna for each channel.
- Some TVs can memorize channels. You can set this feature to automatically find broadcasters. To check the list, use the special tester that comes with the antenna.
If you are a happy owner of SMART-TV or want to connect a computer to an antenna, then you will need an express program for setting up a satellite dish (Fastsatfinder), it is easily installed from the disk with your own hands, after which a telecard is created by the device. The main advantage of this method: simplicity and speed, disadvantage: it can only be used on "smart" devices. Some extensions are installed even on Android (Android) and Linux.
 Photo - Satellite dish design
 Prices and companies
In any case, the master will cope with the installation of the antenna faster and better than an amateur.
Also, many owners of the antenna do not want to "play" with its installation, and therefore we propose to consider how much it costs to set up and install a satellite dish in different cities of Russia and Ukraine. Price table, the cost of installing an azimuth satellite dish 43 cm, 0.55-0.6:
| City | Price, rubles |
| Almaty | 2400 |
| Barnaul | 2500 |
| Vladivostok | 2500 |
| Volgograd | 2400 |
| Donetsk | 2500 |
| Rostov-on-Don | 2400 |
| Ekaterinburg | 2400 |
| Zaporozhye | 2500 |
| Irkutsk | 2400 |
| Karaganda | 2300 |
| Kyiv | 2500 |
| Minsk | 2500 |
| Moscow | 2500 |
| Odessa | 2400 |
| Permian | 2400 |
| Samara | 2300 |
| St. Petersburg | 2500 |
| Saratov | 2400 |
| Kharkov | 2400 |
| Ulan Ude | 2400 |
| Novosibirsk | 2500 |
Independent and professional setup of a satellite dish Yamal (Yamal 201 90E), Tricolor TV Siberia (Tricolor), HotBird (HotBird), GAL, Orion, Samsung DSB-S300V is carried out within a few hours, under normal weather conditions. The following models are most popular now: SatelliteAntennaAlignment (Germany), ABS-1, LMI 75, ExpressAM2 80, Turksat 1C/2A 42E, Satgate, StrongSRT90 Multisat, HDHumaxVAHD-3100S, PBIDVR-1000S, Openbox®SF-20.
class="eliadunit">
After we have decided on the installation site of the antenna and its approximate direction, the pre-assembled antenna is hung on the bracket. After that, additional multifeeds and converters, cables and other structural elements are installed.
- IMPORTANT: To fine-tune the antenna, it must be moved vertically/horizontally. BUT, you should tighten the fasteners just enough so that the antenna itself does not move and does not change the slope, but you could, although with effort, still move the antenna in planes. To do this, the left/right screws are not fully tightened.
For example, the loose left lower screw on the U-shaped adjustable antenna element (see photo) allows you to adjust the antenna according to vertical, and those that are on the clamp for fixing the antenna to the wall mount, usually there are two of them, - according to horizontal.
What is multifeed and how it works
Multifeed- this is a design that allows you to receive SIMULTANEOUSLY several satellites on one satellite dish due to the possibility of installing additional heads (converters). This allows you to save your money on the purchase of an additional satellite dish.
Law of multifeed: angle of incidence = angle of reflection
An antenna is often called a mirror. And in the case of a multifeed, the laws of optics and reflection apply (remember physics?) Specifically: The angle of incidence is equal to the angle of reflection. That is, if you adjust the antenna to the corresponding satellite so that it is in focus, then the signal from a neighboring satellite located at a different orbital position will no longer be reflected in the converter that is in focus, but in some other point. The whole thing works according to the same law!
Understanding this law is simple:
If a neighboring satellite (Amos 4) in geostationary orbit is located to the right of the focus of the central converter (Sirius 4.8) of the satellite dish, then the reflection of its signal (yellow arrow in the figure) from the dish mirror will be focused to the left of the place where the central converter is in the focus of the antenna. (see pic)

If the satellite is higher, the signal will focus lower. Basically a mirror effect.
Setting up an antenna for a satellite with multifeeds installed
Then you need to put 2 mutifids on the antenna nose mount, which already has an installed holder for the main converter (converters are fixed in all holders). Next, everything must be tightened securely, but leave the opportunity to turn the converters in multifeeds in all directions and planes with some effort. The cable system is connected at the very end.


Customization: the steps of a painstaking process
Setting up equipment is a rather troublesome and time-consuming task. It all starts with screwing to the center. F-connector converter with a cable length of 2 meters or more. The other end of this cable is fixed on the receiver.
The receiver itself is connected to a television receiver. Be careful: the power supply (220 V) must be turned on only after connection. Another important point to keep in mind: when you wind the F-connector, make sure that the shielding film and the thinnest conductors on the cable sheath do not short-circuit with the central core. Otherwise, everything may end up with a breakdown of the receiver!
Setting up a satellite dish to the main satellite Sirius 4.8E
Turn on your TV and receiver. Go to MENU - INSTALLATION, then - to SEARCH FOR CHANNELS. On the left you will see a list of satellites from which reception will occur. Select the desired one, for example Sirius 2/Ku 4.8E, if a central converter is set up for it, which has previously been firmly fixed.
- LNBP- turn on the converter.
- LNBP Type- select Universal (you can see the type in the documents for the converter).
- LNBP Freq- 10600/9750 (this data is also indicated in the instructions for the converters).
- 22Khz- select the AUTO item (this is a signal that switches the disc).
- DISEqC- leave NONE (if you connected the signal reception directly, without using DISEqC).
Then look for the corresponding button on the remote: it will take you to the transponder submenu. This is where you will need to look for a satellite signal. TIP: mark in advance for yourself a couple of transponders from satellites with different polarizations and any channels (preferably free) that really WORK (FTA). These are easy to find on the Internet at specialized sites.
- EXAMPLE: let's analyze the option with the 11766H transponder. It broadcasts at a frequency of 11,766 Mega Hertz (horizontal polarization). To make it more convenient to adjust the quality of the picture and signal, it is better to display all the information in full screen mode. There is an INFO button for this. It will be convenient to focus on quality on the microscale located below.
Do not be alarmed if at first the "quality" of the signal is 0. The reason for this failure is quite understandable: at the very beginning we discussed the options for directing the antenna and turned it in the right direction using the "scientific poke" method. And now it's time to tune the antenna in all planes. Immediately get ready for a long and monotonous process that requires accuracy, attentiveness and self-control. Why? A couple of millimeters and the signal will be lost. It will not even be in its poor quality, but in its complete absence!
Tuning the receiver antenna in planes
First you need to find one ideal vertical position. Then slowly and smoothly try to turn the antenna horizontally. In this case, you need to constantly monitor the signal quality scale. As soon as the number moves from 0, then you are doing the right thing. In this way, you should bring the scale to at least 15. It is possible that all manipulations with horizontal movements will be unsuccessful. Then you have to return to the vertical position and change it a little. And then start all over again: gentle movements to the right and left until a signal appears, even a small one. Your task is to achieve the highest quality of reception. To do this, of course, is not easy, but without it, as they say, nowhere.
You can try to turn the converter a little in the holder (around the axis). There are even special marks on the case for this. You can also move it a little along the holder back and forth, while achieving maximum readings on the QUALITY scale.

The conclusion is that in order to achieve the best signal quality, you need to try ALL adjustment options. Only in this way the result will suit you completely.
- IMPORTANT: if you double-checked everything a hundred times, tried to adjust the antenna, repeatedly changed the receiver settings, but did not find the signal, try replacing the converter. There is a possibility that it is simply broken.
Have you achieved the highest possible reception quality? Accept congratulations! It seems to be time to tighten the screws and enjoy a job well done?! Not everything is so rosy. Remember: the tuning was carried out with a transponder broadcasting ONLY in horizontal polarization (label "H" on the case). It is also necessary to set up a V-transponder, that is, with vertical polarization. Yes, back to the fight!
In each case, completely different actions can help. Somewhere a small turn of the converter around the clockwise or counterclockwise axis leads to success. And some have to scan transponders in a manual search. A description of this process can be found in the documents for the purchased receiver. And after visually monitor the reception of certain channels, their correspondence to the desired satellite.

We tighten the nuts!
The long-awaited moment has come when the signals in both polarizations give the highest possible quality. Now you need to tighten the nuts very tightly and firmly. And here again, difficulties can overtake you: by tightening the adjusting nut, you, unwittingly, slightly change the direction of the antenna. As a result, the signal quality is again noticeably reduced! Therefore, this must be done very carefully, with patient caution.
Position of converters on multifeeds
Before you start setting up converters on multifeeds, you need to know the angle of their inclination to the horizon and understand how they will be located.
Satellites in the sky in geostationary orbit relative to the territory of Russia are located in an arc that lies closer to the south of the sky. To an observer, it will look something like this:

Therefore, the location of the converters on the antenna must be inverted-mirror. If the antenna is directed to the southern sector, then the neighboring LNBs will be conventionally located as follows: 
If the “dish” is tuned to a western satellite, then the converters on the multifeed should be located like this:

And finally, if the satellite dish is directed towards one of the eastern satellites, then the "heads" in the neighborhood should be positioned as follows:

Let's look at another important point that should always be remembered. Since the satellite transmits a signal in most cases in horizontal or vertical polarization, then for various satellites the vertical polarization will not always be “vertical”, and, accordingly, horizontal is not always “horizontal”. Vertical and horizontal polarization will remain exclusively for southern satellites, and for all others the polarization will be somewhat "tilted", as shown in the figures. Therefore, both the central converter and the converter on the multifeed must be positioned at a certain angle relative to their axis. To do this, the converters have special division marks.
Calculation of the position of converters on multifeeds relative to the central head
The program "Rainbow TV: Installer Assistant", which can be downloaded here, is designed to calculate the installation angles of a satellite dish. It also contains all the information for setting up a multifeed. To calculate the multifeed, you can use the corresponding tab in the program. Converters will need to be placed according to the calculation scheme presented on the tab as a result of the calculation.
Here is an example of calculating our multifeeds with distances relative to the central converter according to the program:

where Hor- distance from the core of the central converter to the center of the head on the multifeed a Ver- distance from the center of the main converter to the center of the head on the multifeed.

Setting up a multifeed to a satellite
So, the antenna itself and one of the converters are successfully configured. After that, turn off the receiver and twist the cable of the central converter to the converter from the multifeed. Then turn everything back on.
A familiar menu will appear in front of you, only now you should select Hotbird 13E and another valid transponder. As in the case described above, it is necessary to systematically achieve excellent signal reception. However, it is not the antenna itself that will have to be moved here, but the converter on the multifeed. By the way, it is able to move in any planes: up / down; right left; back forward.

If you see that the signal is excellent, tighten the screws. But don't forget about checking polarizations. Scan transponders and check any channel that broadcasts without payment, purely visually. Everything is okay?
Multifeed to Amos 4w satellite
Turn off all equipment again and twist the cable, as before, to the last converter. Then the tuning process is repeated with some changes: the Amos 4w satellite and its operating frequency are selected in the receiver menu.

Having set up the multifeed, connect all three converters with the disk with the attached short cables, in accordance with the attached picture.


In the receiver settings, you need to set the port parameters in accordance (set the following numbers in the Diseqc 1.1 menu: Sirius 2 / Ku 4.8E - 1, Hotbird 13E - 2, Amos 4w - 3) with connecting cables to the disk.
Then, to automatically search for channels on satellites. If not all channels are found as a result of the search, then you should switch to the manual search mode and search for them by entering the parameters of the missing transponders.
Is it worth it to cover the disc from rain or moisture
Of course, yes, a disk is also an electronic device and runs on electricity, and if water gets in, a short circuit cannot be avoided. Lucky if only he burns. Just a bag of tape will not help, it will only aggravate the situation.
But a plastic bottle with a cut off top is another matter, simple and reliable. You can dream up and find a bottle or box of a suitable shape and cover the gaps with silicone or sealant.
Modern discs are already sold with a plastic protective casing in the kit.

Disek must be installed in such a way that water does not reach the cable connections. Therefore, it must be raised above the level of converters.
ANTENNA tuned to 3 satellites INSTALLED SUCCESSFULLY!
Satellite television is gaining the market of television services at a steady pace, and even "yesterday's" luxury - a satellite dish - has become commonplace in millions of families. There is an opinion that the installation of a "dish" is the lot of professionals, and that an ordinary person simply cannot understand how to set up an antenna.
Below we will try to dispel this myth, showing in practice what and how to do in order to join the era of satellite television on our own.
Satellite selection
After you got the idea to purchase a satellite dish yourself, you need to decide on a satellite television operator, in other words, with a satellite, the signal from which the antenna will receive.
Satellite television is named so because it uses a system of orbiting satellites in space. They receive a signal from television stations and then broadcast it to vast areas below them. Satellite dishes receive the signal and reflect it to the collecting head (converter), which transmits it further to the receiver (tuner), from where it goes through the final decoding stage and enters the TV in the form of images and sound.
It becomes clear that one satellite dish is not enough to receive a signal. To do this, a whole system of satellite equipment must be installed and correctly configured. We will begin its consideration a little later, but for now we will return to the choice of a satellite.
Today there are two types of satellites. The first broadcast open channels, others - encrypted. It happens that the equipment on the satellite is used by different operators. In this case, you will have to purchase a card for decoding each channel separately.
But most often the channels are collected in packages, and it is enough to purchase one single card on your own to get access to all at once.
Russian-language channels are broadcast from various satellites located over different latitudes and meridians. In order to receive a signal from a certain source, it is necessary to set (direct) the antenna to it with the utmost accuracy and adjust the reception frequency. If your preferred satellites are close to each other, then you have every chance to receive a signal from them using just one satellite dish.
Satellite "YAMAL 201" allows you to watch up to 30 Russian-language channels in the public domain. There are also many other satellites in Earth orbit that broadcast free-to-air channels. When choosing a satellite TV operator, pay attention to Tricolor-TV. For several years of operation, this operator has built up a solid client base, which is direct evidence of the high quality of the services it provides. In addition to him, you can advise NTV-Plus (with an extensive list of channels) and Rainbow-TV.
You can independently find a list of satellites with free broadcasting on the Frocus.net website, with a paid one - on the official websites of the above operators.


When choosing a satellite, check whether you will be able to point your satellite dish at it. In the event that there are objects that interfere with the signal path (another house, power lines, trees, etc.), consider installing a “dish” on the roof. Well, if this turns out to be impossible, you will have to turn your attention to the satellite located in the intended antenna visibility zone.
Purchase of equipment
Before installing and configuring satellite equipment, it must be purchased. You need to go to a specialized store for the following items for assembly:
- "Dish" (antenna). She will "collect" the signal from the satellite, concentrate and reflect it into the converter. The recommended diameter is more than 90 cm.
- Converter (head). It picks up the signal that hits the antenna, and, after converting, transfers it to the receiver. The choice depends on the polarization (circular or linear) of the preferred satellite, in the description of which this parameter can be found.
- Receiver (tv tuner). It will receive a signal from the converter, then it will decode it (“translate” into the language of the TV) and transmit it to the final destination - the TV. Setting up this device does not require special knowledge.
- Bracket ("leg"). Provides secure mounting of the antenna on the wall (or roof) of the house. In addition, it will allow you to quickly rotate the dish in two planes (to search for a signal). Make sure that the plate is far enough away from the house so that it does not touch the wall during rotation. In general, it is not possible to install an antenna without a bracket.
- Cable (coaxial). Acts as a signal conductor, connecting the converter to the receiver (tuner).
- DiSEq. Masters simply call it "disek". It will be necessary if you decide to receive a signal from several satellites at once. In this case, it will help to combine a group of converters into a common cable.
- "F-ki". Without them, it is impossible to connect the cable to each link in the antenna-receiver chain. You will need 8 pcs. (for reinsurance - 10).
- Cable for connecting the receiver to the TV. Can be: composite (tulip), SCART, or HDMI (for the highest quality). It is necessary to independently check which cable is suitable for your case.


All of the above devices and devices can be purchased in a satellite television kit, which has already been assembled by professionals. You can assemble it yourself - in this case you will be sure of the quality and reliability of each element of the system.
Self-installation of the antenna
Before proceeding to this step, you must be absolutely sure where your satellite dish should be pointed. The Agsat.com.ua/satdirect service will help you make the right decision. You just need to indicate the place where you plan to install the antenna, and select the desired satellite. The screen will then prompt you to select a direction.
Before proceeding with the installation of the system, it is recommended to make sure that there is a signal (it should reach 60-70%), holding the antenna in your hands. If the test is successful, the next step is to install the bracket.
Make sure that the place for fastening is reliable and, using a perforator, make holes in the wall for anchors, the size of which should be selected depending on the material of the wall and the weight of the entire structure to be mounted. Having fixed the bracket, proceed to install the satellite dish itself (you will find a description of this process in the instructions for it). Remember: until you are sure that it is in the right direction, there is no point in tightening the nuts. First you need to set up a satellite dish.
Connection and setup
Setting up satellite dishes does not start on its own until they are connected to the receiver. To do this, you need to prepare the cable (wind the F-ku on it) and transfer it from the converter (head) to the tuner.
We prepare the coaxial cable according to the algorithm:
- Cut off the insulating layer (1.5 cm from the edge) of the cable;
- We bend the shiny braid (from small aluminum strands) outward;
- We release the core of the cable from the foil screen (you need to get rid of about 8-9 mm of the screen);
- We clean the core (the main copper core) from the remaining enamel and put on the F-ku.
- It remains to make sure that the core "peeps" out of the F-ki by no more than 2 mm. All excess must be cut off with wire cutters.
- We do the same with the other end of the cable (having previously measured the required length on our own).
- We connect the cable to the converter (if there are several of them, then we combine them into one with the help of a disk), and pull the other end to the receiver.


System installation is complete, the next step is configuration.

The antenna is set correctly and "looks" at the satellite (approximately so far). We go into the settings of the receiver and select, for example, the Sirius satellite. For it, you need to specify the frequency "11766", the speed "2750" and the polarization "H". Two bars will appear on the screen: the first shows that the dish has caught the signal, the second shows its power. If the satellite dish is installed correctly, you should see at least 40% signal strength. It remains only to improve the quality, which is still in the region of zero. We leave the TV and go to the plate. It is desirable that you can see the changes on the signal scale. But if you cannot monitor them yourself, leave an assistant who can correct your actions - it will be easier to set up the system with him.
Start by turning the satellite dish all the way up to the right. From this position, slowly, constantly observing the signal level from the satellite, rotate the dish to the left.
If the signal could not be caught, it is necessary to lower the antenna a couple of millimeters (the fasteners are usually marked), and then repeat the rotation of the dish.
Setting up a satellite dish on your own just means a painstaking search for a signal by manual adjustment.


First you need to achieve at least 20% quality, after which you can fix the satellite dish stronger. After that, with light manipulations (literally by degree), we turn the plate left and right in search of 40%. But even this is not enough. For good work, you need at least 60-80%. Further "adjustment" is made by manipulating the converter, which must be turned clockwise or counterclockwise. When the signal level is satisfactory, you can proceed to debug the side converters (if you do not have them, skip this step).
Setting up additional heads will be much easier, since the main antenna already picks up the signal in full. All that remains is to specify your satellite for each converter (select in the receiver settings, as well as indicate the frequency, speed and polarization) and by rotating or bending the head leg to catch an acceptable signal.
Pay close attention to the labeling of the inputs in the disc (A, B, C…). In the same sequence, they will need to be specified in the tuner.
The last step is setting up the TV
It remains only to scan the satellite for channels and set up the TV (arrange the channels in the desired sequence for easy searching). If you are dealing with a paywall, insert an unlock card purchased in advance from a satellite TV operator.
 Consider each of the requirements for metal detectors
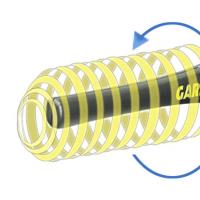 Metal detector in an educational institution
 How to wipe the TV screen at home
 Senaki mikha tskhakaya. Mikha tskhakaya. Notable residents of the city
 International Journal of Applied and Basic Research Volgo-Caspian Shipping Canal Main Bank
 How to deal with sunburn if you are burned
 Hagen, Germany: why go, what to do, where to eat, travel tips Where and what to eat and drink in Hagen