How to clean your computer from unnecessary files using special programs and services. How to remove junk files. We remove excess garbage from the computer How to clean up junk files
The task of cleaning a computer and even more so a laptop from unnecessary programs and files is always relevant for any user. If you can use special utilities - uninstallers to remove the “tails” of various software, then to get rid of unnecessary system objects, you need to point out the reason for the increase in the volume of each directory.
All sorts of optimizers can break the integrity of Windows. We will list you the actions that will free up space and are guaranteed not to lead to incorrect operation of the operating system.
Cleaning up temporary files with a system cleaner
Windows developers have provided an excellent tool for deleting optional files - a cleaning manager integrated into the operating system. To run it, press the combination "Win" + "R", enter the cleanmgr value and click "OK". After that, the application will analyze the system and display a list of data available for deletion, as well as the planned amount of freed space. By the way, this manager will even cope with the upgrade to Windows 10 loaded in the background. And this is as much as three Gigabytes.
Emptying the Recycle Bin
A banal tool, but very effective - removing garbage from the Recycle Bin. We have met users with Gigabytes of unnecessary data placed there long ago. Don't forget to check the contents of the container and empty it with the "Empty Trash" command.
Disabling hibernation
A convenient mode for a quick start of the computer. It is especially active on laptops. When using it, the entire contents of RAM is written to the local disk in the hiberfil.sys file. Most likely, it will not work to delete it simply by pressing the "Delete" key. The solution is to disable the mode through the command line.
To do this, press the combination “Win” + “R” already familiar to us, copy or enter the text “powercfg -h off” in it and click “OK”. You can turn this mode back on simply by changing the text "off" to "on".
Cleaning up user files
We recommend checking and deleting unused user accounts. They are located in the "Control Panel", item "User Accounts". Here you should also disable the guest account of the operating system.
After restarting the computer, you can "clean up" the remnants of the folders. By default, they are located on the system media in the root folder "Users".
Removing temporary objects from the browser cache
Auxiliary program files are located in the "Temp" folders located in the following locations:
- C:\Users\(user_account_folder)\AppData\Local\Temp
- C:\Users\All Users\Temp
- C:\Users\Default\AppData\Local\Temp
- C:\Windows\Temp
- C:\Users\All Users\Temp
- C:\Documents and Settings\Default User\Local Settings\History
- C:\Windows\Temp
- C:\Documents and Settings\(user_account_folder)\Local Settings\History
- C:\Documents and Settings\(user_account_folder)\ Local Settings\Temp
Internet browsers like to "store" various information that they need to launch certain functions faster or simplify the authorization algorithm. If these two factors are not critical for you, you can safely delete cache files.
We list the locations for popular browsers:
Opera
C:\users\(user_account_folder)\AppData\Local\Opera\Opera\cache\
Mozilla Firefox
C:\Users\( )\AppData\Local\Mozilla\Firefox\Profiles
Google Chrome
C:\Users\(user_account_folder)\AppData\Local\Google\Chrome\User Data\Default\Cache and C:\Users\(user_account_folder)\AppData\Local\Bromium\User Data\Default\Cache
Internet Explorer
C:\Users\(user_account_folder)\AppData\Local\Microsoft\Windows\Temporary Internet Files\
Of course, you can do all these manipulations through the menu of the web browser itself, but the forced cleaning tool is the most reliable.
Local copies of recently opened office documents can also be deleted. They are located at
C:\Users\(user_account_folder)\AppData\Roaming\Microsoft\Windows\
It is possible that not all directories will be available for cleaning. The reason for this is that some software is accessing the folder at that moment. If the situation does not change immediately after starting the operating system, try deleting data in safe mode. To do this, when loading the operating system, press the "F8" key and select the "Safe Mode" item in the list provided.
Clearing game saves
Recently, games to save user data are increasingly using not their own directory, but a separate folder in the "Documents". Finding these objects is very simple - we follow the path "Computer" - "Documents" and find the name of the directories in which the name of the games you deleted or do not need occurs. We check that they do not contain data that is useful to you and remove garbage. Catalogs of current games, of course, do not touch.
Please note that if you have previously installed various multimedia software or graphic editors, then you should also check folders with the name of unused programs - these applications also like to leave garbage in documents.
Reducing the swap file size
If the availability of free space is critical to you, try forcibly limiting the size of the local file, which is used in case of a lack of RAM. You can limit its size in the "Control Panel", the "System" section, the "Advanced Options" tab. Then, in the "Performance" item, select the "Advanced" attachment. However, we recommend that you do not make the file size smaller than 500 MB, especially on machines with little RAM. There is a risk of encountering "brakes" during work.
And this time I will tell you how to manually remove computer trash on your own, using Windows tools and programs.
1. Where is garbage stored in operating systems
On Windows XP
We go and delete everything in the folders: Windows temporary files:
- C:\Documents and Settings\username\Local Settings\History
- C:\Windows\Temp
- C:\Documents and Settings\username\Local Settings\Temp
- C:\Documents and Settings\Default User\Local Settings\History
For Windows 7 and 8
Windows temporary files:
- C:\Windows\Temp
- C:\Users\Username\AppData\Local\Temp
- C:\Users\All Users\TEMP
- C:\Users\All Users\TEMP
- C:\Users\Default\AppData\Local\Temp
Browser cache
Opera cache:
- C:\users\username\AppData\Local\Opera\Opera\cache\
Cache muff:
- C:\Users\username\AppData\Local\Mozilla\Firefox\Profiles\ \Cache folder
Google chrome cache (Chrome):
- C:\Users\ username \AppData\Local\Bromium\User Data\Default\Cache
- C:\Users\User\AppData\Local\Google\Chrome\User Data\Default\Cache
Or we drive in the address chrome://version/ and see the path to the profile. There will be a folder Cache
Temporary internet files:
- C:\Users\username\AppData\Local\Microsoft\Windows\Temporary Internet Files\
Recent Documents:
- C:\Users\username\AppData\Roaming\Microsoft\Windows\Recent\
Some folders may be hidden from prying eyes. To show them, you need .
2. Cleaning the disk from temporary and unused files using
Standard Disk Cleanup tool
1. Go to "Start" -> "All Programs" -> "Accessories" -> "System Tools" and run the "Disk Cleanup" program.
2. Select a drive to clean up:
The disk scanning process will begin...
3. A window will open with information about the amount of space occupied by temporary files:

Check the boxes next to the partitions you want to clear and click OK.
4. But this not all. If you installed Windows 7 not on a blank disk, but on top of a previously installed operating system, you probably have such space-consuming folders as Windows.old or $WINDOWS.~Q.
In addition, it may make sense to delete system restore checkpoints (except the last one). To perform this operation, repeat steps 1-3, but this time click "Clean up system files":

5. After the procedure described in paragraph 2, the same window will open, but the “Advanced” tab will appear at the top. Go to it.

Under System Restore and Shadow Copy, click Clean.
3. Files pagefile.sys and hiberfil.sys
The files are located in the root of the system drive and take up quite a lot of space.
1. The file pagefile.sys is system paging file(virtual memory). It cannot be deleted (it is not recommended to reduce it either), but it can and even needs to be moved to another disk.
This is done very simply, open "Control Panel - System and Security - System", select "Advanced system settings" in the "Performance" section, click "Settings", switch to the "Advanced" tab (or press the win + R key combination, the command will open and there type SystemPropertiesAdvanced) and in the "Virtual Memory" section, click "Change". There you can choose the location of the paging file and its size (I recommend leaving "Size at the choice of the system").

4. Removing unnecessary programs from the disk
A good way to free up disk space (and as an added bonus to increase system performance) is to remove unused programs.

Go to the control panel and select "Uninstall programs". A list will appear from which you can select a program. which you want to delete and click "Delete".
5. Defrag
Defragmentation of a hard disk, carried out by a defragmenter program, allows you to organize the contents of clusters, that is, move them on the disk so that clusters with the same file are placed sequentially, and empty clusters are merged.
This leads to an increase in the speed of accessing files, and hence to some increase in computer performance, which can be quite noticeable with a high level of disk fragmentation. The standard disk defragmenter program is located along the path: start> all programs> standard> system utilities> disk defragmenter.

This is what the program looks like. In which you can analyze the disk, where the program will show a diagram of disk fragmentation and tell you whether or not you need to defragment. You can also set a schedule for when the disk will be defragmented. This is a program built into Windows, there are also separate disk defragmentation programs, for example, which you can download here:

Its interface is also quite simple.

Here are its advantages over the standard program:

- Analysis before disk defragmentation.
- Do a disk analysis before defragmenting. After the analysis, a dialog box is displayed with a diagram of the percentage of fragmented files and folders in the disk and a recommendation for action.
- Analysis is recommended to be carried out regularly, and defragmentation only after the appropriate recommendation of the disk defragmenter. Disk analysis is recommended to be performed at least once a week. If the need for defragmentation is rare, the disk analysis interval can be extended up to one month.
- Analysis after adding a large number of files.
- After adding a large number of files or folders, the disks can become excessively fragmented, so it is recommended to analyze them in such cases.
- Checking for at least 15% free disk space.
- For a complete and proper defragmentation using Disk Defragmenter, the drive must have at least 15% free space. Disk Defragmenter uses this volume as an area for sorting file fragments. If the amount is less than 15% of free space, then Disk Defragmenter will only perform partial defragmentation.
- To free up more disk space, delete unnecessary files or move them to another disk.
- Defragmentation after software installation or Windows installation.
- Defragment drives after installing software, or after performing a Windows update or clean install. Disks often become fragmented after software is installed, so running Disk Defragmenter helps ensure the best file system performance.
- Saving time on disk defragmentation.
- You can save some time required for defragmentation if you remove junk files from the computer before starting the operation, and also exclude from consideration the system files pagefile.sys and hiberfil.sys, which are used by the system as temporary buffer files and are recreated at the beginning of each Windows session .
Many people are familiar with the situation when the computer freezes, programs load very slowly or do not respond at all to user actions. The most common reason for this is the large number of junk files that take up most of the hard drive space. In this article, we will look at various ways to clean your computer of junk and unnecessary files, which will help restore the system to its previous speed.
Standard Windows Tools
The Windows operating system has several standard features that will help you get rid of junk and unnecessary files. Let's consider each of them in detail.Disk Cleanup utility
The function is designed to remove temporary and other unnecessary system files. For this: To free up as much space on your hard drive as possible, you can delete unnecessary system files. To do this, click on "Clean up system files". The utility will restart, analyze again, and two new items will appear in the list: “Service Pack Backup Files” and “Windows Update Cleanup”.
 Clearing temporary files in the temp folder
To clean your computer of unnecessary files, you also need to delete the contents from the temp folder - it contains temporary files of various programs. You can get to the ass with the "Run" command. First, press the keyboard shortcut Win+R, after which we enter in the line %temp%.
After clicking the "OK" button, Explorer will open, where all the contents of this folder must be selected (Ctrl + A) and deleted (Shift + Del).
You can also find this folder through the explorer. To do this, open system drive C, go to Windows folder, then find Temp. In some cases, it may be hidden, so you must first enable the "show hidden files" option.
It must be remembered that not all temporary files will be deleted in the folder, but only those that are not involved in the programs. Therefore, before cleaning, it is recommended to close all running programs so that you can delete all files.
Deep cleaning
You can perform deep cleaning of system files using the command line. For this:
Clearing the Downloads Folder
Windows has a special folder for downloading programs and files from the Internet. To free up more space and increase the performance of your computer, it also needs to be cleaned from time to time. Since there may be files that the user needs, they must first be copied to another folder on the hard drive. To clear the Downloads folder, follow these steps: Thus, you can free up to several tens, and in some cases hundreds of gigabytes of memory.
 We also recommend disabling auto-loading of unnecessary or slow-down software products. To do this, simultaneously press Ctrl + Alt + Delete, go to "Task Manager" - "Startup". Select applications that you do not need at system startup and disable.

Third party software products
To clean your computer from unnecessary files, you can also use third-party software. The choice of such utilities is very large, many have paid and free versions. For home use, the functionality that is presented in the free version is quite enough.Use such utilities with caution, as there is a risk of erasing important information. Therefore, only sections that do not contain important information should be selected for cleaning.
Dism++
With this program, you can clean your computer of junk, remove unnecessary programs, configure startup, optimize the system, and much more. The program is completely free. To clean up junk files:
ccleaner
The program is used to clean the registry and hard drive from debris. You can download it completely free. It consists of several sections: "Cclearer" for cleaning unnecessary files, "Registry" for cleaning the registry and "Tools", which contains such additional tools as uninstalling programs, managing startup and more.To clean up unnecessary files, perform the following sequence of actions:  Cleaning your computer regularly will keep your computer running at high speed. These procedures are recommended to be carried out once a month and a half, so that the computer is always in good condition.
In the article I will teach you how to clean your computer from garbage. I'm a blogger and I download a lot of stuff on my computer, install programs, test patches and stuff like that. The system accumulates a lot of garbage that interferes with normal operation. I will consider several tricks on how to clean and speed up your computer with your own hands.
How to clean your computer from garbage: hard drive
I'll tell you how to clean your computer from garbage, follow all the steps in the article. Do not use the standard uninstaller, the Revo Uninstaller program will help. As for the garbage on the hard drive itself, we carry out in two stages.
First stage: standard
Few people know that Windows has a standard utility for cleaning hard drives. To do this, open "my computer", and on each of the local drives, right-click and select "properties".

Find and click "clean". 

And we agree with our decision.

The process will pass, after which quite a lot of space will be added to your disk. I am writing this article from a working computer, it is 2 weeks old, and in these two weeks almost 6 GB of rubbish has accumulated.
The second way: program
The standard cleaner is only good for the system itself, so you need to clean the rest of the hard drive as well. For these purposes, I advise the CCleaner program, here it is official site. Downloading for free is not difficult. We open and see the program window in Russian.

- Select the "Cleanup" option.
- Let's do the analysis first.
- The entire list of unnecessary files will come out, click delete.
This completes the hard drive cleanup. I offer a list of alternatives for free.
- Advanced Disk Cleaner
- Blank And Secure
- Freespacer
- HDD Cleaner
- Moo0 Disk Cleaner
Cleaning your computer from garbage: registry
Cleaning the computer from garbage in the registry, I use the Wise Registry Cleaner program, you can download here, the program is completely free. Download and install. At the first start, they will ask about a backup copy of the registry, we make it. We choose deep cleaning to get rid of all the jambs, which is good, everything is completely in Russian. 
Let's go to the optimization section.

- The section itself.
- We mark the checkboxes, I put everything.
- Click to optimize.
- After the program has run, the inscriptions “optimized” will appear.
The last section is registry compression, a cool thing. We need to start with an analysis. The computer will not respond for some time, do not be afraid.
Now click on compression. The registry will begin to compress, I advise you not to do anything at this time.

After compression, a reboot will take place, this is a must. The second step was taken, the registry was optimized, the free utility Wise Registry Cleaner helped. For an alternative, I offer more programs, you can download for free and without registration.
Registry application for windows 7,8 and 10
- Auslogics Registry Cleaner.
- Vit Registry Fix Free.
- Reg Organizer - this program for free on Windows 10 works fine, I tested it.
- Avira RegistryCleaner.
Cleaning the system volume information folder
A month ago, my computer started to boot very slowly for about 35 minutes. I thought that the end of the hard drive, but nothing happened. The thing was that the system volume information folder contains backup copies of recovery points, and I had 253 GB of these points, and I started cleaning it. First you need to enable the visibility of hidden folders. We enter the control panel and find the folder options.

- The path to the panel.
- We expose large icons.
- Click folder options.
- View tab.
- We uncheck the box.
- Change the checkbox.
- We press ok.
Now this folder has appeared on the C drive, but it cannot be opened even if administrator rights are set. To clear, you need to go to drive C, and find system volume information, right-click and select properties.


To add an administrator to access, click add.

Enter your account and click ok.


All record created, click ok. 
During creation there will be all sorts of warnings, we ignore them.
To clear restore points, go to the control panel, and look at the screenshot.

- The path to the program.
- In the left section, select "system protection".
- Select drive C.
- Click to configure.
That was the problem, I had this slider set to 50%, so all the memory was full. I set it to 5 percent, let there be points. To clear the memory, click delete.

That's all the hard drive is clean of debris. Let's move on to the last step.
Hard disk defragmentation: free windows 7, 8, 10
Let's start with the standard method, it works the same on all systems, including windows 8. We go into my computer and select the disk to defragment.
Defragmentation is the transfer and clustering of system files by type.

- We press the right button.
- Finding properties.
- Service tab and perform defragmentation.
 In the next window, select the local drive. First, click on the analysis, as it passes, click on defragmentation. There are analogues of the standard program, I will not analyze them, because they all work on the same principle.
List of programs for windows 10 and all others.
- Auslogics Disk Defrag.
- Super Ram
- Advanced Defrag
- Ashampoo Magical Defrag
- ScanDefrag
- Memory Improve Ultimate
Do not use garbage checks using online tools, they will not help, it is better to do it manually.
The article shows cleaning a computer from garbage, namely: a hard drive, registry, restore points and defragmentation. Keep only what you need on your computer. At the end of the video.
System: extra services
Cluttered "Windows slows down programs and can cause errors in your computer. What do you need to clean up?
1. ANALYZE WINDOWS Before you put things in order, you need to get an idea of the extent of the chaos that is happening on your PC. To do this, press the "Win + R" keys and enter the command "perfmon / report". Windows will start monitoring performance and provide a list of system health indicators. At the very beginning, errors will be highlighted in red - for example, non-functioning devices or too long responses from system services. If there are a lot of these marks, tackle those issues first by tackling them with our cleaning tips. Green entries indicate that Windows is normal, but often there are still many opportunities for perfect cleanliness.
 |
2. CLEAR AUTOLOAD Too much programs in the startup folder slows down Windows startup. To view processes running in the background, you need to turn to external analysis utilities such as Autoruns. This program checks the system and displays running applications, loaded drivers, and running services. You can find the information you need to optimize startup on the Logon tab. Unlike Windows' native "msconfig" feature, Autoruns provides a description of the program and, if possible, the name of its developer. Thanks to this, if an unfamiliar service is detected, you can decide whether to disable it or leave it alone.
 |
3. "RAKE" THE SERVICES The smooth interaction of various components - for example, network connections - is provided in Windows by background services. Use the combination "Win + R", enter the command "msconfig" and go to the "Services" tab. Here, check the box in front of the "Do not display Microsoft services" entry to view only additional application services. When you eventually find program entries related to the utilities you actually use, decide if they need to start automatically. For example, iTunes installs the Bonjour service to share your music library. If you don't need it, you can turn it off. The same applies to SkypeUpdater. Click on the "Start" button, open the "Run" dialog and type "services.msc". Is the list of service entries still amazing? Not only does Windows offer many services, it is also very common for programs to inject themselves into the system through services. To manually disable, right-click on the service and select Properties. In the window that appears, click on the "Stop" button - the service will be immediately disabled. Now change the "Startup Type" to "Disabled". However, you should not spend too much time on Microsoft services, as, indeed, on autoloading, since the not very significant benefit from these actions is hardly worth such an effort.
 |
4. CLEAN OUT THE GARBAGE WITH CCLEANER Windows accumulates a lot of data that has become unnecessary. Although their inhibitory effect in the "seven" and "eight" is no longer as great as in the days of Windows 95, from time to time they are worth removing, if only in order to clear the space that is always lacking on solid-state drives. Our choice fell on the CCleaner utility, as it not only removes temporary files and cache in Windows, but also purposefully deals with memory “eaters” among installed programs. The latest (fourth) version even removes the cache of the Photoshop installation process. To do this, on the left side of the Cleanup screen, simply select the Windows items and programs you want to clean up. Now click on the "Analyze" button. CCleaner will check your selected partitions for digital garbage and compile a visual list of results. Clicking on the "Purge" button will start the process. If cleaning with CCleaner left you wanting more, you can continue with the CCEnhancer extension. This utility adds CCleaner 500 additional cleaning options for other programs. In addition, once a year, you should review installed applications and remove unnecessary ones. This can be done either through the Windows Control Panel or using a special program - for example, Revo Uninstaller.
 |
5. SORTING WINDOWS 8 APPS Applications for the G8 tiled interface, which exist along with classic programs, create an additional possibility of littering the PC. In this case, the rule also applies: once a year, find time and look at the installed applications. The "Win" key will take you to the Windows 8 start screen. On it, you will surely find applications that you will definitely not use anymore. In this case, they should be removed. It is very easy to do this: select the application on the main screen with the right mouse button, and then click on the "Uninstall" button in the bar at the bottom of the screen.
 |
6. CLEARING THE WORK SPACE Desktop interface fans love to fill their screen tightly with various shortcuts. To a certain extent, this is convenient, but at one point you can stop orienting yourself. Icons that you no longer need should be deleted. If they refer to installed programs that you no longer use, then erase the entire software through the Control Panel. For the remaining desktop icons, the rule applies: order is above all. The commercial program Fences (stardock.com, about 350 rubles) will provide greater visibility to your desktop. Like a drawer system, Fences neatly sorts all programs, files, folders and shortcuts into categories and organizes a hodgepodge of icons.
NOTE Free Fences is distributed only in version 1.01, but the latest version 2.10 will already require costs.
8. GET RID OF OLD DRIVERS Corrupted and outdated drivers can cause performance issues in Windows. In this regard, it is worth looking into the Device Manager. See the exclamation marks here? Update the appropriate drivers via the context menu. Free software - such as SlimDrivers (driverupdate.net) - will also perform this check for free and automatically.
2. TAKE CARE OF THE FILE SYSTEM The built-in Windows health check does not affect the file system. A suitable utility must be run through the command line as an administrator. In the "seven" this line is called up by pressing the "Win + R" keys and entering the "cmd" command. When confirming with the "OK" button, hold down the "Ctrl" and "Shift" keys. In Windows 8, use the keyboard shortcut "Win + X" and select the option "Command Prompt (Administrator)". Now at the command prompt type "chkdsk". You can fix the detected errors with the "chkdsk / f" command.
 |
3. CLEAR THE HARD DISK Regular defragmentation not only collects broken files together, but also adds speed. Windows versions from XP to 8 have their own defragmenter. However, in XP, it must either be started manually or configured to run regularly using the Task Scheduler. In Windows 7, the defragmenter starts automatically when the PC is idle or at one in the morning when the PC is usually turned off. You can also use a third-party program - for example, Defraggler.
ATTENTION! Defragmenting only makes sense on regular hard drives. On solid state drives, it will not be useful. Fans of the built-in Windows tools can use the little-known Disk Cleanup function for cleaning. It can be called directly from the Start menu through the search bar with the query "cleanmgr" and get rid of unnecessary files.
5. ERASE WINDOWS.OLD Those who have upgraded Windows (for example, upgraded to version 8) will find the Windows.old folder on the C: drive. It contains the files of the previous version, occupying, depending on the size of the installation, from 5 to 15 GB. If you no longer need files from old Windows, just delete the Windows.old folder. To do this, call the Disk Cleanup service through the search bar for the keyword "cleanmgr", select "Clean up system files" and check the box in front of the "Previous Windows installations" entry. Click OK and then Delete Files to completely erase the entire Windows.old folder from your computer.
 |
Internet: tricky surf tracks
The browser and web services also collect data that, among other things, can compromise you. How to clean them up? Here are some pertinent tips.
1. CLEAN IE Users of Internet Explorer 10 can, of course, resort to using external utilities such as CCleaner to erase unnecessary web browsing data. However, now we will talk about our own funds. In Internet Explorer 10, click on "Settings" and then on "Internet Options". On the General tab, in the Browsing history section, check the box next to the Delete browsing history on exit entry. Internet Explorer will now delete temporary files such as history, cookies, passwords, and form information when it shuts down.
3. ORGANIZE THE DROPBOX Dropbox is a well-implemented online storage, but after a while it often becomes like a file dump. Vigorous cleaning required. We recommend the WinDirStat utility. When using it, you do not need to go to Dropbox through the site - the program simply scans the "Dropbox" folder integrated into Windows Explorer. WinDirStat is able to report the space allotted for individual folders and very clearly display the volumes occupied by certain types of files by coloring them in different colors. So you instantly calculate the "eaters" of memory and can purposefully get rid of them.
 |
4. "DESCARE" FACEBOOK Even Facebook accumulates a huge number of applications in a year that you used once and then forgot about them.
We recommend that you visit facebook.com/appcenter/my to review the programs and remove unnecessary ones. Sorting by "Recently used" will help with this. In addition, Facebook saves every search query. This log is deleted on your profile via the Activity Log. To do this, select "Search" in the menu on the left, and then click on the line "Clear search history" at the top.
 |
5. CLEAN GOOGLE To view your saved searches, go to any Google service of your choice, such as Gmail. If you are already logged in, then in the upper right corner of the browser window next to your profile picture, find the small arrow, click on it and select "Privacy" from the drop-down menu. Here, in the "Google" section, go to the "Personal Account" entry. Under the Web History category, you will see a corresponding link to Remove entries from Web History. Follow it and Google will make a list of all your saved Internet queries, which can be easily deleted with one click on the "Delete Entries" button.
 A tripod for a phone - what it is, what it looks like, why it is used, features of different types
 Homemade USB power supply in the car
 How to Create Neon Sign Text in Photoshop
 Overview of GPON technology from Rostelecom - equipment, cost, benefits
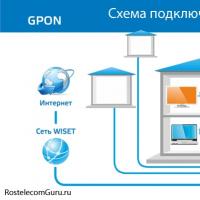 Rostelecom GPON technology - tariffs and settings
 Mgts - Internet shutdown
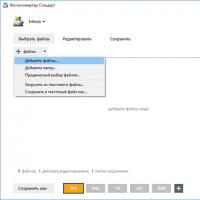 Opening JP2 files Possible problems with JP2 format files