Remote Desktop Manager windows 7. Review and testing of free RDP clients for Android. Where to download Remote Desktop Connection Manager
Good day! Dear readers and guests, computer blog №1 in Russia site. I write a lot about how to use technology to save my time in various aspects of my life, a recent example is paying for housing services through Sberbank online, where I described this process in detail. A system administrator or engineer can and should save their time and make their work as convenient as possible and it is desirable to do everything from one or two consoles. Today I will tell you about a very convenient system administration tool that allows you to make a huge number of RDP connections from one utility, displayed in one window, and even with different parameters and structuring. Today we are going to talk about a super utility from Microsoft. We will figure out where to download the Remote Desktop Connection Manager and how to install it, and, of course, configure it.
What is Remote Desktop Connection Manager
RDCM is a utility from Microsoft designed to conveniently manage a large number of remote RDP connections to various servers from a single window:
- Letting the user create folders to structure servers
- Set automatic login while preserving user credentials
- Set connection permission
- Perform console login
- Interactive thumbnails of open connections updated in real time
- Much more
Where to download Remote Desktop Connection Manager
You can download RDCM from the official Microsoft site or from my site, where I uploaded it to mail Cloud.
Microsoft official page https://www.microsoft.com/en-us/download/details.aspx?id=44989
Go to the official page of Remote Desktop Connection Manager 2.7 and click the Download button. You will download a small msi distribution kit, 1 megabyte in size (rdcman.msi).

Installing RDCM 2.7
Installing this software should not cause you any problems, as it is trivial. I will only cite it for the integrity of the article. I will install Remote Desktop Connection Manager on the Windows 10 1803 operating system, at my workplace it is it.
We start the installation by opening the rdcman.msi file. The installation wizard will open, in the first step you simply click "Next".


Well, the last step is clicking the install button

After a couple of moments, you will see that everything has been successfully installed, you can view the log if you wish, click the "Finish."

I installed the entire RDCM 2.7 installation on Windows 10, now let's show you how to configure it. open the utility, it should have created the corresponding icon on the desktop. If it is not there, then look for it through the "Start" button

You will see a program window, by default everything will be empty here and you need to create a configuration file first.

This is done through the File - New menu, or simply by pressing the hot keys Ctrl + N

we set the name of your file, you can name the files by belonging to different Active Directory domains or sites.

Since this utility allows you to structure your RDPs in a hierarchical form, it would be more correct to create the required number of groups that unite servers according to any service or territorial affiliation, for example, you can conveniently unite all members of terminal farms. Right-click on the root and select the "Add group" item from the context menu to add a group.

At the first step, you will be asked to set the name of the group on the Group Settings tab, I advise you to write meaningful names, so as not to get confused later, and not just Windows 2008 R2 or 1012 R2. In my example, I named the group "Domain Controllers"

Go to the "Logon Credentials" tab, on this tab RDCMan will ask you to specify the credentials on behalf of which remote connections will be made. I have set my domain data, do not forget to click the button Save to save them.

Saving will allow you to use them later for other groups created in RDCMan 2.7

Now your credentials are saved, you can go to the Connection Settings tab.

On the Connection Settings tab, you will see the RDP connection port, by default it is 3389, unless of course you have changed it for security purposes.

Remote Desktop Connection Manager allows you to change the standard RDP port, for this uncheck the "inherit from parent" checkbox and the fields will be activated for you. The "Connect to console" field will allow you to connect like a console, if you connected to a monitor and keyboard, it is useful to do this when connecting to a member of the farm so as not to receive the error "Remote Desktop Connection could not connect to remote computer"

On the Remote Desktop Settings tab, you can select the required screen resolution, but I advise you to set it to Full screen.

So that you do not have scrolling and your entire screen in RDCMan fits, be sure to check the box "Scale docked remote desktop to fit window"

The "local Resources" tab will allow you to select which devices you would like to redirect when connecting remotely, I left only the clipboard.

Now add the servers to the required group. This is done in the same way through the right click, but already on the group, all group rights will be applied to the participants, but you can also change them. Once you've added servers, don't forget save config file otherwise, exiting Remote Desktop Connection Manager will lose all of your settings.
As a result, my humble test bench looks like this. Everything looks like convenient tiles, which, by the way, are updated in real time.

The following operations are available on the server:
- Connect server - a normal connection will be made on behalf of the account specified in the settings
- Connect server as - run on behalf of another person
- Reconnect server - handy when the server is blocked
- Send keys - sending keyboard commands
- Disconnect server - disconnect from the server
- log off server - exit from the operating system
- Properties - properties
The rest are of little use.

There is also a community-created version of RDCMan for Linux, to download it go to the website:
http://www.shashlik.io/download/
For Android
Version 3.6 https://cdn.devolutions.net/download/Linux/rdm/RemoteDesktopManager36.apk
Latest version https://cdn.devolutions.net/download/Linux/rdm/RemoteDesktopManager.apk

Installing on Linux
- $ sudo dpkg -i / path / to / the / shashlik / deb / file
- $ sudo apt-get install -f
- $ sudo apt-get update
- $ sudo apt-get install libgl1-mesa-dev
I think I told you in detail about what Remote Desktop Connection Manager is, how you can conveniently use it, and most importantly, the utility is completely free and from the developer, the operating systems to which we connect.
Hello, Habr! This post was written solely with the aim of shedding light on the program undeservedly lost in the wilds of Microsoft, and not for an overview of all its capabilities. There won't even be a download link here. But first things first.
Foreword
The post of the hacker emoxam inspired thoughts about the convenience of remote server management. And in particular those running Windows Server. For * nix systems I use old putty and the idea of a mega-combine is not to my liking. But this, of course, is a purely personal opinion. To be honest, I used to be quite lazy and used the standard remote desktop client ala mstsc.exe. But after switching to another company with an order of magnitude more servers, endless terminal windows began to tire.Programs like Radmin and DWNTU install their modules / services on each computer that needs to be controlled. And I really wanted something native (that is, working under the rdp protocol), as well as free. I will not list the list of monstrous combines and simple programs that have been tested, I will also refrain from listing their pros and cons, worthy enough.
Accidental find
I would also like to dwell on a program that I stumbled upon by accident. This lightweight (less than 800 Kb) and, as it turned out, very convenient program does not require hundreds of parameters to be configured, does not support skins and does not ask for a separate database to store connection parameters. But it fulfills its main purpose perfectly well. Its name is Remote Desktop Connection Manager or rdcm or RDCMan, as Microsoft itself calls it. The latest version dates back to 2010, but this does not affect functionality in any way. I tested it in operation with both 2000 and 2008R2 servers (since 2012 it was not possible to test it yet). In addition to the standard set of functions such as storing and substituting login / password, favorites, etc. etc. the program has its own zest, or rather three.- The ability to connect to the console. This is very useful for me, because the company strictly adheres to the licensing policy, therefore, Terminal Service is not installed on every server. By default, Windows Server allows two simultaneous remote desktop connections. The same function allows you to "raise" the limit to three. Yes, yes, it is in the standard client, but not all competitors have it.
- Interactive thumbnails of open connections, updated in real time. Those. you can not only watch what is happening on several servers at the same time, but also click, for example, OK in the pop-up window, right in the thumbnail. Not a key function, of course, but not noticed by competitors.
- A tree view of a list of servers and open connections. It takes a little getting used to and it turns out to be much more convenient than tabs. Again, IMHO, so in third place.
Unknown to anyone
The main factor that prompted me to write this article is that the program is little known, rarely anyone uses it, and from my point of view, this is not deserved. None of my colleagues have heard of this. Certainly not an indicator, but still. Wikipedia also bypassed it. You can find rdcm on the English version of the Microsoft website. If you are interested, search for the full name.Thank you for the attention.
Configuring RDP (remote desktop protocol) - remote desktop
If you have a professional or maximum version, you can set up an entrance to your PC via a remote desktop. To do this, you need to do a few things.
- allow login via remote desktop (there is no such menu for younger versions) 
- add users who have the right to work via remote desktop (usually Windows adds the current user automatically)
How do I start Remote Desktop in Windows 7?
Everything through the "Start" button:
We type in the search line "Remote Desktop Connection" (funny - that's exactly what MicroSoft recommends through the "Search" line -> it will open in a new tab) or "mstsc.exe" - the program itself is so called


Or through the "Standard" folder in the programs. Not all versions of Windows have such a folder, for example, Windows 7 Started (yes, the one with a software limitation of 2 GB of RAM) does not have such a folder.

After launching, we get the form of remote desktop settings, we need an expanded version (with parameters)

On the general tab, configure:
Computer - or IP address or computer name
User - the user under which we will log into the remote PC

On the "Local resources" tab, select whether the printers of the main computer and the clipboard will be available to us.

If you have all PCs in the local local area network (ie the network speed is not critical), you can use the background image of the desktop of the remote PC on the "Advanced" tab.

Well, everything seems to be set up - we return to the first tab, save it as a shortcut - try to connect.
Result:(

The main reasons for this situation:
- the remote PC has an IP address assigned to it by the router via DHCP, it changes periodically. It is necessary to register a fixed IP address in the adapter properties
- forgot to allow remote access through the "Properties" of the computer
- remote access was allowed, but they forgot to specify the user who can be logged in
- prohibits Windows brandmauser, you need to add "remote desktop" to the exceptions
- You have done a remote reboot of the PC and until the local user is logged in, the remote desktop will not work
In most cases, Windows 7 must do all this by itself (add the current user, allow in the brandmauser, etc.), but this does not always work. Those. for example, "Remote Desktop" has been added to the list of programs in the firewall, but the checkbox is not checked: (You have to check everything yourself.
Additional remote desktop settings.
1. There is a need to reboot the PC via Remote Desktop. Restarting itself is not a problem - either through the task manager or through Alt F4. (this option will not be available in the "Start" button). But until the local user logs in, the remote desktop will not connect. What if the PC is in a dark room with no local users?
Here's a surprise - you need to create a shortcut for the remote desktop via the command line with the / admin parameter
Like this: mstsc.exe / admin
Visually, the shortcut setting will be the same - but the system will start up through the remote desktop after rebooting the remote PC.
Here is a complete list of options for launching Remote Desktop from the command line.

2. If necessary, allow login without a password (highly not recommended for the corporate segment)
Start menu - run - gpedit.msc (policy editor) - "computer configuration" - "windows configuration" - "local policies" - "security settings" - "restrict the use of empty passwords ... .." - "disabled" 
Yes, on lower versions of Windows, of course, gpedit.msc does not start (there is no this setting)
- All consumer versions of Windows allow only one user to work on a PC (when a new user logs in, the current user will be forcibly closed), unlike server versions. This is a licensing limitation - but there is a way out. A little shamanism - and everything works, look (opens in a new window)
3. Automatic login with saved username and password
There is a magic checkbox "Allow me to save credentials." If you run the change again, the checkbox will change to "Always prompt for credentials"


We receive a request to enter data, they are saved, the entrance to the remote machine works only by clicking on the shortcut.

What if the credentials are not saved (in Windows 7 and older)?
Or we receive a warning “The system administrator has denied using the saved credentials to log on to the remote computer because its authenticity is not fully verified. Enter your new credentials. "

What to do?
The fact is that in recent versions of Windows, the password is not stored in the rdp file, but in a separate storage (Credential Manager). At a minimum, the following settings should be disabled in group policies:
- User Configuration - Administrative Templates - Windows Components - Remote Desktop Services - Remote Desktop Connection Client - Prevent saving passwords;
- Computer Configuration - Administrative Templates - Windows Components - Remote Desktop Services - Remote Desktop Connection Client - Prevent saving passwords.
Here you can (opens in a new window)
4. Sometimes, when connecting, you see the following picture - "it is not possible to verify the authenticity of the remote computer"

Authentication was added starting with Windows XP SP3. But it is disabled there by default (it is already enabled on Wibdows Vista).
How do I enable remote computer authentication on Window XP SP3?
Go to the registry regedit.exe (Run)
Branch HKEY_LOCAL_MACHINE \ SYSTEM \ CurrentControlSet \ Control \ Lsa
Opening the parameter Security Packages and looking for a word there tspkg... If it is not there, add it to the existing parameters.
Branch HKEY_LOCAL_MACHINE \ SYSTEM \ CurrentControlSet \ Control \ SecurityProviders
Opening the parameter SecurityProviders and add to existing providers credssp.dll if there is none.
Close the registry editor. We reboot.
If this is not done, then when trying to connect, the computer will ask us for a username and password, but instead of the remote desktop it will answer the following:
Remote Desktop Connection
Authentication error (code 0x507)
5. When connecting, a Windows security warning appears
"The publisher of this remote connection cannot be determined"

This means that the rdp file is not protected by a signed certificate. For a local network, there is nothing terrible here, you can check the box "Do not display the request again ..."
The security system itself works as follows. The policy setting allows you to control whether users can run unsigned Remote Desktop Protocol (RDP) files and RDP files from unknown publishers on the client computer.
If this policy setting is enabled or not configured, users can run unsigned RDP files and RDP files from unknown publishers on the client computer. Before starting an RDP session, the user will receive a warning and a prompt to confirm the connection.
When this policy setting is disabled, users cannot run unsigned RDP files and RDP files from unknown publishers on the client computer. If the user tries to start an RDP session, they will receive a publisher blocked message.
Supported by: Windows Vista Service Pack 1 (SP1) or higher
| Registry Hive | HKEY_LOCAL_MACHINE |
| Registry Path | SOFTWARE \ Policies \ Microsoft \ Windows NT \ Terminal Services |
| Value Name | AllowUnsignedFiles |
| Value Type | REG_DWORD |
| Enabled Value | 1 |
| Disabled Value | 0 |
Default.rdp file
Actually - this is exactly a file, not a shortcut to the remote desktop. This customized file can be sent to another user, he will save it - and everything will work.
Moreover, it is a simple text file that stores all the settings for a remote connection, and this file can be opened with Notepad. By the way, some of the parameters cannot be edited through the standard settings, they can be entered by hand.
screen mode id: i:- 1 - the remote session is performed in windowed mode, 2 - in full-screen mode. Edited on the Display tab of the Remote Desktop Connection Options window.
use multimon: i:- 0 - disable support for multiple monitors, 1 - enable support for multiple monitors. Can be used on Windows 7 / Windows Server 2008 and later.
desktopwidth: i:- the width of the desktop. Selected on the Display tab of the Remote Desktop Connection Options window.
desktopheight: i:- the height of the working table. Selected on the Display tab of the Remote Desktop Connection Options window.
session bpp: i:- color depth. Selected in the Colors group on the Display tab of the Remote Desktop Connection Options window.
winposstr: s:- position and size of the window in WINDOWPOS format
compression: i:- 0 - do not use data compression, 1 - use.
keyboardhook: i:- Determines how Windows keyboard shortcuts are interpreted. The value of this parameter corresponds to the setting in the Keyboard field on the Local Resources tab of the Remote Desktop Connection Options window. 0 - on the local computer. 1 - on a remote computer. 2 - only in full screen mode.
audiocapturemode: i:- Determines where the audio is played. This setting matches the Remote Sound setting on the Local Resources tab of the Options window of the Remote Desktop Connection tool. 0 - on the client computer. 1 - on a remote computer. 2 - no sound is played.
videoplaybackmode: i:- 0 - do not use RDP efficient multimedia streaming when playing video. 1 - use.
connection type: i: 2 - the type of connection to achieve maximum performance. Corresponds to the "Performance" settings on the "Advanced" tab of the "Options" window of the "Connect to a remote desktop" tool Determined by the type of selected connection speed.
displayconnectionbar: i:- Displays the connection bar when logging into a remote computer in full screen mode. The value of this parameter corresponds to the check box next to "Show connection pane when working in full screen" on the "Display" tab of the "Options" window of the "Remote Desktop Connection" tool. 0 - do not display the connection bar. 1 - show the connection panel.
disable wallpaper: i:- prohibit displaying the background image of the remote desktop. Corresponds to the settings in the Performance group - the Desktop Wallpaper check box on the Advanced tab of the Remote Desktop Connection Options window. 0 - display background image. 1 - do not display background image.
allow font smoothing: i:- resolution of anti-aliasing of fonts. Corresponds to the settings in the Performance group - the Font smoothing checkbox on the Advanced tab of the Remote Desktop Connection Options window. 0 - do not use anti-aliasing. 1 - use.
allow desktop composition: i: 0 - Corresponds to the settings in the Performance group - Font smoothing checkbox on the Advanced tab of the Remote Desktop Connection Options window. 0 - do not use anti-aliasing. 1 - use.
disable full window drag: i:- Display the contents of a folder when dragging. The value of this parameter corresponds to the check box "Show window contents while dragging" on the "Advanced" tab of the "Options" window of the "Remote Desktop Connection" tool. 0 - display content while dragging. 1 - do not display.
disable menu anims: i:- prohibition of visual effects. The value of this parameter corresponds to the state of the checkbox "Visual effects when displaying menus and windows" on the "Advanced" tab of the "Parameters" window. 0 - use visual effects, 1 - don't use.
disable themes: i:- ban on the use of themes. 0 - use themes. 1 - do not use themes.
disable cursor setting: i: 0- prohibition of cursor settings. 0 - cursor adjustment is allowed. 1 - prohibited.
bitmapcachepersistenable: i: 1- Caching bitmaps on the local computer. The value of this parameter corresponds to the setting of the "Always cache bitmaps" check box on the "Advanced" tab of the "Options" window. 0 - do not use caching. 1 - use caching.
full address: s:- the name or IP address of the remote computer to which you are connecting via RDP. If necessary, you can specify the number of the used TCP port.
audiomode: i:- determines where the sound is played. The value of this parameter corresponds to the entry in the "Remote sound" field on the "Local resources" tab of the "Parameters" window. 0 - on the client computer. 1 On a remote computer. 2 - the sound is muted.
redirectprinters: i:- using printers during a remote session. The value of this parameter corresponds to the state of the "Printers" checkbox on the "Local Resources" tab of the "Options" window. 0 - do not use local printers during remote session. 1 - use automatic connection of printers.
redirectcomports: i:- using the serial ports of the local computer when connecting to a remote desktop. 0 - do not use. 1 - use.
redirectsmartcards: i:- using smart cards of the local computer when connecting to a remote desktop. 0 - do not use. 1 - use.
redirectclipboard: i:- use a shared clipboard for the local and remote computers. The value of this parameter corresponds to the state of the "Clipboard" checkbox on the "Local resources" tab of the "Parameters" window. 0 - do not use the shared clipboard. 1 - use.
redirectposdevices: i:- redirects devices that use Microsoft Point of Service (POS). 0 - do not use redirection. 1 - use.
redirectdirectx: i:- DirectX redirection. 0 - do not use DirectX redirection. 1 - use.
autoreconnection enabled: i: 1- automatic connection when the connection with the remote computer is broken. The value of this parameter corresponds to the state of the "Reconnect on interruption" checkbox on the "Advanced" tab of the "Parameters" window. 0 - do not use automatic reconnection. 1 - use.
authentication level: i:- the level of authentication for the remote connection. Determines what to do when a remote computer cannot be authenticated. Determined by the setting of the "Server Authentication" group on the "Connection" tab. In Windows 10, the "Connection" tab corresponds to the "Interaction" tab. 0 - if it was not possible to verify the authenticity of the terminal server, then connect without warning. 1 - do not connect. 2 - connect with warning.
prompt for credentials: i:- asking the user to confirm the credentials if they were saved earlier. 0 - do not prompt for credentials if they were previously saved. 1 - always prompt for credentials.
negotiate security layer: i:- RDP session encryption level. 0 - session with TLS 1.0 (SSL) encryption will be used if supported by the client. If the client does not support it, the standard built-in RDP encryption will be used. 1 - the remote session will use x.224 encryption
remoteapplicationmode: i:- operating mode with a remote application. 0 - remote desktop mode. 1 - operation mode with a remote application.
alternate shell: s:- the name of the alternative user's shell.
shell working directory: s:- the user's shell working directory.
gatewayhostname: s: Is the name of the RD Gateway server. The values of the gateway server parameters are determined by the "Connect from anywhere" group on the "Connection" tab (for Windows 10 - on the "Advanced" tab).
gatewayusagemethod: i: 4- The method of using the RD Gateway server. 0 - Never use an RD Gateway server. 1 - Always use RD Gateway Server. 2 - Do not use RD Gateway server for on-premises clients. 3 - Use the default settings of the RD Gateway server. 4 - do not use the RD Gateway server, but in the "Connect from anywhere" setting - "Options" the checkbox is enabled "Do not use RD Gateway server for local addresses"
gatewaycredentialssource: i: 4- the method used to authorize the user. 0 - use NTLM (password prompt). Corresponds to the selection of the "Login method" - "Require password (NTLM)" parameter in the "Connect from anywhere" - "Options" settings. 1 - use smart cards. The settings that govern the use of the RD Gateway server and the login and connection options are intertwined, and changing one might change the other.
drivestoredirect: s:- redirecting disk devices of the local computer. The value is determined by the settings on the "Local resources" tab - "More"
Supported local computer peripheral redirects and the syntax of the RDP file content depend on the RDP version and may vary slightly.
Fighting the "cross" of the terminal session.
Here he is the pest (on the connection panel when working in full screen)
The problem is that the "cross" only closes the "Remote Desktop" on the user's PC, but leaves an open terminal session on the server. If there are many users, then all their sessions remain open on the server and take up memory.
Solution options.
- In general, remove the panel from the user - in the settings when creating a remote desktop (exit only through the end of the session)

2. Remove the "cross" itself (exit only after the end of the session)
Let's figure out how to make a permanent IP address for the device in the local network. We assign a permanent IP address through the Windows 7 settings. Go to change the adapter parameters. then in the properties of the desired connection, there we select the Internet protocol ver ...
The system administrator of a large network has to connect via SSH or telnet to network equipment every day to configure and troubleshoot. And how many times a day does he enter his credentials in order to connect to the Windows server again via RDP?
Utility RDCMan (Remote Desktop Connection Manager) Is a convenient RDP connection manager for the Windows system administrator, which allows you to manage a large number of RDP connections in one window, create tree structures with remote Windows servers (with which you constantly work or manage), use various RDP connection parameters for individual servers and groups, and save administrator (user) credentials for automatic authorization on RDP servers, which eliminates the hassle and saves time.
Downloading and Installing RDCMan
The RDCman utility is free and available for download from the Microsoft website. The current version is 2.7.1406.0. Uploading the file rdcman.msi(size 1.1 MB) from the link:
All modern versions of Windows are supported, up to Windows 10 and Windows Server 2016. Windows XP and Windows Server 2003 are also supported, but on these operating systems, you must first install the RDP client version 6 or higher.
The RDCMan installation is standard, no trickery. Launch, click next-next-next and that's it. No desktop shortcut is created, look for the program shortcut in the Start menu.
Configuring RDP Server Groups in RDCMan
Launch RDCMan.exe and we see an empty console. First, you need to create a configuration file that will store your settings by pressing Ctrl + N or through the “File” - “New” menu. We set the file name * .rdg (in fact, this is a text XML file that can be edited manually). Any number of RDP connections to your remote servers can be saved in one configuration file. The utility allows you to structure RDP connections according to your preferred criteria: use this and create groups.
For example, you can create a group with 1C servers and a group with domain controllers. You can group remote servers by location, role, or customer.
You can save the user's RDP credentials to connect to servers in this group. Find the "Logon Credentials" tab in the group properties and enter your credentials. All servers in this group inherit the group's settings. To change any server parameter different from the specified group settings, uncheck the “Inherit from parent” checkbox and set your personal settings.

Don't forget to click “Save”.
Attention! Passwords for RDP connections in RDCMan are stored not in Windows Credential Manager, but directly in the RDG file in encrypted form (does not depend on domains). However, the encryption algorithm is unstable and there are many utilities that can decrypt the RDG file and get the password for the RDP connection in clear text (it is advisable to encrypt the RDCMan configuration file using, for example, or TrueCrypt).
Configuring RDP Connection Settings in RDCMan
Now go to the RDP settings on the “Connection Settings” tab. By default, the standard port 3389 is used for RDP connection. You can change the port if yours. Uncheck the "Inherit from parent" checkbox and change the port. Check the "Connect to console" checkbox, this will allow you to connect to the server in console mode. Console mode simulates a direct connection to a local monitor server, is used to connect to a server with RDS without using or in situations where a license server is not available or.

Configure the screen resolution that will be used in the remote RDP session on the “Remote Desktop Settings” tab (I recommend setting “Full screen”) and local resources in “Local Resources” that need to be redirected when connecting remotely (for example, you can forward the RDP session to clipboard, local printer, local disk, etc.). So that you do not have scrolling and so that the rdp window is guaranteed to fit into your monitor, be sure to check the "Scale docked remote desktop to fit window" checkbox.

Right click on the group and add a server.
- Server Name - host name or its IP;
- Display Name is the server name displayed in the RDCMan console.

As a result, you will have a console like this with server tiles that are updated in real time.

Now, when you double click on the server, an RDP connection will be established using the saved password.
You can make Connect Group - then RDP consoles will be open to all servers in the group.
You can perform standard actions with the server, they are all intuitive.

- Reconnect server - reconnect if the server is blocked;
- Send keys - send standard keyboard shortcuts to the server;
- Disconnect server - disconnect from the server;
- Log off server - log out on the server;
- List sessions - viewing sessions connected to the server;
- Undock - brings the current server to a separate window;
- Dock - Returns the server to the console.
Most importantly, be sure to save the config file. Otherwise, all settings will disappear when you exit.


Importing servers into RDCMan
Unfortunately, there is no way to import servers directly from Active Directory. Oddly enough, this is a Microsoft-developed tool.
But you can import servers from a text file or CSV file (you can dump lists of computers or servers from AD using a cmdlet). To do this, select “Import Servers” from the “Edit” menu. In the window that opens, specify the path to the file with the list of servers and click "Import"

To split the imported server list into groups, use the “Edit” -> ”Add smart group” option. Name the group and set the rules by which servers will be placed in it (for example, a common fragment of the display name or IP address).


RDCMan: Accessing the Hyper-V Virtual Machine Console
In RDCMan 2.7, you can configure direct connections to the consoles of virtual machines running on a Hyper-V host (mode is used). To do this, you need to get the virtual machine ID on the Hyper-V server. Use the command:
Get-VM -Name your_vmname1 | select ID

Once you have obtained the VM ID, you can use it when setting up a connection in RDCMan. When adding a new server in the RDCMan console, specify the name of the Hyper-V host, check the “ VM console connect”And in the ID field copy the received VM ID. The connection is performed under an account with Hyper-V administrator rights, via the VMBus (i.e., you do not need network access to the IP address of the guest OS - access works through the Hyper-V host on port 2701).

RDCMan has a simple user interface and is very easy to use. There is also a version for installation on Linux.
If you just want an RDP connection manager, then this is a great and easy-to-use everyday Windows admin tool.
 Full description of the streaming service
 How to create a WebMoney wallet Detailed instructions for registering in webmoney
 A program for optimizing and speeding up Windows
 Increasing the cache in the Yandex browser How to increase the cache in the Mozilla
 How to email a file or folder
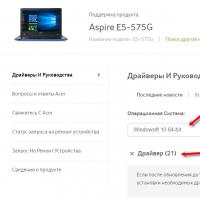 Driver for Wi-Fi and LAN for laptop Acer
 Register VKontakte new page