Ordinary Logout Html View. Views Log In and Log Out. Create the main page
You can even hear about design templates and even flip these wonderful books:
- E. Gamma, R. Helm, R. Johnson, J. Wlissidess "Takes of object-oriented design. Design patterns »;
- M. Fowler "Architecture of corporate software applications".
The submitted article will be useful primarily by novice. In any case, I hope that in a couple of hours you can get an idea of \u200b\u200bthe implementation of the MVC pattern, which lies at the heart of all modern web frameworks, and also get "food" for further reflection over the "how to do". At the end of the article, a selection of useful links, which will also help to figure out what the web framework is consisting (in addition to MVC) and how they work.
Located php programmers are unlikely to find something new in this article for themselves, but their comments and comments to the main text would be very by the way! Because Without the theory, the practice is impossible, and without practice the theory is useless, it will first be a little theory, and then we turn to practice. If you are already familiar with the MVC concept, you can skip the section with the theory and immediately go to practice.
1. Theory
The MVC template describes an easy way to build an application structure, the purpose of which is the business logic branch from the user interface. As a result, the application is easier than scaled, is tested, accompanied and of course implemented.Consider the conceptual MVC template diagram (in my opinion - this is the most successful scheme of those that I have seen):
In the MVC architecture, the model provides data and business logic rules, the presentation is responsible for the user interface, and the controller provides interaction between the model and representation.
The typical MVC application sequence can be described as follows:
- When the user arrives at the web resource, the initialization script creates an instance of the application and starts it to execute.
This displays the appearance, say the main page of the site. - The application receives a request from the user and determines the requested controller and action. In the case of the main page, the default action is performed ( index.).
- The application creates an instance of the controller and starts the action method,
in which, for example, contains model calls that read information from the database. - After that, the action generates a presentation with the data obtained from the model and displays the result to the user.
The model should not directly interact with the user. All variables related to the user's request must be processed in the controller.
The model should not generate an HTML or another display code that may vary depending on the needs of the user. Such code should be processed in the species.
The same model, for example, the user authentication model can be used both in the user and in the administrative part of the application. In this case, you can make a general code in a separate class and inherited from it, determining in heirs specific methods.
View - Used to specify the external display of data obtained from the controller and model.
Types contain HTML markup and small PHP code inserts to bypass, formatting and displaying data.
Do not directly access the database. This should make models.
Do not work with data obtained from user request. This task must be performed by the controller.
It can directly access the properties and methods of the controller or models to obtain ready-to-line data.
Types are usually separated by a common template containing markup, common to all pages (for example, a cap and basement) and part of the template that is used to display data from the model output or displaying data entry forms.
Controller - Binder link connecting models, types and other components in the working application. The controller is responsible for handling user requests. The controller should not contain SQL queries. It is better to keep them in models. The controller should not contain HTML and other markup. It is worth it to species.
In a well-designed MVC application, controllers are usually very thin and contain only a few dozen lines of code. What, you can't tell about Stupid Fat Controllers (SFC) in CMS Joomla. The logic of the controller is quite typical and its large part is made in the basic classes.
Models, on the contrary, very thick and contain most of the code associated with data processing, because The data structure and business logic contained in them are usually quite specific to a specific application.
1.1. Front Controller and Page Controller
In most cases, the user interaction with the Web application passes through the links by reference. Look now to the address bar of the browser - on this link you received this text. For other links, for example, located on the right on this page, you will receive other content. Thus, the link represents a specific Web application command.I hope you have already noticed that different sites can be perfect different formats for building an address string. Each format can display the Web application architecture. Although it is not always the case, but in most cases it is an obvious fact.
Consider two options for the address bar, which shows some text and user profile.
First option:
- www.example.com/article.php?id\u003d3
- www.example.com/user.php?id\u003d4.
Second option:
- www.example.com/index.php?article\u003d3.
- www.example.com/index.php?user\u003d4.
Approach with many interaction points you can watch on the forums with the PhpBB engine. View forum occurs through the script viewForum.php., view topic through viewtopic.php. etc. The second approach, with access through one physical script file, can be observed in my favorite CMS MODX, where all appeals pass through index.php..
These two approaches are completely different. The first is characteristic of the Page Controller template (Page CONTROLER), and the second approach is implemented by the Query Controller Pattern (Front Controller). Page controller is well used for sites with fairly simple logic. In turn, the request controller combines all the actions to process requests in one place, which gives it additional features, thanks to which you can implement more difficult tasks than usually solved by the page controller. I will not go into the details of the implementation of the page controller, and I will only say that the query controller will be developed in the practical part (some similarity).
1.2. URL Routing
The URL routing allows you to configure the application for receiving requests to the URL that do not meet the real application files, as well as use CNCs that are semantically significant for users and are preferred for search engine optimization.For example, for the usual page that displays the feedback form, the URL could look like this:
http://www.example.com/contacts.php?Action\u003dfeedBack
Approximate processing code in this case:
switch ($ _Get ["Action"] (Case "About": Require_ONCE ("about.php"); // page "About us" Break; Case "Contacts": Require_ONCE ("Contacts.php"); // Page "Contacts" Break; Case "Feedback": Require_ONCE ("feedback.php"); // page "Feedback" Break; Default: Require_ONCE ("Page 404.php"); // Page "404" Break; )
I think almost everyone did it.
Using the URL routing engine, you can configure the application for the reception of such requests to the same information:
http://www.example.com/contacts/feedback
Here Contacts is a controller, and feedback is the Contacts controller method that represents the feedback form, etc. We will return to this issue in the practical part.
It is also worth knowing that many web framework routers allow you to create arbitrary URL routes (specify what each part of the URL) and the rules for their processing.
Now we have sufficient theoretical knowledge to go to practice.
2. Practice
To begin with, create the following file structure and folders:Looking ahead, I will say that the Core folder will store the basic classes model, View and Controller.
Their descendants will be stored in the Directors of Controllers, Models and Views. File index.php. This is a point in the course of the application. File bootstrap.php. Initiates the application download by connecting all the necessary modules, etc.
We will go sequentially; Open the index.php file and fill it with the following code:
ini_set ("display_errors", 1); Require_ONCE "Application / Bootstrap.php";
There should be no questions here.
Next, we immediately move on to Falu bootstrap.php.:
require_ONCE "CORE / MODEL.PHP"; Require_ONCE "CORE / VIEW.PHP"; Require_ONCE "CORE / CONTROLLER.PHP"; Require_ONCE "CORE / ROUTE.PHP"; Route :: start (); // Run the router
The first three lines will be connected so far the non-existent kernel files. The last lines plug in the file with the router class and run it to call the static Start method.
2.1. Implementing the URL router
So far, I will reject from the implementation of the MVC pattern and will take mrachrutization. The first sh is that we need to do, write down the following code in .htaccess.:RewriteEngine on RewriteCond% (Request_fileName)! -F RewriteCond% (Request_FileName)! -D rewriterule. * Index.php [L]
This code will redirect the processing of all pages on index.php.What we need. Remember in the first part. We talked about Front Controller?!
Routing We will be placed in a separate file route.php. In the Core directory. In this file, we describe the Route class, which will run the methods of controllers, which in turn will generate a view of pages.
The contents of the route.php file
class Route ( Static. function start () ( // Controller and default action $ Controller_name \u003d "Main"; $ ACTION_NAME \u003d "INDEX"; $ Routes \u003d Explode ("/", $ _server ["request_uri"]); // Get the name of the controller If (! Empty ($ Routes)) ($ Controller_Name \u003d $ Routes;) // Get the name of the action if (! Empty ($ Routes)) ($ Action_name \u003d $ Routes;) // Add prefixes $ model_name \u003d "model_". $ Controller_Name; $ Controller_Name \u003d "Controller_". $ Controller_Name; $ ACTION_NAME \u003d "Action_". $ Action_Name; // Pouch the file with the class class (the model file may not be) $ model_file \u003d STRTOLOWER ($ model_name). "PHP"; $ Model_Path \u003d "Application / Models /". $ model_file; If (File_exists ($ model_path)) (include "Application / Models /". $ model_file;) // Pouch the file with the controller class $ Controller_File \u003d Strtolower ($ Controller_Name). "PHP"; $ Controller_Path \u003d "Application / Controllers /". $ Controller_File; if (File_exists ($ Controller_Path)) (include "Application / Controllers /". $ Controller_File;) ELSE ( / * It would be correct to throw an exception here, but to simplify immediately make a redirect to the page 404 * / Route :: errorpage404 (); ) // Create a controller $ Controller \u003d New $ Controller_Name; $ Action \u003d $ Action_Name; if (Method_exists ($ Controller, $ Action)) ( // Call the controller $ Controller -\u003e $ Action (); ) ELSE ( // also it would be wiser to throw an exception Route :: errorpage404 (); )) fUNCTION ERRORPAGE404 () ( $ host \u003d "http: //". $ _ Server ["http_host"]. "/"; Header ("HTTP / 1.1 404 NOT FOUND"); Header ("Status: 404 NOT FOUND"); Header ("Location:". $ Host. "404"); ))
I note that a very simplified logic is implemented in the class (despite the surround code) and it may even have security problems. It was done intending, because Writing a full-fledged routing class deserves at least a separate article. Consider the main points ...
In the global array element $ _Server ["Request_uri"] contains the full address for which the user addressed.
For example: Example.ru/contacts/feedback
Using a function explode. The separation of the addresses is made. As a result, we get the name of the controller for the example above, this is a controller. contacts. and the name of the action, in our case - feedback.
Next, the model file is connected (the model may be missing) and the controller file, if any and finally are created, an instance of the controller is created and an action is called, again, if it has been described in the controller class.
Thus, when switching, for example, at:
example.com/portfolio.
or
example.com/portfolio/index
the router performs the following:
- connect the Model_PortFolio.php file from the Models folder containing the Model_Port Folio class;
- connect the CONTROLLER_PORTFOLIO.PHP file from the Controllers folder comprising the CONTROLLER_PORTFOLIO class;
- create an instance of the CONTROLLER_PORTFOLIO class and causes the default action - Action_index described in it.
example.com/ufo.
that will transfer it to the page "404":
example.com/404.
The same thing happens if the user turns to action that is not described in the controller.
2.2. Return to the implementation of MVC
We turn to the Core folder and add three more files to the ROUTE.php file: model.php, view.php and Controller.phpLet me remind you that they will contain basic classes, whose writing we will begin now.
File contents model.php.
class Model ( Public function get_data () (
}
}
The class class contains the only empty data sampling method that will overlap in the descendants classes. When we create classes of descendants, everything will become clearer.
File contents view.php.
class View (
// Public $ Template_View; // Here you can specify a general view of the default.
fUNCTION GENERATE ( $ CONTENT_VIEW, $ template_view, $ Data \u003d NULL)
{
/ * if (IS_Array ($ Data)) (// We transform the elements of the array into the Extract variables ($ DATA);) * / INCLUDE "Application / Views /". $ Template_View; ))
It is not difficult to guess that the method generate Designed to form a type. The following parameters are transmitted to it:
- $ CONTENT_FILE - types of page content reflecting;
- $ template_file - common template for all pages;
- $ DATA - an array containing page content elements. Usually filled in the model.
to display a specific page content.
In our case, the general template will contain HEADER, MENU, SIDEBAR and FOOTER, and the page content will be contained in a separate form. Again, this is done to simplify.
File contents controller.php.
class Controller ( Public $ Model; Public $ view; fUNCTION __CONSTRUCT () ( $ this -\u003e view \u003d new view (); )))
Method action_INDEX. - This is the action caused by default, we will block it when implementing the classes of descendants.
2.3. Implementation of the classes of descendants of Model and Controller, creating a View "s
Now the most interesting begins! Our website business card will consist of the following pages:- the main
- Services
- Portfolio
- Contacts
- As well as - Page "404"
The file separately selected on the previous figure. template_View.php. - This is a template containing the overall markup for all pages. In the simplest case, he could look like this:
<hTML LANG \u003d "RU"\u003e
<head\u003e
<meta Charset \u003d "UTF- 8"\u003e <title\u003ethe maintitle\u003e
head\u003e
<body\u003e
$ CONTENT_VIEW; ?\u003e body\u003e
hTML\u003e
To give the Site of the presentable view, the CSS template is overlapping and integrating it into our site by changing the HTML markup structure and connect CSS and JavaScript files:
<link REL \u003d "STYLESHEET" TYPE \u003d "TEXT / CSS" HREF \u003d "/ CSS / STYLE.CSS" /\u003e
<script SRC \u003d "/ js / jQuery-1.6.2.js" Type \u003d "Text / JavaScript"\u003escript\u003e
At the end of the article, in the "Result" section, a reference to the github repository with the project, which has been done to integrate a simple template.
2.3.1. Create the main page
Let's start with the controller controller_Main.php., Here is its code:class Controller_Main Extends Controller ( fUNCTION ACTION_INDEX () ( $ this -\u003e View-\u003e generate ("main_view.php", "template_view.php"); ))
In the method generate An instance of the VIEW class is transmitted by the names of the common template files and the type of page content.
In addition to the index in the controller, of course, other actions may be contained.
The file with a common view we considered earlier. Consider the content file main_View.php.:
<h1\u003eWelcome!h1\u003e
<p\u003e
<iMG src \u003d "/ images / office-small.jpg" Align \u003d "Left"\u003e
<a href \u003d "/"\u003eOlolosh Team.a\u003e - team of first-class specialists in the development of websites with many years of experience collecting Mexican masks, bronze and stone statues from India and Ceylon, bas-reliefs and sculptures created by the masters of Equatorial Africa for five to six centuries ago ...p\u003e
It contains a simple markup without any PHP calls.
To display the main page, you can use in one of the following addresses:
- methods of libraries implementing abstriction data. For example, the methods of the PEAR MDB2 library;
- oRM methods;
- methods for working with NOSQL;
- and etc. For simplicity, here we will not use SQL requests or ORM operators. Instead, we grab real data and immediately refund the resulting array.
- Controller_Login in which a form with a form for entering a login and password is generated, after filling out the authentication procedure and, if successful, the user is redirected to the admin.
- CONTORLER_ADMIN with an index action, in which it is checked if the user was previously authorized on the site as an administrator (if it was, the type of administrator is displayed) and the exercise logout for heating.
- spring-Security-Web 4.2.3.release: Spring-Security-Web.
- spring-Security-Config 4.2.3.release: Spring-Security-Config.
- spring Webmvc 4.3.9.release: Spring Web MVC.
- javax.Servlet-API 3.1.0 Java Servlet API
- JDK 1.8.
- Maven 3.3.9.
- Login_redirect_url: Reports what URL to redirect the user after logging into the system.
- Login_URL : URL to redirect the user to the input (for example, using the decorator login_required.)
- Logout_url : URL for user redirection
- To highlight the current section in the menu using CSS. Also displays the username and link to log in if the user has passed authentication, or the link to log in.
Open in the browser http://127.0.0.1:8000/account/login/. You must see the entrance stream. Enter the valid login and password. You will see the following:
You can see that the MY Dashboard section is highlighted with CSS, as it has Class selected.. Since the user has passed authentication, the username is displayed in the right side of Header. Click link Logout.. You will see the following page:

On this page you can see that the user came out of the system, and therefore the Website menu is no longer displayed. Link on the right side of the Heder shows now Log-in.
If you see the Log Out page from the Dzhango administration site, and not your own system output page, check the installed_apps settings and make sure that django.contrib.admin. is after account. Both templates are in the same relative path, and the loader of the Dzhango template will use the first found.
Django Comes with a Lot of Built-in Resources for the most Common Use Cases of a Web Application. The Registration App Is a Very Good Example And A Good Thing About It Is That The Features Can Be Used Out-of-the-Box.
With the Django Registration App You Can Take Advantages of the following the Following Features:
- Login.
- Logout.
- Sign Up.
- Password Reset.
In this Tutorial We Will Focus in the Login and Logout Features. For Sign Up and Password Reset, Check the Tutorials Below:
Getting Started.
Before WE Start, make sureh in your Installed_apps and the authentication middlelled_apps and the authentication middleware properly configured in the middleware_classes settings.
Both Come Already Configured WHEN YOU START A NEW DJANGO PROJECT USING THE COMMAND STARTPROJECT. SO If You Did Not Remove The Initial Configurations You Should BE All Set Up.
In Case You Are Starting a New Project Just to Follow This Tutorial, Create A user Using the Command Line Just So WE Can Test The Login and Logout Pages.
$ Python Manage.py CreateSuperUserIn The End of This Article I Will Provide The Source Code of the Example with the Minimal Configuration.
Configure the URL Routes
First Import the django.contrib.auth.views module and add a URL ROUTE FOR THE LOGIN AND LOGOUT Views:
from django.conf.urls import url from django.contrib import admin from django.contrib.auth import Views as auth_views urlpatterns \u003d [url (r "^ login / $", auth_views. login, name \u003d "login"), URL ( R "^ logout / $", auth_views. logout, name \u003d "logout"), URL (R "^ admin /", Admin. Site. URLs),]CREATE A LOGIN TEMPLATE
By Default, The Django.contrib.Atth.views.login View Will Try to Render The Registration / Login.html Template. So The Basic Configuration Would be Creating A Folder Named Registry and Place a login.html Template Inside.
Following a Minimal Login Template:
(% Extends "Base.html"%) (% block title%) Login (% endblock%) (% block content%)
Login.
(% endblock%)This Simple Example Already Validates Username and Password and Authenticate Correctly The User.
Customizing The Login View
There Are A FEW Parameters You Can Pass to the Login View to Make It Fit Your Project. For example, if you Want to Store Your Login Template Somewhere Else Than Can Pass The Template Name As A Parameter:
URL (R "^ login / $", Auth_views. Login, ("template_name": "core / login.html"), name \u003d "login"),You can Also Pass a Custom Authentication Form Using The Parameter Authentication_form, Incase You Have Implemented A Custom User Model.
Now, a Very Important Configuration Is Done in the settings.py File, Which Is The Url Django Will Redirect The User After A Successful Authentication.
Inside The Settings.py File Add:
Login_redirect_url \u003d "Home"The Value Can Be a Hardcoded URL or A URL NAME. The Default Value for login_redirect_url is / accounts / Profile /.
IT IS ALSO Important to Note That Django Will Try to Redirect The User to the Next Get Param.
SETTING UP LOGOUT VIEW
After acessing the django.contrib.auth.views.logout view, Django Will Render The Registration / Logged_out.html Template. In A Similar Way As We Did in The Login View, You Can Pass a Different Template Like SO:
URL (R "^ logout / $", auth_views. logout, ("template_name": "Logged_out.html"), name \u003d "logout"),Usually I Prefer to Use The Next_page Parameter and Redirect Either to The Homepage of My Project Or to the Login Page WHEN IT MAKES SENSE.
Model file model_Portfolio.php. Position in the model MODELS folder. Here is its contents:
class Model_Portfolio Extends Model ( Public function get_data () ( Return Array (Array ("Year" \u003d\u003e "2012", "Site" \u003d\u003e "http://dunkelbeer.ru", "description" \u003d\u003e "The Dunkel Dark Beer Promotion site from the German producer Löwenbraü produced in Russia's brewing company" CAN IBEV "."), Array ("year" \u003d\u003e "2012", "site" \u003d\u003e "http://zopomobile.ru", "description" \u003d\u003e "Russian-language catalog of Chinese phones of ZOPO on the basis of Android OS and accessories to them."), // TODO); ))
The model controller class is contained in the file. controller_Portfolio.php., Here is its code:
class Controller_Portfolio Extends Controller (
fUNCTION __CONSTRUCT () ( $ this -\u003e model \u003d new model_portfolio (); $ this -\u003e view \u003d new view (); ) fUNCTION ACTION_INDEX () ( $ Data \u003d $ this -\u003e model-\u003e get_data (); $ this -\u003e view-\u003e generate ("portfolio_view.php", "template_view.php", $ data); ))
In a variable data. The array returned by the method is recorded get_data.which we considered earlier.
Next, this variable is transmitted as a method parameter. generatewhich is also transmitted: the file name with a common template and file name containing a view of the pages content.
View Containing Page Content is in the file portfolio_view.php..
Portfolio
| Year | Project | Description | . "$ ROW [" YEAR "]." | "$ ROW [" SITE "]." | . "$ ROW [" Description "]." | " ; }


 Lighting devices based on alternating current LEDs find their niche and may come out beyond its limits.
 Requirements and rates for cable laying in Earth Scope of application, Definitions
 Automobile stroboscope from laser pointer
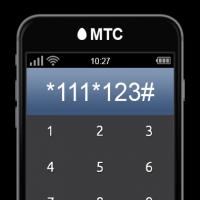 Order 20 UAH to the account. How to Borrow on MTS. Additional information on the service
 How to check the account replenishment
 How to get a loan on tele2?
 Responsiveness SSD on a miniature board What SSD Drive Buy