How to make data signatures in the diagram. Microsoft Excel: Turning on the signature of the diagram axes. Adding data labels
Each series of data consists of separate data points (on the histogram - from individual columns, on a circular diagram - from sectors, etc.).
To edit a separate data point (for example, the maximum or minimum), it must be highlighted in the corresponding row and call the dialog box Data point format. Calling this window can be done either by pressing the button Format of the selected fragment in a group Current fragment On the tab Layoutor with the team Data point format In the context menu.
The exercise. You need to change the display of the data point (column), reflecting the price of the most expensive goods. For this:
Select the appropriate column in the number "price", for which you first highlight the entire number of data, and then by placing the mouse pointer to the highest column, allocate it, pressing the left mouse button. As a result of the actions, the markers will appear only around the selected data point.
Without moving the mouse pointer, click the right button to call the context menu where you select the command Point format data.
In the window that opens Data point format Choose different from the rest of the columns of this row color of the fill and press the button Close.
Adding data signatures
To clarify the values \u200b\u200bof these rows, you can display the corresponding data from the table in the diagram. Data signatures can be added to all the data elements of all rows by clicking on the diagram area, as well as to the data elements of a specific series by clicking on this row or to a separate item of a particular row by clicking on this item. Then on the tab Layout in a group Signatures Press the button Data signatures Selecting the desired display parameter, or using the command Add data signatures In the context menu.
The exercise. You must add data signatures for the editable row, for which:
Select a number of data "Price" and press the button. Data signatures in a group Signatures On the tab Layout, then choose At the top of the outsideAs a result, the numbers corresponding to the value in the table will appear above each data point (column).
Since the data points in a separate row can be quite a lot, and their values \u200b\u200bin the table are sufficiently large, then all the valued signatures on the diagram can overlap each other, which prevents the graph viewing. In this case, you need to use the window Data signature format To configure their display.
Data signature format
You can change the format and image of the data signatures declined to the diagram. Data Signature Format (Font, Size, etc) can be changed using a mini-panel that appears when you press the right mouse button after selecting this item, and the image is using the window Data signature formatcaused after selecting the command of the same command in the context menu or after pressing the button Format of the selected fragment in a group Current fragment On the tab Layout.
The exercise. Change data signatures display:
Allocate all data signatures, to do with the left mouse button, placing the pointer to any of them.
Press the right mouse button to call the context menu, using a mini-panel to choose a bold one-panel, size 10, click the left mouse button outside the panel.
Re-select data signatures, click the button in the group Current fragment On the tab Layout.
In chapter Alignment Install in the area Another corner -10. Press Close At the bottom of the window.
Slush the left mouse button in any free location of the chart to view the result.
Note: You can change the placement of data signatures using the tab Alignment dialog box Format signatures data, as well as "manually", for which any of the signatures you need to highlight and move with the mouse.
Data signatures can be shown on a diagram not for all points of a number, but only for one, showing, for example, the maximum or minimum value.
The exercise. It is necessary to display data signatures for the most expensive goods. For this:
Delete all signatures of data from the diagram, for which you allocate them and press the key Delete. on keyboard. Data signatures will disappear from the diagram image (data signatures can also be deleted using the context menu where you need to select the command Delete).
Allocate the price series.
Pointing to the mouse cursor to the highest column in this row, right-click. In this case, the markers will appear only around this column.
Without moving the mouse cursor, right-click.
Add data signature.
Select the signature that appears and click the button. Format of the selected fragment in a group Current fragment On the tab Layout.
In the window that opens Data signature format In chapter Number Choose a cash numeric format, the number of decimal signs 2, the designation is a sign of the English dollar or euro, press the button Close.
The exercise. Change the image signature image by placing it into the frame, for what:
Click the left button by placing the mouse pointer to the numeric value that appears above the maximum value of the row.
Without moving the cursor, right-click.
In the context menu that appears on the screen, select the command Data signature format.
With the help of the team Fill choose Solid fill(Pouring color to choose if desired) using the command Border color choose Solid line (color line choose optional) .
On the tab Alignment All parameters are left unchanged.
Press the button Close.
Slush the left mouse button in any free location of the chart to view the result.
You can change the format and image of the data signatures declined to the diagram. Data Signature Format (Font, Size, etc) can be changed using a mini-panel that appears when you press the right mouse button after selecting this item, and the image is using the window Data signature formatcaused after selecting the command of the same command in the context menu or after pressing the button Format of the selected fragment in a group Current fragment On the tab Layout.
The exercise. Change data signatures display:
· Select all signatures of data, for which click the left mouse button by placing the pointer to any of them.
· Press the right mouse button to call the context menu, using a mini-panel to choose a bold italing, size 10 as an inscription, right-click outside the panel.
· Re-highlight data signatures, press the button. Format of the selected fragment in a group Current fragment On the tab Layout.
· In chapter Alignment Install in the area Another corner -10. Press Close At the bottom of the window.
Note: You can change the placement of data signatures using the tab Alignment dialog box Data signature format, as well as "manually", for which any of the signatures you need to highlight and move with the mouse.
Data signatures can be shown on a diagram not for all points of a number, but only for one, showing, for example, the maximum or minimum value.
The exercise. It is necessary to display data signatures for the most expensive goods. For this:
· Delete all signatures of data from the diagram, for which allocate them and press the key Delete. on keyboard. Data signatures will disappear from the diagram image (data signatures can also be deleted using the context menu where you need to select the command Delete).
· Select the price series.
· Indicating the mouse cursor on the highest column in this row, right-click. In this case, the markers will appear only around this column.
· Not moving the mouse cursor, right-click.
Add data signature.
· Select the signature that appears and click the button. Format of the selected fragment in a group Current fragment On the tab Layout.
· In the window that opens Data signature format In chapter Number Select a cash numeric format, the number of decimal signs 2 , Designation - a sign of the English dollar or euro, press the button Close.
The exercise. Change the image signature image by placing it into the frame, for what:
· Slide the left button by placing the mouse pointer to the numeric value that appears above the maximum value of the row.
· Not moving the cursor, right-click.
· In the context menu that appears on the screen, select the command Data signature format.
· Using the team Fill choose Solid fill(Pouring color to choose if desired) using the command Border color choose solid line (color line choose optional) .
· On the tab Alignment All parameters are left unchanged.
· Press the button Close.
· Slide with the left mouse button in any free location chart to view the result.
The diagram in the table editor is based on data based on the axes always displayed. The axes displays the values \u200b\u200bof this data. But, by default, the editor can leave the axis empty or output numbers in the wrong format. To fix it, you need to understand how to sign the axis in Excel correctly, using the built-in setting functions of the diagrams.
The program menu has a layout tab that allows you to configure items. We find the button name of the axes and from the drop-down list, select the name of the vertical axis. Next, the editor proposes to make a choice regarding the placement of the inscriptions from three options: the turned title, vertical or horizontal.
After selecting the first point, the inscription placed in the figure is displayed in the figure. You need to click on the field and change the text at your discretion.
Below can be seen, as the name is located after activating the vertical location.
And when choosing horizontal accommodation, the inscription will look like this.
Horizontal axis name
Actions perform by analogy with the placement of the name of the vertical axis. But there are some differences. For the user only one way of arrangement is provided: the name under the axis.
After the appearance on the horizontal inscription, we change its contents.
How to sign an axis in Excel? Sappings of the horizontal axis
The axial guide diagrams is usually divided into several equal parts, which allows to determine the ranges of the curve. They can also be signed in their own way.
On the axis button there is a master horizontal axis item. After clicking on it, the inscriptions setup menu appears, thanks to which you can completely remove the signatures by selecting no signatures from the list or not.
By default, in Excel, the text is displayed from left to right, but you can change it by clicking on the menu item on the right left.
There are also additional parameters, with which you can adjust the axial data in detail: the interval between inscriptions, the type of axis, its location relative to the text, the recording format, etc.
Signatures of the vertical axis
To set up a vertical axial, you need to select the item Main Vertical axis axis button. You can remove signatures or display them according to numerical characteristics:
Millions.
Billions.
Logarithmic scale.
Figure below shows the signatures in thousands.
It is also possible to configure the axis more carefully by clicking on additional parameters.
These are the basic ways to adjust the division scale and the names of the axes. Performing this algorithm, even a novice user can easily cope with the process editing process.
Share our article in your social networks:I recently had a task - to reflect the level of employee competences on the chart. As you may know, change the text of the signatures of the values \u200b\u200bof the values \u200b\u200bis impossible, since they are always generated from the numbers denoting the scale of the row. You can manage signature formatting, but their contents are rigidly defined by Excel rules. I wanted to instead of 20%, 40%, etc. The chart shows the names of the levels of ownership of competences, something like:
Fig. 1. Chart of competencies along with source data for constructing.
The decision method suggested to me the idea hung in the book of John Waolenbach "Charts in Excel":
When creating a diagram shown in Fig. 1 The following principles were used:
- The diagram is actually mixed: it combines a graph and a point diagram.
- "Real" axis of values \u200b\u200bis hidden. Instead, a series of point diagram is displayed, formatted in such a way as to look like a axis (fictitious axis).
- These point diagrams are in the range of A12: B18. The Y axis for this series represents numerical estimates of each level of competencies, for example, 40% for the "basic".
- Axis signatures y are user signatures of these rows Point diagrams, and not signatures of the axis!
To better understand the principle of action of the fictitious axis, look in Fig. 2. This is a standard point diagram in which the data points are connected by lines, and the row markers mimic horizontal fission marks. The diagram uses data points defined in the A2 range: B5. All values \u200b\u200bx are the same (equal to zero), so the row is displayed as a vertical line. "Tags of axis division labels are simulated by user signatures of data. In order to insert the symbols in the data signature, you need to sequentially select each signature separately and apply the insertion of the special symbol by passing the insert menu - a symbol (Fig. 3).
Fig. 2. Example formatted point diagram.
Fig. 3. Inserting a symbol in the signature of the data.
Let's now consider the steps of creating a chart shown in Fig. one.
Highlight the range A1: C7 and build a standard grouping histogram:
Place the legend from above, add a header, set the fixed parameters of the values \u200b\u200baxis: minimum (zero), maximum (1), the price of basic divisions (0.2):
Select the range A12: B18 (Fig. 1), copy it to the memory buffer. Highlight the diagram, go to the Home tab and select Paste-\u003e Special Insert Command.

Set the new rows and values \u200b\u200b(y) switches in columns. Check the number names flags in the first line and category (axis x x) in the first column.
Highlight a new row and right-click Select Change Chart Type for Row. Set the type "Point with smooth curves and markers" diagram:
For a new series, Excel created auxiliary vertical (right) and horizontal (top) axis. Remove the auxiliary vertical axis. By this, you specify the scale for a series of point diagrams the same as for the main histogram. Highlight the auxiliary horizontal axis and format it, indicating for the main divisions - no, for the signatures of the axis - no:
Highlight the main vertical axis and format it by specifying for the main divisions - no, there is no axis signatures.
Highlight a series of point chart and format it. Line color - black, marker - similar to axis dividing (select the marker size and set the black color), select the thickness of the line so that it does not differ from the horizontal line, add data signatures (anyway, what). Format the data signatures by specifying the signature options tab on the left.
Enter the legend, select and remove the description of the number related to the point diagram.
Select the number of data signatures of a series of point diagrams and (as shown in Fig. 3) Print in them those words that wanted (area C13: C18 Fig. 1).
To quickly define a number of data in the diagram, you can add data labels to its data point. By default, the data labels are associated with the values \u200b\u200bon the sheet and are updated automatically if they are changed.
Adding data signatures in a diagram
To make data signatures more visual, they can be moved to data points or even beyond the chart. To move the signature of the data, drag it to the desired location.
If the signatures visually clutter the diagram, you can delete them all or some of them by selecting the desired signatures and pressing the Delete key.
Tip: If the font of the text signature text is too small, it can be increased by clicking the signature and stretching it to the desired size.

Using cell values \u200b\u200bas data signatures
The cell values \u200b\u200bcan be used as data labels for the diagram.

Changing data label text
Tip: If you want to add a note about the diagram or you have only one data label, you can use the inscription.
Deleting data labels with chart
Adding and deleting data labels in the chart in Office 2010
Adding data marks to the chart (Office 2010)

Application of another predefined Label recording (Office 2010)

If you have entered your own text, but you want to restore the data label elements associated with the sheet values, you can click the button Reset.
Creating a custom Label element (Office 2010)
On the diagram, click the label at the data point you want to change, and then click the data label again to select only it.
Click within the Data Tag Field to go to edit mode.
Perform one of the following actions.
The size of the data label field varies according to the text size. It cannot be changed manually, and the text can be truncated if it does not fit in the maximum size field. If you need to put more text, you can use the inscription. For more information, see the article Adding an inscription to the chart.
Changing Data Labels (Office 2010)
The position of the individual data tag can be changed by dragging it. You can also place data labels in standard positions regarding their data markers. Available location parameters depend on the type of diagram.
Removing Data Labels in Diagram (Office 2010)
Data signatures containing information about the ranks or individual data points simplify the understanding of the chart. So, without signatory data on the circular diagram below, it would be not entirely clear that the sales volume of coffee is 38% of the total sales. Depending on what needs to be highlighted in the diagram, the signatures can be added to one row, to all rows (all diagram) or one point of data.
Adding data labels
You can add data labels to show the value of data points from the Excel sheet on the diagram.

Press the button Advanced data label parameters To change the appearance of data signatures.
Changing the type of data signatures
Right-click any data label and select Command data signature format.
Press the button Parameters stickers and in the section Signature is includedselect the desired parameters.
Changing data label text
Click the data label with the text you want to change, and then click it again to select only the label.
Select the existing text, and then enter the text to replace.
Click anywhere outside the data tag.
Tip: If you want to add a note to the diagram or have only one data label, you can use a text field.
Deleting data signatures
If you decide that the stickers will look too quickly, you can delete all or all of them by clicking the data signature and pressing the key Delete..
Note: All labels for a number of data will be removed.
Note: This page is automatically translated, so its text may contain inaccuracies and grammatical errors. It is important for us that this article be useful to you. Was the information useful? For convenience also (in English).
 Lighting devices based on alternating current LEDs find their niche and may come out beyond its limits.
 Requirements and rates for cable laying in Earth Scope of application, Definitions
 Automobile stroboscope from laser pointer
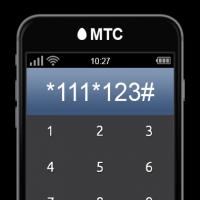 Order 20 UAH to the account. How to Borrow on MTS. Additional information on the service
 How to check the account replenishment
 How to get a loan on tele2?
 Responsiveness SSD on a miniature board What SSD Drive Buy