What is a touch bar on a Mac. The Touch Bar in the New MacBooks: What a Beast That Is. Other Apple software
Now officially Apple's newest toy - and quite an expensive toy considering the $ 1,799 price tag for the initial model. Sensory touch panel Bar opens the door to absolutely new world how we will interact with the MacBook when working on it. Developers get access to API codes and the panel will work flawlessly with third-party applications. And of course, Apple has already taken care of the deep integration of the touchpad with macOS Sierra where it will definitely find great use for itself.
Most importantly, the Touch Bar changes based on what you are doing. When using one application, you get one set of controls and, accordingly, when using another application, you get a different set of controls. It is a very flexible system that instantly adapts to the needs of the user.
Over time, developers will very soon dramatically increase the potential for using this panel. In the meantime, let's figure out how, here and now we can use the Touch Bar in MacBook Pro.
# 1. Use the Touch ID scanner to make purchases with Apple Pay
A little bonus the appearance of the Touch Bar in MacBook Pro can be considered the placement of the fingerprint scanner on it. At first glance, it seems that it is built into touch pad but it is actually part of the Power button, located on the very right side of the strip. This means that finally Macs have decent support for the service. Apple Pay... If the web page or app supports Apple service Pay, then you can just put your finger and make a purchase online.
# 2. Edit photos
The Photos app, and possibly others like it, can provide user-friendly interface on the Touch Bar for editing photos. It not only houses instant options for making small adjustments such as rotating a picture, but it also displays more advanced sliders for editing brightness or for rotating the horizon of photos.
No. 3. Video editing
The Touch Bar brings a further development to the control of video playback, as now the entire video segment is displayed on the panel in the form of icons. With a swipe of your finger, you can start viewing the fragment from anywhere. Most likely this option will work with video files located on the computer and with existing projects in iMovie / Final Cut Pro applications, but it would be great if in the future it would be possible to do such tricks on sites like YouTube too.
No. 4. Switch between browser tabs
The Safari browser also received deep integration with the touch panel. When surfing the web, your bookmarks will appear as icons. With a light touch, you can switch from one tab to another tab, literally without taking your hands off the keyboard, instead of using the mouse for this purpose. To go to new page all your bookmarks are located right there, under your fingers.
#5. Using the Touch ID scanner to unlock your Mac and switch between accounts
The most practical use for the Touch ID scanner on the new MacBook Pro is to switch between user accounts on a computer, as demonstrated at the presentation by Phil Schiller. If the computer has multiple user accounts, then all that needs to be done to switch to the corresponding profile for other users is just to bring your finger to the scanner and macOS will identify the user and switch to the corresponding profile. In the same capacity, the scanner can be used to instantly unlock your computer, which will allow you to continue working on it from where you left off for a break.
No. 6. Develops creativity
An Adobe representative revealed what the Touch Bar in Photoshop will be capable of in the very near future. You can change the size of the brush on the fly, view the entire color range and choose the desired color for the brush and much more. On the plus side, the Touch Bar allows you to add shortcuts to the panel for the most frequently used actions, which are usually deeply hidden in the command and settings menu.
No. 7. View and send emoticons
In fact, the question is: would there be a Touch Bar if there was no need to invent a super way to add emoticons? And if it's no joke, then the very ability to view emoticons on the keyboard sounds great. This method is more intuitive than going through and selecting emoji icons with the mouse. You can expand any category of emoticons, select the appropriate one and send it with a simple touch of your finger.
No. 8. Edit and view Keynote slides
The Touch Bar makes it easier to work with any text application, including Keynote. Plus, you can flip through and view slides in Keynote. In a long list of slides, you can scroll through the icons and switch between them.
No. 9. Add live effects to your music
Music apps like GarageBand give you the tools to control your music right from the Touch Bar. If you have participated in the creation of musical compositions, then you will definitely love it. Not only will you be able to edit your projects using the menu options, but as was demonstrated by DJ Algoriddim at the presentation, it will be possible to add live effects. While playing music, you can change the sound and add effects in real time right from the Touch Bar, just like DJs usually do.
#ten. Change operating system settings
Last but not least, you certainly have the ability to change system settings and access buttons so familiar. To such as volume level, playback control buttons, display brightness control and keyboard illumination buttons, of course, to your favorite ESC button.
In defense of the MacBook Pro with Touch Bar. He had to tell you how to properly set up the touchpad, to make it as useful as possible.
It's a shame, but many still refuse to admit that the Touch Bar is a step forward compared to the F1-12 function buttons. It is for such doubters that we have prepared as many as 40 additional tips on how to pump the sensor strip.
Basic features:
1. Learn to look at the Touch Bar
Train yourself to look at the Touch Bar and you'll love it
When Apple launched the first MacBook Pro with Touch Bar in 2016, it seemed awkward. But in fact, he was rather unusual.
The fact is that most Mac owners who work at a computer for a long time every day become so used to their keyboard that they no longer even look at it.
With the Touch Bar, different habits are needed: you have to learn to look wider and look at the touch strip.
As practice shows, you can adapt in a week or two.
2. Don't overload the Touch Bar with buttons
An illustrative example of volume control from a button
Keep in mind that you don't have to try to fit literally everything on the touchpad: it is better to use multifunction buttons.
For example, "Volume slider" can easily replace all the other buttons for its adjustment. You can't just press it to bring up the adjuster - instead, hold down and drive in either direction.
3. Make sure to configure the Control Strip
Left - application control buttons, right - Control Strip
You can customize the Touch Bar in the " System settings"> Keyboard> Keyboard."
Choose Program Control Buttons from the Show On Touch Bar, check the Show Control Strip, and check Expand Control Strip for Press Fn To.
It is this combination for a year of use proved to be the most simple and versatile... Now on the left of the Touch Bar there will be application control buttons, on the right - computer control, which you can expand with the Fn button.
Now click Customize Touch Bar and drag only the Control Strip that is useful for both the full version and the shorthand version.
4. Actions for all applications can be customized

Application-specific Touch Bar settings are most commonly found in the View menu.
Check the "View" menu of the standard and third party applications... Most often, it is in it that the item "Customize the Touch Bar" is located, which will help you choose the filling of the panel for yourself.
5. Understand how to hide the Control Strip
If you don't have enough room for app buttons, hide the Control Strip
If you are using complex applications with big amount Quick Actions on the Touch Bar, you can hide the Control Strip in System Preferences> Keyboard> Keyboard.
You can still access it by pressing Fn.
6. Think about how you can occupy the entire Touch Bar

This is especially true in third party applications.
If you actively use Adobe photoshop, be sure to customize the Touch Bar. In this program, this item was hidden in the "View" menu.
You can add buttons to the panel for working with a brush and a fill, a quick transition to the history of changes, control of the opacity level - all this will help you usefully take a seat on the Touch Bar.
7. Understand switching between tabs
Note the arrow buttons
Usually buttons with an arrow icon are switches with additional features.
For example, when editing images in the Photos app, you can use the arrow button on the left edge of the Touch Bar to toggle between settings, filters, and cropping.
8. Try the incoming call panel
If your iPhone is set up to make calls from others Apple devices(Settings> Phone> On Other Devices) and you've answered or made a call from your MacBook Pro, you can control it right from the Touch Bar.
9. Do not be afraid to be left without F1-12 keys

You can bring back the familiar function keys for selected applications
If some of your applications are not adapted to work with the Touch Bar (to be honest, we have not met any), you can enable for it the usual function keys F1-12.
To do this, go to System Preferences> Keyboard> Keyboard Shortcuts and add it here.
Editing text:
10. Try predictive input
Predictive mode will speed up your text input if you are not good at it
If you are not typing as fast as you would like, the predictive mode will help you with this - it is supported by almost all standard and many third-party applications.
When you work with text, the Touch Bar will show word suggestions for further input.
11. Enter Emoji quickly
Quick Emoji Input via Touch Bar
In Messages and other instant messengers, a button with an emoticon appears on the left side of the Touch Bar. It helps you quickly enter Emoji without going to the Emoji & Symbols panel.
12. Learn to switch between sections of emoticons
The button with the coveted arrow will help you with this.
By default, the Smiley menu shows the last emoji you have used. However, you can navigate to other sections using the arrow button.
13. Turn ordinary words into emoticons
Predictive Input + Emoji
In addition to the usual words, the Touch Bar also offers Emojis that you can and should use to diversify your communication.
14. Open the secret formatting tools
Auto hide predictive input
When you select text in Notes or any other predictive text application, it is automatically hidden so that speed up the formatting process.
Actions for Finder:
15. Change the Finder display with one click
Switch the display of files in the Finder via the Touch Bar
The Finder's most convenient way to use the Touch Bar is to switch between file display options.
16. Quickly create folders and move files
Pay attention to the button with the folder icon
Select several files that you want to move to a new folder, use drag-n-drop, click on the create folder button and drop these files into it.
This combo seems difficult at first, but over time it will greatly speed up the work with files.
17. Send any file in a couple of clicks
The fastest way
Select any file in the Finder, click on the button with the eye image to activate the preview, and then immediately click on the submit button to transfer it in any convenient way.
This is much faster than using the submission from the context menu.
Buttons for Safari:
18. Open links in a couple of clicks
The entire list of featured sites on the Touch Bar
Just click on the input line and the Touch Bar will immediately show full list selected sites with folders.
19. Sort links by relevance
The bookmarks bar on the left should contain the sites you use most often
To make the sites that you open more often are immediately available, move them as far to the left as possible in the bookmarks bar.
20. Enter site passwords quickly
Select the account you want to use
If you are using Keychain Access, just click on the login or password field, and the Touch Bar will immediately show multiple accounts that are available to enter.
21. Add Reading Mode to the Touch Bar
Touch Bar Reading View in Safari can be added via Preferences
Add Reading View to the Touch Bar in Safari through View> Customize Touch Bar so you can activate it as quickly as possible.
Other Apple software:
22. Mail: hold a checkbox to change its color
Mark the letter with any color
In Mail, you can select letters with flags so that you can later find information on a specific topic by color - you can do this using the Touch Bar.
First select a letter and then hold down the red checkbox to select a color.
23. Photo: flip through pictures
Flip through pictures in Photos with the Touch Bar is super
You don't even have to look down at the touchpad: just flip through your photos by swiping left and right.
24. Photo: adjust the intensity setting
Make your photo darker and brighter, but not only
Please select required parameter when editing a picture in "Photos" and change its value through the Touch Bar. This applies to brightness, chromaticity, white balance, and so on.
In doing so, you will immediately see the possible result on preview touch panel.
25. Photo: compare before and after
You only need to press one button!
Pay attention to the button to the left of the adjustments. It will give you the opportunity to quickly see the result before and after, in order to understand that you did not make the picture worse with your manipulations.
26. Books: turn the pages
And also through the Touch Bar in "Books" it is convenient to quickly make bookmarks
By analogy with "Photos" in the "Books" application there is a convenient slider for turning pages. To the right of it there are also buttons for searching by book and bookmarks.
27. iTunes: control from any application
The most convenient playback control
If you listen to music through Apple Music, on the Control Strip a button is automatically added, which activates the playback control mode.
With it, you can rewind the song, pause it, and also switch between recordings.
28. Calculator: Use Action Buttons
Touch Bar makes calculator complete on Mac
If you've literally just upgraded to a MacBook Pro with Touch Bar, you'll be delighted with the calculator buttons on the Touch Bar.
Now you will not need to use the cursor to perform actions at all, and this speeds up the calculations at times.
29. Terminal: use function keys

You can add up to 20 function keys in the "Terminal"
If you need function keys in the same "Terminal", go to Touch settings Bar for this application and add up to 20 pieces.
Third Party Applications:
30. Adobe Photoshop: Customize your favorites
Customize any of the three panels
In Adobe Photoshop, you have three panels available for the Touch Bar: Layer Options, Brushes, Favorites. You can first select any of them, and then customize as you wish.
In this case, the item with the touch panel settings is hidden in the "View" menu.
31. Adobe Photoshop: switch between changes
The history menu on the Touch Bar is brilliant
Notice the history button on the Touch Bar. It will open you a whole set of iterations of your image, and you can select the one you want by previewing it.
32. Adobe Illustrator: Combine Objects
One of the most requested features when working with vector graphics
The most requested button on the Touch Bar when working with Adobe illustrator it has long been the unification of several simple shapes into a more complex one.
33. Microsoft Word: switch between styles
It speeds up formatting a lot.
Activate Style Editing and quickly use them with text via the Touch Bar. This speeds up the formatting of documents in this editor literally at times.
Try it.
34. Microsoft Office: open recent documents
Quickly find recent documents
To quickly open one of the latest documents, just click on the button with the image of the clock - this works in any application Microsoft Office.
35. Take screenshots of the Touch Bar
And then also edit them.
To take a screenshot of the Touch Bar, just press Command + Shift + 6. After that, you can make the necessary notes on it using the built-in macOS Ecoran snapshot editor.
It will help you explain the tricks of the touchpad comrade, as I am doing now, or, conversely, ask questions.
36. Customize the area for screenshots
Select an area for the screenshot and a location to save it
Press Command + Shift + 4 and then select Extra options screenshot on the Touch Bar.
37. Understand how to understand that there are many elements on the Touch Bar
Note the blackout on the left and right
This can be understood by the shading of the elements on the left and right side of the touchpad.
38. Customize your site for the Touch Bar
To have a beautiful icon on the Touch Bar
To get the best look for your web page icon on the Touch Bar, use Apple's Site Owner Guidelines.
39. Add Automator Actions to the Touch Bar

Quick Actions button from Automator in the lower right corner
If you actively use Automator, you can add a button with your favorite quick actions based on it on the Touch Bar.
So launch them will come out easier and faster.
Over the past couple of weeks, we've introduced you to a few fun (or weird?) Touch Bar apps in new MacBooks Pro. During this time, there were even more of them, so it was decided to make a small but relevant selection of all sorts of utilities, toys and applications for the touch panel in MacBooks. Some programs you will definitely like, others you may not even want to install. Already interested?
1. TouchSwitcher (free download)
It is strange that the functionality of this little utility was not originally built into Touch functions Bar. It's so intuitive to switch between applications running on a Mac using the touchpad. This is what TouchSwitcher is for. After installing it, a special button will appear on the left edge of the sensor, which will display the icons on the small display running programs... They tapped one and it instantly opened.
2. Rocket (download free)
Rocket is the same TouchSwitcher, only with a slightly redrawn interface and two important features. Firstly, after launch, the utility icon is always lit in the upper bar, through which it can be updated or tweaked. Secondly, with the help of Rocket, you can fully launch applications from the Dock. That is, those that have not yet been launched.
3. Doom
No, well, if you could once run the classic Doom game on first iPhone why not give it a try on a powerful MacBook Pro? Only it will not be possible to play with you on the Retina-screen, but on the tiny Touch Bar. Yes, you can play Doom on such a narrow screen! It is not yet possible to download the toy, apparently, its author, Adam Bell, is still finishing it.
4. Nyan Cat (free download)
Nyan Cat is a world famous Maine who appeared thanks to a YouTube video that appeared in 2011. It depicts a cat running in space with a cookie body. Want the same on your Touch Bar? Easily! Even with sound, which is very important.
5. KnightTouchBar 2000 (free download)
This is an entertainment utility for those who remember the 1991 film "Knight rider". After launching it on Touch screen Bar will display the same animation as in dashboard Pontiac cars of the protagonist of this legendary film. And the soundtrack is the same, yeah.
6. Lemmings
Who is to remember the Lemmings? This is a 1991 game that has been ported to many gaming platforms over the years. In it, funny little people thoughtlessly walk around the level, your task is to guide them so that they do not get into all sorts of troubles and successfully reach the end of the level. One of these can now be on your Touch Bar. You can control the little people using tapes on a small screen. By the way,
Fair, not overpriced or understated. There should be prices on the Service website. Necessarily! without "asterisks", it is clear and detailed, where it is technically possible - the most accurate, final.
With the availability of spare parts, up to 85% of complex repairs can be completed in 1-2 days. Modular repairs take much less time. The website lists the approximate duration of any repairs.
Warranty and liability
Any repairs must be guaranteed. Everything is described on the website and in the documents. The guarantee is self-confidence and respect for you. A 3-6 month warranty is good and sufficient. It is needed to check quality and hidden defects that cannot be detected immediately. You see honest and realistic terms (not 3 years), you can be sure that they will help you.
Half the success in Apple repair- this is the quality and reliability of spare parts, so a good service works with suppliers directly, there are always several reliable channels and a warehouse with proven spare parts for current models so that you do not have to waste time.
Free diagnostics
This is very important and has already become a good form for service center... Diagnostics is the most difficult and important part of the repair, but you should not pay a dime for it, even if you do not repair the device as a result.
Repair in service and delivery
Good service appreciates your time, therefore offers free shipping... And for the same reason, repairs are carried out only in the workshop of the service center: correctly and according to technology, it can only be done at a prepared place.
Convenient schedule
If the Service works for you, and not for itself, then it is always open! absolutely. The schedule should be convenient so that you can be in time before and after work. Good service works both on weekends and on holidays. We are waiting for you and working on your devices every day: 9:00 - 21:00
The reputation of professionals consists of several points
Age and experience of the company
Reliable and experienced service has been known for a long time.
If a company has been on the market for many years, and it has managed to establish itself as an expert, people turn to it, write about it, recommend it. We know what we are talking about, since 98% of incoming devices in the SC are being restored.
We are trusted and passed on by other service centers for difficult cases.
How many masters in directions
If several engineers are always waiting for you for each type of equipment, you can be sure:
1. there will be no queue (or it will be minimal) - your device will be taken over immediately.
2.you give in Macbook repair expert specifically in the field of Mac repairs. He knows all the secrets of these devices
Technical literacy
If you ask a question, a specialist must answer it as accurately as possible.
So that you have an idea of what exactly you need.
They will try to solve the problem. In most cases, the description tells you what happened and how to fix the problem.
She promised to become iconic and revolutionary. This year, Apple laptops are 25 years old, the Pro and Air lines have not been updated for a long time, everyone was waiting for a bunch of emazes.
Tim Cook and his team tried to keep the public interest for more than an hour, but they showed only one New Product... years on the Air line (more powerful and smaller laptops) and installed new standard in the segment of compact but powerful ultrabooks.
The main innovation of the "proshka" was the second display, or rather, the touch panel Touch bar.
I believe that the new feature is a step back, and not a cool revolutionary innovation; a number of complaints arise about this engineering solution.
1. Why did you remove the top row of keys
Many users regularly use efki for work, often adjust the brightness of the display or the volume of the device without even looking at the keyboard. Now you won't be able to do this blindly, and when the panel displays buttons for another application, you will have to switch to the Finder or the desktop to reduce the sound or increase the brightness of the keyboard backlight.
The touch key raises the most questions Escape... The button is quite often used in games and applications, touch input without feedback this is not the best solution.
2. Panel height is too low

During the presentation, we saw how the Touch Bar helps when working in professional applications. The panel contains keys for applying various effects, you can view the color palette or timeline, depending on the program.
From my experience in video editors, I will say that sometimes a third of the screen is not enough to work comfortably with the Timeline, not to mention a small strip the size of a truncated key.
Displaying previews of windows with photos and open tabs Safari makes a fit of laughter. On big screen it looks fine during your presentation, but try to lower your eyes to the keyboard and imagine a series of pictures the size of an F1 button.
3. There is no feedback

Clicking on virtual button has no feedback. The user will have to control the keystrokes all the time.
4. Constantly changing the capabilities of the panel

It will be very difficult to learn the location of the changing icons, which means that the speed of working at the computer will decrease. Only when working with Photoshop or Final Cut Pro, the panel can change depending on the selected tool, the enabled work mode, or the selected area of the photo and video.
The variety of icons on the Touch Bar is simply impossible to get used to.
5. Why duplicate hotkeys

Most of the actions that were performed from the touch panel in the presentation can be done by pressing the corresponding hot keys. Shortcuts have been present in the system for a long time, we got used to them and learned the necessary ones, we can quickly click them blindly.
Why instead look at the touchpad and press the sensor without feedback?
6. Cross on blind dialing

But I started to master the blind 10-finger typing method and already got used to not looking at the keyboard of my computer. Why is Apple trying to take me back a step again so that I regularly "jump" my eyes between the buttons and the screen.
PC users in the US, 95% of whom are proficient in blind typing, will have to get used to looking at the keys to perform certain actions.
It was very sad to see how all the presenters at the presentation had to bury their eyes at the keyboard to convince us of its convenience and usefulness.
A ray of light

The only one the desired function the new panel has a Touch ID sensor. It significantly expands the capabilities of laptops, allows you to pay for purchases without smartphones and instantly switch between user accounts.
Unfortunately, the fingerprint scanner did not make it to the younger MacBook model without a touchpad.
We are very interested in your opinion on the main innovation of 2016.
 Skype free download Russian version Install Skype application
 How to recover a photo on Android after deleting it?
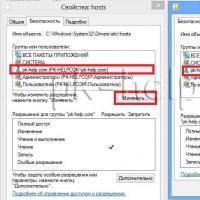 Original hosts for Windows operating systems What should be in a Windows 7 host
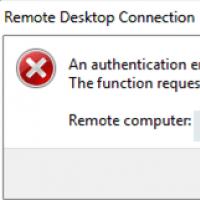 An authentication error has occurred
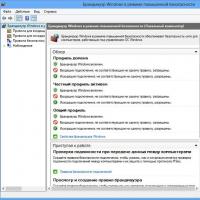 Open the following ports at the client's workstation
 How to hide all VKontakte friends in the new version?
 Hide friends on VKontakte