How do I run the ISO file? How to open a ZIP, RAR, ISO file - unpack with an archiver and without it When unpacking files, iso is defined as
Most of us use a computer, and almost every newbie asks the question: how to open an ISO file?
By default, there are no programs in Windows that can open the .iso extension.
For this, many programs have been created, including free ones. Let's dwell on them in more detail.
What is an ISO file image?
ISO file Is a digital image of an optical disc. It can be said to be an archive that contains files and disk information. Images are mainly used to store games, as well as distributions of operating systems.
How to open an iso file?
In general, there are very 2 ways to view the contents of ISO files:
- using archivers;
- creating a disk image using special programs.
Using archivers
There are many archiving programs, the most popular of which are WinRar and 7Zip. You can download them from the official sites:
- Winrar;
- 7Zip.
After installation, right-click (pkm) on the ISO file that we want to open. Choose "Open with / Winrar / 7Zip".
Special programs
There are many different programs on the Internet for opening. For instance:
- MagicISO.
- Ultra ISO.
- Alcohol 120%.
- IsoBuster.
- Daemon tools
other.
Then the question arises: "Which one is the best?" Most users use Ultra ISO and Daemon Tools. Let's see how to use them.
Ultra ISO
You can download the program on the official Ultra ISO website:
Installation is simple. We will not dwell on it in detail.
When installing the program, do not uncheck the "Install ISO emulator" checkbox.
Then we launch Ultra ISO, click "Trial period".
The following window will open in front of us:
Click "File / Open".
We indicate the path to the image and in the program window we see the open ISO file.
To create a disk image, at the top of the window, click:
"Tools / Mount to virtual drive ..." (or just press F6).

In the window that appears, click "Mount".
Everything! The disk is now successfully mounted.
To use the files on it, open "My Computer" and see the disk we have mounted.
Read also:
Daemon tools
On the official website download the utility.
After installing the utility, the program icon (a circle with a lightning bolt) will appear in the lower right corner next to the time and date.

Click on it pkm, select the item "Virtual drives / Add virtual SCSI drive".
A new virtual drive is coming soon.
After that, again click on the icon and click: "Virtual drives / Drive 0 / Mount image".
We indicate the path to the ISO file. Everything is ready.
Undoubtedly, I advise you to use Winrar and Daemon Tools Lite to run files with the ISO extension, as these utilities are convenient and free.
We watch a useful video to add information:
Unpack the ISO image into a folder and work as with regular Windows files. Divide the archived file into several parts.
- In this article, we will analyze two examples using the Win Rar program. The program is paid, but it's worth it, I think its analogue can be compared with 7Zip, which can be downloaded for free. To become the first option from this article, you can and use 7Zip. You have come across such a file extension as Iso, read on the Internet that it can be opened with virtual drive emulators. And also write such a file to a disc and work with it, launching what was in the ISO image. Programs that emulate cd dvd drives are: Alcohol 120%, Alcohol 75%, DaemonTools for writing to disc. But perhaps this approach to business does not suit you and you wanted to work with a program, for example, which is in an Iso image as with a simple file that can be launched by double-clicking the mouse. Let's print the ISO image into a regular folder, which will contain the files previously located in the ISO image. We installed WinRar and parse the first option with unpacking the ISO image.
- Right clicking on the ISO image? You can choose an action: 1.) view the contents of the "ISO" 2.) Unpack the "ISO" image into the folder named after the image itself.
- 1.) option of the link in the context menu we find ourselves in a window to view the contents of the "ISO" image. We press the "Extract to" button, we go to the window for editing the path, extracting the image.
- The ability to write yourself in 1.) the extraction path line 2.) Select the folder into which the image files will be extracted 3.) Confirm the actions with the "OK" button.
- The second option is in the context menu for extracting files from an ISO image. In which we do not open additional settings and view the image, we simply unpack it into the same folder in which the image file itself is located.
- File extraction process.
- In any choice in the options menu, we get a folder with files, in the same folder as the image, if you did not change the path yourself as described in the first option. Below is the result after extracting, unzipping the ISO image. The folder that contains the files that were in the image and the ISO image itself.
- The archive created in WINRAR can be divided into equal parts of your choice. These parts can be sent separately by mail if the file size is large and the mail does not send larger files. You can also divide an important file into two parts and send first one file, and then the second when the deal is completed. For reliable storage of files, you can put several archives in different places and until they all end up in one place in one folder, you or someone else will not be able to open them, turning, say, without one archive into one file or folder, as it was initially when several archives were created ...
- We click the mouse on the required file, folder, right-click and select the operation "Winrar" "add to archive" from the context menu.
- Next, the "Winrar" window will open to select further operations with our file. We need to choose the size of the individual parts of the archives to be created. We have a choice of 5 options on the "General" tab, 5mb, 100mb, 700mb, 4095mb, 4481mb, the last option is auto. My file in this example weighs 3.37GB and I will divide it into 700MB pieces. If you select the "AUTO" option, then the archiver will automatically create archives with equal weight indicators. I choose from the menu as in the picture below 700MB and press the "OK" button.
- In the example folder at the end of creating the archive, I see 5 files with the extension "rar" 700MB each and the last 481 MB. Who knows why the latter is different, write in a comment?
- I have given you two options for using the WINRAR archiver. The methods I use myself, especially the first one helps. Since many programs are downloaded in an ISO image, it is too expensive to run a virtual disk drive, a simple option with unpacking the image in a pack is what you need. Quickly, without unnecessary actions, less wasted resources of the computer device, in fact, one savings in everything is obtained. If you have a question about other parameters of the WinRar archiver, then I advise you to download the Help file in which you will find full instructions from the manufacturer on the use of the archiver and its functions.
- Russian version of WINRAR x32
- Russian version of WINRAR x64
- Help file
- To the official WINRAR website to download other versions of the program
Divide a file or folder into parts when creating an archive.
Links mentioned in the article:
The question of opening some types of files constantly arises among computer users, since not every extension is supported by the standard set of programs preinstalled in the operating system.
What are ISO files for?
My acquaintance with ISO files began at a time when it was a big problem to find programs on the Internet, and low speed and expensive traffic put an end to any attempts to download online.
People used disks and actively copied them from each other. There was one problem with this process - many disks were protected. Games did not work without a disc inserted into the CD or DVD drive, and autostart was required to install the programs. In short, you couldn't just take and copy the files - you needed the disk itself.
During this period, programs appeared that imitated a floppy drive, creating its virtual analogue, and the files with which they worked received the ISO extension.
An ISO file is an image file of a CD or DVD disc containing in a compressed form all the data that is present on its physical original (optical disc). In addition to storing a disk image, the use of files of this format allows you to create an exact digital copy of the original by writing the data to a blank CD-RW or DVD-RW.
Most often, ISO files are used to distribute large assemblies of programs, or for versions of bulk paid products such as Windows, Microsoft Office, Photoshop, games, etc.
Programs that open ISO files
To open image files, two types of programs are used - archivers and disk drive emulators.
1. Archivers
These are programs that work with archive files. The main purpose of archives is to compress information or combine a large number of different files into one, so that it is more convenient to transfer it somewhere. These include WinRar, 7Zip and a few others.
The structure of the ISO file is identical to other archive formats, therefore, it is supported by the above archivers.
2. Emulators of CD / DVD drives
The purpose of these programs is not to work with files inside disk images, but to create virtual disks and mount image files (ISO) instead of physical storage media. Emulators are not designed to edit or work with individual files within an image.
How to open an ISO disc image file with WinRar?
In the article "" I already talked about this archiver and its capabilities, so if you decide to get acquainted with it in more detail, go there. We are now interested in how to open an ISO using it.
Since your ISO files do not have a typical WinRar icon in the form of a stack of books, I believe that you do not have an archiver or this file type is not included in its settings as a characteristic one.
1. If the archiver is not installed
You need to download it from the official site - win-rar.ru/download/
After starting the installation file, you will be asked what files to associate with WinRar. If you want to automatically open ISO files with this program, then check this box.
Now all image files will have a corresponding icon and will be automatically opened by the archiver when you double-click.
The program allows you to make changes to the contents of the archive - delete, add and edit files.
2. If WinRar is already installed and ISO does not open
The files are marked as unrecognized, which means that the files are not associated with the program. In this case, it is possible to manually select WinRar when opening a file or change the program settings so that it understands ISO by default.
To change the settings, run the archiver. Press the key combination Ctrl + S or in the top menu select the "Parameters" tab and "Settings" in it.
In the installations, we need the last tab, codenamed "Integration" - it contains the cherished plate with the types of associated files. Put a tick in front of ISO and click "OK".
We have figured out how to open the file to extract the necessary data from it and make changes, now let's move on to using it as an image.
How to run ISO file with Daemon Tools Lite
To work with image files for their intended purpose, you can use not only this program, there are a number of applications that create virtual disks and use ISO images, free versions of each of them are approximately identical in capabilities and user interface.
I am comfortable using Daemon Tools Lite because it is officially free (no need to pay, look for pirated versions and various cracks), and, most importantly, I am used to it.
Program installation
Official site for downloading the application - daemon-tools.cc/rus/products/dtLite
Download the installation file from there, when you start it, you will be prompted to install a free version of the program with advertising or pay a small fee to use a clean product.
During the installation, they may ask a few more questions (depending on the version of the program, something changes). In particular, you can choose which shortcuts to put in the system, whether to allow the transfer of statistics data and which files are automatically associated with this application.
During installation, there may be suggestions for installing software for different types of controllers - they are not required, but may be useful.
First start
The first launch of the program will happen immediately after installation, if you do not refuse this action by unchecking the checkbox. When you start it for the first time, Daemon tools will offer to scan all your hard drives (HDD) to find suitable files (ISO and other related files). I recommend unchecking all unnecessary checkboxes, leaving only ISO.
At the end of the scan, the main interface of the program will open, where the image files that were found during the scan will be placed in the central part.
Program interface
At the top right is a search box and "+" to search and add new images.
At the bottom there are icons of active virtual disks, and on the left there is a menu for management (which you can do without).
In order to launch the ISO file with the Daemon Tools program, you need to select it with the mouse and drag it to the virtual disk in the lower panel. The image will instantly be mounted into the drive and autorun will occur, if it was provided by this file.
All virtual disks are perceived by the system as normal and are displayed in the "My Computer" list.
In such a disk, you can enter and navigate through the folders, as with a regular disk.
How to enable multiple drives at the same time
Daemon Tools can open several ISO files at the same time, mounting images to different virtual disks. This means that it is not necessary to extract one file before installing another - you can simultaneously run at least all the image files found.
To do this, when selecting the desired image file, do not drag it to the disk on the bottom panel, but click on the "Mount" link in the left menu.
In this case, a new virtual CD / DVD drive will be automatically created and the disk image will be installed into it.
Other useful functions
The "Quick Mount" icon allows you to add images to the drive directly through the explorer, even if they are not in the list of found ones.
To extract files and to delete virtual disks, click on the disk with the desired letter with the right mouse button and select “Unmount” or “Delete”, respectively.
The paid version of the program has a lot of functions that are no longer related to opening ISO images, but to their creation and burning to physical disks, if you need these functions, you can connect them by paying a certain amount.
We are finished for today, I hope that now you will have no problems opening ISO files and launching other types of images.
You can unpack an ISO file on your computer using the usual WinRAR or 7-Zip archivers, which will just as easily cope with this task, as well as special programs that open ISO files. As a rule, one of these archivers is already installed on the computer, and further options for unpacking the ISO file with each of them will be discussed in detail.
You can unpack an ISO disk image in many ways and even without additional programs, you can learn more about this in the article at the link http://chajnikam.ru/computer/39-kak-otkryt-fayl-iso.html. Archivers allow you to work with an ISO disk image as with a regular archive, and the whole task will be reduced only to selecting the image file through the explorer and searching for the "Extract" menu item.
How to unzip an ISO file using WinRAR?
WinRAR is one of the most popular paid data archivers, capable of unpacking many archive formats. Despite the license required for the work, it works great and for free without any restrictions in functionality, periodically giving a message about the need to purchase the product.
Its menu is integrated into the Windows shell, which allows you to work with archives directly in Explorer without first launching the archiver application itself. The fastest way to unpack an ISO to a hard drive using WinRAR is to right-click on the file in the explorer and select the appropriate extract item from the context menu.
When you open an ISO file directly through the WinRAR program, you can immediately view the contents of this disk image and extract either any individual file or all files through the standard program menu.
How to unzip an ISO file using 7-Zip?
7-Zip is a free open source archiver with high compression ratio, support for many archive formats and has its own file compression format.
This archiver also integrates into the Windows shell, and allows you to unpack the archive through the context menu of the operating system, without going into the program itself. Unlike WinRAR, 7-Zip does not offer Windows shell integration options during installation and has a nested menu structure. To unpack an ISO disk image using 7-Zip, you need to right-click on this file in Explorer, select "7-Zip" and then select the desired item in the menu that appears.

 How to send on a megaphone waiting for a call
 Setting a password on a computer How to set a code on a computer at startup
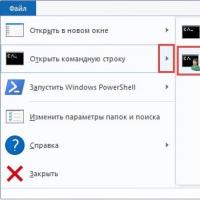 What is ESD format Open install esd
 How to format a mobile phone
 Information satellite systems named after academician M
 Independent rating of the best Russian blogs LiveJournal blogs in Russian top 50
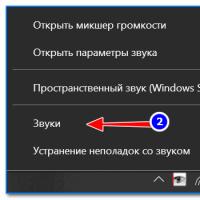 How to set up a microphone on a laptop