What is the ESD file extension? What is ESD format Open install esd
Updated by: The ESD files of the updated RTM build 17134 are already available online. We have changed the links in this post so you can download the latest build.
Earlier there were rumors that 1803, aka Redstone 4, would start shipping on April 10, but something didn't work out and the developers had to re-create the RTM build. Microsoft has not yet announced an official launch date for the new version of Windows 10, nor has it said anything about the name of this update. Although release build 17134 is already available in Fast Ring, Slow Ring and Release Preview, the update is not yet available in the Media Creation Tool. Nevertheless, stable versions of various editions are already on Microsoft servers, so all interested users can download ESD files and assemble an ISO installation file from them for a clean installation of 17134. You will need an ESD file decoder that can be downloaded, as well as a list all references to ESD files. It is located.
- Download and unpack the decoder to any folder you like.
- Download and unzip the file with links to ESD files. Run the XML file in any browser you like.
- Now you need to find the assembly you need. Click on Ctrl + F and search for “ ru-ru” (uk-ua for Ukrainian assemblies and en-us for American English). The browser will display a list of all editions in Russian. Navigate further on the parameters Edition(Professional / Home / Education) and Architecture(x64 / x86).
- Then copy the link from the FilePath line. It should look like this: 17134.1.180410-1804.rs4_release_CLIENTCONSUMER_RET_x64FRE_en-us.esd... Paste the link into the address bar of your browser and wait for the ESD file to load.
- Now place the downloaded file in the folder with the ESD decoder and run the file dectypt.cmd on behalf of the Administrator.
- Select which edition to include in the composition (1 - all editions, 2 - one of the above, 3 - a number of editions and 4 - random edition). Press the corresponding number and then Enter.
- In the next step, select 1 or 2. The first will create a standard ISO, and the second will create an ISO with compressed install.esd.
- Wait until the process is complete, after which you will have a ready-to-use ISO file. Write it to a USB flash drive or disk, after which you can use the created drive to install Windows 10 Spring Creators Update. For more details on this procedure, see the article "".
If you don't want to play with ESD files, you can wait for Microsoft to release an updated Update Assistant and an updated version of the Media Creation Tool. The most impatient can confidently update using the method described above, since these assemblies will be sent to users in the next few days.
During the upgrade of the Windows operating system to a newer version, or assembly, a special image with the ESD extension is loaded, it contains the entire system assembly intended for further updating, or installation on a clean system.
Today we will take a closer look at a method for converting an ESD file to an ISO disk image, which can later be used to burn the system to a disk, or to create a bootable USB flash drive so that you can later install Windows 10 from it.
Here we will use a tool that allows you to convert files of this kind, using the built-in system utility that allows you to work with such images - DISM. To make everything go automatically, additional utilities and a batch file will be used.
First step: Download the update and download the ESDtoISO utility
In our case, we took an update with assembly number 10166. It was located in the following directory: C: \ Windows \ SoftwareDistribution \ Downloa \ c31932a53b8bd06aedcff39a19. This folder contained a file whose name looked like this: 10166.0.150703-1818.fbl_impressive_CLIENTPRO_RET_x64fre_ru-ru.esd.
In other updates, assemblies of other versions could be located in other directories, for example:
C: \ Recoveryimage C: \ Windows \ SoftwareDistribution \ DeliveryOptimization C: \ $ Windows. ~ BT \ Sources
So, if you need a different assembly than the one described in this article, you will have to look for the required file. The best way is to use Search in the system.
By the way, the file with the update can be renamed to any other convenient name, here it may come up install.esd.
Second step: Launch ESDtoISO

In this case, when choosing the first option, a file with a volume of 3931455488 bytes will be released. And if you choose the second option, then we will have a file with a volume of 3177324544 bytes.
When the conversion is over, the finished image will be located in this path: D: \ ESD \ ESDtoISO. Both the one and the other file will be able to fit for normal, classic. In any case, the output will be a regular ISO image, from which it will be possible, or a USB flash drive.
The difference in the size of the finished files lies in the different compression methods. If you choose the second option, then during the installation process you will need to spend more time to unpack the data, as a result of which the installation itself can take ten minutes longer.
There can be many reasons for creating your own distribution of the Windows 10 operating system, and they are not the subject of this article. It is important that there is a need for your own version of the distribution kit, and we will tell you how to create it using only the Windows ADK (Windows Deployment Kit) and the command line, in other words, we will do without third-party software, using only the tools built into the OS.
So, a customized distribution kit may be needed, for example, if you plan to increase the number of computers. You decided to get one more machine, in addition to the laptop, you decided to order the assembly of a more productive computer, but the set of software on it will be about the same as on the laptop.
You can, of course, install the OS on a new machine, and then install and configure the remaining software. You can do it differently: turn that Windows 10 configuration, complete with all installed programs, which runs on one of the computers, into a distribution kit. All that remains is to install the system on a new machine, and all the necessary software will be installed automatically. All that remains is to install the drivers for the hardware that will be in the new computer.
To work, you will need two computers, as a last resort, for experiments you can do with one, but install a virtual machine. Let's assume that one of them has Windows 10 and all the necessary software installed.
Training
You will need an OS distribution that can be downloaded from the Microsoft website.

Create a bootable USB flash drive using this distribution and run the built-in sysprep utility. The task of this utility is to prepare a system image, which includes all settings and installed programs, for transfer to another computer.
The command line must be run and the command entered:

C: \ Windows \ System32 \ Sysprep \ Sysprep.exe
In the window that opens, all parameters are set as shown in the screenshot:

Let's explain a little what some points mean:
- Putting the system into OOBE mode - the next time you start the system, the system will go into OS transfer mode.
- Preparation for use - unnecessary information that is not intended for copying will be deleted, for example, activation data, etc., while all installed programs, utilities must be included in the copying.
The sysprep utility will run for a few minutes, depending on the amount of data that will be transferred to the new computer.

When finished, the computer turns off.
Creating an ESD Image
Now you need to connect an external drive, insert the previously prepared bootable USB flash drive, and boot from it. When the Windows 10 installation window appears, you need to press the key combination "Shift + 10".

- "Diskpart" (a utility that allows you to work with hard disk partitions),
- "Lisvol" (viewing disk partitions, for example, Windows 10 is installed in the C: partition, and the connected USB drive received the letter I :),
- "Exit" (exit the utility. We have learned the data about the partitions).
Now you need to start the process of saving the C: drive, where the installed Windows 10 OS is located, to an image file in ESD format on the connected USB drive. The command looks like this:
Dism / Capture-Image /ImageFile:I:\install.esd / CaptureDir: C: \ / Name: Windows
Let's explain the command:
- Install.esd - the name of the system image file to be created,
- I: - the disk on which this file will be created In our case, this is a portable disk I :),
- C: \ is the drive where the original Windows 10 is installed.
You can also specify the degree of compression of the resulting file. This parameter is not specified on this line and the default value fast will be used. If a different operating mode is needed, then a different value can be used. It should be remembered that the stronger the compression, the more time it takes to work.
Upon completion of the work, a finished image file will appear on the removable disk.

Now you can turn off the computer on which Windows 10 was installed and which was used to create the image. The rest of the work will be done on the second computer.
Additional compression of the image file
This section is optional. The "Install.esd" file obtained in the previous step can be compressed even more by reducing its size. We check for the presence of the file on the removable disk.

We enter the command:
DISM / Export-Image /SourceImageFile:I:\install.esd / SourceIndex: 1 /DestinationImageFile:I:\install2.esd / Compress: recovery

With this command, we create a second file named "Install2.esd", which should differ from the original only in size. In this case, we use a new type of compression - Compress: recovery.
After the operation is completed, there will be 2 files on the disk, differing in size. Now you can delete the original image file ("Install.esd"), and the new one can be renamed from "Install2.esd" to "Install.esd".

As a result, again there is only one file with the same name "Install.esd", but reduced in size.

Editing the Windows 10 ISO
Now it's time to start creating the version of the OS image we need. To do this, we take the distribution kit downloaded earlier from the Microsoft website and copy its contents into a folder that we create on a portable disk where our file is already located. Let's name the folder "10".


After copying is finished, in the “sources” subfolder you can see a file with the same name as the file of the source computer that we created when creating the OS image. Our task is to replace this file with our own. To do this, copy our file "Install.esd".

Then we paste it into the "sources" folder of the Windows 10 distribution.

It is necessary to replace the original file with ours.

Create an ISO image
There is little left to do. From the folder into which you copied the contents of the original Windows 10 distribution, and where you replaced one file with your own, create an ISO image again. To do this, we will use the Windows ADK (Windows Deployment Kit). It is usually installed along with the OS. If not, then you can download and install from the Microsoft website.

Launch the deployment and imaging environment.

In the window that opens, enter the command:
Oscdimg / u2 / m /bootdata:2#p0,e,bI:\10\boot\Etfsboot.com#pef,e,bI:\10\efi\microsoft\boot\Efisys.bin I: \ 10 I: \ Windows.iso
Let's explain the command:
- u2 - UDF file system,
- m - the image has no size restrictions,
- b — boot sector write etfsboot.com, the path to the etfsboot.com file when specifying b (boot) is written without a space: bI: \ 10 \ boot \ etfsboot.com,
- I: \ 10 - indicate the folder where the files for creating the image are located,
- I: \ Windows.iso - we indicate that the final image file must have the name Windows.iso and be located on the I: drive.

After the operation is completed, an image file of the Windows.iso distribution kit will appear on the disk.

Create bootable media
The distribution kit has been created, now you need to write it to the media from which the system will be installed on another computer. You can use a USB flash drive. How to create a bootable USB drive can be found on the Internet. This is not difficult. If you have coped with creating your own distribution kit without resorting to outside help, without bothering friends, acquaintances or a system administrator at your work, did not contact laptop repairs near the Otradnoye metro, where, for example, you live or work, then you will cope with this task.
As a result, we will get a media from which you can install a system with an integrated set of necessary software, and you can install it on any computer with both a UEFI BIOS and a regular one.
Installing Windows 10
If you have already installed this version of the OS, then you are familiar with the procedure. There are no differences when using a self-created distribution kit. As a last resort, the installation process will take a little longer.
After completion, you will have a computer on which all the necessary software is already installed. The only thing left to do is install the device drivers for this computer.
This assembly is convenient if you need to transfer the system to another computer. If you need to install the OS on several computers, then this distribution can be used as a basic configuration with an integrated set of necessary software.

Or $ Windows. ~ BT, $ Windows. ~ WS. It turns out that the ESD folder also stores various temporary files that can restore the system if, for example, a critical error has occurred. But the question comes, is it possible to delete the ESD folder? I want to say that yes, you can. The folder stores recovery files, which weigh a lot and, if you do not have a lot of space on your hard disk, then you should delete it.
Advice! I suggest that at first you do not delete this folder, as well as Windows.old and others, since if you are only recently using Windows 10, then you can test it for now. If everything suits you, you can delete all unnecessary garbage. I recommend doing this using the standard Windows Disk Cleanup tools.
So, if you have administrator rights, then go to the utility Disk Cleanup, you can enter it in the search box.
Now, in our field "Disks" you need to select the system drive, usually (C :). Click OK.

We are waiting for the system to estimate the disk space that can be freed.

The following window will appear, in which you must click the button "Clean up system files"... We are again waiting for the disk size to be estimated.


We confirm actions by pressing a button "Delete files" and wait for the operation to be completed.
Once the temporary files are removed you can do some more. To do this, in the Disk Cleanup utility, go to the tab "Additionally" and where the point is System Restore and Shadow Copies push "Clear"... It is advisable to delete all control points, and leave the last one, so that you can return in case of something.

Actually, that's all. If you have any questions, ask them in the comments, let's try to figure it out.
When updating the Windows 10 build through the Windows update system, the installation image of the new preliminary (insider) build of Windows is downloaded to the user's computer in a specially new image format - ESD ( ElectronicSoftwareDownload). ESD is encrypted and compressed. WIM ( WindowsImagingFormat) Windows image.
This image distribution format was first used in Windows 8.1 when updating the operating system online. Unlike a WIM file, an ESD image cannot be mounted or modified. Microsoft plans to widely use this format for deploying systems. Compared to a WIM file, the .ESD file is about 30% smaller, which is a big advantage when distributing it over the Internet.
In this article, we will show you how to decrypt and convert a Windows 10 ESD image into a familiar Windows installation image that can be burned to a DVD or USB drive and used for a clean install of Windows 10 or performing an update.
Note... In fact, the easiest way to get a Windows 10 installation ISO image and burn it to a USB flash drive / DVD is to use a free one that will help you download the latest Windows 10 image directly from Microsoft servers.
How to get ESD file with Windows 10 image
Let's figure it out where can i getESDfile? When you upgrade from Windows 8 to Windows 8.1, the install.esd file is downloaded in the background from the Microsoft repository and saved to the directory C: \ Windows\ SoftwareDistribution\ Download\ (some ID} .
Get the file Install.ESD with the latest build of Windows 10, you can go to the installed system in the section Start -> Settings -> Updates and Security ( Start -> PC Settings -> Update and recovery -> Preview builds)... If a new build is available for your Windows 10, you will be prompted to download and install a new image.

Run a system update for the new build, but do not overload the computer. During the upgrade process, Windows will download the files required to perform the system version upgrade. After the download is finished, open the explorer and go to the directory C: \ $ Windows. ~ BT\ Sources... Find the file in this directory Install.ESD(it is) and copy it to any other directory. This is the .ESD file with a compressed image of the latest build of Windows 10.
Advice... In an already installed Windows 10 Technical Preview, the ESD file can be copied from the C: \ RecoveryImage \ Install.esd directory.

To get information about which Windows images are inside the ESD file, you can use the standard DISM utility:
DISM / Get-WimInfo /WimFile:"C:\iso\install.esd "
Deployment Image Servicing and Management tool
Version: 10.0.17134.1
Details for image: C: \ iso \ install.esd
Index: 1
Name: Windows 10 Home
Description: Windows 10 Home
Size: 15,439,030,656 bytes
Index: 2
Name: Windows 10 Home Single Language
Description: Windows 10 Home Single Language
Size: 15,439,078,082 bytes
Index: 3
Name: Windows 10 Education
Description: Windows 10 Education
Size: 15,662,641,239 bytes
Index: 4
Name: Windows 10 Pro
Description: Windows 10 Pro
Size: 15,662,520,267 bytes
The operation completed successfully.

In our example, there are several system images inside the install.esd archive. For example, Windows 10 Pro has an index of 4.
Knowing the ordinal index of the Windows image in the ESD file, you can export it to a WIM file using the command:
dism / export-image /SourceImageFile:c:\iso\install.esd / SourceIndex: 4 / DestinationImageFile: c: \ iso \ win10pro.wim / Compress: max / CheckIntegrity

The resulting WIM file can be converted to ISO image using third-party utilities.
ESD Decrypter Utility
To convert ESD image to ISO file, we will use the command line utility ESDDecrypter(ESDToolKit) , which can be downloaded on GitHub: https://github.com/gus33000/ESD-Decrypter/releases/. The ESD Decrypter utility is written in PowerShell, so you can easily familiarize yourself with its source code (the cdimage.exe utility is used to generate an ISO image from a WIM file).

Dism ++ utility for converting the install.esd file
To convert ESD image to ISO file, you can use a simple and convenient graphical utility Dism++ (https://www.chuyu.me/en/index.html) which does the same as the ESD Decrypter script but has a more user-friendly GUI.

 How to send on a megaphone waiting for a call
 Setting a password on a computer How to set a code on a computer at startup
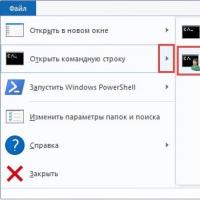 What is ESD format Open install esd
 How to format a mobile phone
 Information satellite systems named after academician M
 Independent rating of the best Russian blogs LiveJournal blogs in Russian top 50
 How to set up a microphone on a laptop