How to change the password from WiFi Netis. Where the password from Wi-Fi is written on the router, IP address, MAC address, login and password Netis Router where Password is written
How is the Netis WF2411 and WF2411E router and WF2411E configuration? Let's wonder in detail what needs to be done to configure the Internet connection on the Netis router, as well as we will understand how the WiFi wireless access point is configured. The instruction is suitable for any WiFi model of the Netis series WF2411 series.
To begin with, I would like to say a few words about the fact that Netis is for most unknown company, but it seems to me quite promising. Netis routers have a small cost, and I begin to make competition to great players. I did not find special, substantial complaints about the quality of Netis routers. In view of all growing demand for WiFi Netis WF2411 and WF2411, I decided to write a step-by-step action plan for those who acquired them. I also want to note that the WF2411 and WF2411E interface has a very nice interface, and most importantly firmware are completely translated into Russian, which is not very important for us users.
I think how to connect a router to a computer, no one has problems, connect along the old scheme:
Netis Routher Connection Scheme
After connecting, we turn on the power, and we are waiting for a couple of minutes when the router boots. Next, we need to get into the modem settings. After loading, the WiFi network of the Netis router will appear, it will be called masked: netis _xxxxx. Connect to it. If for some reason it is stolen, then I recommend trying to enter the factory password, which is specified on the Netis label.

Internet connection
We open the browser, enter in the address bar http://192.168.1.1 or http://netis.cc, press the Enter key.
If problems have arisen when connected to the router, then read the setup instructions:
After entering, we will see the window:


Here the main parameter is the type of connection, as a rule, it is indicated in the contract, when entering the service with the provider. Fill the required parameters. Press the "Save" button at the bottom of the page. After setting, we will wait for a while, the router will apply the parameters, check access to the Internet.
Wi-Fi Setup

To configure WiFi, go to the network menu, Wi-Fi settings.
Change the state of the wireless network on incl. We specify the SSID is the name of the WiFi network. The remaining parameters fill as indicated on the screenshot, in the end we come up with a password from the password, click Save. Configuring a wireless access point is made.
It is useful to view
Video
Video to set up the Netis WF2411 router into PPPoE mode.
Review of the router.
Found a typo? Highlight the text and press Ctrl + Enter
Eastern users need high-speed Internet access with a stable wireless signal and with a large radius of action, so all additional complex functions are unnecessary. These criteria are fully consistent with the Netis router, which also has an affordable price and high quality assembly. Below is a manual for the connection procedure and setting settings for the example of the Netis WF2411E router.
The web interface of the apparatus is characterized by simplicity and thoughtfulness and, most importantly, it is Russified, so the Netis router setting will not cause difficulties even at novice users.
The following instructions are universally suitable for all Netis models. The Netis router is very easy to connect and in the procedure for entering the settings.
Connection procedure for a PC, laptop or mobile device
Before configuring, the device is required to correctly connect.
It is necessary to carry out the following sequential steps:

The above connection instruction is preferred and will exclude possible malfunctions when the subsequent settings procedure. However, in the absence of a computer, it is possible to enter the necessary parameters to enter the necessary parameters and using the connection of any mobile device to the router via wireless technology. As soon as the router is enabled, it will immediately begin to broadcast its Wi-Fi network with a name, for example, "Netis_C2323B". It is only required to connect to it using the Password code, from a smartphone or tablet and enter the equipment interface. At the bottom of the device enclosure, the name and password for the entrance are written.
 Sometimes the specified access codes and login are not triggered. This happens when the equipment has already been tuned and used in the provider's network. In this case, it is recommended to reset the parameters of the apparatus to the factory state. To this end, it should, simply pressing, for about ten seconds to hold the special "Reset" button, recessed in the housing.
Login to settings
The entry procedure to the router interface does not have absolutely no differences from other routers, so users already having such experience will cope with the process even without instruction.
The following several actions are required:

Setting
Enter quickly settings as follows:

If you need to detailed configuration, you need to click "Advanced".
 After that, a window will be displayed with all sections, ordered in the left menu block, and the main interface window serves to enter the functioning parameters.
Section "Network"
The router can function on a wired connection and via Wi-Fi. When booking "Network" is opened a selection of any of these connection methods.
Next, the remaining parameters will appear. For example, in the case of using a Wi-Fi network, a list of networks will appear, and when a cable connection is made, you should select the WAN type. Here is the subsection "LAN", where IP, DHCP is carried out. In some modifications, Netis provides an IPTV connection, which is included with the indication of the "Bridge" mode and the introduction of the LAN connector used. 
Wi-Fi-mode
To enter WiFi parameters, you need to enter the "Wireless Mode" section, where to specify the name of the Waifa created, the access code to it, the type of protection of the encryption, the width of the channel, etc.
 After completing the adjustments to click on "Save".
In the future, when connecting devices with the created network, you will need to specify the name and password entered in this window, so it is highly recommended to write them in notepad, since even the worst notepad is always better than good memory.
In this manual you will find all the necessary information on setting up the Netis WF2411 router. Introduction to fully configure a new router to work with the provider, setting up a Wi-Fi network, setting a password to a wireless network, etc.
Netis WF2411 is actually a very interesting model that attracts buyers with a small price, and good reviews. I read a lot of information on it and reviews before buying this router, as Netis was not familiar with routers. I decided to buy, and check what this device is. I will not talk now about any specifications, since you have liked the router, and you want to customize your Netis as soon as possible. This is now we will deal with. I read in the comments that after resetting the settings on this router does not enter the settings, and the settings are flying after rebooting. I checked everything, and I did not find such problems.
I really liked the control panel in Netis WF2411. Made everything is very simple and thought out. Everything is clear, besides there is Russian. I think there will be no problems with the setting, especially for such a cool instruction as this 🙂
Already in habit, we will customize the router according to the standard scheme:
- I'll show you how to connect Netis WF2411 to the Internet and to the computer.
- Go to the settings of our router, and configure the Internet (connection to the provider). Consider the settings for both dynamic IP and PPPOE, PPTP, L2TP.
- Next, configure Wi-Fi to Netis, and set a password to the wireless network.
- Install the password to protect the router settings.
This instruction is suitable for a new router that you just bought and to re-set up. If your router used to work with another provider, or you already tried it set up, then I advise make reset settings. To do this, connect the power to the router, and the Default recessed into the housing is 10 seconds. After this procedure, you can start setting up Netis WF2411 (or other model that you have).
Connecting the Netis router
First of all, connect the power cable to the router, and turn it on into the outlet. Next, in the WAN connector of the router you need to connect the Internet (cable from the Internet provider), or from an ADSL modem. It looks like this:

Now we need to connect to the router from the device from which we will configure it. If you have a stationary computer, or a laptop, it is best to connect it to Netis WF2411 using a network cable that comes in a set. One end of the cable is connected to the router in LAN connector, and the second end to the computer network card.

If you want to configure the Wi-Fi router, simply connect to the wireless network, which will appear immediately after turning on the router. It will have about this name: "Netis_C2323B". To connect, you will need to use a standard password. I have: "Password". Network name, and standard password are shown on the bottom of the router.

After connecting to the router, you can proceed to its configuration.
Configure Internet on Netis WF2411
Open any browser (Manufacturer recommends Chrome or Internet Explorer)I configure through the opera. In the address bar, type the address 192.168.1.1 , or http://netis.cc.And go on it. A page with the router settings opens. I have prepared a separate one.
If you want, you can update the firmware of your router before setting up. You can do this according to the instructions in which I wrote about. Update software can be updated.
You will see a page with rapid settings. You can configure the connection to the Internet provider, and Wi-Fi. But first of all, I advise you to change the language of the control panel into Russian, and clicking on the button Advanced, go to extended settings. There we will do everything.
Further go to the left to the tab Net – WAN.. Here are very important settings, if they are incorrectly set, then the Netis WF2411 router will not be able to connect to the Internet and distribute it. What type of connection uses your Internet provider, you need to check with the provider itself. This can be: dynamic IP, static IP, PPPoE, L2TP, PPTP. If you have a connection type is not a dynamic IP, then you should also have parameters for connecting: the username, password, and the IP address is possible. This data issues a provider.
In the drop-down menu WAN Connection Type Choose our type of connection, and if you need, set the necessary parameters.
For example, setting up a popular connection PPPoe (Beeline, Dom.ru) on the Netis router will look like this:
To save the settings, click on the button Save. If you need to set any special parameters, for example: cloning the MAC address, set DNS addresses, server name, etc., then click on the button ExtendedAnd additional settings will open.
The main goal of these settings is that the Internet began to work through the router. If you are connected to the router and the Internet is already working, and there is no status "Without Internet access", then everything is fine. Save the settings and follow this instruction. If it fails to configure the Internet connection, then the Council check the settings again, clarify them with the provider and read the article.
Wi-Fi Setup, and installing a password on the Netis WF2411 router
Under the configuration of the wireless network, I will perform the change of the name of this network. If the standard name is not satisfied with you. And of course, I advise you to protect your Wi-Fi network with a good password.
To do this, go to the settings. Wireless mode – Wi-Fi settings (If necessary, then select the 2.4G network, or 5G, if the router is dual-band). On this page we are interested in the SSID field, there we prescribe the name of your wireless network.
To install a password, in the drop-down menu Type of authentication Choose WPA2-PSK.. And in the field Password, Come up and write down the password that will be used to connect to your Wi-Fi. The password must be minimum of 8 characters, English letters and numbers.
The remaining parameters are better not to change. Press the button Save. After that, you will need to connect to Wi-Fi with a new password that we installed. Try not to forget it, and if you forget, you will come in handy.
If you only changed the password, then an error may appear on computers that have already been connected to this network: "", or "network parameters saved on this computer, do not meet the requirements of this network." In this case, you just need, and will be connected again.
Install the settings password
Everyone who will connect to your router will be able to access its settings. Therefore, I advise you to set the password, which will appear when entering the control panel. To do this, go to the settings to the tab. System – Password. Specify the username, I recommend admin, and twice specify the password. This password will need to be entered only when entering the settings. Press the button Save.
Now when you enter into the settings of your Netis WF2411, you will appear as a username and password.
That's all, now the settings of our router are reliably protected. The main thing is not forget this password, otherwise you have to reset the settings.
I showed the basic settings, after which you can connect to the router and use the Internet. He is fully ready for work. Instructions such as: IPTV setting, client lock, port forwarding, etc., I will prepare in separate articles.
If you have any questions about Netis WF2411 settings, then leave them in the comments. Well describe your case, and I will try to help the advice.


Netis routers have their own software that allows you to set up an Internet connection. Almost all models have the same firmware and configuration is carried out at about the same principle. Next, we will step by step, consider which parameters should be set for correct operation of routers of this company.
At first, I would like to clarify that entering some addresses is performed in accordance with the provider's contract. When connecting the Internet, the company was supposed to provide you with information about which data should be inserted into the router. If there is no such documentation, refer to the technical support of your provider. Next, follow the instructions from our manual.
Step 1: Login and Main Parameters
Unpack the router, read the package, use the instruction to properly connect it to the computer. Now we will show how to go to the Netis router settings:

Step 2: Setup Internet Access
Now you should refer to the documentation, we are talking about. The Internet access configuration is carried out in accordance with the designated provider of data. You will need to accurately enter them in the row allotted for this:

Step 3: Wireless Mode
Most routers from Netis support are supported by Wi-Fi and allow you to connect to the Internet without using a cable. Of course, the wireless connection also needs to be configured to work correctly. Follow these steps:

You can connect to your point without entering the password using WPS. Click a special button on the router so that the device can connect, or enter the specified code. This is configured as follows:

Sometimes you need to create multiple wireless connection points from one router. In this case, go to the section Multi SSIDwhere specify the point, set the name and additional data to it.

Setting the security of such networks is carried out in the same way as in the instructions above. Select a convenient authentication type and set the password.

Specifying the additional parameters of the wireless network, the usual user is almost never needed, but experienced users will be able to configure them in the section "Extended". Here are the possibility of insulation point of access, roaming, protection and transmission power.

Step 4: Additional Routher Functions
The main configuration of the Netis router was completed, can now be connected to the Internet. To do this, go to the category "System", Select "Restarting system" And press the corresponding button displayed on the panel. After rebooting, the set parameters will come into force and access to the network should appear.

In addition, Netis software allows you to configure additional functions. pay attention to "Control of the bandwidth" - It is limited to the incoming and outgoing speeds on all connected computers. Such a solution will help correctly distribute the speed between all network participants.

Sometimes the router is installed in a public place or in the office. In this case, it may be necessary to filter on IP addresses. To configure this feature there is a special section in the category "Access control". It remains only to determine the parameters suitable for you and set PC addresses.

Above, we disassembled in detail the process of setting up routers from Netis. As you can see, this procedure is light, does not require additional knowledge or skills from the user. It is only necessary to have documentation from the provider and accurately follow the instructions provided, then it will be necessary to solve the task.
The factory name of the network, the password and the entry address in the settings are indicated below the Netis WF2419R or Netis WF2419 router.
To enter the router control panel, you do not need to connect to the Internet. It just connects to the router.
If you have a high-speed connection on your computer, now it is not necessary. After setting, this connection will install a router.
Before proceeding to setup Netis, you must first connect it. Connect the router to the router. In WAN port (blue) you need to connect the cable from the ELTEX modem.
Next, you need to connect to the router from the device through which you plan to hold the setting. If you have a computer, or a laptop with a LAN port, then it is better to use it. Using a cable that comes in the kit, connect the computer with Netis.
2 Setting up the Internet center to connect to the Internet PPPoe protocol
Go to the menu Internet\u003e PPPOE / VPN and click Add connection To configure Internet connection settings.

If there is no possibility to connect via the cable, or you will customize your Netis from your phone, or tablet, you connect via Wi-Fi. When the router is new, on factory settings, it distributes a Wi-Fi network named, which is indicated from the bottom of the router itself. There also specified a password for connecting to this network. Standard password - Password.

We simply select the network on your device, enter the password and connect.
2 Reset Routher Settings Netis WF2419R
Perhaps the router has already been configured. Changed password, network name, password is set to the entrance to the settings. In this case, so that the old parameters do not interfere with, you can make a reset settings to factory. To do this, hold down the Default button for seconds.

She was recessed into the case, so you need something sharp.
Connected figured out. As a result, we have the Internet and the device from which we will configure must be connected to Netis. Internet access through the router may not be. At this stage, this is normal.
3 Fast Setup Netis Routher
We continue. On the device that is connected to the router open any browser and go to netis.cc. The address must be entered in the browser address bar.

If an error appears and the page with the router settings does not open, then try moving at 192.168.0.1.
If it fails to go to the settings, you first reset the router settings (it is written above) and try going again.
A starting page should be opened on which you can specify almost all the necessary parameters. Namely: configure Internet connection and Wi-Fi network.
There are two sections:
Connection type to the Internet. You need to highlight the connection type that will be used. If this Dynamic IP.In most cases, this is the case, then everything should work immediately. PPPoe - Popular connection type. You need to set the username and password (they are spelled out in the contract).
Installing a wireless communication. Here you need to specify only the name for your Wi-Fi network and password. Come up with a good password and specify it in the appropriate field. It is also desirable to write it somewhere.

Save the settings by clicking on the "Save" button. Everything will be saved without rebooting. A network will appear with a new name (if you changed it). To connect to which you want to use the set password. Internet via Netis should already work. If it does not work, then go in the settings and check the connection.
4 Extended Netis Settings
To open a page with all the settings, click on the "Advanced" button.

Everything is simple here. On the "Network" tab - "WAN" you can configure the connection to the provider (Internet).

Configure Wi-Fi network, install or change the Wi-Fi password, change the channel, etc. You can on the Wireless Mode tab. You can also change the mode of operation of the router to the repeater, client, WDS bridge.

These are all the basic and most necessary settings. We also recommend installing a password that will protect the page with the settings of your router.
5 Setting the password on the web interface
Go to the "System" section - "Password". Specify the username (for example, Admin) and twice enter the password. Password must write down so that then you do not have to make a reset of settings.


Settings are securely protected. And no one can get access to them.
This is all that is necessary for the basic setting of the router.
 Error appearance during program launch
 FRIGATE plugin for Firefox
 How to show hidden folders and files in Windows
 Ways how to make a screen on a laptop brighter or darker
 How to format a flash drive, disk protection
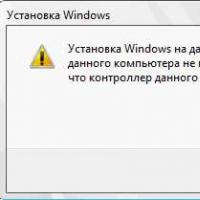 If installing Windows to this disc is not possible
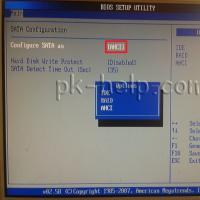 During installation of Windows "Make sure that the controller of this disc is included in the computer's BIOS menu.