Increased the font on the computer how to reduce it. How to make the font larger on a computer and laptop, change it. Changing the general font
Novice users, when purchasing a laptop, do not know how to change the font on it. Of course, this question cannot be answered unequivocally, and you cannot immediately figure out which system you need to change the font in. There is a method of changing the font when it should be changed in the "OS" itself on the laptop. If you need to change the font in the browser, then this is a completely different operation.
There is also a method for the "office" application.
So, it turns out there are three main methods that exist when changing the font on a laptop.
Method one
This method examines changing the font on a laptop in Windows. In this case, first of all, you should open the "start", then open the "control panel". All operations with the operating system are carried out through this control panel. You can also use the device search. It is necessary to enter the function you are interested in in a special search field, and the computer will open this function. It will even come out much easier.
Then select the desired function and just click on this link, a special window should open, in which you can change the font of the laptop operating system. After the changes have been made, you will need to click on the "apply" link and at the end all this is saved by clicking on "ok". The font will be changed immediately after closing this window.
Change the Windows 7 font
Method two
The second method changes the font in the browser. In this case, scaling is carried out. You can do it both with the keyboard and together with the mouse. They can be combined. The combination method will come out much easier than separately.
You need to press the "CTRL" key on the keyboard and then twist the scrolling on the mouse. You can twist it in both directions. In one direction it will decrease the scale, in the other, on the contrary, it will increase. But you can also do this purely with the keyboard, without the help of the mouse. The "CTRL" key is also pressed, and with it a plus key, if you need to increase the scale, with a minus sign, if you need to decrease the scale.
Third method
This method is the simplest. Changing the font in the "office" system on a laptop will take no more than 20 seconds.
You need to select the text, then at the top of the screen (on the left) open the "main" tab, and then the "font" tab and set the font size of interest there.
kakpravilino.com
How to enlarge the font on a laptop in various applications?
The question "how to enlarge the font on a laptop" arises quite often among novice users. There is no definite answer to it. It all depends on the application you are working in. One way can be used in the operating system itself. The browser uses a completely different combination. But for an office suite, you need to use the third method. It is all this that will be considered within the framework of this material.

Windows
First, let's figure out how to increase the font on a laptop in the operating system itself. To do this, you need to go to "Start", then we need a "Control Panel". The easiest way to find the section we are interested in is using the squeak field, which is usually located in the upper right corner. We type in it "Change colors" and press "Enter". In the list that opens, select the item that begins with the entered words. This will open a window with font settings in the operating system. Then you can configure all this at your discretion. For example, you need to change the title. We click on it with the right mouse button. In this case, the type of font used and its size will appear at the bottom of the window. Open the first of them and select the desired type of text design in the drop-down list. In the second, we enter its size. After that, click on the "Apply" button for the changes to take effect. Close the window with "Ok". Likewise, you can change the options for menus, messages, or text. To do this, it is enough to right-click the manipulator on the element of interest instead of the window title. The rest of the procedure is the same.

Browsers
All browsers today allow web pages to be scaled. Moreover, for these purposes, you can use both the keyboard and its combination with a mouse. It is both of these methods that will be described now. The second of them is simpler, so let's start with it. You should have a browser with an open Internet resource on your screen, the scale of which needs to be changed. Hold down "Ctrl" on the keyboard. Then you need to use the scrolling of the mouse. We twist it first in one direction. If the scale changes not in the direction we want, then it is necessary to change the direction. But manipulators are not always equipped with a scroll wheel. In this case, you can solve the question of how to increase the font on a laptop using one keyboard. To do this, hold down the same "Ctrl" and together with it "+" (to increase) or "-" (to decrease).
Office
In the office suite "Microsoft office" you can scale the image in the same way as in the browser. But the question of how to change the font on a laptop is solved differently in this case. First, a fragment of text is selected that needs to be enlarged or reduced (or everything is done before entering it). Then you need to go to the "Home" tab. On it we find the "Font" section. All the necessary parameters are set here. Moreover, if you enter the height of the characters, they will immediately change. This is the answer to how to increase the font of the text.

Outcomes
This article describes how to enlarge the font on a laptop using the example of the Windows operating system, any browser and office suite. As can be seen from everything previously stated, there is nothing difficult in this, and everyone can cope with such a task, regardless of their level of training.
fb.ru
How to enlarge the font on a laptop screen
 How to increase the font on a laptop screen - this question arises for almost all novice users of a laptop and a stationary computer.
The answer to it can be clarifications in the form of possible cases, for changing the font size in some specific programs and applications.
Hello everyone, today on the blog for novice computer users, I will tell you how to enlarge the font on a laptop running the windows 7 operating system.
- If you want to increase the font on the desktop of your laptop, then in the windows 7 operating system, this can be done by following the path: Start> Control Panel> Font. Next, in the left column, select "Change font size":
and then as shown in the screenshot, just select the size you want.
This option has its own nuances (oddities), so after the changes take effect, do not worry. All your actions can be "rolled back" back by returning the previous settings.
This can be done by going through the "Personalization" option, for this, by right-clicking on the desktop, select: Personalization> Screen and then select the font size.
- If you need to enlarge the font in the browser, then going into the settings, let's say Google Chrome, you will immediately notice the "Scale" option, where you can change the size of the picture "for yourself."
You can also use another simple method, when, while in a browser with an open website, while holding down the CTRL key with the mouse wheel, scroll to one side or the other.
- Almost every program associated with writing and creating documents, or graphic editors has its own option to change the size, style and color of the font. Changes are made simply to the point of disgrace, so that a novice user will not be given any difficulty to master these actions.
Thus, today we have learned how to increase the font on a laptop screen. And if you need information on how to enter the BIOS of an asus laptop, then this can be done by clicking on the link.
When visual acuity is poor, enlarging the font and icons of the operating system is only beneficial. Otherwise, large inscriptions only take up too much space and interfere with the perception of information and work. However, it is quite easy to reduce the font on a computer or laptop.
Implementation
Microsoft software developers have incorporated into their operating systems the ability to adjust many parameters for themselves. The user can choose either one of the preset font sizes (Small, Medium or Large), or independently define any other (in dots per square inch).
In the first case, this is done like this:
- press the "Start" button;
- select the item "Control Panel";
- go to the section "Design and personalization";
- in the sub-item "Screen" click on the link "Changing the size of text and other elements";
- in the new window, select the item "Small" or any other;
- press the "Apply" button;
- in the warning window, click the "Exit now" button.
Sometimes "Small" is too small and "Medium" is too large. In this case, you can use another method:
- press the "Start" button;
- select the item "Control Panel";
- go to the section "Design and personalization";
- in the sub-item "Screen" click on the link "Changing the size of text and other elements";
- click on the line "Other font size (dots per inch)";
- in a new window, place the cursor on the scale and hold down the left mouse button;
- move the mouse to the right until the sample size is the most appropriate;
- press the "OK" button;
- in the previous window, click the "Apply" button;
- in the warning window, click the "Exit now" button.
Once you sign in to your account, the font will be exactly what you need. Information on changing other elements can be obtained in our article.
Some text is difficult to see or does not fit at all on the PC screen, so in today's topic we will get acquainted how to reduce, increase the font on the computer using the keyboard and Windows 7, 8. In the first case, we will change the font size as a priority in programs, and some elements of the OS. In the second case, we will change the size of the text and all interface elements of Windows itself.
Changing the font size in programs and individual OS objects
Users are often faced with the need to reduce, increase the font size on the computer screen in programs such as text editors (Word), browsers (Opera, Google Chrome) and others.
In a number of programs, the size of the text changes both at the time of the current operation of the program, and at all times through the settings. It makes no sense to describe the change in the size of the text using the settings, since this process can be very different in different applications. You can easily find information on this on the Internet for a separate program.
Let us describe the process of changing the size of the text with the keyboard and mouse, which is valid for most Windows applications. To reduce the font on a computer using the keyboard, hold down the Ctrl button and press the minus sign (to increase the font size, the plus sign). This combination works for browsers and is very convenient for laptops.
The most versatile way is to hold down the Ctrl key, then, without releasing it, scroll the mouse wheel up to increase the size of the text and down to decrease it. Applicable even in Windows Explorer.

You can also change the font size on the computer to individual elements of Windows 7, 8. The article describes in detail how to change the text size of the desktop icons.
In the previous instruction, the font style of a part and all elements of the OS was changed. Follow the link above to find out how to open advanced customization options.
Not all elements of Windows 7, change the font size is available, however, select the element for which you want to set the size of the text. In the "size" field, click on the current number to select a different value from the list. Having done this with a group of elements, you will fine-tune it.

B, use the small icons view. Find the "screen" option, select it.

At the bottom of the window, you can change the font size for individual elements. In revision 8.1, to access these settings, check the box to select the scale for all displays. Next, specify the element and size of the font. Then click "apply" and wait for the changes to be applied.

Change font size for all Windows objects
The instruction will show you how to increase the font size on a computer or decrease it by changing the number of dots per inch, while all other elements will be displayed more or less. First you need to find the screen settings (described above). In Windows 7, 8 you will have access to a list of sizes in percent (standard "small").
To enlarge the font on the computer screen, select a percentage larger than standard. Next, click the "apply" button and then "exit now".

You can set your own settings. In the seven, click on the left "other font size" (screenshot above). In the figure eight, click Custom Size Options.
In the window "scale selection", set a custom percentage of the size, by choosing from preset percentages, or hold down the mouse button on the ruler and drag to the right to increase, to the left to decrease the percentage. Here you can also track the pixel per inch value. The maximum value is 500%. Be sure to check the box on the WindowsXP style scale options so that there are no problems with displaying text in old programs.

After selecting the required percentage, click OK, then "apply" and "exit now".
You can reduce, increase the font on the computer manually through the registry. or, visit the "Desktop" section (see the picture for details). In the right pane, find the "LogPixels" option, double click to open it. Select the number system "decimal" and set the value in pixels. Then click OK, restart your PC.

Here is a guideline for pixel-to-scale ratio:
If you set a very large size for, then the image may look distorted, fuzzy. Produce and set an acceptable size, or download the registry file, unzip it. Double click to run the reg file, click yes (User Account Control message), then yes, and OK. Then restart Windows.
So you know how to reduce or enlarge a font on a computer using the keyboard of individual components of Windows 7, 8 and programs, and also considered changing the size of the text on the entire screen. Which recommendation to use is up to you.
Do you want to know how to earn 50 thousand monthly on the Internet?
Watch my video interview with Igor Krestinin
=>>
Many beginners, especially older people, have poor computer skills. Sometimes a simple situation can "drive you into a stupor", ruining your mood for the whole day.
For example: you have opened a website, but the print is too small. I would like to read the article, but nothing comes of it, the letters merge, my eyes are watering with tension. Familiar situation?
Today we will look at several ways to increase the size of letters. Choose the method that suits you best.
How to enlarge letters on a computer screen
The fastest, easiest way to enlarge letters is to zoom in on the page using hot keys or the mouse.
I describe the method of "hot" keys:
We press the button - "Ctrl", while holding it, press the button - "+" (plus). If this is not enough, press the plus sign as many times as necessary.
To gradually decrease the scale, press "Ctrl" while pressing the "minus" - "-" key.
Return the scale to its original "default" state - press "Ctrl" and the zero key "0". You can enlarge the letters using the mouse

How to increase the font size on the computer screen using the mouse
Pressing the "Ctrl" key, scroll the mouse wheel. When you rotate the wheel away from you - the scale of the computer screen increases, visually "bringing closer" the text.

When you turn the wheel towards you, the screen scale decreases, "moves away" from you. Return to the "default" state - hold down "Ctrl" and press "0".
If you are visually impaired, you can enlarge the pages in your browser settings. Then you do not have to constantly resort to "hot" keys.
Changing the scale of Internet pages in the browser settings
All browsers have settings that can be adjusted. Usually the icon is at the top right. It can be an image of a wheel or a gear. Yandex browser - an icon of three horizontal stripes.
I'll tell you about the Yandex browser as an example. When you hover the mouse over the icon, a hint appears: "Yandex browser settings". Press the settings icon, select the "settings" item.
A new tab opens - the settings page. Scroll down the page, click the "Show advanced settings" button. Scrolling down the page a little more, we find "Web Content".
Here you will see what font sizes, page scale, are indicated by default. You can change the size of the font, increase the scale of the page by specifying the desired value.

Press the button: "adjust fonts", set the maximum value, the minimum value of the fonts. For example, I will set the maximum value to 16, and raise the minimum value to 10, since by default this value was 0. I will press the "done" button.

You can set the desired values, do not be afraid to experiment, you can always change the settings by returning the original position.
For example, let's look at how to increase font sizes - Google Chrome browser. At the top, to the right of the address bar, there is an icon - three vertically spaced dots. Hover over the cursor, read: "Configuring and managing Google Chrome." We press this icon.
A window drops out, we find the inscription "scale". Right in this window, you can adjust the desired scale by pressing the "plus" or "minus". After that, you no longer have to change the scale of individual pages, it will be the same as you set once.
It is convenient, does not distract from work or reading, and your eyes do not get tired of the fact that letters on different sites are different in size.
I think that now everyone understands the principle of changing the font size or page scale in the browser settings. Therefore, let's move on to other ways to enlarge the letters.
How to increase the font size on the screen through computer settings
To increase the font sizes, you can open the computer settings, then all programs, applications, web pages will open with an increased size of letters.
How to increase the font size on a computer screen - Windows 10
Changing the font size settings - operating system Windows 10. You need to go - "screen settings", increase the letters in the following way:
- "Start";
- "Control Panel";
- "Design and Personalization";
- "Screen";
- "Change only the text size" - select the required font size for all sections, be sure to click the "apply" button.
You can click on the screen with the right mouse button - "Screen settings", a page will open, at the bottom click: "Additional screen settings", the following window will open, there you need to click on "Additional changes to the size of text, other elements", then - "Change only dimensions text ".

You can increase the text size for:
- Window title;
- Message window,
- Menu and icons;
- Hints.

At the same time, elements such as tooltips will not be affected by the changes, since they use themes in modern versions of Windows.
Only the old type tooltips will change, which you will see by hovering the cursor over the button "Close", "Minimize", "Minimize", "Window".
How to increase the font size on a computer screen - early versions of Windows
In other versions of Windows, you can also change the size of the letters. As far as I remember, you need to do it in the following way:
Click in the sequence:
- "Start";
- "Control Panel";
- "Registration";
- "Screen";
- "Resizing text and other elements."
A warning window will pop up - "when setting the average font size, some elements will not be able to fit on the screen." This is not a big deal, because when the elements do not fit, horizontal scrolling is automatically turned on.
After all the actions taken, you need to restart the computer for all the settings to start working.
How to increase the font size on a computer screen - conclusion
As you can see, the steps described are identical to those in Windows 10. To summarize, I think that after reading this article you will not have any difficulties with font enlargement or scaling.
Now you can easily cope with the task! And to blog readers who have difficulty working with a computer, I would advise you to study it thoroughly. On my blog, there is an article "" on this topic.
Write a comment, in what ways do you enlarge the letters, or change the scale?
P.S. I am attaching screenshots of my earnings in affiliate programs. And I remind you that everyone, even a beginner, can! The main thing is to do it correctly, which means to learn from those who are already earning money, that is, from professionals.
Do you want to know what mistakes beginners make?
99% of newbies make these mistakes and fail in business and making money on the Internet! Take a look so as not to repeat these mistakes - “3 + 1 BEGINNER ERRORS KILLING THE RESULT”.Do you urgently need money?
Download for free: “ TOP - 5 ways to make money on the Internet”. 5 best ways to make money on the Internet, which are guaranteed to bring you results from 1,000 rubles per day or more.


In this article, we will introduce our readers to fonts in the Windows 7 operating system. After installation, the Windows 7 operating system has dozens of different fonts in its set. These fonts are used in the installed programs of the operating system. For example, these fonts can be used in the built-in text editor WordPad, as well as in popular programs such as LibreOffice and Adobe Photoshop. After reading this material, you will learn how to install new fonts on your own, and you will also be able to change the font in the Windows 7 windows themselves. In addition to the fonts in the seven, we will briefly describe them in Windows 10, and also remember the old XP.
Installing new fonts
Consider installation in Windows 7... The first thing we need to do is find new fonts. The site www.1001fonts.com will help us out in this, where you can find dozens of free fonts... For our purpose, we will download a new character set called Metal macabre.
Now unzip the Metal Macabre archive and open the MetalMacabre.ttf file. After this action, the file will open in a special utility for viewing alphabetic and numeric characters.
In this utility, you need to click the Install button. This action will install Metal Macabre into the system. You can view the installed Metal Macabre in the shared folder where all the fonts installed in the system are located. You can open this folder in the control panel, as well as using the application " Execute»And fonts commands
In this folder, in addition to viewing all installed character sets, they can also be deleted. In fact, in this folder, we delete the regular file with the ".ttf" extension.
Now let's look at the installation in Windows 10... For this example, let's take a new font from www.1001fonts.com called The godfather.

After downloading and unpacking The Godfather archive, open the TheGodfather-v2.ttf file. After this action, an almost identical utility for installing The Godfather will open.
All further steps for installing the new The Godfather character set are similar to installing Metal Macabre in Windows 7, so you can safely click the Install button. The only difference between Windows 10 and Windows 7 is the new option “ Use shortcut". By checking this box during installation, for example, TheGodfather-v2.ttf this file will not be copied to the fonts folder, but a link to this file will be installed. That is, the file TheGodfather-v2.ttf, for example, located on the desktop and will be the font The Godfather in Windows 10. After deleting this file, The Godfather will disappear from Windows 10. It is also worth noting that you can also delete fonts through the panel " Fonts».
Now let's consider the installation into an already fairly old OS. Windows XP... To do this, download the new Grinched character set.

Just like in the previous examples, let's run a file called Grinched.ttf. After opening the file, a window will appear with a program already familiar to us.
In Windows XP, this utility has an old interface, but the principle of operation is the same. Also, the Windows XP utility does not have an Install button. To install a new character set in Windows XP, you need to go to Control Panel and open the add-in " Fonts". In the add-in that opens, you need to find the item " Install font"And open it. In the window that appears, select our previously downloaded file Grinched.ttf.
You can also delete Grinched.ttf through this panel.
Changing system fonts in windows 7
The default 7 for all explorer windows and built-in utilities mainly uses the font Segoe UI... In the most Windows 7 can change the font and its color in such eight elements:
- Tooltip;
- Highlighted menu item;
- Active window title;
- Inactive window title;
- Icon;
- Panel name;
- Message window;
- Menu bar.
The process of change itself is carried out in the window " Window color". You can get to this window through the context menu of the desktop. To do this, click on the active desktop with the right mouse button and go to the item " Personalization"As shown in the image below.

As intended, this action will transfer us from the desktop to the personalization panel.

For example, we will replace the standard character set Segoe UI on the Times New Roman in the element " Active window title". We also set Times New Roman to size 12 and made it red. To check our changes, let's open the standard calculator.

In the image above, you can now see the red heading "", which uses Times New Roman. In the same way, you can make a change in all other elements from the above described list.
If you try to make such changes in a new Windows 10 then you won't succeed. In Windows 10, instead of the window " Window color»The user is taken to a panel where only the color of the windows can be changed.
Fixing font issues
The most common problem on a computer with Windows 7 which is encountered by users is wrong character encoding... For example, when there is an incorrect encoding, incomprehensible hieroglyphs may appear instead of normal Russian-language menu items. A program with such a problem is shown below.
Most often this problem is on Windows 7 occurs due to the installation of programs that change the registry settings... Also, this problem occurs when installing the English version of Windows 7. This problem is solved quite simply. To do this, go to the control panel and find the add-on " Language and Regional Options". After opening the add-in, you must go to the " Additionally».

In this tab in the block " Language for non-Unicode programs»It is clear that the language is English. To solve our problem, it is enough to select the Russian language and restart the computer.
Windows 10 solves this problem in a similar way.

Another problem is error message: « Windows Font Cache Service failed to start».

This means that the service FontCache stopped or cannot start due to registry errors. Typically, this error appears when opening a program that uses system fonts, but most often in a Microsoft Office suite. To cure this problem, you must restore the service startup settings to their original state. Launch the services panel, where you can find the one we need FontCache you can use the services.msc command in the application “ Execute". Below are the windows with settings for the FontCache service.
By restoring the FontCache service settings, the error should be gone. If the problem persists when restoring the service settings, then you must use the example described below. For this example, you will need a registry file that restores the FontCache service to work. You can download the file with the registry by following the link FontCache.reg. After downloading the file, open it to update the registry settings.

Changing the font size in Windows 7
To change the size in all windows of the seven, you need to go to the control panel using the links " Appearance and personalization"-" ". After clicking on the links, such a window will open.
In this window you can see that we can increase the font size from 100 percent to 125. If the 25 percent increase is not enough for you, then you can increase the size even more by clicking on the link “ Different font size"Located on the left side of the window. After the transition, the window shown below should appear.

In this window, the user is given the opportunity to increase the font size from 100 percent to 200. This way of capturing is especially convenient when the monitor is far away or the user has low vision. The only downside to this size increase is that some third-party programs won't scale.
Summing up
In this article, we tried to outline all the basic principles of working with fonts in Windows 7. In addition, although we briefly, but described some aspects of working in Window XP and Windows 10. We also described how to fix the most common problems. Based on the presented material, we hope that it will help our readers to master the principles of working with fonts on a computer with Windows 7.
Related Videos
 How to send on a megaphone waiting for a call
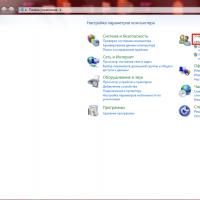 Setting a password on a computer How to set a code on a computer at startup
 What is ESD format Open install esd
 How to format a mobile phone
 Information satellite systems named after academician M
 Independent rating of the best Russian blogs LiveJournal blogs in Russian top 50
 How to set up a microphone on a laptop