Reducing the size of the VHD virtual disk (x). How to reduce the size of the disk in Hyper-V to reduce the size of the virtual disk
Unlike the VMware virtual machine extension procedure, which can be performed directly "on-fly", the procedure for reducing the VMDK file on the VMware ESXI hypervisor task is more complex, and it is not possible to perform it directly via the VSphere CLIENT graphical interface - it is not possible to specify a smaller size simply will not work.
Note
Note that in the latest version of the Microsoft hypervisor - there is a technology of dynamic change (both expansion and compression) virtual disks called Hyper -V Online VHDX Resize.
This instruction is not a formally supported solution on the compression of VMDK discs, but the author of the article in the productive environment has been applied more than once. When writing this article, ESXI 5.1 was used.
Before implementing the procedure for reducing the size of the virtual disk on VMware ESXI, it is necessary:
Remove all the snapshots of the virtual machine, otherwise you can damage the virtual disk
Create a full backup of the virtual machine or simply make a copy of the dimmable file of the file using commands:
cp vmname.vmdk backup_vmname.vmdk cp vmname-flat.vmdk backup_vmname-flat.vmdk
The procedure for reducing the size of the virtual disk consists of two stages:
Decreased partition inside the guest OS
Reducing VMDK VMWare Virtual Machine File Size
Decreased partition inside the guest OS
First of all, it is necessary to reduce the size of the disk partition inside the guest operating system. This can be made from the disk management manager (SHRINK VOLUME operation supported from Windows Vista) or with third-party utilities (for example, Acronis Disk Director). If this is not done, you can get an inoperable file system after compressing the virtual disk.

Suppose we want to reduce the size of the disk by 19, 5 GB. This means the volume of volume should be reduced by 19968 MB (19.5 GB x 1024). This value must be entered in the SHRINK VOLUME wizard field. After decreasing the size of the section on our disk, there will be some amount of unbalanced space (in our example 19.5 GB)

Reducing VMDK VMWare Virtual Machine File Size
Go to the second operation - directly changing the size of the VMDK file on the VMware VMFS file system.
Turn off the virtual machine, the size of the virtual disk of which you want to reduce
Connect to SSH to the ESXI hypervisor console on which VM is registered
Go to the directory in which the VMDK file is stored (the path can be found in the virtual disk properties in the VSphere graphic client):
cD / VMFS / Volumes / DataStore / VM-Name
 4. Review the contents of the configuration file with the * .vmdk extension using the CAT command:
cAT VM-NAME.VMDK
The size of the VMDK disk is set in the #EXTENT description section (after RW characters). In this case, the figure 83886080 (40 GB * 1024 * 1024 * 1024/512)
 5. We want to reduce the size of the VMDK disk from 40 to 20 GB. This means that in the Extent Description section you need to specify the value: 41943040 (20 GB * 1024 * 1024 * 1024/512). Specify the new size of the virtual disk using the text editor (VI or NANO).

6. It remains to clone or migrate (Storage VMotion) a virtual machine to another storage (DataStore). After moving the virtual machine files, the new size of the virtual disk will appear in its properties.
If vcenter is missing, or VMFS storage one, these operations are not available. In this case, you can clone the VMDK disk by the command:
vmkfstools -i vmname.vmdk vmname-new-size.vmdk
Remove the original disk and clone the VMDK disk again, returning it to the old name:
rM Vmname-Flat.vmdk
vmkfstools -i vmname-new-size.vmdk vmname.vmdk
 7. It remains to run the guest OS and make sure that the indiffered area has disappeared.
Council. If the VMKFstools utility was used in the previous step, it may be necessary to reconnect the virtual disk in the settings of the VM, because Its new size can be displayed incorrect.

So, we looked at one of the options for performing a virtual VMDK disc size reduction operation on VMware ESXI. If required to reduce the size of the VMWare thin disk due to the unused place, we recommend using this instruction.
There are several virtual machines at work, running the ESXI 5 hyperviser, when created discs made them thin, at some stage the size of the disk occupied increased, although I deleted the data in the virtual server, the disk remains the same size as you can compress the disk?
Thin (Thin) VMware wheels allow you to significantly save space on the VMFS storage file system when creating a virtual machine. Such VMDK discs when creating practically do not occupy the location system and gradually grow to the maximum size as information accumulates. However, the main problem when using Thin disks is that they are growing with time even if you have been released within the guest operating system.
Note. When you delete data in Windows OS (and Linux it also concerns) the system does not fill out with zeros, but simply marks the area as deleted in the section metadata (they can be used to record). It turns out that the ESXI server cannot independently determine which blocks given to it are actually free
There is no standard means of compressing thin disks in ESXi, and the virtualization system itself knows nothing about the storage features of the data inside the guest OS.
In this article we describe a simple way to compress the thin VMDK disk in ESXI.
- At the first stage, it is necessary to help the hypervisor by filling out all the free space on the disks inside the guest ral-zero. You can use free blocks in Windows using the SDELETE Rusinete Mark utility (at the time of writing the article The latest available version of SDELETE v1.61, if you use earlier SDELETE versions Keep in mind, it can use some other parameters). You can download SDELETE here: http://technet.microsoft.com/en-us/sysInternals/bb897443.aspx.
Unpack the archive to disk, open the command line (naturally, with administrator rights) and run the following command
SDELETE -Z C:
In this case, C: - This is a virtual thin VMDK disc that we plan to compress.
In Linux, this operation can be performed with Help DD
DD if \u003d / dev / zero bs \u003d 64k of \u003d zero.temp; RM Zero.Temp
- Turn off the guest OS (Shutdown).
Note. You can squeeze the disc by migrating a virtual machine to another storage (Storage VMotion). However, we note that this method is not universal and only works when complying with certain conditions.
- Connect to the ESXI SSH server under the root (do not forget to enable the SSH service and allow the incoming traffic on the ESXI firework). Go to the catalog with virtual machine files:
CD VMFS / VOLUMES / STORAGE1 / VM1where Storage1 is the name of the repository, and the VM1 is a directory in which the files with VMDK virtual machines are stored
- Withdraw the "full" size of the virtual disk.
LS -LH * .vmdkThe "real" size of the virtual disk, which it takes on the file system can be found as follows:
Du -h * .vmdk
As you see, THIN disk occupies a 33 GB storage (maximum size of 40 GB). Moreover, inside the Windows guest OS is busy only 15 GB.
- Squeeze the VMDK disk using vmkfstools. Thin Disk Compression Team will look like this:
vmkfstools --punchzero /vmfs/volumes/storage1/vm1/vm1.vmdkThe compression procedure in our example took about 5 minutes (speed on the size of the disk and speed and loading of the storage and SAN network). After the compression procedure is completed, check the current size of the VMDK file.
How do you see vmdk disc shrinking up to 15 GB!
Note. If the discs are several, this procedure must be performed for each.
Whatever big storage, the place is sooner or later on it ends.
It is quite a long time dealing with "Varai" and developed for myself such a rule: create a virtual machine minimum size, you always have time to expand the discs. Reduce discs will then be much more difficult.
But one day the moment comes when it comes from.
And this can be done in several ways:
1) Perform Shrink or Compact.. For VMware Esxi you can do Shrink Through the VMware Tools interface installed on VM. Or through the VSphere Administration Interface. For VMware Workstation you can do Compact. In the properties of the VM in the disk properties.
May not work.
2) Reduce the size of the disk through its cloning:
- Add another disc of the desired size (smaller) to the VM for which we want to reduce the disk.
- We download the VM from the boot disk of third-party cloning programs (Acronis True Image or Ghost32 (Symantec Norton Ghost) or the like).
- Cloning the contents of a large disk to small.
- Delete a large disk from VM
3) Reduce the size of the disk through the conversion of VM using VMware VCenter Converter. When converting, you can specify the size of the resulting disk less than the original.

13.03.2014
Important. This instruction is not a formally supported solution on the compression of VMDK discs, but the author of the article in the productive environment has been applied more than once. When writing this article, ESXI 5.1 was used.
Before implementing the procedure for reducing the size of the virtual disk on VMware ESXI, it is necessary:
- Remove all the snapshots of the virtual machine, otherwise you can damage the virtual disk
- Create a full backup of the virtual machine or simply make a copy of the dimmable file of the file using commands:
cp vmname.vmdk backup_vmname.vmdkCP Vmname-Flat.vmdk Backup_Vmname-Flat.vmdk
The procedure for reducing the size of the virtual disk consists of two stages:
Decreased partition inside the guest OS
First of all, it is necessary to reduce the size of the disk partition inside the guest operating system. This can be made from the disk management manager (SHRINK VOLUME operation supported from Windows Vista) or with third-party utilities (for example, Acronis Disk Director). If this is not done, you can get an inoperable file system after compressing the virtual disk.
Suppose we want to reduce the size of the disk by 19, 5 GB. This means the volume of volume should be reduced by 19968 MB (19.5 GB x 1024). This value must be entered in the SHRINK VOLUME wizard field. After decreasing the size of the section on our disk, there will be some amount of unbalanced space (in our example 19.5 GB)
Reducing VMDK VMWare Virtual Machine File Size
Go to the second operation - directly changing the size of the VMDK file on the VMware VMFS file system.
- Turn off the virtual machine, the size of the virtual disk of which you want to reduce
- Connect to SSH to the ESXI hypervisor console on which VM is registered
- Go to the directory in which the VMDK file is stored (the path can be found in the virtual disk properties in the VSphere graphic client):
CD / VMFS / Volumes / DataStore / VM-Name - We will review the contents of the configuration file with the * .vmdk extension using the CAT command:
CAT VM-NAME.VMDKVMDK disk size is set in section #Extent Description. (After RW characters). In this case, the figure 83886080 (40 GB * 1024 * 1024 * 1024/512)
- We want to reduce the size of the VMDK disk from 40 to 20 GB. This means that in the Extent Description section you need to specify the value: 41943040 (20 GB * 1024 * 1024 * 1024/512). Specify the new size of the virtual disk using the text editor (VI or NANO).
- It remains to bow or align (Storage VMotion) a virtual machine to another storage (DataStore). After moving the virtual machine files, the new size of the virtual disk will appear in its properties.
Council. If vcenter is missing, or VMFS storage one, these operations are not available. In this case, you can block the VMDK disk by the team:
vmkfstools -i vmname.vmdk vmname-new-size.vmdkDelete the original disk and block the VMDK disk again, returning it to the old name:
Rm vmname.vmdk.RM Vmname-Flat.vmdk
Vmkfstools -i vmname-new-size.vmdk vmname.vmdk
- It remains to run the guest OS and make sure that the unintended area has disappeared.
Council. If the VMKFstools utility was used in the previous step, it may be necessary to reconnect the virtual disk in the settings of the VM, because Its new size can be displayed incorrect.
So, we looked at one of the options for performing a virtual VMDK disc size reduction operation on VMware ESXI. If required to reduce the size of the VMWare thin disk due to the unused place, we recommend using this instruction.
Note. As common alternative methods for compressing virtual VMDK discs, such schemes are often used:
- Reducing the size of the virtual disk by converting the virtual machine using VMware VCenter Converter (the size of the resulting disk is less than the original)
- Cloning the contents of the virtual disk using third-party software (for example, Acronis True Image or Symantec Ghost32). The operation is performed by adding a smaller disk to the virtual machine of a smaller disk and cloning the contents of a larger disk. After that, the big disk is removed.
Reducing the size of the virtual disk through converting using VMware VCenter Converter Standalone
Another way to reduce the size of virtual disks at the VM on the VMware with the help of the GUI is to use the free converter - VMware VCenter Converter Standalone.
Failure:
- The method is not fast
- no need to open in the Console VCenter or ESXI host
- create an exact copy of VM
- the source will not break in case of error in assigning the parameters of the conversion task
Below step-by-step instructions
Note. The cartoon machine that is going to convert (change disk size, etc.) must be turned off.
It is turned off.
That is, before conversion, on the source virtual machine, you must perform: shut down or power off, and not Suspend..
Indicate the address of the ESXI host.
Select the original VM.
Indicate the parameters of the new VM.
Go to DTA Edit Mode (Data to Copy -\u003e Edit)
Select Copy Mode: Select Volumes To Copy
Indicate the desired disk size in the new VM. As you can see, there are 48 GB on the disc in the guest, and the size of the disc itself is 150. We will reduce it to 60 GB.
Run the conversion process, turn off the original VM, turn on the new one. We check that the disc size decreased, after which the initial VM can be deleted.
Important.This instruction is not a formally supported solution on the compression of VMDK discs, but the author of the article in the productive environment has been applied more than once. When writing this article, ESXI 5.1 was used.
Before implementing the procedure for reducing the size of the virtual disk on VMware ESXI, it is necessary:
- Remove all the snapshots of the virtual machine, otherwise you can damage the virtual disk
- Create a complete or simply make a copy of the dimmable VMDK file using commands: CP vmname.vmdk backup_vmname.vmdk CP VMName-Flat.vmdk Backup_vmname-Flat.vmdk
The procedure for reducing the size of the virtual disk consists of two stages:
Decreased partition inside the guest OS
First of all, it is necessary to reduce the size of the disk partition inside the guest operating system. This can be made from the disk management manager (Operation supported from Windows Vista) or using third-party utilities (for example, Acronis Disk Director). If this is not done, you can get an inoperable file system after compressing the virtual disk.

Suppose we want to reduce the size of the disk by 19, 5 GB. This means the volume of volume should be reduced by 19968 MB (19.5 GB x 1024). This value must be entered in the SHRINK VOLUME wizard field. After decreasing the size of the section on our disk, there will be some amount of unbalanced space (in our example 19.5 GB)

Reducing VMDK VMWare Virtual Machine File Size
Go to the second operation - directly changing the size of the VMDK file on the VMware VMFS file system.
- Turn off the virtual machine, the size of the virtual disk of which you want to reduce
- Connect to SSH to the ESXI hypervisor console on which VM is registered
- Go to the directory in which the VMDK VM file is stored (path you can find in the virtual disk properties in the VSphere graphic client): CD / VMFS / VOLUMES / DATASTORE / VM-NAME

- Browse the contents of the configuration file with the * .vmdk extension using the CAT command: Cat VM-Name.vmdk
VMDK disk size is set in section #Extent Description. (After RW characters). In this case, the number is indicated 83886080 (40 GB * 1024 * 1024 * 1024/512)

- We want to reduce the size of the VMDK disk from 40 to 20 GB. This means that in the Extent Description section you need to specify the value: 41943040
(20 GB * 1024 * 1024 * 1024/512). Specify the new size of the virtual disk using the text editor (VI or NANO).

- It remains to bow or align (Storage VMotion) a virtual machine to another storage (DataStore). After moving the virtual machine files, the new size of the virtual disk will appear in its properties.
Council. If vcenter is missing, or VMFS storage one, these operations are not available. In this case, you can block the VMDK disk by the team:
Vmkfstools -i vmname.vmdk vmname-new-size.vmdk
Delete the original disk and block the VMDK disk again, returning it to the old name:
Rm vmname.vmdk Rm vmname-Flat.vmdk vmkfstools -i vmname-new-size.vmdk vmname.vmdk

- It remains to run the guest OS and make sure that the unintended area has disappeared.
Council. If the VMKFstools utility was used in the previous step, it may be necessary to reconnect the virtual disk in the settings of the VM, because Its new size can be displayed incorrect.

So, we looked at one of the options for performing a virtual VMDK disc size reduction operation on VMware ESXI. If it requires to reduce the size of the VMWare thin disk due to the unused place, we recommend using the instruction.
Note. As common alternative methods for compressing virtual VMDK discs, such schemes are often used:
- Reducing the size of the virtual disk by converting the virtual machine using VMware VCenter Converter (the size of the resulting disk is less than the original)
- Cloning the contents of the virtual disk using third-party software (for example, Acronis True Image or Symantec Ghost32). The operation is performed by adding a smaller disk to the virtual machine of a smaller disk and cloning the contents of a larger disk. After that, the big disk is removed.
Reducing the size of the virtual disk through converting using VMware VCenter Converter Standalone
Another way to reduce the size of virtual disks at the VMWare with the GUI can be used by the free converter.
Failure:
- The method is not fast
- no need to open in the Console VCenter or ESXI host
- create an exact copy of VM
- the source will not break in case of error in assigning the parameters of the conversion task
Below step-by-step instructions
Note.Virtual machine that is going to convert (change the size of the disks, etc.) should be disabled.
It is turned off.
That is, before conversion, on the source virtual machine must be performed: Shut Down. or Power Off, but not Suspend..
Indicate the address of the ESXI host.
 Select the original VM.
 Indicate the parameters of the new VM.
 Go to DTA Edit Mode (Data to Copy -\u003e Edit)
 Select Copy Mode: Select Volumes To Copy
 Indicate the desired disk size in the new VM. As you can see, there are 48 GB on the disc in the guest, and the size of the disc itself is 150. We will reduce it to 60 GB.


Run the conversion process, turn off the original VM, turn on the new one. We check that the disc size decreased, after which the initial VM can be deleted.
 How to pay a domain name
 Domain zone of tokelau islands
 What is domain what problems may be
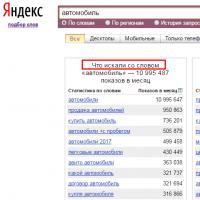 Yandex Wordstat: detailed instructions for using the service and grouping operators and a complicated request
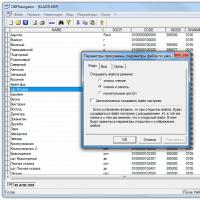 Editing DBF files
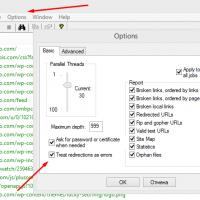 Xenu Link Sleuth - What is this program how to use the Xenu program
 Methods Copy and insert text from keyboard without using mouse