Remove the cooler from the processor. Self Replacement Cooler in Laptop Silent or Quiet Fan for CPU
The computer overheats, you decide to change the thermal paste. OK. but it was not there!
This article will tell how correctly and safely remove the cooler from the processor. Trying to tear the fan accurate to the CPU great chance to damage the "heart" of your computer. How to avoid this? I will try to describe the correct algorithm and possible situations, drove.
How to remove the fan from the processor: an algorithm of action.
1. The computer must be completely disconnected before starting. This is understandable, another thing: Is it worth waiting for full cooling?
Give cool radiator - opinions are diverged.
On the one hand, this is true: CPU can warm up to 90 degrees, burn hands. But at high temperatures of the thermal paste, which is located between the processor and the fan more advantage; In other words, in a dry condition, the process of removing the cooler can be a real problem. But it does not work for all types of thermal paste. CCT-8 will not roll: it is still a color at any temperature.
I advise you to remove the fan when the radiator has not yet cooled. When touching it, the hand will be warm, but not hot.
2. Turn off the power of the cooler.
To do this, pull the plug strictly vertically.
Any loosening is unacceptable. Break the needle.
3. Remove fan mount.
The fastener type depends on the motherboard and each specific device. On some computers are used brackets, on others - some latches. At first, it seems to be a problem, but in fact - nothing over complex.
If there are bolts, then unscrew them vsclockwise.
4. Above was a foreplay, now we will perform the action. When everything is disconnected, pull out the cooler with the radiator. And here they will come. PROBLEMS.
With 90% probability of the CPU in the literal sense of the word adhesion to cooling. Because of the thermal paste. Be extremely careful: loosen up and down, go to the right, clockwise, etc. Gradually Increase strength and amplitude. Hurry or immediately, excessive efforts are prohibited.
Do not be surprised and not scared if you pull out the processor from the native socket.
P.S. Turn on the computer without a fan is to kill the processor. With warranty and control shots. Do not do it this way. Also before assembly, do not be lazy, good luck!
Computer cooling system - It consists of components that implement heat removal from components heated during the stationary computer or laptop. Often use the air cooling system, as it is a simple and cheap technology. Our wizards can replace the cooler or computer cooling system at home or in the office in Moscow and MO.
Principle of operation of the cooling system - This is a direct transmission of heat when the component is heated (processor, video card, etc.) on a specialized radiator with good heat-conductivity, heat pipes are also used.
Principle of operation of the PC cooling system:
Radiator (heat exchanger) Gives the resulting heat from the heating element into the surrounding space by means of heat radiation or the cooler is not rarely used, with the help of it there is an additional cooling of the radiator or heat tubes. To increase the thermal conductivity on the heating elements (the video card, the processor, individual elements on the motherboard) are applied by a specialized thermal, since the direct contact of the elements should not be allowed.
- Purchase air into the computer external and side fans;
- Distributes difty air on a computer center cooler and processor radiator;
- Displays heat from the system using the rear fans through the computer grilles.
Cooler (fan) - It is installed additionally on the radiator with an increased heat generation of the cooled element (usually more than 5 W): a graphic video processor, a central processor, a power supply, chipset chip, on the system of the computer's system block. One of the reasons for which the computer can turn off during operation is a cooling system malfunction, the fan failed more precisely. In this case, the fan replacement is necessary. Our masters replace the computer cooler cooler at home or in the office.
Prices for repairing PC cooling systems
Efficient cooling for computer
.jpg)
For An increase in the effective area of \u200b\u200bheat dissipation is set additional coolers on the system unit housing and on such devices as a hard disk, motherboard, RAM modules and others.
Tip: Install one large fan on the side cover of the computer, it will improve the cooling of the central processor and 70% will be more efficient to cool the motherboard with all electronic compaments.
Constantly clean the cooling system from dust and dirt;
Clean In the system, a vacuum cleaner with a special nozzle and a sprayed aircraft, such components like:
- Housing and wires;
- Motherboard and radiators;
- CPU;
- Power supply cooler;
- Front and rear coolers.
Tip: Disassemble the case before cleaning, disconnect all the wires and remove all the fans, it will be more efficient.
All our employees have extensive experience.
And certified by manufacturers!
Periodically, you need to change the thermal paste;
It is necessary to change the thermal interface on the computer processor, by a complete palair and radiator panel.
Tip: The thermalcolus should be changed once a year, otherwise the processor will overheat.
The computer must be installed on the floor away from heat sources;
As is known from the lessons of physics, the density of cold air is greater than a warm, so the computer must be installed on the floor into a special stand that protects the system unit from the dust leaf.
Tip: Do not put the computer close to radiators, air conditioners or climatic stations.
Signs of a faulty computer cooling system:
- When you turn on the computer makes noise that sinks over time;
- The computer may sound unexpectedly;
- Very hot: processor radiator, motherboard, hard disk, video card;
- The computer is slowly loaded;
- Temperature monitoring sensors show critical value.
Repair and prevention
Most often noisy fans due to, that they are broken (they need to be cleaned and consolidated);
Sometimes fans are badly rotated (it is necessary to lubricate them with machine oil);
If, during, not to make the first two points, the fan will be out of order of bearings (you need to buy a new fan);
Once a year you need to change the thermal chaser on the processor (if it does not help, then the upgrade of the cooling system);
It is necessary to follow the purity of all radiators, and if necessary, add them cooling.
Masters of the company Service number 1:
- Will make prevention of the cooling system at home - free of charge;
- They determine the profitability and cost of repair;
- With mutual agreement with the customer will make repair or replace the computer cooling system;
- Will be briefing to properly work on the PC;
- Leave a contract with a guarantee to 2 years.
All active components of the computer are highlighted heat. Especially a lot of heat allocates processor, video card, RAM and power supply. Natural air circulation does not always allow you to remove the selected heat to reduce the temperature of the elements below the maximum permissible, which should not exceed 80 ° C.
The optimal heating temperature for the operation of semiconductor devices lies in the range up to 60 ° C. This question is especially relevant in the summer, when the ambient temperature reaches 30 ° C. When overheating, the processor begins to slow down the work, fails and leads to the enlightened computer. It rarely fails, since there is a thermal protection scheme.
Program for measuring processor temperature
In order to be able to learn and control the temperature of the computer and video card in their kernels in their kernels in their kernels. In modern computers, the CPU temperature can be found by going to the BIOS. But restarting the computer during operation on it is inconvenient, and during the rebooting time the load on processors will decrease and the measured temperature will be lower than during the maximum loading of processors.
But this issue is easily solved using the program. It is enough to run the utility and can monitor the temperature mode of the computer's CPU. Programs, as a rule, provide many more additional information on the computer.
I offer you two simple programs that have tested for monitoring the temperature mode of processors that can be downloaded directly from my site. These utilities are not required to be installed, just run enough and immediately in the pop-up window see the CPU temperature and many other computer parameters.

Depending on the type of cooler, the connectors are used two, three and four contacts. On a two pin connector, the supply voltage is supplied with wire black red Wire (+12 V).

The three-pin connector supply voltage is supplied in the same way as on the two-contact, wire black colors (-12 in, first conclusion) and red Wire (+12 V). But another conductor has been added yellow Colors according to which the Hall Cooler Speed \u200b\u200bSensor is transmitted to the motherboard. This conductor does not take part in the work of the cooler, as it is information and allows you to control the speed of rotation on the monitor. Connect yellow The wire is not necessarily, without it, the cooler will also work successfully.

The four contact cooler color of the wires differ. The black - -12 in, yellow - +12 in, green - rotation speed sensor, and blue - To feed the speed control signal from the motherboard. On the motherboard next to the connector for connecting the processor cooler, the CPU_FAN marking is usually applied, as in the photo below.
On the motherboard, in addition to the connector for connecting the processor cooler, several more connectors are set. All of them are one type and easy to find them. One three-pin connector is designed to connect a cooler installed in the system side housing. Next to him usually there is an inscription SYS_FAN. Another or two is also three-pin without inscriptions. They are usually free and can be connected to them, if necessary, connect another or two additional coolers.
Four wired coolers are rarely used. Typically, the speed of rotation of the cooler is adjusted by changing the supply voltage, which varies depending on the temperature of the processor heating.
Work should be done very carefully, make sure that the tool does not randomly slid and did not hit the motherboard. Sometimes it is difficult to get to the latches and it is easier to remove the radiator entirely and then remove the cooler. But here you have to be prepared for what we will have to be applied to the surface of the radiator and the processor a thin layer of heat-conducting paste, instead of the fed.
Replace such a cooler to the standard possible. It is enough to make several fasteners. Specifications are good for replacement suitable cooler, from the power supply of the computer. Sometimes, the cooler of this size for additional cooling is installed in the system unit housing.

Of the broken plugs from the system unit, from the place to install additional cards, 2 planks made. Screwed them to the cooler twisted when it dismantled with 4 screws. From the noise cooler cut off the feeding wires and connected them with the conductors of the new technology with a shift. Red wire (+12 V) is connected to red, black (-12 in, common) with black. Even if you accidentally connect incorrectly, nothing happens, just the cooler will not work. The yellow wire, according to which the signal is transmitted from the cooler about the rotational frequency, did not connect. I do not like it when all the time with the "overestimation" changes the frequency of the cooler impeller. Therefore, the lack of feedback does not confuse me.

On 2 self-press, through the lumens in the impeller brought the cooler to the processor radiator. Self-tapping screws need to choose this diameter to ensure their reliable fixation. If the self-tapping screw, during the computer, accidentally falls on the motherboard, it can bring it out of order.

Tests, after replacing the cooler, showed the quiet operation of the computer and sufficient cooling of the processor at ambient temperature more than 30 ° C. The temperature of the processor at full load, according to the BIOS readings, did not exceed 60 ° C.
Replacing the cooler of the video card
In all video cards, the coolers of the original structures are installed, and it is almost so practically impossible to purchase, especially if the card worked for many years.
Replacement cooler with a standard fan
The cooler on the video card began to noise firmly. I decided to smear the bearing, disassembled and found that the plastic base of the impeller in cracks.

Lubrication in this case will no longer help, the cooler replacement is required. Picked up the diameter of the impeller cooler, caught with a large size. So, it will be even better to cool than standing native cooler.

When selecting a new cooler, it is necessary to take into account the size of the ribs of the radiator, so as not to make additional fasteners and twist the screws right in the grooves between his ribs. Passed by two self-tales, which turned out to be quite enough, as the ribs of the radiator turned out to be quite rigid. You can fix on four screws. If you do not want to put on self-drawing, you can successfully tie the cooler with a thick thread to the ribs of the radiator from two opposite sides. It will be kept, no worse.

The supply voltage video card was supplied to a regular video card cooler through a two-contact connector. The new one was with three contacts. In order not to do additional work, installed the video card into the slot and connected the cooler to the motherboard. They almost always have free three-pin connectors for connecting additional coolers. On the cooler, which was previously on the video card, there was no label and it was possible that it was designed for the supply voltage of 5 V. on this, if you replace the cooler to connect to the connector on the video card, pay attention to the compliance of the supply voltages.

Check showed quiet work and sufficient cooling of the video processor.
Standard cooler for installation in a video card
The computer began to hang, when it was autopsy, it was found that the impeller of the cooler installed on the video card does not rotate.

After removing the cooler, it became obvious that it was not subject to repair. The microcircuit, the adjusting speed of rotation of the cooler burned down, as a result of which the stator winding was charred, and the cooler overheat was falling apart.

It was possible to screw the standard cooler to the radiator, as in the previous case, but I wanted to do everything professionally.

For replacement, a standard cooler of the appropriate size was selected for the voltage of 12 V (the burnt was also designed for the voltage of 12 V) and the ring of the housing is removed from it, as shown in the photo.

For accurate drilling holes, the old cooler was used as a conductor. For this, the coolers were interconnected using threads, as in the photo. After drilling the first hole, for the accuracy of obtaining the following, the screw was immediately inserted into it.
Since the connector for supplying the supply voltage on the old cooler in the design was different, it was necessary to disappear wires from the connector from the board of the burnt and solder them, observing the color marking, to the new cooler board.

The foot mounts of the new cooler turned out to be more thick than that of the burnt. Therefore, I had to use for fastening a self-length of a larger length. As can be seen in the photo, the cooler after refinement perfectly fit into the form of the radiator of the video card.

Before installing the video card to the computer, the supply voltage has been served on the cooler connector. He worked quietly and blew the radiator ribs well. Checking the heating temperature of the radiator after installing the video card to the computer showed the good efficiency of the new cooler.
Re-repair of the video card due to the failure of the replaced cooler
Six months in the summer, the video card processor began to overheat. Analysis showed that the newly installed cooler stopped working. The impeller did not rotate, the hand was turning tight.

It became apparent that the cooler was blown due to the imperfection of the cooling system design. It fell tightly to the radiator base, as a result, not only worsened the heat removal from the most heated surface of the radiator, but also hesitated to a high temperature.
Therefore, it was decided when replacing the refused cooler new, consolidate it in such a way that the cooler blew not only the radiator, but also himself.
For the replacement, the appropriate size of the used branded cooler from the Pentium processor, which was served for many years, but was in excellent condition. Before installing, it was disassembled and the bearing is lubricated by graphite lubricant.

The cooler from the processor had a three-pin connector, and two pin was installed on the video card. There were two options for connecting the cooler to the power scheme. To the motherboard without steaming the wires, or to the video card board, with a dressing.

On any motherboard there are a pair of connectors, one of which is shown in the photo, to connect the coolers that are installed in the system of the system block of the computer. If the wire length allows, you can set the video card and connect the cooler connector to one of these connectors. This method of connection will additionally allow systematically control the speed of rotation of the impeller.

But in my case the length of the wire was little and therefore decided to turn off the wires with a faulty cooler. To work the cooler, you only need to supply the supply voltage.

The cooler was fixed to the radiator with the help of four self-tapping screws, screwed between his ribs, as shown in the photo. The outer diameter of the self-drawing should be slightly more than the distance between the ribs of the radiator.

Since then, more than two years have passed, the cooler works stable. Due to the change in the method of installing the cooler, the efficiency of cooling the video processor has grown, and the cooler blowings itself, began to work in lightweight conditions.
Replacing the cooler in the power supply
In order to make maintenance or replace the cooler in the computer power supply, it is necessary to get to it. After removing the side cover of the system unit, you need to unscrew the four fastening screws of the power supply, which are located on the wall where all connectors are placed. In this case, the system unit should be positioned so that the power supply unit is released from attaching, did not fall on the motherboard.

The power supply is removed from the system unit. From the power supply to all devices and the motherboard are conductors with forks at the ends feeding the supply voltage. If the wires are sufficient, then the connectors can not be disconnected, or remove only those whose wires are tensioned.

By placing BP on the corner of the system unit, you need to unscrew the four screws marked on the photo with pink color and remove the lid. Sometimes the screws are sealed with paper labels and to unscrew them, you must first find. The cover is removed shift up. You will be surprised by the amount of dust on the power supply elements. It must be completely removed with a brush with a vacuum cleaner.

Next, unscrewed screws marked with yellow color, and the cooler is removed. From the cooler there are two conductors of red and black. Red wire (+12 V), black (-12 c). For the convenience of servicing the cooler, it is better to unscrew the BP fee and disappear these wires, but it is not necessary if it is enough to restore the normal operation of the cooler, it is only lubricated it.
Reducing cooler revolutions
If the performance of the cooler work after the replacement has become more necessary, the turnover can be reduced by reducing the supply voltage supplied to it. It is enough to include in the gap of the red wire one diode of any type, or several sequentially, cathode (it is usually labeled by a strip on the body) towards the cooler. If the diode marking is not clear, then you can enable it, as it is necessary if the cooler does not rotate, swap the ends of the diode connection.
One diode will reduce the supply voltage by 0.8 V, or up to 11.2 V. Turning on sequentially, for example, five diodes, reduce the supply voltage of the cooler of 4 V, it will become 8 V.
Having reduced turnover, you need to make sure that the processor does not overheat when working on full load. For this, there are, allowing to control the speed of rotation of the cooler and the temperature of the processor heating without leaving the operating system. The work of the processor in a heavy thermal mode leads to a slowdown in its speed, it is possible to failures in the computer and even hang.
Fan as part of the cooling system runs continuously to protect the device from overheating. Undime, as well as the lack of preventive work and lubrication of the cooler displays the entire cooling system. As a result - the incorrect operation of the device as a whole and breakdowns of its components.
Signs of cooling system malfunction:
- Overheat;
- Extraneous noises;
- Incorrect and slow operation of the operating system;
Replacing the cooler in the laptop is able to solve these problems and correct the situation.
If you do not change the fan on time, after a while your device may need expensive repair with the need to replace the most important parts, right up to the motherboard. Is it possible to replace the cooler at home? Yes, it is possible, and it is about this that will be discussed in our article.
First stage: Disassembly laptop
In order to independently replace the fan, you must correctly disassemble the laptop:

Second Stage: Fan Replacement
After disassembled the housing and removed components from the area where the cooler is in a laptop, you have access to the fan. Now you need to do the following:

So we replaced the cooler, now it remains back to gather a laptop.
Third Stage: Laptop Assembly
After you installed the fan and connected the required loops, proceed to the assembly:

As you can see, it is not so difficult, as it seems from the very beginning. The most important thing is to accurately follow the instructions, which will help minimize the likelihood of random breakdown. If you have any difficulties or problems, it is recommended to find instructions on disassembling and assembling exactly your PC model. In the network you will definitely find information on the device of such devices as Acer, Asus, Dell, HP, Lenovo, Samsung, Packard Bell.
Fourth Stage: Performance Check
After you collected a laptop back, turn on and let it work for a while. Using a special program, test it and check the processor temperature. It usually decreases by 7-10 degrees.

In addition, your computer should work quieter and more stable. The system should not slow down, but on the contrary, should function without failures. Also significantly increases the service life of the device. If nothing has changed, then you may have done something wrong or your device is required to replace the cooler to more powerful.
Now you know how to change the fan at home on a laptop.
How much is the replacement if you called the wizard
And now I propose to calculate how much such a service is at the repair masters. The specific price depends on your area of \u200b\u200bresidence, on average it is from 800r, excluding the price of the most component itself. It is also difficult, especially a newbie to track the quality of one or another spare parts, and in general, whether it is new.
Making an independent replacement of a cooler in a laptop, you not only save and protect yourself, but learn to do it with your own hands.
The cooler is a special fan, which sues cold air and spends it through the radiator to the processor, thereby cooling it. Without a cooler, the processor can overheat, so when a breakdown, it must be replaced as soon as possible. Also, for any manipulation with the processor, the cooler and the radiator will have to remove for a while.
Today there are several types of coolers that are attached and removed in different ways. Here are their list:

Depending on the type of fastening, you may need a screwdriver with the desired section. Some coolers are soldered together with radiators, therefore, the radiator will have to disconnect. Before working with components of the PC, you must disable it from the network, and if you have a laptop, you need to extract the battery.
Step-by-step instruction
If you work with a regular computer, it is advisable to put a system unit in a horizontal position, in order to avoid a random dropping out of the maternal card components. It is also recommended to clean the computer from dust.
Perform these steps to remove the cooler:

If the cooler is spanned together with the radiator, then do the same thing, but only with the radiator. If you can not disconnect it, that is, the risk that the thermal paste is dried down at the bottom. To pull the radiator will have to warm it. For these purposes, you can use the usual hairdryer.
As you can see to dismantle the cooler you do not need to have any in-depth knowledge of the PC design. Before turning on the computer, be sure to install the cooling system in place.
 Error appearance during program launch
 FRIGATE plugin for Firefox
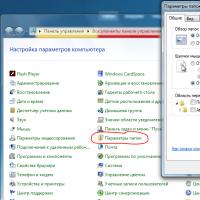 How to show hidden folders and files in Windows
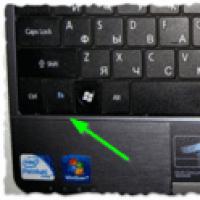 Ways how to make a screen on a laptop brighter or darker
 How to format a flash drive, disk protection
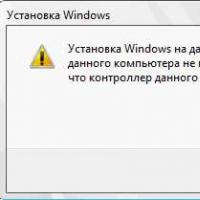 If installing Windows to this disc is not possible
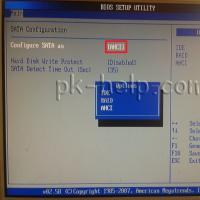 During installation of Windows "Make sure that the controller of this disc is included in the computer's BIOS menu.