Adding a grid to MS Word. How to create and configure a local area network between two computers How to configure a network between computers
In Microsoft Word, you can add and modify pictures, illustrations, shapes, and other graphics. All of them can be edited using a large set of built-in tools, and for more accurate work, the program provides the ability to add a special grid.
This mesh is an auxiliary tool, it is not printed and helps to make a number of manipulations on the added elements in more detail. It is about how to add and configure this grid in Word that will be discussed below.
1. Open the document where you want to add a grid.

2. Go to the tab "View" and in the group "Show" check the box next to "Net".

3. The grid of standard sizes is added to the page.

Note: The added grid does not go beyond the margins, as does the text on the page. To resize the grid, more precisely, the area it occupies on the page, you need to resize the margins.
Changing the default mesh sizes
You can change the standard dimensions of the grid, more precisely, the cells in it, only if the page already has some element, for example, a picture or a shape.
1. Click on the added object twice to open the tab "Format".

2. In a group "Arrange" press the button "Align".

3. In the drop-down menu of the button, select the last item "Grid options".

4. Make the necessary changes in the dialog box that opens, specifying the vertical and horizontal dimensions of the grid in the section "Grid step".
Until recently, most users had only one computer at home, but times have changed quickly, and in each apartment there is not only a stationary PC, but also a laptop or even several netbooks and other computer equipment.
Not to mention printers, scanners, tablets, smartphones, etc. This anticipated the question of users about the need to create a LAN at home.
Below is a guide for setting up a LAN using the example of the Windows 7 operating system, but the principle of creation is the same and the instructions given are suitable for owners of PCs on Windows XP, 8 and 10.
What is a LAN?
These are PCs, office equipment and other similar equipment for the accumulation and exchange of information connected to each other in a single network.
 They are divided into two categories:
- local;
- global.
The first ones are created within the framework of a specific space (apartment, institution, settlement, etc.);
The latter allow devices to go online and use the information of world networks.
 "LAN" or for advanced users, it is more customary to use the abbreviation "LAN" (Local Area Network), which in Russian means "Local Area Network" - PCs, office equipment and other similar equipment for accumulating and exchanging data connected together into a single network.
 For normal operation, in addition to the listed devices, additional equipment is required. For example, network adapters, routers, switches, etc. They are linked together by cable and wireless connections.
It should be noted that it is important to use software for LAN operation, that is, OS and special protocols for data exchange.
In a LAN, PCs are not spatially separated from each other, since the use of, for example, a twisted pair leads to signal attenuation as the length increases.
If it is necessary to combine several networks into one "LAN" that are geographically located far away (even if at different parts of the world, tens of thousands of kilometers from each other), VPN is used - the technology of virtual private networks.
- The creator of the network receives a unified security policy at his disposal. In simple words, the administrator no longer relies on the conscience and caution of LAN clients, but solely controls, records and limits the actions of individual users;
- Efficiency of information and file exchange. There is no need to use external drives (flash drives, floppy disks, USB hard drives, CDs, etc.) to transfer data from one PC to another;
- When using a LAN in offices, joint work is ensured without interrupting the employee's desktop, as well as the introduction of electronic office work;
- Simultaneous work of several users in a single file without duplicating information in each individual PC;
- Using networked office equipment. It is not required to buy and connect your printer, plotter, scanner and other similar equipment to each PC.
Thanks to the development of wireless technologies for transmitting information and the use of secure radio channels, there is no need to install cables to network devices.
Using wi-fi routers, mixed systems are organized using wired and wireless methods of transferring information in the LAN.
Data transfer methods
In "LAN" they are divided into wired and wireless.
Wired
From the name it becomes immediately clear that a wire is used to transfer information.
A PC can be connected to each other only with a cable without the use of additional intermediate equipment, but since this requires computers to be equipped with two network cards at once (one for receiving, the other for transmitting), and also considering the impossibility of providing a common output to the global, this method is used extremely rarely.
It is advisable to use a switch between PCs. This switch allows you to create a network of several PCs, and those only from 2, as in the above method. And most importantly, each PC has access to the Internet and networked office equipment.
The disadvantage of this method is the mandatory manual configuration with the input of IP addresses in Windows 7. If there are many PCs on the network, then the process, despite the simplicity of execution, is laborious and time-consuming.
Wireless
The way to create a local area network using wireless routers is gaining popularity at a breakneck speed. Modern routers are capable of connecting dozens of devices and computers on a LAN. It should be noted that even a novice user can quickly set up such a network.
Used devices
As noted above, it is advisable to use the connection of intermediate devices when creating a LAN. Next, we will consider the popular equipment for achieving this goal.
Hub
In Russian, this device is called "Repeater", but, as often happens in our country, the English-language name "HUB" remains familiar to the user. Colloquially sounds like a "hub".
 Everything that is connected to this little box is repeated. The repeater is assigned one IP address and connects the connected PCs. The hub receives data in one of the ports and transmits it through the other ports.
 There is a direct relationship between the increase in network load and the number of clients connected to the hub, so this technology is gradually being replaced by more advanced ones. After all, everyone needs a stable and high speed of data transmission and reception, regardless of the number of equipment in the LAN.
 However, due to the affordability of such technology, it continues to be used by some users to communicate with a small number of PCs. Sometimes in the documentation you can come across the name of this device as "hub".
Switch (switch)
"Switch" is already more modern equipment in comparison with "HUB". It is devoid of the downsides of a hub. Each device that is connected to the "Switch" has its own "IP".
If working in the hub is like talking on parallel connected telephones, then the connected PC to the Switch receives information that remains inaccessible to the rest of the LAN participants. This reduces the load on the network.
 However, if the provider cannot provide the required number of IP addresses, then problems immediately arise. Therefore, this method is gradually becoming a thing of the past. Depending on the size of the LAN being created, switches of various models are produced.
 Functionally, they are equipped with special ports, for example, for printers and other office equipment.
Hubs and switches cannot share the speed for access to the global network between PCs; therefore, routers have become widespread.
This device already lacks the disadvantages of all the devices described above. There are various modifications of routers, which allows each user to choose a router suitable for their purposes.
 Often, routers are equipped with indoor or outdoor antennas for broadcasting a wireless signal to devices equipped with Wi-Fi modules.
 Expensive models are equipped with USB ports to which you can connect network printers and USB modems.
The device is configured by means of the program (firmware) installed in it. The proprietary interface provides convenient input of network parameters. The web configurator of the router provides control and safe operation in subnets.
Currently, routers are used not only by commercial companies, but they can often be found in home use. Through them, access to the worldwide network of any of the LAN components is organized.
Access point
It differs from a router in that it looks like a signal extender (wired or wireless). An "access point" (AP) or "Access Point" (AP) does not have such broad capabilities as a router. Doesn't create subnets.
 "AR" can be purchased as separate equipment, but it should be noted that any router is capable of operating in AP mode, and computers or mobile devices connected to the Internet with a wi-fi module can be used as AP.
Setting process
In all Windows, the setup process is almost the same. Below is an example based on the 7th generation Microsoft operating system.
Configuring Windows Network Settings
You need to do the following:

Note: In the IP address, in the place of the last digit, there can be any number from one to 255, the main thing is that different ai-pi are registered in all LAN computers.


Router configuration if available
If you have a router at home, you can create a LAN through it. In fact, in the case of using a router to communicate with the global network of all home devices, we can state the fact that these gadgets are already in the common network.
It makes no difference which of the devices are connected to the router with a wired connection and which ones are connected via WI-FI. They are already networked. Its configuration is "Star".
 The basic element here is a router to which cables or via a wireless signal are connected: PCs, mobile gadgets, netbooks, set-top boxes, etc.
The router is connected to the provider's network, thanks to which each of the network's clients gets the opportunity to enter the World Wide Web.
The network access password is set through the router's web interface. The interface is usually entered through any Internet browser by entering an address, for example, "192.167.0.1".
In the accompanying documentation for the router, the address for entering its settings and an access code with a name for authorization are indicated.
Due to the wide variety of manufacturers of router models and the use of different software modifications in them, it is necessary to use individual instructions for the network configuration settings created by the devices.
How to check if the network is working?

So, you have finally concluded an agreement with a new provider, and a cable with a plug has been brought into your apartment - a real window into the world. All that remains is to connect it to your computer - and the Internet is at your service. However, if it was enough to insert the plug into the jack, you would not need to read this article.
Let's consider how to connect the Internet to a computer via a cable, in the simplest case. Let's say you have only one computer, and you will use it as a router (if you suddenly need a tablet). Or (as an option) you are going later, so turn off the router to facilitate remote access.
Let's say you have a network card on your computer (it doesn't matter whether it is separate or built into the motherboard), and you just connected an Ethernet cable to its input. We assume that you are using the most up-to-date Windows 10. However, for correct settings of Windows 8 / 8.1 or even 7, these instructions will also work: the principle is the same.
Of course, you can always call a foreman to do all the necessary work for you. But specialists are not always free. In addition, on your own you will not only save money on the call, but also learn how to set up the Internet on your computer via a cable. In our world, such knowledge can come in handy at any time.
Dynamics vs. Statics
Now check with the provider what kind of connection he offers on your tariff plan: dynamic or static.
With a dynamic connection your IP-address may change depending on the provider's settings (and if you intend to subsequently connect to your workplace remotely, this may interfere with you). But manipulations with entering parameters are reduced to a minimum: the provider sets the IP address, subnet mask and default gateway independently. In this case, it is enough to insert the cable into the computer and that's it, Internet access will appear.
Static connection provides a static IP address assigned to your computer (or router, if you choose to connect through one). In this case, you will have to manually register the IP address itself, the subnet mask and the default gateway in the connection settings. Usually, all these incomprehensible numbers and letters fit into the agreement on the provision of access or in the annex to it. If necessary, you can clarify them in the technical support service, naming your details.
In some cases, access also requires a login and a password (do not confuse Internet access as such with access to a personal account on the provider's website - data is required for a personal account).
How the connection is made
Let's consider the procedure step by step.
- Plug the Ethernet cable into the apartment into the corresponding port on the computer. Even if you have never done this before, you will not be able to confuse this type of connector and plug with something.

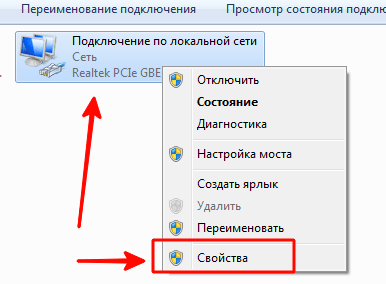
- Right click on the "Start" button and find the section "Control Panel - Network and Internet - Network and Sharing Center". In the left column, select the "Change adapter settings" tab. The main window will display a list of your adapters (more precisely, in our case, one adapter "Local Area Connection"). Apply the crown trick again "right click" and select "Properties".
- The small pop-up window contains a whole column of different rows with properties. Select the line "IP version 4 (TCP / IPv4)" in them. While it is selected, click the Properties button below the combo box.

Now our instruction is branching out. Have you checked with your provider what IP you are provided with? If not, check right now.
- If it is dynamic, then trust the automatic selection in the IP address and DNS server settings.
- If it is static, then you have to enter the values manually. As a rule, you need to specify "IP address", "Subnet mask", "Default gateway" and "DNS server". When you have finished entering your data, press the OK button to save your selection.
Important points:
- If the connection requires a modem, enter its default address as the IP-address; usually 192.168.1.1. If the modem has a different IP (which is rare), it is indicated on the bottom of the modem itself or in its instructions.
- Usually the ISP provides the DNS server details, but sometimes this is omitted. Then you can use the universal ones:
1) Public DNS from Google: 8.8.8.8 or 8.8.4.4 - a universal solution, usually suitable for all computers
2) OpenDNS - 208.67.220.220 and 208.67.222.222
3) Yandex DNS with its own antivirus filter - 77.88.88.88 or 77.88.8.2 - if you trust Yandex's antivirus policy (although sometimes it may find it unreliable and quite a decent site)
4) Yandex DNS with a filter for pornography and other obscene content - 77.88.8.7 or 77.88.8.3 - although depending on what you actually need from the Internet, hehe.
- Let's repeat: if remote access is important to you, make sure that your provider's support will not change your IP.
If your ISP offers L2TP access, this may require some additional steps on your part. Usually, the provider provides instructions for setting up such a specific type of connection, but from our side it also does not hurt to duplicate.

So, to set up L2TP, you need:
- Go to the already known to us section "Network and Sharing Center" and choose to create a new connection
- Unlike the previous options, here you should go to the "Connection to the workplace"
- When the system prompts you to create a new connection, select this item
- Select "Use my connection"
- Enter the server address provided by the provider. The immediate connection option should not be selected. You assign a name that is to your liking.
- In the next window, enter the login and password provided to you. Do not forget to tick the box "Remember password"
- Connect now when the system prompts you
- Return to "Adapter Properties" (as discussed above) and select the "Security" section
- Select "L2TP IPsec VPN" from the drop-down options "VPN type". Below is the line "Data encryption", here you need to select "Optional",
- Under the line "VPN type" click the "Advanced options" button
- Enter this same key in the "Key" field. You should have it from your provider.
- Everything, you can click "OK" with peace of mind and use the connection.
This instruction works for Windows 7 and newer versions.
Why all these complications? - you ask. This solution has advantages: for you - increased security of the connection (compared to a regular LAN), for the provider - simplification of the billing system.
PPPoE setup
Before setting up the Internet on your computer, check with your provider for the type of access that it offers. PPPoE access requires not only correct settings, but also authorization using a username and password. You will need this method of connection if you do not use a modem or router, but insert the cable from the provider directly into the connector on the computer, without intermediaries.
To do this, you again go to the "Network Control Center" and select there, create a new connection with it.
In the launched wizard, you select the first item - "Internet connection" - and click "Next". Then in the window that appears, you must select "High Speed (with PPPoE)".
The final step remains. In the final window, you need to come up with a name for the connection and enter the login and password issued by the provider. If your computer is used by several people (for example, family members), each under his own account, and you want to give them all access, then check the box "Allow other accounts to use this connection".
Now make sure your internet connection is working. And if so, hello world!
Good afternoon friends! I am very pleased to welcome you to our training Internet portal https: // site. We continue to talk about setting up a home network. The topic is vast, but interesting and very important.
Today we will be engaged in a network educational program or network settings... In order to be able to set up a home network yourself, you need to get a minimum of ideas about how a local area network works.
We will talk about the terminology of local networks, about configuring network adapters, and also take a closer look at connecting two or more computers to a network.

Let's turn to the network connection settings:
1. For Windows XP: Go to “Start” -> “Control Panel” -> “Network Connections”. If the computer has a network card, the network connection icon will appear in the window that opens. Click on it with the right mouse button, and in the menu that opens, select "Properties".
2. For Windows 7: Go to the "Start" menu -> "Control Panel" -> "Network and Internet" -> in the first item "Network and Sharing Center" select the sub-item "View network status and tasks" -> click on the link “Local Area Connection” and then the button “Properties”.

In the window that appears, select the "Internet Protocol (TCP / IP) (version 4, if specified)" item in the list and click on the "Properties" button.

A window will open in which the main ones will be displayed.
adapter network settings
- a kind of formal designation of your computer in the global or local information space. The network we are building will most likely operate over TCP / IP (Transmission Control Protocol / Internet Protocol).
A protocol is a set of standard algorithms and rules according to which data is exchanged in a network.
As TCP / IP works, each network device is assigned a unique IP address. It consists of 32 bits (or 4 bytes), which are written as four decimal numbers in the range 0-255, separated by periods, for example: 192.168.0.10.

Note that addresses 0.0.0.0, 127.0.0.1 and addresses ending in 0 and 255 are reserved for service purposes and cannot be assigned to network devices.
When setting up an Internet connection, pay attention to the IP-address input field: if your provider has indicated an IP-address, then enter it in the corresponding field, if it was not provided to you, then simply select the “Obtain an IP-address automatically.
2. Subnet mask. As a rule, a large network is divided into subnets, each of which is assigned its own unique address, like a separate computer. The full IP address, which we considered above, contains information about both the address of a specific node and the subnet address.
To separate these sections from a single IP address, you need to know the subnet mask. It also consists of 32 bits and takes the value 0 or 1. If you impose a subnet mask on an IP address, then the numbers under the ones will mean the subnet address, and under the zeros - the address of a specific node. The subnet mask is also written as an IP address, four digits separated by periods, for example: 255.255.255.0.
For reference, computers can only be connected to a network without a router if they are on the same subnet (or have the same subnet address). If the subnet addresses differ by at least one, then information between them will not be transmitted.
3. Types of IP addresses and default gateway. As you already understand, the number of unique IP addresses on the Internet is limited, and the number of computers wishing to access the World Wide Web is growing every day. The decision was made: to divide the addresses into private and public.
- Public IP addresses can be connected to the Internet directly. They are visible to every computer on the Internet. To get a public IP address, you need to pay money. The pleasure is not cheap. As a rule, such addresses are distributed to providers and dedicated servers, sometimes to clients.
- Private IP addresses are addresses that are not visible from the Internet. They are assigned to computers on subnets that are connected to the Internet through a router. A router is a device that connects two subnets: local and global (Internet), and therefore has at least two network ports (IP addresses): public (for connecting to the Internet) and private (for working within a local network). Because subnets do not interact with each other, then the same addresses can be repeated many times in different subnets.
It is best to use private IP addresses to create your home network. A common option is to use an address like 192.168.x.x, where x is a number between 0 and 254.
 4. DNS servers. We've covered what an IP address is. But everyone will probably agree that memorizing so many numbers is difficult. Which is easier to remember 94.100.191.204 or mail.ru? Of course, it is easier to remember the alphabetic address of the site (domain name). To replace IP addresses with understandable nominal values, special servers - DNS servers - have been invented. If the IP address changes, then the DNS server is immediately notified of this, and for you access to the site remains under the same domain name.
To configure Internet access, you need to specify the IP address of the DNS server (usually it is issued by the provider or it is assigned automatically). If this is not done (or the DNS server stops working), then you will have to specify their IP addresses to access the sites.
home network for two
If you need to quickly connect two computers to a network (for example, to transfer information, create a backup copy, or just to play), then it is not at all necessary to buy a router or switch. We'll consider two connection options:

I will not consider wireless configuration in this article. We will dwell on this option later, when considering the settings of the routers.
After choosing the type of cable connection, you can go to the settings of the network adapters.
First, make sure the computers are in the same workgroup, in the same address range, and with different network names. Let's see how this is done:

Next, you need to set the IP addresses and the subnet mask (the subnet mask is automatically substituted for the specified IP address) for each computer. How to choose IP addresses, we discussed above. Let's see how the IP address is configured:

If you connect several computers to the network using a switch (network switch), then repeat the above settings on each computer in the network.
network troubleshooting
1. The first thing to look for when troubleshooting a network is whether the network connection is established. Those. whether there is a physical connection between computers (whether network cables are connected to network adapters and network devices such as a router, whether the wireless Wi-Fi adapter is enabled, for example, on laptops it is disabled by a special keyboard shortcut). It is immediately necessary to determine the health of the network adapter. As a rule, for this it is sometimes enough to see if the yellow-orange diodes of the network connector blink when the cable is connected.
2. It is necessary to check that the IP addresses are not duplicated in the given subnet. All computers must have different addresses so that there are no conflicts when exchanging data.
3. Make sure the subnet address is correct. Those. it is necessary to check that the subnet mask is set to the same on all network adapters.
4. Check that the same group is specified in the properties of the computer (we talked about this above).
5. If a specific site has become unavailable, then this does not mean that the network has disappeared, perhaps the DNS server has failed. Check other sites. To control the operation of the DNS server, enter 94.100.191.204 instead of mail.ru into the address bar of the browser. If the site loads, then the DNS is definitely faulty.
The development of electronics led to a reduction in the cost of computer equipment, and, as a result, second computers began to appear in users' apartments, and after that the question arose "How to set up a local network between two computers?"
Connecting computers
The simplest way to connect two computers is with a cable. Let's figure out how to set up a network cable between two computers.
Please note that the cable must be special. In fact, this is the same eight-core twisted pair, with the only difference that the ends of this cable are not crimped the same way. The cable is also called crossover. If you look at the connectors on the crossover cable, you will notice that the green and orange wire pairs are swapping. This cable is inserted into the slot of the network card of one and the second computers.
Now let's see how to set up a network between two computers. After you have connected the computers with each other, we will make the necessary settings so that the computers can see each other. First, you need to give the computers different names and put them in the same workgroup.
Did you know that the first test of networking technology took place on October 29, 1969 in the United States?
Setting up a network in Windows XP
Setting up a network between two windows xp computers is done as follows: by right-clicking on the "My Computer" icon, open the context menu and click "Properties", select the "Computer Name" tab, press the "Change" button. You can also assign a new name to the computer through "Start" (see image). In the field "Computer name" write, for example, "Comp1", and for the second computer - "Comp2". Name the workgroup, for example, "OFFICE" (this name will be the same for both computers). Click OK and restart your computer.

Now let's see how to set up communication between two computers. To do this, you need to assign IP addresses to each computer. Press the "Start" button, select "Settings" and "Network Connections". Here, right-click on the connection icon and open the "Properties" item.


On the "General" tab, select "Internet Protocol (TCP \ IP)" and click the "Properties" button. Select the "Use the following IP address" setting and fill in the fields with the address and mask for the first (for example, 192.268.100.240 and 255.255.255.0, respectively) and for the second computer (for example, 192.268.100.245 and 255.255.255.0, respectively). Remember the settings by clicking OK. The local network between the two windows xp computers is ready.
We make sure that everything works by running the command line (Start, Run, type cmd) and from the first computer by sending the ping 192.268.100.245 command. If everything is correct, then a message will appear as a response stating that 4 packets have been sent and 4 packets have been received.
Provided that one of the PCs is connected to the Internet (for example, via a USB modem), you can set up a network between two windows xp computers, through which the Internet will be distributed to the second computer. To do this, in the properties of the network connection, switch to the "Advanced" tab and check the box that allows other users to access the Internet. Now you know how to make a network between windows xp computers.
After setting up a local network, you may need to configure the printer to print from computers on the same network. Recommendations on this topic are given. Read about setting up Skype on a Windows 7 laptop.
Network setup in Windows 7/8
Let's see how a local network of two windows 7 computers is configured. Press the "Start" button, right-click on the "Computer" line and press the "Properties" item. In the "System" window that opens, click the "Change parameters" button. In the "Computer name" tab, you also click the "Change" button and set the names of the computers and the name of the workgroup. Reboot your computer.
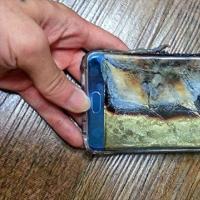 The smartphone heats up when charging: what to do?
 How to Download Music to iPhone with iTunes
 How to Download Music to iPhone with iTunes
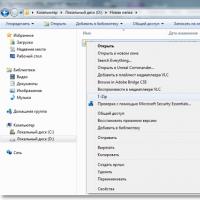 Unpacking a damaged archive
 How to clear the internal memory of your phone from unnecessary files
 Close windows 10 update window
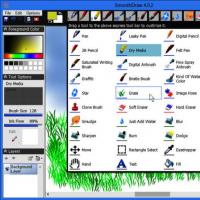 Computer drawing programs