Android 6.0 requirements. Updating Android: how to update to a new version, rollback? Guide in details
At the Google I / O 2015 developer conference held at the end of May, a new version of Android was announced, and on October 5, the final version of the system was released for the first gadgets, including Nexus 9, Nexus 7 2013, Nexus 6, Nexus 5, as well as the Nexus Player media center. In this article, we have prepared for you a description of all the new Android 6.0 Marshmallow products, the review of which will certainly interest those who plan to switch to a new operating system in the next six months (of course, when official or custom firmware updates for the most popular hardware devices are released).
Interface
The first change that becomes apparent right away the first time the system boots is the updated phone boot animation, which uses the updated logo of the Mountain View company.
As for the initial setup of the smartphone, everything remains the same as in.
Before we begin our acquaintance with the visual component, we need to clarify one nuance. The same “Google Now” application that was part of the interface model of previous versions of Android is used as a shell. A reasonable question may arise: why should I upgrade to 6.0, if on my phone with an old system I have the same interface as on new products. As it happened before, in Marshmallow all innovations are hidden "under the hood", that is, they are not visible at first glance. Exactly, this is what will be discussed in this material.

The first notable innovation is the unlock screen. Here the purpose of the keys has changed (for example, pressing the bottom left icon launches "Google Start", whereas in the previous version the "dialer" was called). Moreover, from now on, you need to drag icons right from the corner, which at first glance is not very convenient.

No changes were made to the desktop. A colored microphone and an updated logo of the developer company appeared along with the updated Google Now build. What is really worth noting is that now you can delete applications directly from the desktop, before that you could only delete shortcuts.

Together with this function in the application menu, "Google Start" introduced a change in the scrolling orientation. If in previous versions it was possible to scroll through the list from right to left, now the combination is applied from top to bottom and vice versa. A search field is always displayed at the top of the screen, below which are the four most frequently called programs. The order of placement of programs is simple - first there are applets that start with a number, and then all the rest in alphabetical order.

Finding applets works just like lightning fast. Users who use a large number of games and applications on their phone will surely like this. From now on, you will not have to carefully look for the necessary program, leafing through the list. You can only set the initial letters, and in a couple of moments you will be working with the application.
Certain changes also affected the animation of launching, minimizing and switching between applications from the task manager. All animations work very smoothly and smoothly.
Google Now on Tap
The release of Android 6.0 was accompanied by a new feature called "Google Now on Tap", which provides the ability to search in a specific program. By holding down the home button for a few seconds, the new mechanism will analyze the screen content. You can search for data on an open web page, in mail, messages, twitter, music player and other programs. It should be noted that only data located in the active part of the display are subject to such analysis. The analysis procedure itself is incredibly fast.
How it works? For example, let's use such a search at the moment when a musical composition is played in the smartphone player.

When you launch "Google Now on Tap" we get a summary of the song in pictures, Google search, YouTube, and in addition to this information about the artist on social networks and on Youtube. In general, working with this tool is quite convenient. The main disadvantage is the inaccessibility of this feature if Russian is specified as the main language in the smartphone settings. Let's hope that in the next updates there will be multilingual support as well.

App permissions
In our Marshmallow review, we'll cover a conceptual change in app permission management. If earlier, when installing the applet, the installer asked for permission to access the calendar, SMS, contacts, multimedia files and other objects, now the installation goes smoothly and without any questions. Now requests for individual permissions appear when the user is already working with the corresponding applet, and at a certain point in time there is a request for access to a file, photo, microphone, GPS coordinates, etc. installing the program, now all this happens gradually and measuredly.


Storage and external media management
A new interesting item has appeared in the main settings table - "Storage and USB-storage". Using this menu, you can find out about the contents of external or internal drives (for example, a USB flash drive or microSD memory card connected using an OTG cable). Although this integrated file manager can only delete, move and share files, the very fact of its presence is undoubtedly pleasing.


Battery usage and battery saving
Quite profound changes have also been made to the mode of using the battery. Now, in the statistics of energy consumption, you can see not only the battery life of the gadget, but also the actual indicators of energy consumption in mAh.

But that's not the point. The main innovation introduced back in the Developer Preview is the Doze save mode. What is its use? Apps in Android can now be configured to save battery power when they are running. In the currently available version, almost all applets are configured so that the battery works with them economically (the only exception concerns Google Play services). The essence of the Doze function itself is to increase the battery life of the smartphone in stand-by mode. If earlier during the night the battery sat down by 15-20%, now the representative of the fifth line of Nexus smartphones for sleep mode is quite enough 1-2% of the discharge in one night. To achieve these results, there is no need to turn off Wi-Fi or use airplane mode. Real magic, isn't it?


Fingerprint scanner support
The Android 6.0 firmware includes a special API that allows you to unify the fingerprinting tools for authorization in programs. Now all that remains is to wait for the equipment of new models of smartphones with the scanners themselves, since even in the phones of the Google Nexus series, in which Marshmallow is only available, fingerprint scanners have not yet been delivered. We expect the availability of such a hardware solution in the next models.

USB Type-C support
The latest hardware version of the USB interface called Type-C (or simply USB-C) is becoming more and more fashionable. The main advantage of USB 3.1 over the previous version 3.0 is twice the bandwidth. If the earlier version provided data transfer rates up to 5 Gb / s (625 Mb / s), then the new interface allows you to increase it to 10 Gb / s. In addition, this type of connection uses a completely new connector. In addition, following the specification of the standard, Type-C uses currents of 1.5 and 3.0 A, while the voltage is 5 V. As a result, this gives a significant increase in the charging speed of the gadget.

An auxiliary bonus of the new interface is the ability to charge tablets, smartphones and phones from one another, which is useful in field conditions, on the road and in other situations where there is no access to another outlet.

Let's summarize
In fact, Marshmallow, which we reviewed with an emphasis on global and noticeable innovations, has been massively bug-fixed. Although there are almost no external changes, you can see that thanks to the optimization of the Lollipop code, many tools have become smoother and much faster. The autonomy has increased significantly, especially in stand-by mode. New goodies are good news, such as Google Now on Tap, a function for fine customization of applet permissions and a storage manager. In the next minor builds, you can expect a multi-window mode both on tablets and, probably, on smartphones, as well as support for Android Pay technology for making contactless payments.
Photo material for the article: / applepack.ru / itc.ua / xdrv.ru / gottabemobile.com
In terms of the quality of iron and assembly, Chinese manufacturers are already keeping pace with the world's giants. Yes, sometimes plastic is cheaper, the design is not impressive at all, but the crumbling panels are gone, as well as there are no millimeter gaps between the body parts and terrible backlashes. But the software is still not always well-developed. Even the pure Android that manufacturers install is sometimes a little crooked. In such a situation, the question of how to install Android firmware on a smartphone without turning the device into a brick becomes very relevant.
Why you may need to install Android on a smartphone from scratch
Before you start installing Android on a smartphone from scratch, you need to decide for yourself why you need it. If none of the reasons on the list fit, then better not. Practice shows that the lion's share of problems in topics on specialized forums comes from those who just like that, out of interest or out of boredom, decided to "pick" the firmware. If you want to experiment, you need to be aware that the consequences can be very different. So, in what cases you may need to reinstall Android:
What you need to install Android
Before you start installing Android on a smartphone, you need to have a theoretical minimum of knowledge and basic inventory for this. Otherwise, it is possible to "distort" the device to such an extent that they do not reanimate it in the SC (for example, accidentally demolishing a low-level bootloader). If you are determined, then check out the list items below.
- The firmware requires a stable working PC or laptop based on Windows (preferably x64).
- To connect to a PC, you need a good USB cable, the contacts of which will probably not come off during the process.
- To correctly connect a smartphone to install the Android firmware, you need to download and install the driver for it on your computer. Find out what chipset your smartphone has and download a driver for it.
- There is no one-size-fits-all installation guide for Android on all smartphones. Depending on the manufacturer of the device, as well as the model of the chipset, the programs for the firmware are different. For MediaTek chips, this is the SP Flash Tool, for Sony - just Flashtool, for Samsung - Odin, Xiaomi - XiaoMi Flash. Check which program is needed for your model on a profile resource (like XDA or 4PDA).
- If you need to install an alternative firmware assembly on your smartphone, make sure on the specialized forums that one exists at all. Not all devices have high-quality alternative versions of Android.
- Make, if possible, a full backup (backup) of the entire contents of the system memory of the smartphone (completely copy the current version of Android). How to do this through a computer depends on the specific model. There is no universal advice here either.
- Think again: are you willing to take risks? After all, suddenly arising problems will have to be solved by yourself, and it is impossible to foresee all the unsuccessful turns of events.
Universal way: installing Android on a smartphone using TWRP
TWRP Recovery is a special add-on over the OS bootloader that replaces the standard recovery service menu. After installing it, functions such as backing up the firmware (a copy of the current Android version), resetting the system to the factory state, deleting the application cache, installing patches and full Android assemblies become available. There are two ways to install TWRP:
1. Through native Recovery
To do this, you need to download the TWRP assembly for your smartphone model, save it to the device's memory or to a MicroSD flash drive. After that, you need to turn off the device and turn it on by simultaneously holding down the "power" and "volume +" keys to call the recovery menu (depending on the smartphone model, sometimes you also need to hold down the "volume -" or the "home" key under the screen). A menu of several items should appear on the screen. Using the "volume +" and "volume -" buttons, you need to select the "install" item and select the saved archive file with TWRP in memory. The selection is made by pressing the power button.

In this menu, you must select the "instal zip from sdcard" item after dropping the installation file archive into the root folder of the memory card
When the installation of the patch is completed - when turned on with the "volume +" pressed, the TWRP menu with convenient touch control will open.
Not all smartphones have a recovery menu that looks like this. There are such options:

In this case, instead of "instal" the word "update"
Well, a similar case:

2. Through the TWRP Manager program
To install the recovery using the program, you need the phone to meet two conditions: it turns on normally and has Root access. Root rights for each smartphone model are opened individually. After downloading TWRP Manager from PlayMarket, you need to launch the program, give it root rights and select the name of the smartphone (device name). In the proposed list, you should find your model and download the TVRP for it. Then you need to click Install recovery. Then you can work with patches and firmware, as well as make backups, directly from the program interface.
Unfortunately, both options are not truly universal. Smartphones with a locked bootloader (for example, all Xiaomi released in 2016) do not have native recovery for protection. Only official firmware and patches can be installed on them. To unlock the bootloader, you need to submit an application on the manufacturer's website and wait until you are allowed to do this. In some cases (for example, on Samsung Galaxy S7), you just need to enable OEM unlocking in the "for developer" menu.
The use of TWRP is also limited on smartphones with Android OS 6 or newer. Many of the manufacturers use memory encryption to protect data. In such cases, the TVRP will not be able to read the data for removing the backup, which increases the risk of getting a brick if the firmware is unsuccessful (there will be nothing to roll back, or very difficult). All that is possible in such conditions is only to install Android entirely, at your own peril and risk.
In order to install Android on a smartphone in TWRP, you need to download a compatible firmware to a USB flash drive, turn it off and turn it on by holding down "power" and "volume +" at the same time. In the selected menu, you need to find the item "install" or "install", select it, confirm the seriousness of your intentions and wait for the end of the process. Sometimes, before installing Android, you need to select the "wipe cache and data" item. After installation, the smartphone can be rebooted and it will start with the new firmware. 
The market for mobile products is arranged in such a way that as new versions of the Android OS are released, smartphone manufacturers are introducing their support into their own, both recently released and already proven models. How it works? At the time of purchasing a new mobile product, the basic version of the system installed by default is available on it. After a period of time, Google releases a new Android release. After six months or a little later, depending on the geographic region, when the new version becomes run-in and stable, you can install it on your smart too. As a result, you get a new, modern interface, support for new applications, and more customization and customization. In this material, we have compiled a detailed guide for you, how to update Android on your phone.
What is software update on Android and why is it needed
You need to be aware that as a result of updating or rolling back the operating system, all data stored on the phone will be irretrievably lost. Be sure to back up all the data you need (address book, notes, photos) to a secure external media before taking any of the steps in this guide. It can be an external drive, a hard drive on a PC (as a last resort, a memory card, but not desirable).
One more nuance. Since it will take a certain time to update the operating system (from 5 to 10 minutes, and sometimes more), be sure to charge the phone to 70-80% of the total battery capacity so that the update procedure is not interrupted due to problems with the phone's battery.
Automatic Android update
The most affordable and least difficult upgrade method. Go to the options menu and select the "Information about the phone" section. Here we go to the item "Software update". On your device, this section may be located somewhere else, so you may have to go through the settings.
Now we tap on the "Update" button, having previously set the option to download updates only via Wi-Fi, so that the update does not "eat" all your money from the account.
Option in the settings menu to automatically update the OS
When all the data from the manufacturer's server is loaded, in the menu that appears, tap the "Install" button and wait until the device reboots.
Since in the way described above, you can update your mobile device only to the minor release build, you should also use a special utility from the manufacturer (for Samsung gadgets, this is Kies, for LG - PC Suite, etc.) or update "over the air" (most of companies that produce smartphones or tablets have such a proprietary feature).
Latest Android update, if it is already available on the server, at any time you can download it to your device using just such a program.
Updating Android firmware manually
This method is used by almost all service centers, but we can easily update ourselves, using only available tools. The Odin system application is used to update. You can download it on many web resources (for example, on the same w3bsit3-dns.com). Using this technique, you can install only a new version of the official firmware, but not a custom one.
1.download the Odin program. We need version 1.83 (or newer) - it is very popular among technicians and is suitable for the vast majority of products
2. we find and download an archive with the firmware we need on the network. After extracting the contents from the archive (you first need to download the archiver for Android), you should have 3 files in your hands: PIT, PDA and CSC
3. we connect the smartphone to the PC. It is critical that the phone is correctly identified in Windows
4. launch Odin. If the connection of the device was successful, the name of the port will light up in yellow in the corresponding field in the program.
Indication of successful connection of the device to the PC for updating in Odin
5.turn off the mobile device and put it in Download Mode by pressing the home key, power and volume down at the same time
6. confirm the activation of Download Mode by holding down the "Volume up"
7.in the central Odin window, select the downloaded files to match the PIT, PDA and CSC objects
8. in Odin, press the Start button and wait until all files are updated.
If the Android system update went smoothly, a field with the inscription PASS in green will appear on the application screen.
Successful system update via Odin
Rollback to a previous version
Perhaps you have updated to one of the latest versions and are not satisfied (the phone is slow, errors often appear, there is a need to reboot, etc.). If necessary, you can roll back to any version you need. How to roll back?
1 way
Suitable for those who wish to return the basic official factory firmware installed in the device at the time of its purchase in the store. This is pretty easy to do. Go to the device settings and select the item responsible for resetting the settings (it can be "Privacy" or "Backup and reset"). On the test phone, this feature was available in the Backup & Reset menu under the Personal Information category.
Section in the parameters menu, designed to reset the device to the factory state
- We go into this section of the menu and stop at the item "Reset settings".
- A form pops up with a warning about deleting all data from the gadget. If the backups have already been saved in a safe place, feel free to click "Reset phone settings".
- The phone starts to reboot. In 5-10 minutes it will boot up again with a clean base system on board.
Method 2 - reset to factory settings (hard reset)
- turn off the phone / tablet
- simultaneously press and hold down the "Volume Up", "Home" (bottom center) and "Power" buttons. The Recovery menu opens.
- using the volume keys, mark the item "wipe data / factory reset".
- press the power key to confirm your choice
- in the next menu you need to confirm your decision. Select "Yes - Delete all user data" using the keys for adjusting the volume
- press the power button again. The main menu pops up in front of you again.
- using the power key, mark "reboot system now"
Everything is ready. The next time the OS will boot to the factory version.
How to rollback if a custom version of Android is installed (Cyanogenmod, MIUI, Paranoid Android)?
If you installed a custom ROM, you can return the official firmware in the same way as performing a manual update, using the Odin program already mentioned in the review. First, you will have to search the network for files with the firmware you need, suitable individually for your smart model. Perhaps the best resource for searching is the mobile portal w3bsit3-dns.com, here you can find any firmware for almost every phone model.
- we connect the mobile device to the PC
- run Odin
- turn off the phone and enter it into Download Mode. To do this, you need to press the home key, power and volume down
- when the phone is loaded, press the volume up key to activate Download Mode
- on the main Odin form, select the uploaded files as the correspondence between PIT, PDA and CSC
- in Odin, press the Start button and wait for all the files to be updated.
The successful completion of the rollback procedure will be indicated by a green field with the inscription PASS at the top.
Successful downgrade via Odin
How to update Play Market on Android
The first time you boot a fresh system, you have to configure everything again: account, language, mail, time zone, network, etc. The same goes for the Google Play Market. An update of this module will become available immediately after setting up a Google account on a mobile device.
Suggestion to connect Google account to the system
As soon as you enter the credentials for your Google account, the Play Market components will appear in the notification panel, which can be updated just like any other application.
Updates for Play Market components
If you are using custom firmware, you need to go to the store at least once to update. The service update will then appear on the display.
Answers to readers' questions
When will the new Android update be available?
Answer... Since a certain time passes between the immediate release of the new version of Android and the physical possibility of installing it on the gadget (from 2-3 to 6-8 months), you need to be patient and follow the company announcements. Among the first products with support for "marshmallow" are the devices of the Nexus and Android One lines. As for the Samsung brand, this month they promise updates for 6.0 for the following mobile devices: Galaxy Note 5, Galaxy S6 edge +; January 2016 - Galaxy S6 and Galaxy S6 edge; in February - Galaxy Note 4 and Galaxy Note Edge.
Now about other brands. Sony has announced an update for all current Xperia devices, from the Xperia Z Ultra GPE launched in 2013 to all Z5 models (both premium and budget). A number of devices from LG are limited to the G4, G3 and G Flex2. HTC, in turn, limited itself to only the last two generations of devices of its own production: One M9 / E9 and One M8 / E8. In addition, companies such as Motorola, Xiaomi, Huawei, Asus, OnePlus and ZUK promise to equip their flagship devices and mid-level units with Android 6.0. This list is not yet final. Subsequently, we will keep you updated with the latest announcements.
I have a Huawei U9500 phone, and I didn't know or didn't understand that I needed to update the version. Now I have Android 4.0.3, how to update the firmware to the new version, please help!
Answer... The Huawei firmware update process is described. In short, there are two ways to update the Huawei U9500 firmware.
- We take out the battery, hold down the volume buttons on the phone. After that, the Android update process will begin.
- Go to Settings -> Memory -> Software update -> SD card update, launch the Android OS update.
I have an MFLogin3T tablet and until this moment I did not know that it was possible to update the system. I read it on different sites, tried it, it doesn’t work. I have Android 4.4.4. How to update the Android version?
Answer... The easiest way to update your phone is through Settings - Options - About device - Software update. The location of the section may vary in different versions of Android OS. Thus, a standard update is performed on Android, the official software is downloaded. This is the safest and easiest way.
I have a Samsung Duos, version 4.1.2, I cannot update the operating system to a larger version. Please help me update the android on your phone!
Answer... First you need to find out if you can update Android on your phone to version 5.x. It turns out not. The point is that your phone's specifications prevent you from installing newer versions of Android.
On the other hand, you can download the update to Android from the w3bsit3-dns.com forum, where the modified firmware is uploaded. But we would not recommend installing such updates on a sufficiently old phone if you do not have the necessary skills and are not ready for a drop in the performance of your mobile device.
Lenovo A1000, Android is not updated. I am trying to update version 5.0 to the newest one. At first everything goes well, but then he writes "Error" and shows the opened Android with a red triangle with an exclamation mark hanging over it. What should I do? How do I update my OS to the latest version?
Answer... Why isn't Android updating? The fact is that Android 5.0 is the last OS version to which you can officially update the firmware on your phone. At least, this is what users of the w3bsit3-dns.com forum say. Of course, you can update your phone by installing custom firmware, but no one can guarantee stability after such an update.
I got NTS one m7. I can not update Android 4.4.2. The device does not find the software update, how can I solve this problem? How do I update it?
Answer. HTC one m7 can be upgraded to at least Android 5.1. If you can't install the official update, try downloading the custom firmware on the w3bsit3-dns.com forum. There are also collected instructions for updating on this device (see). In this thread, you will find solutions to the problem if the Android OS is not updated.
I have Moto x play, I don't want to update the system, the message “Android 6.0.1 software is available” constantly appears, which is wildly annoying. Please tell me how to remove this message so that it does not appear again. I even contacted the support service of the smartphone manufacturer itself, all the instructions given to me by them did not bring any result.
Answer... To disable firmware updates, go to Android settings, section About phone - Software update and disable updates by unchecking the box next to the corresponding item.
A year ago, the memory on the device flew away (the phone stopped turning on), it was replaced, but the firmware was not installed natively (it is no different, only on the launch screen in the corner the yellow inscription Kernel appears). Naturally, there are no updates for this firmware. Can I roll back Android (put my native one) through Kies and update it?
Answer... In order to roll back the update, you need to reboot the phone in Recovery mode, select wipе dаta / fаctory reset, wipe cache pаrtition and reinstall the firmware from the zip archive previously downloaded to the memory card. You can find the official firmware both on the official website of the manufacturer and on the w3bsit3-dns.com forum, in the section with the corresponding name of your mobile device.
Tablet Acer Iconia A1-810. I have no firmware updates ... I click system update and says "an update is required for your device." How can you "force" - (update the android system forcibly) or update yourself?
Answer... This tablet model came out about 5 years ago, it does not support new versions of Android, so the manufacturer does not post updates for firmware. You can look for custom (unofficial) firmware on the w3bsit3-dns.com forum, but we do not recommend installing them - it is better to buy a new tablet than to experiment with firmware to the detriment of the stability and speed of the device.
Build number does not open on Android. I clicked for a long time. How to be?
Answer... The Android build number is initially available for viewing in the About Smartphone (About Tablet) section. If you want to enable hidden settings (section "For Developers"), you can activate them just by clicking on the build number, just make 4-7 clicks on this line.
Marshmallow interface
The Material Design presented at Google I / O 2014 is also present in the new Android, of course, there are no special changes. Google has added a very interesting function to change the theme of the settings menu to dark. Unfortunately, this is not included in the release. Another significant change is the applications menu. It's still white, but the programs are now scrolled down and sorted alphabetically. Not to say that this is the right decision, but you can get used to it. The four most frequently used applications are always displayed at the top.
Loxrin has also changed slightly. Previously, it was possible to quickly get into a dialer or a camera, now there is a voice search and the same camera. This fact confirms that Google focused specifically on Google Now, but more on that later. To be honest, there is a lack of quick access to the "Phone", since you do not use voice search often, but you have to make calls all the time.

By the way, the dialer has been slightly redesigned, now the call history is displayed in the style of cards. The add contact window has also slightly changed in design. The settings have become much more convenient than on Android Lollipop.

There are a few minor Marshmallow innovations that make it easier to use. So, for example, in the curtain of notifications there is a highly customizable Do Not Disturb mode.

The application menu in the settings looks a little different - the tabs have been removed horizontally, but by clicking on the settings icon at the top, you can access additional functions: "Default Applications", "Links", "Permissions" and others.

In the "Memory" item, you can now see which program, for what period of time and how much memory was used.

Finally, Google made a normal data backup - not just restoring programs from the Play Market, but a complete restoration of the device with all its data and settings.

The Battery item hasn't changed much, but fans will definitely love that it displays the amount of mAh consumed by each process. Previously, this functionality could only be achieved with.

It was 2015 and Google finally implemented showing battery percentages in the status bar. True, so far this is only available through the settings for developers. To enable them, you need to tap on the build number several times, after which the "For Developers" item will appear in the settings, where you need to activate. Also, this mode can be activated by long pressing on the settings icon in the notification curtain.
In addition to displaying percentages, here you can customize the status bar and the notification curtain, and enable the demo mode, with which it is very convenient to take screenshots.

Overall, the Android 6.0 Marshmallow interface has changed for the better, and minor cosmetic changes are a step in the right direction. You will have to get used to some innovations, but the impressions of the appearance are still only positive.
An unexpected feature is the built-in file manager, which can be opened in the "Storage and USB" item using the "Open" button.

The star of the show was the Google Now service, which got smarter and got the Now On Tap function. The point is that when you press the "Home" button, the system tries to find places, artists, people, music or movies in the application in use and opens the information. On paper it is not at all impressive, but in life it is really useful and convenient.

For example, if someone sent you a place in Hangouts, you can immediately open information about it, but if it's a cafe or restaurant, book a table. It can work not only with Google Maps, but also with YouTube, Google Play Music, etc. Keep in mind that Now On Tap is not magic, so you cannot get information on absolutely everything that is on the screen. The more programs installed on the device, the better Now On Tap works.
For residents of Russian-speaking countries, there is unpleasant news - the function does not work in Russian, so you will have to switch the system language to English.
This feature has been around for a long time on iOS, but with the release of Marshmallow, it has migrated to Android as well. The essence is very simple - the user himself decides which applications have access to what. Moreover, immediately at the first start, the system asks which data to provide access to. You can change your mind at any time, as noted above.

Android 6.0 officially came out with API Level 23, which allows you to customize app permissions. All programs on the device must be updated to support this feature.
Not many people know that even in Android 5 Lollipop there was a lock function in the application. Now it has been finished a little. The point is that when this function is turned on, the system fixes the application on the screen, and you simply cannot exit it. Very useful for when someone picks up your phone.
First you need to activate the function in the settings.

After that, the "Attach" icon will appear in the multitasking menu.

In order to exit, you must simultaneously press the "Back" and "Browse" buttons.

In this mode, only the pinned application is available. It is impossible to open even the notification curtain.

Performance and autonomy
At the Google I / O 2015 conference, the company introduced a very interesting mode - Android Doze, which helps to save battery power when the device is in standby mode.
Another feature - App Standby - also allows you to save battery power when the device is not in use. This mode is configured through the application menu. The user himself chooses which programs should work "at full", and which to save the charge.

Google stated that Android 6.0 will save up to 30% of battery power, and the Nexus 5's lifespan will almost double. To be honest, there is virtually no difference.
In terms of performance, here the gadget really came to life. For the entire time of use, there was not a single bug, switching between applications is carried out without delays, the system itself works flawlessly. This may be due to an improvement in the ART runtime.
 Skype free download Russian version Install Skype application
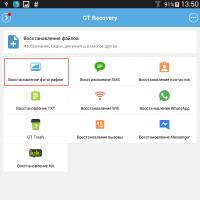 How to recover a photo on Android after deleting it?
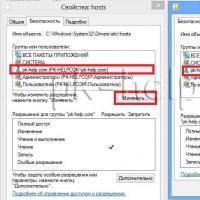 Original hosts for Windows operating systems What should be in a Windows 7 host
 An authentication error has occurred
 Open the following ports at the client's workstation
 How to hide all VKontakte friends in the new version?
 Hide friends on VKontakte