How to edit a VKontakte group. Create a VKontakte group. The main differences between the Public Page and the VKontakte Group
Almost every community owner on the VKontakte social network is interested in the issue of group editing to one degree or another. Further along the course of this article, we will cover all the main nuances regarding community editing tools.
First of all, you should familiarize yourself with the material on the topic of maintaining a public, since there we touched on important aspects. In addition, thanks to this, you will gain a certain amount of skills in terms of group development.
With all that said, we draw your attention to the fact that most of the material is intended for users with privileges "Owner". If you are an administrator, moderator, or editor, you may be missing some of the affected items.
Note that the article is equally suitable as a community creator with the type "Group", and "Public page". The only significant difference may be a different appearance of a particular section.
Method 1: Full version of the site
The vast majority of people who have the VK community in their use prefer to edit through the full version of the site. All further described actions will be related to the section "Community Management". You can get there in the following way.

Once on the page with the main parameters of the group, you can proceed to a detailed analysis of their purpose.
- On the tab "Settings" the main elements of community management are located. It is in this section that the following changes are made:

This tab also contains tools for exporting the community to Twitter and the ability to create a separate room in Snapster for followers.


Using this feature will allow you to customize the display of selected sections on the main page of the community.


You can also create a widget to make it more convenient for visitors to use your public.

This is where you can finish editing the group through the full version of the VKontakte social network site.
Method 2: VK mobile application
If you are interested in the process of editing a group through the official mobile application, you need to first read the overview of such an application directly. A special article on our website on the VK mobile add-on for the iOS platform can help you with this.
Mobile applications for Android and iOS have a minimal difference between them.
As well as in the case of the full version of the site, you first need to open the section with the main parameters.

Being on the page "Community Management", you can start the editing process.
- In chapter "Information" you are given the option to change the community's master data.
- On the page "Services" you can edit the content displayed in the group.
- The leaders tab is designed to view a list of people with special privileges with the possibility of demotion.


Many users have difficulty with the question of how to edit . If almost everyone can create a community, then only an experienced user can manage it and make the necessary adjustments.
First you need to understand that the procedures for editing a group through a PC and a smartphone have significant differences, which are mainly due to differences in the set of functions of the full and mobile versions of the site. Consider the instructions for each of these devices.
Most often, editing the VK group is carried out through a PC, since the full version of the site is much more convenient and understandable than the mobile one. All processes in this manual are linked to the Management section, the path to which looks like this:

- Click on the name of the desired community, moving to its main page.

- Under the group avatar, find the Manage item. Click on it.

Now you can analyze in detail the procedure for editing a group.
Settings
The Settings tab contains several blocks at once. The first one is General Information, where you can change the name of the group, its description and type. Using the Upload hyperlink, you can add or change . And in the Address line, write the letter code of the group page.

The following block is designed to work with an action button:
- after enabling it, you can select or change the type of action (open the site, make a phone call, send an email, etc.);
- depending on the selected type of action, specify a contact for communication (phone number, email address, etc.);
- specify or change the name of the button (Contact/Write).

The Additional information block allows you to set the topic and theme of the group, as well as age restrictions. If necessary, here you can change the contact phone number, the address of a third-party site or the actual address of the company.
Attention! After all the changes have been made, be sure to save them using the button at the bottom of the screen!

Sections

In this tab, you can control the availability of various sections and blocks in the community structure:
- open or close the wall;
- hide, open or restrict access to photos, videos, materials, discussions, documents;
- enable or disable the Events and Products blocks;
- change the settings of the Goods block (delivery region, currency, store contact details, etc.);
- define the main and secondary blocks.
In addition, if necessary, you can connect the Store application here. To do this, check the box next to the corresponding line and click the Save button.
Comments

This tab is for editing the comments option. You can enable a keyword filter or block messages containing obscene language by checking the necessary items in the list of settings.
At the bottom of the screen, you can see messages that have been removed for ethical reasons.
Links

This tab has only one function - adding relevant links to other VK pages or third-party resources. This will help make the community more informative and ensure a steady flow of visitors to the main site.
Addresses

The full name of the section sounds like Addresses and opening hours, from which it is clear that here you can specify the actual address of the company (if available), add geolocation, phone number and opening hours. For groups representing a virtual representation of an offline business, this option is extremely important, as it creates the impression of openness and accessibility, both for existing and potential customers.
Working with the API

This tab allows you to generate group access keys. As a rule, they are used by the most advanced SMM specialists. And for beginners, it is enough to know that the API key is a kind of virtual signature of the user or the VK community.
Members

In the "Members" section, you can search for information about users who have subscribed to the community, grant them privileges, or add them to the Black List.
Messages

Here you can enable the Community Messages option, after which the corresponding block will appear in the left menu column. In a special text field, you can write the actual greeting text that will be automatically sent to users who start a dialogue with the bot.
Applications

In this section, you can connect or remove applications that are necessary for the effective functioning of the community.
Money transfers

This section is intended to regulate the function of monetary relationships between users in a group.
Content Complaints

Here you can see negative reviews on publications in the community.
Editing a group via the mobile app
Managing a community through a mobile application is not very convenient. However, if there is no other way out, you can follow the instructions below:
- In the standard way, enter the section with group settings.
- In the Information section, you can change the main parameters of the community.
- The Services section allows you to edit the content of the page.
- The Blacklist section displays blocked users. If desired, you can easily remove or add any person here.
- The Invitations section contains a list of users who have been sent invitations to join the group.
- Applications is a section containing a tool for approving or deleting applications to be added to the community.
- In the Members tab, you can see the full list of members, including administrators, moderators, and other users.
- The Links section is designed to add and remove links to internal pages of the social network, as well as to third-party sites.
As you can see, in many ways the menu items for managing the community through the mobile application are the same as the items in the full version of the site. Therefore, if necessary, you can make changes to the group, even while away from the PC.
The social network VKontakte offers ample opportunities for creating, developing, and editing groups. The intuitive interface allows you to quickly customize the community to the needs of the target audience, which ensures stable monetization in the long term.
Your own Vkontakte group is an opportunity to realize your talents, find new friends of interest, and most importantly, earn income. Many companies and individuals providing a wide range of services (cosmetology, nail services, hairdressing, tailoring) use social network groups to promote themselves. It is necessary to figure out how to create such a community correctly, and learn how to manage it rationally.
Creating a VKontakte group
- It all starts with registering on the network and creating a personal profile, while a mobile phone number must be linked to the page, which increases the degree of account protection;
- Next, go to the "My groups" section, where select the "Create community" button.
You will see the task of selecting the type of group:
- Group - a community that can be both closed and open, created for active communication of friends;
- Public page - is an open official community that is suitable for promoting both individuals and companies;
- An event is a community created for the implementation of certain events - concerts, performances of musical groups, memorable events in clubs, etc.
After selecting the type of group, you must click on the "Create Community" button.

Going to the community description page, you will need to specify the topic, select its type “Open / Closed”, determine the possibility for group users to participate in discussions, post audio, video format materials on the group wall. After making the settings, you should save the data and your group is ready.

VKontakte group management
Group management means appointing and removing administrators, adding and deleting users, viewing statistical data. But first of all, you should start by uploading a group avatar that will attract the desired audience.
- First you need to select a personal one from the list in "My groups", go to the "Management" tab;

- Next, in the window that opens, select "Community Management", the line of which is located first under the group avatar.

- By selecting the "Participants" tab, you can define the role of one or more users from the list that appears (the moderator filters messages and users, the editor changes the text, photo, the administrator determines the rights of other users) or change it. In this case, the creator of the page will always have more rights than any of the users.

- You can move a user to the black list by copying his address. In "Community Management", by going to the "Black List" tab, add the copied id.

In the window that appears, select the blocking time, reason, comment. It also allows you to remove a user from the list or change the reason for getting into it.

Greetings! Come on, tell me, many of you have been thinking about how to create a community in contact and monetize this enterprise? I am sure that among you there are those who tried to become the owner of a profitable group on a social network, perhaps even filled it with content, did design, but did not achieve the popularity of their offspring, failed to promote it. That is why I decided to devote today's article to how to promote a group in contact from scratch. From my review, you will learn a lot of interesting information, learn about what needs to be done in order to the group flourished. All advice will practical, and you can immediately apply them without putting off in a long box called "Tomorrow".
Why are we doing this?
So, I would like to start with the fact that on the Internet we can find a huge variety of various publics with different thematic focus. However, profitable in this variety are only individual units. I think you all understand that the scale of the project primarily depends on the efforts of its owner, the leader, who leads his caravan through the endless desert of possibilities. The size of the capital, calculated on the creation and promotion of the VKontakte group, in this case is a secondary factor.
Well, imagine, you decided to whip up a resource in a hurry, gain subscribers into it, and now you are sitting, waiting for the dough to start cutting. I advise you to roll up your lip and wipe the flowing saliva. Nothing in this world falls from the sky(and what falls usually does not bode well).

To earn a couple of pesos, you have to work with your head. First of all, think and decide for yourself, what exactly do you want to do? I.e, decide on a topic your community. I offer you several options from which you can choose the one that seems most attractive to you:
- earnings on advertising and affiliate programs(in this case, the topic is absolutely not important);
- personal blogging;
- creating a resource dedicated to your hobby(this could be finance, music, dancing, or something else).
Socelin for cheating quality subscribers in public
Detailed instructions for creating a community from A to Z
We create a VKontakte group from scratch

Setting up a group
Since we have more or less figured out how to create a community in contact absolutely free, I think we can move on to its direct at the construction site. To do this, follow these steps:

Promote VK pages and publics with Brobot
Registration
Since we are interested in you and me, we need to make sure that in our community there is sufficient number of participants. From design quality group will depend on its attractiveness in the eyes of users, and therefore I propose to go to this lesson:
- Upload a photo (avatar) to your community. Please note that the photo parameters must be 200*500 . Edit the photo and thumbnail, and then save the result.
- Download Links, leading to your site or other thematic community. Do not forget to leave your Skype, a link to a chat in a telegram, to a page on Instagram and a YouTube channel to your subscribers. Edit all titles and save.
- If you are really interested in how to create a popular group in contact, then do not ignore such an important point as " Latest news". Edit this block regularly, do not neglect the importance of fonts. Before saving the result, make a preview of the page.
- In chapter " Discussions» add new topics that will be useful to your readers.

- Add videos to your project. It's great if the videos are filmed by you and posted on YouTube. This way you will increase traffic on the channel.
- When doing this, keep in mind that the sale of goods in it will be effective only if the “Albums of Photography” are well maintained. Upload high quality photos, make a detailed description of the product being sold, under each photo indicate the price of the product and a link to the seller (administrator or manager).
- In the section " Documentation» you can download useful instructions and manuals. Owners of online stores can keep prices or lists of services provided in this section, for example.
- Do not forget about regular interactions with your subscribers. Conduct polls several times a week, encourage people to express their opinions in the comments. Very good when expanding the audience of the group to use promotions and contests. They can be held once a month, for example.
- For those who plan to do business with their group, care must be taken adding products with a clear name and detailed description to it. Remember that the demand for a product will depend on how attractive the photo of this product is. Each product must have adequate price, which must also be specified. Do not forget to indicate to whom / where to pay for the order, in what form the payment is made, how and where the delivery is carried out, and also what guarantees you give to your customers (delivery cash on delivery, the possibility of exchange).
- Optionally, you can change the group and make it a public page. If you do not know what is the difference between a public and a group, I advise you to read a separate article on this issue.
- Create in a group convenient menu, make navigation easier. To do banner and wiki menu in the community I turned to specialists in this topic, if you need it, ask in the comments or write in a personal message - I'll throw off a couple of guys who do this. I decided not to waste time doing it myself, but there are a lot of manuals and articles on how to do these actions yourself on the Internet. You can use the search engine and check.
- And, of course, take care of the quality of the content. Please note that in the group commercial posts should be with photos and make up no more than 50% of all the material you publish. To increase the number of subscribers, pay attention to posts with fascinating information, do not forget that people are attracted to fun and a good sense of humor. More attractive is the information that is presented in the form of images..

- In order for customers to trust you more and, as a result, advise their friends and acquaintances, provide them with the ability to leave feedback about your work. To do this, you can create an appropriate topic in the "Discussions" section. Offer discounts to regular customers and make small gifts and bonuses.
Gather the target audience for business with Pepper.ninja
How to manage a group?
To make adjustments to your community at any time, you just need to click on the icon with three dots, which is located under your group avatar. In the window that opens, you will see the categories:
- « Information”, where at any time you can edit the description, name and other fields;
- « Members”, which contains a complete list of all subscribers of the group;
- « Leaders". Here you can add new or change the access rights of existing community administrators and editors;
- « Black list» - a place where you can block unnecessary subscribers or persistent violators of the rules of your group;
- « Links»;
- « Community Statistics". This category is one of the most important and contains data on:
- Group attendance- the number of unique visitors, views, characteristics (age, geographic location, gender) of the audience that is interested in your group;
- Audience reach, which looks at your community's posts in the "My News" section, and data about your subscribers;
- Activities- the actions of subscribers, the reposts of your posts and the reactions of other users of the social network to this data.
Results
Now that you know everything about how a VKontakte group is created, you boldly you can start implementing your own selling platform or increase the conversion of an existing community. Remember, your every action and decision affects how subscribers treat you and what impression your resource makes on them. Don't stop there, be open to experiments and see you soon!
If you find a mistake in the text, please highlight a piece of text and click Ctrl+Enter. Thanks for helping my blog get better!
Almost every registered user of the popular social network VKontakte is a member of at least one group or public.
At the same time, many users create their own groups and are actively involved in their content and promotion.
We have the following items on the agenda:
The first question that immediately arises is why you need to create a VKontakte group? Most often this is done just for the sake of interest. In this case, a person chooses a topic close to himself and collects an interested audience.
Sometimes groups are created for the purpose of mutual assistance (material, informational or some other). And sometimes - to earn money (for the purpose of subsequent placement of advertising posts, links, announcements, etc.).
Creating a VKontakte group
The question of how to open a VKontakte group is technically solved quite easily. Here you will not need any special knowledge and skills (for example, as with). So, you are already registered on VKontakte and, therefore, you have your own personal page.
To create your own group, select the "My groups" item in the side menu of your page (number 1 in Fig. 1). A "Popular Communities" ad block will appear with a suggestion to "Subscribe", as well as a list of all communities in which you are a member. You need to click on the "Create a community" button (number 2 in Fig. 1), located in the upper right corner.
 Rice. 1. To open a VKontakte group, on our page, click on the "Create Community" button.
  Rice. 2. Enter the name of the group, select the type and click on the "Create Community" button
 We confirm the creation of our group by clicking on the "Create Community" button (number 3 in Fig. 2). After that, the page with the settings for this group will open.
Group settings
The first tab with settings is called "Information" (number 1 in Fig. 3). All the main community management options are located here.

In the "Name" item (number 2 in Fig. 3), you can edit the name of the newly created group.
In the "Page address" item, if desired, you can change the URL of the community. To do this, instead of the standard URL in the "club82063972" format, specify some simpler and more memorable address, for example, superknigi. If the selected URL is already taken, you will see the corresponding inscription.
In the paragraph "Description of the community" (number 4 in Fig. 3), you can place a small text description. Usually they talk about what the group is dedicated to.
Below, select a topic from the list that will open after clicking on the small black triangle - it is marked with the number 5 in Fig. 3. Specify your site, of course, if it exists (number 6 in Fig. 3). You can even indicate your location using the corresponding menu item (number 7 in Fig. 3).
- wall settings (number 8 in Fig. 3),
- photographs (number 9 in Fig. 3),
- video and audio recordings,
- documents,
- materials and
- discussions (number 10 in Fig. 3).
Each of these categories can be turned off, made open, or restricted. For example, in the off state, no one will be able to write anything on the wall. If you turn off photos and videos, then no one will be able to add them.
In limited condition a particular category can only be modified by an administrator or community moderator. For example, only administrators and moderators can write on the wall, only administrators and moderators can add audio and video recordings.
open categories are subject to change by ordinary users. Users have the opportunity to add comments to the wall, photos to albums, videos, etc.
In the last paragraph "Group Type" (number 11 in Fig. 3), you can set the format for new members to join the community. All users without exception can join an open group. In a closed group - only after the approval of the administrator or moderator. As for the private group, you can get here only at the invitation of one of the administrators.
On fig. 3 (numbers 8-11) shows the default group settings, that is, such settings are offered automatically. You can agree with such settings, or you can configure them at your discretion, as described above.
At the end, do not forget to approve your changes by clicking on the "Save" button (number 12 in Fig. 3).
The second tab in community settings is called " Members» (next to the number 1 in Fig. 3). Here you can view a list of users currently in your group. Each of the users can be removed from the group, or appointed as a leader (the person will have the rights of a moderator).
The third tab is called " Black list". Users are posted here, for some reason blocked in your community (insults of other members, spam, etc.).
How to make a link in a group
 Rice. 4 Create a link in your group
  Rice. 5 Enter the URL of the link to the VKontakte group or to an external site
 I entered the address of the free course from my website. Then click on the "Add link" button (number 2 in Fig. 5).
 Rice. 6 Enter link text
 In the window marked with number 1 in Fig. 6 “Enter link text”, click the mouse and enter the text of your link. For example, I entered “Computer Literacy for Beginners in 30 Days”. After that, click on the “Add” button (number 2 in Fig. 6). The link looks like the one shown in Fig. 4, number 2.
How to choose the author of a post in a group?
The “Submission Settings” menu will appear, in which you can choose on whose behalf the entry will be published:
- on your own behalf, or
- On behalf of the community.
If you check the box next to "On behalf of the community", then the entry will be published on behalf of the group.
 Rice. 7. Choosing an author when publishing a post in a group
 I invite you to the group “Computer Literacy with Hope”
I am pleased to invite everyone to join the new VK-public.
 Donations in the VKontakte group: how to add the VKontakte Donations application
 Align tag content Insert content before the content of the selected object
 Bug fix: cannot modify header information - headers already sent by
 Why voice messages do not work in VK - reasons and what to do?
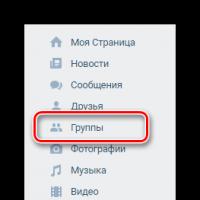 Creating a VKontakte group
 Why is the webcam not working on my computer?
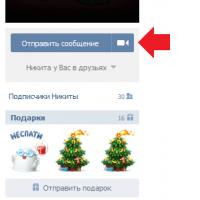 Why is the webcam not working on a laptop