Margin and padding distances are specified in . CSS margins and padding: difference between margin and padding properties. The indentation is set to the last possible element in the house
Let me tell you right now, this is a very important lesson. After studying it, you will be able to place elements on the page, set indents between them, create them inside a separate specific block, and set margins.
padding
Padding is a property that sets the amount of padding an element has from the inner edge of the border to the content. The content can be plain text, an image, or a child element that can also have its own margins.
Units can be pixels (px) or percentages (%).
#block(
padding: 12px /* padding from the block borders to the content - there will be 12 pixels on all sides */
}
It is possible to specify a field only on one specific side:
padding top- a property that creates margins on top.
padding right- a property that creates fields on the right.
padding-bottom- property that creates bottom margins.
padding-left- a property that creates margins on the left.
#block(
padding-bottom: 25px /* bottom margin 25px */
padding-left: 15px; /* left margin 15px */
}
As you noticed, if you specify fields from 2 or 3 sides in this way, you will get a long code. There is a shorthand notation for the padding property for this. All 4 values are indicated in turn in it - from each edge in one line, the movement goes clockwise, starting from the top:
Padding: Top Padding Right Padding Bottom Padding Left;
#block(
padding: 25px 10px 15px 6px; /* top 25px, right 10px, bottom 15px, left 6px */
}
margin

The margin property, unlike padding, sets the amount of padding between the borders of elements.
If the element is a child, then the padding is the space from the element's border to the inner edge of the parent's border.
If the element has no parent, then the indentation is considered to be the free space set by the property to the edges of the border of the surrounding elements.
#block(
margin: 4px
}
To specify indents only on certain sides, the following properties exist:
margin-top- a property that creates indents from above.
margin-right- a property that creates indents on the right.
margin-bottom- property that creates indents from below.
margin-left- a property that creates indents on the left.
Like the padding property, margin also has the ability to shorthand values for different sides. Movement goes clockwise, from the top margin:
Margin: Top Margin Right Margin Margin Bottom Margin Left;
#block(
margin: 15px 10px 5px 25px; /* top 15px, right 10px, bottom 5px, left 25px */
}
Thank you for your attention!
Source: margin or padding?
Philip Sporrer.
Translation: vl49.
When is it better to use margins and when to use padding for formatting purposes, and does it matter?
I struggled for a very long time in search of suitable answers. And only after writing a lot of terrible, illegible CSS code, accompanied by various side effects, I could confidently say that I had found the fundamental ironclad rules regarding the issues listed above.
For clarity, let's turn to a typical situation that is likely to be familiar to every user interface developer in 2017. We have the simplest card template.
In this example, two types of intervals can be distinguished:
It is very important to understand here that we are dealing with two different concepts, which should not be interconnected when linking. That is, if I need to change the distance between the cards and their container, for example, up to 24 pixels, then this should not in any way affect the spacing between the cards themselves.
Implementing an example with CSS?
There are literally thousands of ways to create such a template using margins and padding, but I would like to present to you one of them, which demonstrates the correct use of the margin and padding properties. Moreover, this method allows you to add other cards later.
Container(
padding: 16px
}
.card + .card(
margin: 0 0 0 8px;
}
Just 2 selectors and 2 rules.
What is the function of the plus sign?
Symbol + represents adjacent selector. It only points to the element immediately following the element specified before this selector.
As you can see from the image above, in our case, this selector will select every card preceded by every other card. So with the adjacent selector, we can set the left margin for every card except the first one.
This means that we have the ability to add any number of cards we need, the distance between which will always be eight pixels.
Everything works fine until we need to place something other than a card next to the cards. Well, let's say a button "Add card" ("Add card"):
Based on the CSS snippet we already have, we probably wouldn't give the new element that represents the button a .card class, since it's not a card. How to be? Is it worth it to create an additional class name .add-card , which contains the same rule with a margin property as the .card class? No, there is a better solution.
Lobotomized owl *+* .
And what does it look like. Despite the funny association, this method works great, and I've been using it all the time since I found out about it. So, what is all this for? Here's a look at the relevant CSS code:
Container(
padding: 16px
}
/* Well, did you recognize the lobotomized owl? */
.container > * + * (
margin: 0 0 0 8px;
}
As you probably remember, the previous selector applied to any card that was preceded by another card. Now with its help we can format every element immediately preceded by any other element, including the button, of course.
Eventually.
I sincerely hope that the material presented here has helped you figure out when to use padding to separate the content contained within the container, and when to use margins.
As a conclusion, I would like to present for your consideration a pen project that demonstrates the examples above, as well as two rules that have been tested by my own experience. So, we use:
padding- for spaces between the container and its content.
margin- for gaps between elements inside the container.
Post Views: 427
Description
Sets the value of the margins around the element's content. A margin is the distance from the inner edge of an element's frame to an imaginary rectangle that bounds its content (Figure 1).
The padding property allows you to set the padding value for all sides of the element at once, or to define it only for the specified sides.
Syntax
padding: [value | percent] (1, 4) | inherit
Values
It is allowed to use one, two, three or four values, separating them with a space. The effect depends on the number of values and is given in Table. one.
Margins can be specified in pixels (px), percentages (%), or other CSS-friendly units. The inherit value indicates that it is inherited from the parent. When specifying a margin as a percentage, the value is calculated from the width of the element's parent.
HTML5 CSS2.1 IE Cr Op Sa Fx
The result of this example is shown in Fig. 2.

Rice. 2. Applying the padding property
Object Model
document.getElementById("elementID ").style.padding
Browsers
Internet Explorer up to version 7.0 does not support the inherit value.
Shastaya on the forums came across the fact that the question still arises, what does padding, and what margin and what are the differences between them. That is why I decided to remind about it. So, without resorting to abstruse phrases, let's set the task and analyze an example on which everything will become clear.
Task: On the page need a red block(200x200 pixels), which recedes from the edges of the browser top and left by 40 and 70 pixels respectively, and the text inside which indents from the left and top by 40 pixels.
Decision: look at the picture and the code. Our red block should not exceed 200 by 200 pixels, and it should be padded from the edges of the browser (or other content blocks). Actually, we do these indents through margin. If we do padding, then the padding happens inside our red block and the padding is obtained with the background of the block itself (that is, red).
text, text, a lot of text, a lot - a lot of text text
In addition to the properties used (lines 6-9), there are also the properties margin-right, padding-right, margin-bottom, padding-bottom - they are for indents to the right and bottom, respectively. The values of all these properties can be in pixels (px), percentages (%), or in em units.
Basically, that's it. However, there are some other features of working with them.
Features of margin and padding
When using padding, the padding's dimensions must be subtracted from the block's height and width, otherwise the block's size will increase by the padding's size.
If you set margin-left and margin-right with auto values for some block, then if the block has a fixed width (for example 400px) and there is no float CSS property, then this block will be aligned to the center of the element in which it is located. Actually for non-rubber layout with center alignment, this alignment method is usually used. Even though IE 5.5 and earlier don't support the auto value, it still doesn't stop you from using it all the time=).
It is not recommended to use padding and margin in tables because the effect will be unpredictable in different browsers.
And the last thing I wanted to say. Don't forget to use shorthand post constructs like margin: 10px 0 5px 20px;. If the indent is zero, then you can simply put a zero, without specifying parameters. Remembering which of the parameters belongs to which border is very simple - for the block, the indents go clockwise: the first number is on top, the second is on the right, the third is on the bottom, the fourth is on the left.
That's actually all I wanted to tell you today. Happy weekend everyone!
The padding CSS property is responsible for setting the padding inside the element from its border.
CSS Syntax padding
padding : top right bottom left ;
- top - indent from the top border of the element;
- right - indent from the right border of the element;
- bottom - indent from the bottom border of the element;
- left - indent from the left border of the element;
Values are most often specified in pixels. Percentages and other acceptable CSS units are also allowed.
Note 1
More than four values are allowed. Depending on the number of values, the actions will be different:
- If 3 values are given, then the first value sets the indent from above, the second - both left and right, and the third - bottom
- If 2 values are given, then the first value sets the indent from the top and bottom, the second - to the left and right of the content
- If 1 value is set, then the indentation is set to the same indentation for all sides. For example:
padding : 10px 10px 10px 10px ; You can set it more compactly: padding: 10px
Note 2
Unlike the CSS margin property, negative padding values are not allowed.
Also padding has 4 separate CSS properties. Each of them is responsible for some direction.
- padding-left - padding from the left border of the element;
- padding-right - padding from the right border of the element;
- padding-top - padding from the top border of the element;
- padding-bottom - padding from the left border of the element;
for example
padding : 3px 5px 7px 10px ; Or you can specify in detail: padding-left : 10px ; padding-right : 5px ; padding-top : 3px ; padding-bottom : 7px ;
Examples with different indents within an element
Example 1: Indent text within a tag
Пример с нулевыми отступам (padding: 0px)
Пример с одинаковым отступом от всех границ (padding: 10px)
Пример с разными отступам (padding: 10px 0px 0px 30px)
Вот как это выглядит на странице:
Пример с нулевыми отступам (padding: 0px)
Пример с одинаковым отступом от всех границ (padding: 10px)
Пример с разными отступам (padding: 10px 0px 0px 30px)
Пример 2. Отступ объекта внутри объекта
Понравилась статья? Поделитесь ей
Пример с нулевыми отступам (padding: 0px)Пример с одинаковым отступом от всех границ (padding: 10px)Пример с разными отступам (padding: 10px 0px 0px 30px)
Вот как это выглядит на странице:
Пример с нулевыми отступам (padding: 0px)
Пример с одинаковым отступом от всех границ (padding: 10px)
Пример с разными отступам (padding: 10px 0px 0px 30px)
 Пожертвования в группе Вконтакте: как добавить приложение Пожертвования вконтакте
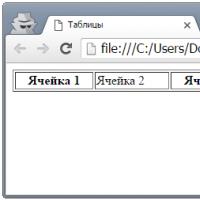 Выравнивание содержимого тегов Вставка контента перед содержимым выбранного объекта
 Исправление ошибки: cannot modify header information — headers already sent by
 Why voice messages do not work in VK - reasons and what to do?
 Creating a VKontakte group
 Why is the webcam not working on my computer?
 Why is the webcam not working on a laptop