Repairing the component store in windows 8. How to fix errors when installing Windows updates using built-in component repair
I apologize for the delay in writing articles, the point was that I was transferring the site to the server.
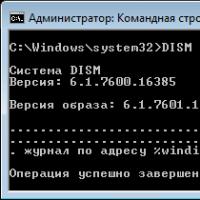
Friends, I want to help you with a problem that occurs when typing commands to solve some problems on the command line. Let's say you decide, then you need to enter the following command at an elevated command prompt: "Dism.exe /Online /Cleanup-Image /StartComponentCleanup". Upon the instant end of the process, we see an error of the following type:
Error: 14098
Component store corrupted
In this article I will try to figure out what can be done.
Fixing: "Error 14098 component store is corrupted"?
I think many of you know what the purpose of the WinSxS folder is and why reduce its size when necessary.
This folder stores some Windows system components. Components are files needed to restore the system, in other words, actual copies of Windows are placed there. Thus, over time, this folder can grow to a volume of several tens of gigabytes. Of course, users immediately resort to action, namely the use of the command line and the shady Disk Cleanup tool. The second option does not always help, so the command line comes into play. When we enter the following command Dism.exe /Online /Cleanup-Image /StartComponentCleanup, which cleans the WinSxS folder, an error may appear The component store is corrupted. Error: 14098. Forgive me for repeating myself, but let's get down to business.
From the name it is clear that some kind of storage is damaged, which, moreover, can be restored in this way:
Let's first verify the integrity of the system files using the command:
| DISM /Online /Cleanup-Image /ScanHealth |
And yes, don't forget to run CMD as administrator.

At the output, we will most likely see a message that "the component store needs to be restored."
Then we type this command:
| DISM /Online /Cleanup-Image /RestoreHealth |

Now restart your computer for the changes to take effect, and then type the command again to clear the WinSxS folder:
| Dism.exe /Online /Cleanup-Image /StartComponentCleanup |
I want to note that when restoring the storage, you must have access to the Internet, since the necessary files will be taken from the Update Center. Of course, in the absence of the Internet, you can also solve the problem, for this you need an installation image of the system. More on this in the next article.
Applications from the Windows Store that don't work or are malfunctioning, problems with the Windows desktop, and instability of the operating system as a whole are often the result of damage to important system files. The easiest way out of a situation where system files are damaged is either . But such a move requires the presence of the latter - if not in a fresh edition, then at least in some kind. If there is not even at least some restore point or backup, before resorting to a radical solution to the problem in the form of Windows, you can try to restore the integrity of its system files. Below, we will look at 5 ways to do this, provided that the current Windows is still able to boot. Only two methods of restoring the integrity of Windows files will be offered directly, the other three are solutions for situations complicated by the need to restore the storage of system components.
1. Restoring the integrity of Windows files
To detect missing or damaged important system files and restore them, Windows provides a standard sfc.exe utility that works using the command line. The utility replaces damaged or missing system files with their originals from a special component store located in the WinSxS folder inside the Windows directory on drive C. Run the command prompt as administrator and enter:
Press Enter. After scanning for system files to be replaced, they will be restored.
But this is with the successful completion of the operation. If the contents of the storage itself are damaged, the operation will end with a message about the impossibility of restoring some of the system files. In this case, you must first resort to restoring the Windows component store, and then carry out the operation to restore the files to their working directories.
2. Restore System Component Store: DISM
To restore the storage of original system files, we will resort to the help of the Windows image servicing utility - DISM, which also works through the command line. During the vault repair process, the utility uses the Windows Update service and downloads missing or corrupted system files from Microsoft servers. Therefore, the presence of the Internet is a prerequisite for a successful operation.
Run command prompt as administrator and enter:
DISM /Online /Cleanup-Image /RestoreHealth
Press Enter. Upon a successful attempt to carry out the operation, we will see a corresponding notification.

Now we carry out the operation discussed in paragraph 1 of the article.
It may also be that the operation process hangs or fails. Notification of an unsuccessful attempt to perform an operation will, in particular, be accompanied by a suggestion to specify the path from where you can get data to restore the system component storage.

We will consider the process of restoring the storage with an indication of the source of data acquisition a little later, in paragraph 4 of the article.
3. Restore System Component Store: PowerShell
You can restore system components in an alternative way - using the Windows PowerShell tool. This method is similar to the previous one: the Windows Update service is also used to restore the storage. And, accordingly, in this case, an Internet connection is also required. The PowerShell method will take longer than the previous DISM method, but the vault recovery process itself will be more thorough.
Run PowerShell as administrator and type:
Repair-WindowsImage -Online -RestoreHealth

Press Enter. In case of successful restoration of the system file storage, we will receive such a report as shown in the screenshot below, where, in particular, the “Image Health State” parameter will be marked as “Healthy”. And that means that the system file storage has been restored. Now it is necessary to carry out the operation described in paragraph 1 of the article.
4. System Component Store Recovery: Windows Installation Disc
You can resort to restoring the Windows Component Store with an indication of the source of data acquisition if there is no Internet or the two previous methods did not bring positive results. The source from which data is retrieved for restoring the system component store is the installation disk of the corresponding version and edition of Windows. This can be physical installation media - a flash drive or disk, or it can be an ISO image with a distribution kit. The latter must be mounted into a virtual drive by calling the context menu on it and selecting the "Mount" command.

We connect a flash drive, disk or image, run PowerShell as an administrator and enter a command like:
Repair-WindowsImage -Online -RestoreHealth -Source D:\sources\install.wim
In this command, the drive letter of the installation media is subject to substitution. In our example, this is the letter D, and instead of it, in each individual case, you need to substitute your own letter of the flash drive, physical or mounted drive, as they appear in Windows Explorer. After entering the command, press Enter.
As a result of the operation, as in the previous case, its successful completion will be indicated by the "Healthy" state of the "Image Health State" parameter.

After restoring the storage, we launch the operation described in paragraph 1 of the article.
5. Update Windows 10
You can restore the integrity of corrupted Windows 10 system files by updating the system using the Media Creation Tool. It can be downloaded from the official Microsoft website. Updating Windows 10 is the longest time, but at the same time the most reliable way to return the operating system to working capacity. The process of updating Windows 10 takes about the same time as the process of reinstalling it. As part of this process, all corrupted system files will be overwritten, user profile data, installed programs and system settings will be saved, and the output will be the freshest, with all Windows 10 Anniversary Updates installed.
Launch Media Creation Tool. We accept the license terms.

Select "Upgrade this PC now".


And wait for the update process to complete.

Have a great day!
System failures are inextricably linked to our digital lives and we should always be prepared for them. Many users seek to anticipate and prevent such failures by installing all sorts of utilities designed to bug fixes. However, unfortunately, even such foresight does not always help to effectively resolve the issue.
In this article, we will consider a situation in which the storage of system components located in the folder WinSxS.
If you are not a fan of using third-party software and, even more so, looking for it, then this article will definitely be useful for you and will help you fix the problem in a short time. Let's get started!
DSIM Diagnostics
Before you begin recovery, you must determine the state of the vault. To do this, open a command prompt as an administrator and enter the following command in it:
DISM /Online /Cleanup-Image /CheckHealth

Useful articles

This command is designed to scan the system storage for possible image corruption and, if there are errors, tell you if they can be fixed. It should be noted that the command does not make any changes to Windows, its only task is to analyze the system.
Even with a positive test result, one cannot be one hundred percent sure of its reliability. After all, a failure could occur in a missed small-sized file, which also makes a certain contribution to the system's performance.
How to be in this case? It is enough to change the parameter CheckHealth on the ScanHealth, which will allow you to perform a deep scan of the storage. This check will take a little longer.
Enter the following command at the command line:
DISM /Online /Cleanup-Image /ScanHealth

Restoring system storage
If no errors were found, congratulations! This indicates that the WinSxS storage has not been corrupted and does not need to be fixed. If system failures do not cease to pester you, the root cause should be looked for elsewhere.
Errors found? For example:
- The component store is recoverable.
- Error: 1726 Remote procedure call failed.
- Error 1910 The specified object export source was not found.
These messages tell us that the vault is corrupted in one way or another and needs to be repaired.
To fix the problem, type the following command at the command prompt:
DISM /Online /Cleanup-Image /RestoreHealth

Restoring the component store using a bootable flash drive
In some cases, the DISM utility may not be able to help you without additional materials. The following messages signal this situation:
- 0x800f0906 Failed to download source files. Specify the location of the files needed to restore the component using the Source option.
- 0x800f081f Could not find source files. Specify the location of the files needed to restore the component using the Source option.
- 0x800f0950 DISM failed. Operation failed.
To get out of this situation, you will need a bootable USB flash drive or a disk with an ISO image of the installed Windows 10 operating system.
Use the instructions below to complete the vault restore process:
1. Determine the boot device letter in the partition My computer (This computer).
In our case, this is the disk F:.

2. Double click to open the contents of the folder and navigate to sources.

3. Find a file install.
It may be in the format .ESD or .wim. Remember or write down these data, they will come in handy later.

At this stage, we need to know the indexing of the system image file. Open a command prompt as an administrator and enter the following command:
DISM /Get-WimInfo /WimFile:F:\Sources\install.esd
Attention!
Specify the correct path to the disk where the your Windows. End (installer format) enter according to what is written opposite your his file. It can be with extension .wim.

Now we know the index of the operating system.
5. It's time to go directly to restoring the operating system! Enter the command at the command line:
DISM /Online /Cleanup-Image /RestoreHealth /Source:ESD:F:\Sources\install.esd:1 /LimitAccess

F:- the letter of the drive on which the ISO image of the operating system was installed.
install.esd:1— operating system index.
Limit Access- creating a ban on access to Windows Update.
Now you can be calm about your storage of system components. It has been restored and is ready for further work. However, do not rush to leave us. It remains to perform the last check - checking the integrity of system files.
Open a command prompt as an administrator and enter the command:
sfc /scannow

Now enter the command shutdown /r /t0 and restart your computer to apply and save your changes.
Just in case you need to recover other deleted files and folders on your Windows system, there are tools to help you. Starus Recovery.
 How to Fix Windows Update Installation Errors Using Built-in Component Repair
 Free programs for Windows free download
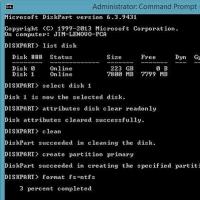 Proven ways to remove protection from the drive
 how to change windows startup ringtone how to set windows ringtone
 Nokia lumiya blacklist in classmates
 How to get a replacement phone under warranty
 Sony Xperia Tablet S - Specifications