How to use the acronis disk director program. Description of Acronis Disk Director. Installing and getting started with Acronis Disk Director Suite
Professional disk management application that allows users to easily perform volume operations. Most of them are in the waiting queue and all jobs will be automatically executed after confirmation. Until then, tasks can be canceled and returned. Tasks are usually completed quickly.
Features of the program:
- Create, delete, resize, merge, split, mirror and convert volumes
- Changing the partition type
- Editing and defragmenting disks
- Checking for disk integrity errors
- Waiting in line with cancel and return buttons
- Acronis Recovery Expert recovers deleted volumes
- Create bootable media
- View log details
- Quick tasks
Acronis Disk Director overview
Partition managers are very useful applications for advanced PC users who frequently reconfigure their hard drives, whether internal or external. Some noteworthy titles in this area are AOMEI Partition Assistant and Paragon Partition Manager.
Another well-known application is Acronis Disk Director. Having in its arsenal a set of different types of disk operations, the program helps users to easily restructure their hard drives, in particular, by creating, resizing, moving, copying, merging and splitting volumes. At your service is a waiting queue for the selected tasks, which will be performed all in a row with the consent of the user. In addition, a built-in module called Acronis Recovery Expert makes attempts to recover deleted volumes that prevent the operating system from booting. Version 12 provides support for Windows 8/8 .1, UEFI machines and Win PE 4.0 / 5.0.
The demo version has no time limit. However, several functions are limited, such as converting MBR disks to GPT disks and vice versa, converting a basic disk to dynamic and vice versa, and cloning basic disks. Users can unlock them by purchasing the full version for $ 49.99 or € 39.95 (for one PC) or $ 79.99 or € 69.95 (for three PCs).
Note: Acronis Disk Director 12 has been tested on an Intel Core i5-3470 CPU @ 3.20GHz with 12GB of RAM running on Windows 8.1 Pro.
Installing the app is very fast and requires minimal attention. The interface is neatly organized and looks a bit like one of the EaseUS Partition Master versions.
All hard drives displayed

A list showing all hard drives is filled up immediately upon startup, also showing their total size, free space, type, file system and status. The bottom of the screen displays a disk map with basic and logical volumes along with unallocated space.
Creating new volumes and setting parameters
New volumes can be easily created using a simple wizard. In addition to creating a primary, Acronis gives users the ability to create a simple, spanned, striped or mirrored partition, depending on the preferred type of disk space allocation. It is possible to set the file system, volume size and cluster size, unallocated space before and after the created volume along with the volume type, letter and label.
Modifying existing volumes and configuring settings

Volumes can be resized by specifying dimension, source or final unallocated space. All unallocated disk space can be added to the volume, while additional free space can be retrieved from other disks as needed. Moreover, the volume can be converted to another type (eg simple, spanned).
Copying volumes and configuring settings
To move or copy a volume, you must select the volume type (basic, simple, spanned, striped, mirrored), destination (unallocated space), and partition size, label, and type (active or inactive primary or logical disk).
Merging and splitting volumes

Merging two or more sections requires two steps: selecting the items to join, and selecting the section to add the others to. Meanwhile, partitioning a volume is done by choosing the original or new size for the volume. To simplify the whole process, users can instruct Acronis to move the selected files to the new volume using a basic tree view.
Changing the partition type and editing the disc

Other disk management tools focus on creating a mirrored copy of a volume, editing disk labels and letters, creating active, inactive and logical partitions, changing their type (for example, DOS 12-bit FAT, root XENIX), deleting volumes to reallocate free disk space, and changing cluster size.
In addition, it is possible to format and defragment volumes, hide them, check disks for errors with the ability to try to fix them and any bad sectors, as well as edit volumes by examining hexadecimal data, partition table, FAT16 boot sector, FAT32 or FS boot sector Info, NTFS boot sector, or FAT Folder mode. You can also use a tree view.
Performing unfinished operations and viewing log details
Most of the operations are not performed immediately. Instead, they are placed in a pending queue, after which confirmation from the user is required to complete all selected tasks. This queue displays a summary of each task, such as hard drive number, drive letter, file system, volume label, and size when the volume was deleted. Unfortunately, Acronis does not implement a mechanism for rearranging already marked operations. However, users can redo each step by undoing and redoing the steps.
All program actions are recorded in a log that contains the date and time of each event along with the details of the job. Either all events, or only selected ones, can be exported to XML format for a closer look.
Recovering deleted volumes and creating bootable media

Acronis Recovery Expert is a special component designed for complete recovery of deleted volumes, especially if the OS has stopped booting. It has an automatic mode that identifies all hard drives connected to the PC. In cases where it stops working, you can use manual mode along with the search method (fast or advanced) to select free space to see the lost partition.
Last but not least, Acronis provides a bootable disk creation tool based on the Linux kernel or Windows PE. Here users will have to download third-party components.

Dignity
In our estimation, the app ran smoothly on 64-bit Windows 8.1 Pro. Most tasks were done quickly, while fast operations (not like defragmentation) used minimal CPU and RAM resources.
Help documentation comprehensively explains Disk Director, prompts are displayed throughout the interface.
Acronis Disk Director gives users the ability to choose their preferred operating system for disk operations. Most of them are in the waiting queue, thus allowing users to change their minds and also leave the workstation unattended for long periods of time while performing numerous and long-term tasks.
All program actions can be viewed in the log files.
disadvantages
During the Softpedia tests, the testers encountered several errors (for example, when trying to create a mirrored copy of a volume), and Disk Director once freezed when we tried to switch from the log back to disk management mode.
Overall score
Although the options are neatly structured, Acronis Disk Director is not an initial choice for inexperienced users who want to quickly perform disk operations. The app is clearly geared towards professionals who want to have detailed control over each setting.
Translating to Russian language: Alexander Ryabov
Found a typo? Highlight and press Ctrl + Enter
This article is devoted to such a software product as: Acronis Disk Director Suite... Here we will consider the following:
- What is Acronis Disk Director Suite;
- Installing and Getting Started Acronis Disk Director Suite;
- An overview of the basic operations with hard disk partitions.
Acronis Disk Director Suite- a comprehensive software package that includes a partition administrator, boot manager and tools for editing hard disk recordings. With Acronis Disk Director Suite, you can:
- Create partitions on your hard drive;
- Resize partitions and their position on the hard disk, divide and merge partitions without the risk of data loss;
- Convert file systems of partitions without fear of data safety;
- Copy / move the contents of sections;
- Delete partitions;
- Recover hard disk partitions deleted as a result of user error or hardware / software failure;
- Format partitions, assign labels and letters to them, hide partitions and make them visible, assign the active status to the partition and perform other operations with partitions;
- Install several different operating systems on one computer;
- Load them from any partition on any hard drive;
- Boot any installed operating systems directly from Windows;
- Install multiple operating systems on one partition;
- Hide any of the operating systems on your computer from strangers or set a password to boot them;
- Duplicate existing operating systems by copying and create the necessary boot configuration for each of them;
- Recover boot records, folder and file structure, detect lost clusters, remove code belonging to computer viruses from disk, and much more.
Installing and getting started with Acronis Disk Director Suite
To install Acronis Disk Director Suite:
- Follow the instructions of the installer;
- You will be prompted to select a Typical, Custom, or Complete installation type. Custom installation allows you to opt out of installing the Bootable Media Builder. You may not need this tool if you purchased a boxed product that includes a bootable CD.
Run on Windows operating system
In the Windows operating system, Acronis Disk Director Suite is launched by selecting Start -> All Programs -> Acronis -> DiskDirector -> Acronis Disk Director Suite.
During the first launch of Acronis Disk Director Suite, you will be taken to the program window, in which you will be asked if you want to work with the program in the mode of automatic operations on partitions ( Auto mode) or in the mode of manual operations on sections (Manual mode).
The capabilities provided in automatic mode are quite enough to create almost any configuration of partitions on your computer's hard drives.
Nevertheless, if you need a detailed view of the structure of partitions on disks, a full set of operations on partitions, as well as full control over their execution, choose the manual mode.
Working with Acronis Disk Director Suite, you can change the mode at any time.
Acronis Disk Director Suite provides the user with two modes:
- mode " "- designed to perform the most common operations that will be sufficient for most users.
- mode " "- designed to perform any operations on sections. The mode is addressed to users with some experience and knowledge of organizing data storage on a disk, and assumes full control of the user over the operations.
Automatic section operations
In the operating mode " Automatic section operations»Operations are performed using the Acronis Disk Director Suite wizards. There are four wizards available to the user:
- partition creation wizard- allows you to create a partition on unallocated disk space or at the expense of the space of other partitions;
- Free Partition Space Wizard- allows you to expand a partition at the expense of unallocated disk space or the space of other partitions;
- partition copy wizard- allows you to create a copy of a section.
- partition recovery wizard- allows you to recover deleted or damaged partitions.
In this mode of operation, even the most inexperienced user will be able to perform operations on disk partitions step by step, guided by comprehensive instructions.
Manual section operations
In the operating mode " Manual section operations»An experienced user has access to all Acronis Disk Director Suite operations, including those that are relatively rarely performed.
Operations on sections are performed using dialog windows in which the user enters the necessary parameters for operations.
The main difference between the automatic and manual modes is as follows: in the automatic mode, the wizards perform a whole range of actions on sections. In manual mode, one operation is always one single action on a partition / disk.
Switching between modes
Take advantage of this View -> Automatic Mode to switch to automatic operation mode, or View -> Manual Mode to switch to manual mode. Acronis Disk Director Suite is managed from the main window. The main window includes a menu, a toolbar, a sidebar and a tree of disks and partitions (which can be enabled or disabled using the View menu), and also presents in a visual form a list of disks connected to the computer and partitions on them.
The appearance of the main window differs depending on the selected operating mode. This difference concerns the composition of operations offered to the user in the main menu, context menus of sections, side and toolbars, as well as the degree of detail in the presentation of the structure of sections.
Examining Basic Hard Disk Partitioning Operations
All operations on sections in modes intended for both ordinary and experienced users are called and performed in a uniform way.
Any operations on sections can be called:
- by selecting operations from the Disk item in the main menu;
- from custom toolbars;
- from the context menu of the section ( both in the main window and in the graphical view pane);
- from the Operations and Advanced lists of the sidebar.
Note that the list of available Disk operations and the list of Sidebar Operations depends on the type of the selected partition. The same is true not only for partitions, but also for areas of unallocated space.
Additional operations
Additional operations on hard disk partitions include operations:
- Convert - convert the file system of a FAT16 partition to FAT32, Ext2 to Ext3 and vice versa,
- Hide - hide the section / show the hidden section,
- Make active - make the section active,
- Resize root folder - resize the root folder of a FAT16 partition,
- Change the number of bytes to INODE - change the size of the INODE table (for Linux Ext2 / Ext3 file systems),
- Resize cluster - resize the cluster of a FAT16 / FAT32 partition,
- Change type - change the type of the section.
- Recover - recover a deleted or damaged partition
- Edit - edit data stored on the hard disk Additional operations on partitions are invoked from the Additional list of the sidebar, the section context menu item, or from the toolbar with the same name.
Examining Basic Hard Disk Partitioning Operations
Creating a new section
You may need a new partition on your hard disk in the following cases:
- for placing on a section a large set of the same type of data - for example, a collection of audio files in MP3 format, video files, etc .;
- to be placed on the backup partition ( images) other partitions / disks;
- to be placed on a partition of a new operating system ( or swap file).
The section wizard will allow you to create any type of section ( Active, Basic or Logical), select a file system, assign a label and a letter, etc.
If you need to create a new section:
- Call the New Section Wizard by selecting Wizards -> Create Section or a similar item in the sidebar in the Wizards list, or by clicking the New Section button on the toolbar;
- The wizard will analyze the disks and partitions attached to the computer. If the wizard finds unallocated space on the disks, you must choose how to create the new partition.
If you want to create a partition on unallocated disk space:
- Set the switch to the Unoccupied position;
- In this case, the wizard will offer to create a partition on the found maximum size unallocated space. For example, if you have free areas of 5.0 GB and 12.0 GB on your disks, the wizard will offer to create a partition on a 12.0 GB area;
- On the Partition Size page of the wizard, set the size of the partition to be created;
- On the next page of the wizard, select the type of partition to be created - Active, Primary, or Logical.
- As a rule, the Primary type is selected if you intend to install an operating system on a partition. If the partition is intended for storing data, the Boolean type is selected;
- Select the Active type if you want to install an operating system on this partition, which will be loaded by default when the computer is turned on;
- On the next page of the File System wizard, select the file system on the partition. The wizard offers to choose one of the Windows file systems - FAT16, FAT32, NTFS or Linux - EXT2, EXT3, ReiserFS, Swap, or leave the partition unformatted;
- On the next page of the wizard, you will be prompted to select a letter for the section.
Increase free space on a partition
You may need to increase the free space of a partition in several fairly obvious cases:
- There is not enough space on the partition to install new programs or write data,
- Some disk-intensive programs, such as defragmentation programs, stop working or work poorly if the free space on the partition becomes less than a certain amount,
- If the free space on the system partition decreases below a certain value, the operating system may malfunction.
The Increase Partition Free Space Wizard will allow you to increase the size of a partition using the free space of other partitions. Moreover, if there is no significant free space on other partitions, this can be done at the expense of unallocated disk space.
If you need to increase the free space of the partition ( partition size):
- Call the wizard to increase the size of a partition by choosing Wizards - Increase free space or a similar item in the sidebar in the list of Wizards, or by clicking the Increase free space button on the toolbar;
- On the Select section to enlarge page, select the section you want to enlarge.
Copying a section
Having created a copy of a section, you will receive an exact duplicate of everything that is located on this section. A copy of a section can be used in the following cases:
- As a partition backup ( first of all, the data posted on it);
- As a backup of the system partition, which is reasonable to create if you are planning to update the operating system installed on the partition;
- To quickly transfer the contents of an old hard drive to a new, larger drive.
If you need to create a copy of a section:
- Call the Increase Partition Size Wizard by selecting Wizards -> Copy Partition or a similar item in the sidebar in the Wizards list, or by clicking the Copy button on the toolbar;
- On the Select a Section to Copy page of the wizard, select the section you want to copy;
- On the next page of the Section Location wizard, an entry is created with the characteristics of the copied section;
- The selected disk may not have enough space to accommodate the copy. You can, however, create a copy of a partition by selecting partitions from which you can take away some of the space they occupy. Do this in the Selector Sections window;
- On the next page Section size of the wizard, you can enter the desired size for the section copy, while the wizard automatically calculates the minimum and maximum possible copy size;
- On the next page Section Type of the wizard, you can select the type of the section copy: Active, Primary and Logical.
Typically, the Primary type is selected if the partition contains an operating system. If the partition is intended for storing data, the Boolean type is selected.
Select the Active type if you want the operating system installed on the partition copy to boot by default when the computer is turned on.
Clicking the Finish button on the last page of the wizard will cause Acronis Disk Director Suite to generally create a batch of pending copy operations.
If you need to split a section:
- Select the section to change;
- Call the partition division operation by selecting Disk -> Divide or a similar item on the sidebar in the Operations list, or by clicking the Partition division button on the toolbar;
- In the folder tree, select the folders that you want to move to the newly created partition. If you want to create an empty section, do not mark any folders.
Merging Sections
Acronis Disk Director Suite allows you to merge two partitions, even with different file systems. All data will remain intact and will be located on the resulting partition. This partition will have the same file system as the target partition (to which the data from the attached partition is appended).
If you need to combine sections:
- Select the section to be attached to the target section;
- Call the operation of merging partitions by selecting Disk -> Merge or a similar item on the side panel in the Operations list, or by clicking the Merge partitions button on the toolbar;
- Select the target section;
- Select a folder on the target partition where the data from the attached partition will be placed. You can create a new folder using the icons above the folder tree;
- by clicking the Proceed button, you will create a pending operation.
The new partition structure on the disk will be displayed graphically in the main window of Acronis Disk Director Suite.
Formatting a partition
- Select a disk and a partition on it;
- Call the formatting operation of the partition by selecting Disk-> Format or a similar item in the sidebar in the Operations list, or by clicking the Format button on the toolbar;
- In the Format Partition window, enter a label for the partition;
- Select the file system that will be created on the partition as a result of formatting.
- FAT16 / FAT32, NTFS - file systems of the Windows OS family;
- Linux EXT2, Ext3, ReiserFS, Swap - Linux OS file systems.
- the smaller the cluster, the less wasted disk space;
- the smaller the cluster, the more space the file allocation table (FAT) takes up;
- The larger the file allocation table, the slower the operating system works with the disk.
Acronis Disk Director Suite supports the following file systems:
- Select the cluster size (options are available: Auto, 512 bytes, 1, 2, 4… 64 Kb);
- Note that:
- By choosing the Auto option, you will entrust Disk Director Suite to automatically determine the cluster size depending on the selected file system and partition size;
- By clicking OK in the Format Partition window, you will create, in general, a deferred operation for formatting a partition.
Checking a hard disk partition for errors
Acronis Disk Director Suite provides the ability to check a hard disk partition for file system errors. It is highly recommended that you check hard disk partitions before performing any operations on disk partitions.
If you need to check a hard disk partition:
1. Select a hard disk and a partition on it in the main window of Acronis Disk Director Suite,
2. Call the operation of checking the partition for errors by selecting Disk -> Check or a similar item in the sidebar in the Operations list, or by clicking the "Check" button on the toolbar,
3. If you want to perform not only check for errors, but also fix the found errors at the same time, select one of the following options:
- Search for errors on the section;
- Search and correction of found errors;
- Search for errors and bad sectors.
Check for errors checkbox Fix found errors,
4. By clicking OK, you directly start the section check operation,
5. The results of checking the disk partition are displayed in the Check Partition window.
Defragmenting a Partition
Defragmentation is the process of reorganizing the way files are stored on a partition on a hard disk so that the data that makes up the contents of a file is placed in sequential clusters.
Defragmentation- a procedure for eliminating file fragmentation, in which, as a result of multiple update operations, parts of the files are scattered across different parts of the disk.
Fragmentation of files significantly reduces the performance of a personal computer or server, especially with a significant volume of I / O operations. Conversely, defragmenting files on the hard drive under the same conditions can improve performance by requiring the read head to move less across the disk to read all parts of the file.
Acronis Disk Director Suite can only defragment Windows XP and Windows 2003 Server. Windows 2000 has its own built-in disk defragmenter. To defragment a partition on Windows 4.0 and earlier Windows operating systems, install a third-party defragmenter.
If you need to defragment a hard disk partition:
- Select the hard disk and its partition to be defragmented in the main window of Acronis Disk Director Suite;
- Start the defragmentation operation of the partition by selecting Disk - Defragment or a similar item in the sidebar in the Operations list, or by clicking the Defragment button on the toolbar.
File system conversion
The main disadvantages of the FAT16 file system were:
- inability to support disk partitions larger than 2 GB,
- inability to work with files larger than 2 GB,
- inability to work with hard drives with a capacity of more than 8 GB,
- limited size of the root folder - it could contain no more than 512 items,
- support for filenames, which could be 8 characters of name, period and 3 characters of name extension ( in Windows NT this limitation has been removed).
The FAT32 file system was introduced in Windows 95 OSR2 and is supported in Windows 98 / ME and Windows 2000 / XP. The main reason for its appearance was the need to remove the FAT16 restrictions. FAT32 is the evolution of FAT16. The main differences between FAT32 and FAT16 are support for significantly larger folders, files and disks, more flexible organization of the root folder, which is no longer limited in size, and support for long file names.
Converting FAT16 to FAT32
Therefore, converting a FAT16 partition to FAT32 is necessary in the following cases:
- If you need to use disk partitions larger than 2 GB;
- If you are moving from a small hard drive to a large hard drive. Otherwise, the space of the new hard disk will be wasted.
If you need to convert a FAT16 partition to FAT32:
- Select the disk and partition with the FAT16 file system that you want to convert to FAT32 in the list of the main window of Acronis Disk Director Suite;
- Call the operation of labeling the active partition by selecting Disk - Advanced -> Convert or a similar item in the sidebar in the Additional list, or by clicking the Convert button on the toolbar (or from the context menu of the partition or its graphical representation), in the Convert partition window, enter the partition type (Logical - Basic)
The new file system of the partition will be displayed graphically in the main window of Acronis Disk Director Suite.
Here is a quick guide and basic steps for Acronis Disk Director Suite. A more complete user manual is distributed with the software product itself, and can also be found on the official Acronis website.
Among the programs for working with hard disk partitions, a utility from the company Acronis occupies a prominent place. The program is capable of creating new partitions, deleting old ones and effectively allocating free space. However, how do you use Acronis Disk Director 12? This question arises from users for the reason that the program has too many options. And you can really get confused in them. But let's try to figure out how to work with the software product.
A little about the developer
Acronis was born in 2000. And, oddly enough, it was founded by developers from Russia. From the very beginning, the guys planned to release specialized software for managing hard drives, creating backups and more. Probably the most famous data backup programs are Acronis Backup and True Image. However, the software of another direction is also available in the company's arsenal. For example, specialized software for data transfer or destruction. But only the disk management utility has reached such popularity that many users are interested in it and would like to know how to use Acronus Disk Director 12. "

Operating modes of the program
Few people know, but "Disk Director" can work well both under the installed OS and under MS-DOS. The latter option is useful in that you can partition the hard disk into partitions even before installing the operating system. You can also perform some operations with partitions if the OS for some reason does not want to boot. Just before doing this, you need to write the image of the software product to a disc or USB stick. Without this, you will not be able to run the program in the MS-DOS environment. Now let's move on to direct answers to the question of how to use Acronis Disk Director 12.

Creating new partitions on the hard drive
Sometimes it is necessary to create a new partition on the HDD in order to place an operating system on it. Or allocate a separate place for music and films. In any case, such an operation is often required to be performed. How to use Acronis Disk Director 12 Build 12.0 3223 in this case? First, you need to launch the program using the appropriate shortcut on the desktop. In the main window, select the free space on the hard disk from which you want to create a partition and click on the "Create volume" button. A window will appear with a choice of features of the new section. Select the section type "Basic" and click "Next". Now we click on the unallocated space. It is from this that the new volume will be created. In the next window, the wizard will offer you to select the size of the new partition, drive letter, and so on. As for the volume, it is worth choosing all the unallocated space. Less just doesn't make sense.
Completion of the operation to create new partitions
Now we select the letter of the new section. You can assign it any letter. This will not affect performance in any way. The default file system will be NTFS. You shouldn't touch this parameter. As well as the size of the cluster. In general, after selecting the letter of the section, it is better to click on the "Finish" button. However, this is not all. Now you need to apply the selected operations. At the top of the screen is an oblong button with a checkered checkbox that says Apply Pending Operations. You need to click on it. The wizard will display a window with general information about the parameters for creating a new partition. You need to check everything and click on the "Continue" button. The volume creation process begins. Upon completion, a new one will appear in the list of disks. This means that everything went well. But how to use Acronis Disk Director 12 Build 12.0 3270 if you just need to format the disk? More on this in the next chapter.

Formatting a partition
It is very easy to format any disk using this utility. No special knowledge is needed here. We launch the program using the appropriate shortcut. In the disk selection window, select the desired partition and right-click on it. In the drop-down menu, click the "Format Section" item. The Format Wizard window will open. Here you need to select the file system (for "Windows" - NTFS) and the formatting method (Fast, standard, and so on). Next, click on the "OK" button. However, this is not all. Now you need to apply the operations (in the same way as in the case of creating a new section). The button "Apply pending operations", located at the top of the window on the left side, will help us with this. In the next window, click the "Continue" button. The operation starts. The time it takes to complete the formatting operation depends entirely on the size of the partition. In any case, the program will notify about the successful completion of the work. And how to work with Acronis Disk Director 12 Build 12.0.3297 if you need to increase the space on a partition? The answer is in the next chapter.

Increasing the volume of a partition
It should be noted right away that such an operation is possible only if there is some unallocated area. Then it will not be difficult to increase the volume of the already created section. This operation is performed without damaging the data on the disk. But you won't be able to resize the system partition from under a running OS. So, in the main window of the utility, select the desired disk and click the "Resize volume" item. A wizard will immediately start to perform this operation. At the first stage, you will be asked to select the size of the partition to change. Here we leave everything as it is and click "Next". Now it is proposed to select the space from which you plan to "pinch off" the piece. Select the unallocated area and set the desired volume. Now click on "OK". We move to the top line of the window and press the button to confirm operations. In the window that appears, click "Continue". The process has started. Now all that remains is to wait for it to end. But how to work with Acronis Disk Director 12 Build 12.0.3223 if you need to merge the disks? There is an answer to this question as well.

Merging Sections
This option may be needed if it is expedient to combine all partitions into one for more successful use of the HDD. There are several options for this operation: with complete deletion of the partition data and with the transfer of all data. The latter is, of course, preferable. But the process will take a very long time. So, select the desired disk and click "Merge Volume". A wizard window will open, prompting the user to select a section to merge. If you want to save all the information, then you should tick the box next to "Transfer user data". By the way, this is one of the answers to the question of how to use Acronis Disk Director 12 to transfer files to a new disk. However, let's continue. After selecting all the parameters, you must click on the "Finish" button and click on the button for applying operations. It is worth paying attention to the fact that this procedure cannot be canceled if the "Continue" button has already been pressed. And if you have not chosen the option of data transfer, then you can say goodbye to them. After clicking on "Continue" in the appropriate window, the process of combining and transferring data will begin. It will take a long time. But the program will inform about the success.
Conclusion
So, we have disassembled a wonderful software product for fine-tuning the hard disk and its volumes and gave an answer to the question of how to use Acronis Disk Director 12. This is one of the few utilities that can adequately work with volumes on the HDD. But the program also has a disadvantage: it is not free. And the license is expensive. However, all users know where to get the license key. So we will probably not delve into this topic. In any case, every user should have such a software product.
Hello friends! Do you want to use the popular program for backing up your data and entire operating systems for free - Acronis True Image 2016? If so, read our article.
A few months ago, the most famous program for backing up your files and entire operating systems was updated - Acronis True Image 2016, which is compatible with all the latest Windows operating systems, including Windows 10!
Attention: B An older version of Acronis True Image, you can read about its capabilities on our website.
How to use Acronis True Image 2011
Quite a lot has already been written about Acronis True Image on our website, and even there is a special section, in a nutshell, if you know how to use Acronis True Image, then you can restore your operating system from a previously created backup in case of any problems, also the program can expand your system to another hard disk partition, another hard drive, and even another computer with completely different hardware. You can store backups on various drives, including Acronis Cloud.
For the most difficult recovery cases(the operating system does not boot due to a failure) you can create a bootable USB flash drive in the program and restore the computer using it.
There are also some good tools in Acronis that you might need, for example:
Acronis Drive Cleanser, with the help of it you can delete any information from the hard disk beyond recovery.
Special module for activating boot recovery using the F11 key (Activate Acronis Startup Recovery Manager).
Try & Decide is a tool very similar to the Sandboxie and Toolwiz Time Freeze programs, it makes it possible to work in a virtual environment (sandbox), where it is almost impossible to get infected with malware and violate the integrity of the operating system by inaccurate user actions, since after a reboot the virtual environment is deleted.

In order for you to find out in detail how the program works, I suggest creating a backup of the Windows 8.1 operating system installed on a new laptop with UEFI BIOS in Acronis True Image 2016 and recovering from it.
Create a backup copy of the drive (C :) with Windows 8.1 files and all hidden service partitions and place it on the drive (D :).

Go to the download page of the program.http://www.acronis.com/ru-ru/personal/Select Acronis True Image 2016 and click the "Try it for free (30 days)" button.

The installer of the program is downloaded to our computer, we run it.

Install

Launch the application

We accept the terms of the license agreement.

We want to register, and if not, then just close this window.

Click on the "Continue in trial mode" button.

The main Acronis True Image 2016 window opens.


Create a backup copy of disk (C :) and all hidden service partitions and place it on disk (D :).Whole Computer-> Disks and Partitions.


We mark the sections that will be included in the backup, that is, everything except the disk (D :) and click OK.

Choice of storage. Overview.

We will save the backup copy on disk (D :), and select it. OK.

Create a copy

The process of creating a backup copy begins: the selected partitions of the laptop hard disk on disk (D :).

After 15 minutes, the backup is ready.

Recovering Windows 8.1 using Acronis True Image 2016
If your operating system is malfunctioning or you have picked up viruses and cannot get rid of them, then simply restore your laptop from a backup.In the main window of the program, select "Recover files".

We select the version of the backup (if you have several of them).Click with the left mouse on "My Computer" and check the boxes for recovery.

Rebuild now.

The recovery process begins.

Backup options
In Acronis True Image 2016, you can configure various backup options, for example, you can schedule backups of your operating system daily or once a week, or once a month, you can also completely prevent the program from creating backups automatically and only create them manually. You can also choose backup methods: incremental (the backup is not created anew every time, but only changes are made to it) or regular and much more.Click Options and configure the program as you need.


Thank you for the attention. Enjoy working with Acronis True Image 2016.
26.06.2017
Acronis True Image is a tool for creating backups of entire disks and individual files. Thanks to this program, you can install Windows not in 2-3 hours with all the programs and drivers, but in 20 minutes, for example. In addition, you can restore absolutely all files that were in the system before deleting and reinstalling. Using Acronis True Image after a system crash, you don't have to worry about documents that have been working on for a long time.
Acronis has a free program for Seagate and WD owners. The functionality of the applications is limited.
Free software versions
- Bootable media on Windows 10 PE with programs and Acronis True Image 2017
The cloud is paid in Acronis, a Premium subscription with a cloud for 1 TB costs 3400 rubles per year. Another option is to rent, buy a server or other cloud storage at a cheaper price (only with it it will not be as convenient as with the Acronis cloud).
Free method of data protection
I am using free cloud and copy files there. For greater reliability, I delete the backup copy from the computer, while copying the files to the folder that I disconnect from synchronization. Open your cloud settings and look for Custom sync or Sync settings. And turn off the synchronization of folders where your backup files are stored. Pros - free, cons - you need fast internet and a lot of memory in the cloud for copying. For example, if you managed to get 1 TB as a gift in the Mail Cloud, then use it. No, then register several accounts in Yandex Disk, for example.
The best option for the reliability of your data is to copy backups to an external drive that is not connected over the network. This will prevent viruses and other infections from reaching the backup. By the way, this is relevant after an attack by a ransomware virus.
Alternatively, you can set up a backup to the network.
The advantage of your server over the cloud is that the network access speed is many times higher than the speed of access to the cloud (1 GB per second versus 100 MB per second, for example, this is in the best case). The files will be immediately available for recovery at high speed. But in this case, you can spend more on electricity per year than those 3400 rubles, so you need to think about whether you need to save at all. Speed is of course a plus, electricity costs are a minus. This is if you need to make a backup at home for yourself, for companies, energy costs do not play such an important role. If the possibility of fast backup and the minimum access time to the backup is preferable, then naturally your own server or external drive will be the best choice.
Backup encryption
Before backing up your data, you should be aware of some important functions. The first is encryption. Before creating a backup, you can set encryption parameters and set a password for the archive so that no one but you can open the archives. To encrypt your data, click on Encrypt backup. Enter your password in the appropriate field and click Save.
The second method is more detailed, here you can already set an encryption method, and not just a password. Before creating a backup, click on Options and open the Advanced tab, open the Backup protection line. Here we enter the password and select the encryption method. The higher the number after AES, the harder it will be to crack the password.

Copy Schedule
Another great option for backing up your data. Decide how often you will back up your data, determine which data you need to back up often, which once a month. And create different copies in the program. To configure the schedule, click Options and the Schedule option will open in the first tab. All parameters, except for one, do not require attention, I think everything is clear here. But what is Continuous copy mode? This is a frequent backup mode, data will be backed up every five minutes. Therefore, do not use this mode to back up the entire computer, as the backups will take up a lot of memory. Only enable continuous backup for very important data.

Spoiler - Using Acronis Nonstop Backup - Acronis help
Using Acronis Nonstop Backup
The Acronis Nonstop Backup feature makes it easy to protect your disks and files. With its help, you can recover disks, files and their versions.
The main purpose of the Acronis Nonstop Backup function is real-time protection of data (files, folders, contacts, etc.), but it can also protect partitions. If you choose to protect an entire partition, you can recover the entire partition by following the image recovery procedure.
It is not recommended to use this function as the main method of protecting your system. Use any other schedule to protect the system. For examples and more information, see Custom Schema Examples.
Limitations of Nonstop Backup
- Only one continuous copy can be created.
- Windows Libraries (Documents, Music, etc.) can only be protected with continuous disk-level backups.
- Unable to protect data on external hard drives.
- Nonstop Backup and Try & Decide cannot work at the same time.
Principle of operation
After starting Acronis Nonstop Backup function, the program will create an initial full backup of the data selected for protection. Then Acronis Nonstop Backup will continuously monitor protected files (including open ones). If a change is detected, a backup copy of the modified data is created. The shortest interval between incremental backups is five minutes. This allows you to restore the system to any point in time.
Acronis Nonstop Backup checks file changes on disk, not memory. If, for example, while working in the Word editor, the save operation is not performed for a long time, the current changes in the Word document will not be backed up.
You might think that with this backup speed, the storage will be full immediately. Don't worry, because Acronis True Image 2017 New Generation only backs up so-called deltas. This means that only the differences between the old and new versions are saved in the backup, and not the entire changed files. For example, when using Microsoft Outlook or Windows Mail, the existing PST file can be very large. Moreover, it changes with every email received or sent. A backup copy of a full PST file after each change can take up too much storage space, so Acronis True Image 2017 New Generation backs up only the changed parts of the file in addition to the original backup file.
Storage rules
Acronis Nonstop Backup keeps all backups for the last 24 hours. Older backups will be consolidated in such a way that Nonstop Backup will keep daily backups for the last 30 days and weekly backups until all free space on the nonstop backup storage is used.
The merge is done every day between midnight and 1 am. The first merging will be performed after the operating time of Nonstop Backup is at least 24 hours. For example, Nonstop Backup was enabled at 10am on July 12th. In this case, the first merge will take place between midnight and 1 am on July 14th. Then the program will merge the data every day at the same time. If the computer was turned off between midnight and 1 am, the merging will begin when the computer is turned on. If Nonstop Backup has been disabled for a while, merging will start when it is enabled again.
[collapse]
Copy method
If you are really worried about the safety of your data, you need to decide how often you will make backups. If you selected Continuous Copy Mode, you do not need to configure the schedule.
Full copy - a full copy of all selected folders and files is created each time.
Incremental backups - each backup retains only the changes that have occurred since the previous copy was created. The disadvantage of this method is that all backups must be kept to restore files. If you delete one copy, you won't be able to recover the files.
Differential Backup - Here, each of the following copies retains the modified data after a full backup is created.
Spoiler - Full, incremental and differential backups - Acronis help
Full, incremental and differential backups
Acronis True Image 2017 New Generation offers three backup methods.
Full backup
The result of a full backup operation (also called a full backup version) contains all the data that existed at the time of the backup. For example, every day you write one page of a document and create a full backup of that document. Acronis True Image saves the entire document every time you back up.
1.tib, 2.tib, 3.tib, 4.tib are full backup versions.  Additional Information
The full backup version forms the basis for subsequent incremental and differential backups. and it can also be used to create an offline backup. Creating an offline full backup can be the best solution if you frequently reset your system or do not want to manage different backup versions.
Incremental backups
The result of an incremental backup operation (also called an incremental backup version) contains only those files that have changed since the LAST BACKUP OPERATION. For example, every day you write one page of a document and create a backup using the incremental backup method. Acronis True Image saves a new page every time you back up. The full version of the backup is always created first.
- 2.tib, 3.tib, 4.tib are incremental backup versions.
 Additional Information
Incremental backups are most useful when you need to frequently create backup versions and be able to revert to a specific point in time. As a rule, incremental backup versions are significantly smaller than full or differential ones. On the other hand, incremental backup versions require more work from the program when restoring. In the above example, to recover all work from the 4.tib file, Acronis True Image reads data from all backup versions. If the incremental backup version is lost or damaged, all subsequent incremental backup versions are useless.
Differential backup
The result of a differential backup operation (also called a differential backup version) contains only the files that have changed since the LAST FULL BACKUP was CREATED. For example, you write one page of a document every day and create a differential backup method. Acronis True Image saves the entire document except the first page, which is stored in the full backup version. Note. The full version of the backup is always created first.
- 1.tib is the full version of the backup.
- 2.tib, 3.tib, 4.tib are differential backup versions.
 Additional Information
The differential method is intermediate between the two previous ones. This approach requires less time and storage space than a full backup, but more than an incremental backup. To recover data from a differential version of Acronis True Image, you only need the differential version and the latest full version. Therefore, recovering from a differential version will be easier and more reliable than from an incremental one. An incremental or differential backup created after defragmenting the disk can be much larger than a regular one. This is because the defragmentation program changes the location of files on disk and these changes are reflected in the backup. Therefore, after defragmenting the disk, it is recommended that you create a full backup again. To select a backup method, you must define a custom backup scheme.
[collapse]
How to make a system backup
By default, when starting the wizard, a full backup is configured, so in the first window you only need to select the location for saving the backup.
Ideally, it is better to use an external drive for saving, since even if the computer is infected, the data from the external drive will not be deleted in any way. In this case, it will not be difficult to recover from the external drive. When choosing a FOLDER for copying, copy all backup files either to an external drive or to the cloud. Otherwise, if the system disk fails, all files will be lost, including the saved backup.

After entering all the necessary parameters (encryption, maximum file size, compression degree, enabling image verification, etc.), click on Create a copy.

Depending on the size of the files, the time of creating the backup will depend.
How to backup files
It's easy to back up your files. We do everything the same as for the system backup, only instead of the entire disk we select the desired folder and files.
Cloning a hard drive

To completely copy the disk, in the backup parameters, check the Back up sector-by-sector checkbox. Also, if you need to create a more accurate copy of the disk, and not just the files on it, check the Archive unallocated space checkbox.

Then click on Create a copy. In general, you do not need to take any more steps to make a copy of all files and hard disk in Acronis True Image 2017. To restore a disk or individual data from a backup, you will have to perform a couple of steps more, which of course is unlikely to affect the speed of data recovery. Everything will be restored quickly, in any case, spend 2-3 times less time than a standard Windows installation.
How to restore the system completely
To restore the system, you need to write an ISO image of the bootable media True Image to a USB flash drive or disk - download the image from this link - https://yadi.sk/d/UYKGvGZe3JVPKa
Or go to Tools - Boot Image Wizard. Select image parameters and save method - ISO image or write directly to a USB flash drive.
To recover from the backup, use the computer from which the backup was made - otherwise the system may not start and there will definitely be problems with the drivers, or use the exact same computer with the same processor, motherboard memory and video card.
We insert the media into the computer and boot from it. To do this, when you turn on the computer, open the BIOS or UEFI program and adjust the boot priority. Depending on the model of the motherboard in the system unit and the laptop model, it can be - F1, F2, Del, F10, Esc, etc. Or just press the keys immediately to select the boot source before loading Windows - F9, F11, F12. Depending on the motherboard manufacturer and laptop manufacturer, the hotkeys will differ. When checking all system devices - many different white letters when computers are turned on - keys must be specified to open BIOS settings and select a boot source.
After booting from the media, launch Acronis True Image. From the Windows 10 PE media, look for Acronis in Start - All Programs - Backup and Recovery - Acronis True Image 2017. From the Acronis media boot, just click on the Acronis True Image name and wait for the boot.

Click in the Restore - Disks parameter, since we need to restore the system disk. Accordingly, to restore individual files from the entire backup - Files and folders.
In the next window, you need to select a backup file from which all data will be restored. To do this, click on the Browse button and look for the system backup file in the file explorer. Connect external media if you need to recover from an external hard drive, for example. Click Next after selecting the backup archive.

Here you need to select the volumes to be restored. Be sure to check the box in front of the disk where Windows is installed and in front of the boot disk (area) - here it is usually signed in parentheses Reserved by the system. Be sure to uncheck the section where the backup is stored. Click Next.
Select the disk to which the recovery will be performed. Click Next.

After you select a drive for recovery, a check will be performed on all partitions on the drive that will be recovered. During setup, you can change their size, letter, change the type of section. We will not do this, since we want to get exactly the system that we had before the breakdown, before the action of viruses, for example. It is the parameters of the old system that are now set by default in the backup parameters. We will not change anything here, and in the next windows, click simply Next up to the Completion window.

Click Finish and start system recovery. 
When restoring, do not change any parameters, the system will create a complete copy of the disk itself automatically. In most settings, you only need to click Next.
It took me only 10 minutes to restore the system with all the files, settings and installed programs with drivers in the test bench. How much would I spend installing everything in a standard way? Hours 2-3, here is such a good program for system recovery.

Plus, a full backup of the system does not have to be done in the program installed in Windows, it is enough to boot from the bootable media and make a backup. The only drawback when using bootable media is that you cannot automate this process to copy the necessary files and documents.
Data recovery
To restore files from a backup, find the backup file made in Acronis True Image and double-click on it. The file will open in Explorer as a folder and you can drag and drop the necessary files onto your computer. The main thing is that you have Acronis True Image installed on your system, otherwise the backup files will not open.

This was one of the file recovery options. Now open Acronis True Image, click on the copy from which you want to recover files, it can be either a complete copy of the system or a copy of individual files and folders. Click on the Restore files button.

In Acronis Explorer, select the required files and folders for recovery. In the left part of the window we are looking for the folder that needs to be opened, in the right part we are already selecting the folders and files to restore. After selecting the data, click Next.

Then you can manually set the folder to save the recovered data. By default, the folder is selected as in the created backup. To change the path, click Browse and select the required folder. Click on Restore.

We are waiting for some time while the files are copied to the selected folder.

The same can be done using bootable media.
 Can I use Google Play Market on Lumia?
 Description and secrets of the current tariff zero doubts on the beeline
 MTS option “Russia is at home everywhere
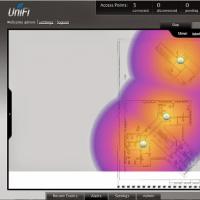 Seamless Wi-Fi Useful reviews about the work of capsman
 How to talk to Alice Screenshots Yandex with Alice
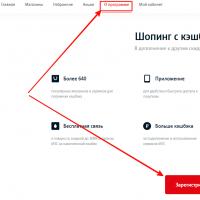 Mts bonus program is closed
 Mobile communications and internet in the resorts of montenegro