Html css code for pagination examples. Bootstrap - Pagination (navigation block for pagination). Connecting the required frameworks
In this article, we will look at the process of creating such a web interface element as a navigation block for pagination. In Bootstrap 3 and 4, this UI element is implemented using the Pagination component.
What is pagination?
Pagination is a pagination of data. Those. this is such a conclusion, when data is output not all at once, but small parts (pages).
The navigation block is used to navigate through these parts (pages).
The Pagination component of the Bootstrap framework is just intended to create this interface element, i.e. navigation block.
Creating a navigation block for pagination
In Bootstrap 3, the navigation box has the following structure:
The nav element in this snippet acts as a wrapping container. It is needed in this structure only for assistive technologies perceived this piece of HTML code as navigation.
In addition, it is advisable for assistive technologies to also clarify what kind of navigation block it is. This action is performed through the aria-label attribute.
The nav block markup for pagination in Bootstrap is done with bulleted list... Each nav link in this block is an a element wrapped in an li and placed in a ul.
The visual styling of the nav box in Bootstrap is done using the pagination class, which must be added to the ul.
Navigation block structure in Bootstrap 4:

Note that in Bootstrap 4, you need to add classes to the li and a elements. Li is the page-item class, and a is the page-link. These classes set CSS styles for the elements and are necessary for the correct display of the navigation block.
Using icons or icons instead of text labels
An example of a pagination navigation bar that uses icons as content for some links:
Changing the state of a navigation link
Changing the state of links in the navbar is done using the disabled and active classes. The first class (disabled) is used to create an inactive (non-clickable) link. The second class (active) is needed to highlight (indicate) current page... You need to add the active and disabled classes not to the link itself, but to the li element.

The disabled class sets CSS links pointer-events declaration: none. This announcement is intended to disable the functionality of the link. But it does not disable keyboard navigation. Therefore, if you want to completely disable the functionality of such links in your project, then using JavaScript you need to additionally track them and add the tabindex = "- 1" attribute to them.
Another way to disable link functionality is do not use element a.
Resizing the navigation box
In Bootstrap 3 and 4, you can resize the navigation box using the pagination-lg and pagination-sm classes. This is accomplished by adding one of these classes to the pagination class.
The first class (pagination-lg) is used when it is necessary to increase the size of the navigation, and the second (pagination-sm) when it is necessary to reduce it.

Aligning the navigation box
In Bootstrap 3 navbar alignment for pagination is done with classes for text alignment.

In Bootstrap 4, navbar alignment for pagination is done using flex classes.
Pager Component (Bootstrap 3)
Pager is a Bootstrap 3 component that is designed to create simple navigation through pages or other site content. This component consists of 2 buttons (links).
One of the most common uses for this navigation is to make it so that the first button moved to more new entry on the site, and the second - to the older.

Pager component syntax:
Changing the button layout
By default, pager buttons center aligned... But besides this option, Bootstrap 3 also allows them to be aligned on different edges. This is done by adding the class previous to the first button, and next to the second. The previous class aligns the link to the left and next to the right.
Disable button functionality
Switching a button to a disabled state is done by adding the disabled class to it.
Pagination, or simply page-by-page navigation, is an important element of any more or less full site. Various content management systems, for the most part, have built-in tools for implementing pagination. There are also a lot of separate plugins written for this useful business, in most cases they are built using the library. All these plugins, different in style of performance and software functionality, but most importantly all of them, this is a great alternative to the server-side implementation of pagination of large content sites.
I propose for consideration, in my opinion, one of the easiest jQuery plugins, to create page-by-page navigation that helps you organize, attractive and fast pagination.
Very light in every way, and in weight, and everything about connectivity, settings, quick to create pagination, complete with three design styles, and charged for support.
By the way, if you are not satisfied with the standard styles, you can use it, which will not be difficult to screw into .css plugin.
Now, let's take a closer look at how to correctly connect the plugin itself and the style file to the document, that is, directly embed it on the site pages, and go through the available plugin settings.
First, of course, you need to get hold of a plugin, that is, with the source code, into which you yourself are carefully packed jquery javascript and a css stylesheet.
Let's take a step by step how to use the plugin:
Step 1. Including jQuery
In the body of the page to the section
... you need to connect the jQuery framework, preferably version 1.7.2, or more recent, you can do this using a special Google storage:If you already have jQuery enabled on your site and is working with might and main, you can safely skip all the gestures described above, the main thing is to make sure that the jQuery version is not too dense. In WordPress, by the way, this is fine.
Next, we connect our workhorse- plugin jquery.simplePagination.js:
You don't have to fence in the garden, but simply choose the style you want, light, dark or compact and paste the rule set into the stylesheet.css file of your template. Write your own styles or use Bootstrap, also an option, in terms of originality and development of site building skills, is even more preferable.
Step 3. HTML
To display the pagination bar on the pages of the site, where you plan to place it, it is more logical and most often, it is at the bottom of the main content, you should write the following:
For a light background:
Compact theme:
$ (function () ($ (# light-pagination) .pagination ((items: 100, itemsOnPage: 10, cssStyle: "light-theme"));));
In the example, I used initialization to paginate the light theme # light-pagination, you can change the selector to something else, for a compact one it is # compact-pagination, or for a dark style # dark-pagination. In this case, do not forget to change the class in the function too. cssStyle.
Kai I already wrote above, the plugin is very flexible in settings, the following options are available to change:
- items- The total number of elements to be used to calculate the pages. Default: 1 .
- itemsOnPage- The number of items displayed on each page. Default: 1 .
- pages- Optional. If specified, the items and itemsOnPage options are ignored. Sets the number of pages in the list.
- displayedPages- How many page numbers should be visible during navigation. Minimum allowed value: 3 , default: 5 .
- edges- How many page numbers are visible at the beginning and at the end of the numbering. Default value: 2 .
- currentPage- Which page will be selected immediately after launch. Logically, the default is: 1 .
- hrefTextPrefix- The string used in the HREF attribute is added before the page number. Default: "# page-".
- hrefTextSuffix- The string used in the HREF attribute is inserted after the page number. The default is an empty string.
- prevText- The text of the button to the previous page. Default: "Prev".
- nextText- Button text for next page. Default: "Next"
- cssStyle- Determine the CSS style. Default: "Light-theme"
- selectOnClick- Selecting a page after clicking, by default - enabled ( true), why I did not understand why to disable it, but there is such a possibility, value: "false".
We have covered the most basic settings. O additional functions and the available methods of using this plugin, you can find out by studying the documentation directly on the developer's page.
All I can do is wish you good luck and success in working on your new projects.
Pagination, including page navigation, is a fairly simple thing, but beginners often have problems creating it, and most importantly, understanding how it works ...
One of the tasks of pagination is the simultaneous display of not all elements, but their limited number, say, no more than $ pp elements, and which group of elements is displayed depends on the input parameter $ pn - the number of this group. This number, in fact, is the page number. Here you need a request like this:
SELECT * FROM `table` LIMIT (($ pn-1) * $ pp), ($ pp)
The value of $ pn is decreased by 1 so that, for example, for the first page of the list with a value of $ pp equal to 10, elements from 0 to 9 are selected, and not from 10 to 19. Naturally, if the pages are numbered from zero, decrease the value of $ by 1 pn is not needed in the request.
To solve the next problem, namely building page navigation, you first need to know the total number of pages in the list. To do this, you can first query the total number of items. Or, right in the request, calculate the total number of pages based on the total number of items:
SELECT FLOOR ((COUNT (*) + ($ pp-1)) / ($ pp)) FROM `table`
To get the total number of pages $ pc, the well-known formula $ pc = (count + per_page-1) div per_page is used here, but adjusted for using the FLOOR function instead of integer division (div). You can also use the DIV operator, which has been supported in MySQL for a long time.
If you need to display only one element at a time on the pages, the above queries can be simplified.
After the total number of $ pc pages has been received, you can immediately display links to all pages in the list using a loop with a counter in the range from 1 to $ pc, however, more sophisticated navigation is usually used, in which links are not displayed simultaneously to all pages, but only on pages with numbers in a limited range, depending on the number of the current page. For example, here are the formulas for getting the $ first and $ last bounding values for the so-called bank navigation:
$ first = $ pn-1 - ($ pn-2)% $ range; $ last = $ first + $ range<$pc?$first+$range:$pc;
In $ range, you need to put a value 1 less than the required width of the range, for example, to display no more than seven regular links to pages in $ range, you need to put the value 6. If you combine all of the above, you get the following:
$ pp = 10; if ($ result = mysqli_query ($ link, "SELECT FLOOR ((COUNT (*) +". ($ pp-1). ") /". $ pp. ") FROM` table` ")) (list ($ pc) = mysqli_fetch_row ($ result); mysqli_free_result ($ result); // rotator of page numbers 0 and 1 can be placed here if ($ pn == 0 || $ pn> $ pc) error (404); elseif ($ result = mysqli_query ($ link, "SELECT * FROM` table` LIMIT ". (($ pn-1) * $ pp).", ". $ pp)) ($ range = 6; $ first = $ pn-1- ($ pn-2)% $ range; $ last = $ first + $ range<$pc?$first+$range:$pc; } else error(503); } else error(503);
All that remains is to display the navigation bar:
In the presented implementation, the first regular link (if it is not a link to the first page) allows you to switch to the previous bank of pages. If you want the last regular link to also allow you to switch to the next bank of pages (that is, work similarly to the "More" link and could replace it), you can specify the expression ($ range-1) as a divisor in the first formula instead of the $ range variable.
The pagelink function is responsible for the formation of the part of the link in which the page number is set. When using a rotator of page numbers 0 and 1, it is better to place this function next to the rotator, because it should compensate for the effect of the rotator, allowing you to get the address / instead of /? p = 1 in the link to match it with the zero value of the $ pn input parameter:
Function pagelink ($ p) (return $ p> 1? "? P =". $ P: "";) if ($ pn == 0) $ pn ++; elseif ($ pn == 1) $ pn--;
Sites usually contain several pages. They can contain as many as 3-5 pages, for example, on the landing-page, or maybe more, much more.
Every good site should contain navigation that will allow the user to navigate and navigate correctly between the pages of the site. You can create such a pagination using JavaScript. In this article, we'll talk about how to create this kind of navigation.
Another point, besides regular JavaScript, the example uses Bootstrap 4. Its bootstrap pagination component is combined with the jQuery library, namely the special Buzina Pagination plugin. It allows you to split all information into several pages with the creation of navigation between them.
Connecting the required frameworks
To work with Bootstrap and JQuery, you need to connect them. This can be done in your HTML document using tags
 The best programs for reading and editing: do without Photoshop psd extension than open
 Why is my phone charging slowly?
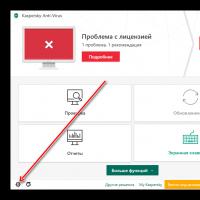 How to add a folder to an exception in Kaspersky How to add exceptions to a program in Kaspersky
 Installing Kaspersky Security Center Installing the Administration Server kaspersky security center 10
 How to take a screenshot on a computer: All possible ways How to take a screenshot of a photo
 Screenshot - what is it and how to make a screen Ways to take a screenshot on a computer
 Free renewal of the Kaspersky Anti-Virus license Suspension of protection from Kaspersky Gadget