An overview of programs for creating screenshots. How to take a screenshot in Paint How to insert a screen after a print into
Many people who have just purchased Personal Computer start learning with simple software products Windows families that are bundled with these operating systems. Therefore, if you want to learn how to use the Paint program, then you need to know some of the mandatory functions and capabilities of this program.
Paint is simple software supplied with the Windows operating system. This graphic editor has become famous for its ease of use and many people who have come across this program know it.
Many are interested in the question - how to take a screenshot inPaint... A screenshot is a live screenshot of the screen. That is, what you see on the monitor screen will be saved as an image. In order to take a screenshot, you need to press a special button on the keyboard that takes screenshots - PrntScrn. By clicking this button, you will receive a screenshot that will be stored in memory. To keep this snapshot in memory until it is displayed in graphic editor, you can not use any kind of copying anything. Press this button you can several times and you will receive exactly the last image after pressing this button.
So, open Paint. For the screenshot image to appear in the work area, you need to insert. This can be done using the special key combination Ctrl + V or by pressing a special menu in the graphical editor, where you will see the "Paste" item.

By pressing this combination, you can see your desktop in the workspace of the graphical editor.

You will get as shown in the picture. Thus, this is how screenshots are taken in Paint program... Now you can edit this image as you want, change colors and use others functionality this graphics editor.
To view the image, you need to save the current work area. To do this, select the Save item in the file menu. When choosing BMP file extension, your image will be saved uncompressed and will take up most of the disk space... If you save the file as Jpg format then your image will be compressed without loss of quality and will weigh much less than a regular BMP file.
Greetings, dear visitors to my site.
Today the topic will be banal, of course, but still there are people interested in this problem, namely how to take a screenshot of the computer screen.
So let's go.
For example, I want to send someone an image from my desktop screen. I mean, you have windows system on your computer.
First, let's free the desktop. Then on the keyboard we find the "print screen sysrq" key and press it. On some keyboards it is simply called "print screen".
After pressing it, go to Paint and press the key combination "ctrl + v", and voila. The image of our desktop has appeared in the workspace of the paint program. Also, instead of "ctrl + v", you can right-click and click on the "paste" item from the context menu.
At this stage, our screenshot can be somehow edited using the tools of the paint program, for example, crop or select something with a pencil. Or add another picture here and you will have two pictures on one canvas :-).
But I decided to leave it as it is.


Then we select the image format in which you want to save the screen, I recommend JPEG.

Well, in the next window, you need to select the place where we decided to save the image and write an arbitrary name.

So this topic is not difficult, I think I wrote it in detail;).
Oh yeah, I forgot to mention.
If you want to transfer an image to social. networks, then after pressing "print screen", in the message sending field, you can immediately press "ctrl + v" and the screenshot of the desktop should be inserted into the dialogue of the social network that you are using. In short, with the help of this, you can not do unnecessary actions: insert first into the paint, save, and so on ...
But this does not work everywhere. For example, there is such a feature in Skype, in Vkontakte and in Odnoklassniki, and it can also be done in the text editor Word.
The original paint is certainly great, but when you save the image, it turns out in some difference. I'm talking about the fact that the picture itself turns out to be of worse quality than it can be. This problem me, to be honest, pisses me off.
But there is a solution.
It is in a program called Paint.NET, you can download it at this link... The algorithm of actions in it is almost the same when saving, as in the original program.
The difference is very large, the functionality is much wider than in a regular paint, and you can save the image by changing the quality of the output file:

Well, this concludes this post.
Subscribe to blog updates, there will be many more interesting things ahead;).
Something, but proven folk wisdom does not age as quickly as our smartphones and laptops go out of fashion. "Better to see once than hear 100 times".
Tried to explain to someone through correspondence how to set up WI-FI router? Then, probably, you understand that it would be better, indeed, a person saw 1 time than heard or read 100 messages 100 times! That is why many people ask how to take a screenshot on a computer.
A couple of words of theory
The word “screenshot” has exactly passed into Russian from international English. It means an exact image of the user's screen, a screenshot. An abbreviated version of this concept "screen" is in use.
How to take a screenshot on Windows
Actually, here are the main groups of solutions:
- standard Windows tools;
- online services that allow you to take a screenshot of the screen on a computer;
- special programs.
Method 1. Screenshot on Windows by means of the system.
If you look at the top left of the keyboard, you can find the button there. PrtScr... The name of this button comes from English Print screen- screen printing. Previously, by pressing this button, the printer was printing the active screen. Now, when we press this button, the screen image goes to the clipboard. All that remains is to insert the image into some program from which it can be saved.
Honestly, say, on a laptop, this button can be anywhere on the right side of the keyboard. Sometimes, as in the example below, for this button to work, you need to start the button with it Fn(Functions - this is usually located on the lower left side next to the button Ctrl) and without releasing it, press the button with the inscription PrtScr.

To action: push PrtScr, we go into the Paint program, it is in any operating system Windows and click "Paste".
You can go to Paint through the Start menu → All Programs → Accessories → Paint.
Start menu depending on Windows versions is different, the screenshot below shows how to enter Paint in, because I use this particular operating system.

In the Paint program, you need to click "Insert" and our screenshot appears here. If necessary, it can be edited by means of the program or simply saved via the button "File" and than "Save" or t.

IMPORTANT. When you press only one PrtScr key, a screenshot of the entire computer screen is copied to the clipboard. When you press the Alt + PrtScr combination, the active (selected) window is copied. If you use the Win + PrtScr combination, the entire screen is saved in the c: \ Users \ Username \ Pictures \ Screenshots \ folder. It is easy to find from the "Computer" menu. In the left column, click the "Pictures" menu item and then select the "Screenshots" folder.
So, to take a screenshot on Windows using the system tools, you need to click PrtScr key, go to any image editing program, such as Paint and click the "Insert" button.
Method 2. How to make a screen on a computer using an online service
It happens that a screenshot needs to be edited and it is often convenient to do this using some kind of website than installed program... Let's take 2 such services as an example. They are united general principle how to take a screenshot of the screen. Push the button PrtScr(if you don't know where she is, see the first method just above). We go to the site and click Ctrl + V.

And, as we are advised, we press Ctrl + V.

We see that the screenshot has been inserted into the site window. If you need to save it, then click on it, it opens in a new browser tab.

Congratulations! The image is saved on the computer.
So, to take a screenshot on a computer using online service you need to press the PrtScr key, or Alt + PrScr, go to the service that we have chosen, press Ctrl + V to paste the image and save it to your computer.
Method 3. How to make a screen on a computer using special programs
It is worth saying that there are actually a lot of programs that allow you to take a screenshot of the computer screen. If you look at the Softportal service, 181 applications are displayed upon the request for "screenshot".

Most of all, each of them has its pros and cons, but often people use such programs out of habit. Once installed, sorted out and that's it. There are especially powerful ones, even paid apps, which allow you to quickly not only create a screenshot, but also edit it. For example, you can add arrows, frames, and other effects.
One of the decent and free options, the Joxi program.
You can download it from the official site joxi.ru.
After installation, the icon for this program appears in the taskbar. The first time you launch it, in the lower right corner you will be able to choose whether you want to take a screenshot of the entire screen, a snippet, or other options. Subsequently, after clicking on the icon, you can select the area of the screen that you want to save and after selection the program looks like this:

Note the blue icon in the upper right corner. By clicking on the small arrow on the right, you can select:

Conclusions of our "screenshot production"
If you make a summary, there are 3 main solutions that allow you to make a screen on a computer.
- Use Windows tools;
- Online services;
- Special programs.
Here, as they say, who likes what and for what purposes. Try it, experiment.
The screenshot can be made standard Windows tools and third party programs, in this article I will describe step by step the most popular ways to take a screenshot.
1 Take a screenshot using the PrintScreen key;
2 Take a screenshot using the built-in Scissors tool;
3 Take a screenshot using the Clip2Net program.
Take a screenshot using the PrintScreen key.
The most common way to take a screenshot is to use the " PrntScr" on keyboard.
By pressing this key, the image of the entire monitor screen is placed on the clipboard. In order to see the image, you need to use an image editor, for example Paint. In order to start Paint, press the " Start"and in the program search bar we write the word paint and press "Enter"(Or press "Start "-" All Programs "-" Accessories "-" Paint".) .

Paste a screenshot from the memory buffer into Paint by pressing the keyboard shortcuts " Ctr "+" V"or the button" Insert"(on Windows7)," Edit- Paste"(in Windows XP).
If you need to take a screenshot of not the entire screen, but only one window, for this you need to make the window active (just click on it) and press the key combination " Alt "+" PrntScr"

After that, paste from the clipboard into an editor, for example Paint (as described above).
Take a screenshot using the built-in Scissors tool.
Using scissors, you can capture an image on the screen or a fragment of it, and then add a note to it, save it, or share it with other users. Please note that the Scissors tool is available in Windows7 Home Premium or higher (i.e. if you have Windows Home Basic or Starter, this tool will not be available to you).
In order to start Scissors, you must press " Start"or press the keyboard shortcut

The second way to launch the application is to press "Start" - "All Programs"- "Standard" - "Scissors".
After launching the utility, the desktop will become as if in a veil and the utility interface will appear.

Select the required area, after that the selected area will be opened using the same Scissors utility. In addition to simply saving a picture, the utility allows you to use a marker. To save, press the Save button or " File "-" Save As".

Take a screenshot using the Clip2Net program.
There are many programs on the Internet that you can take a screenshot, in this article I will consider one of such programs - Clip2Net. You can download it from the official website http://clip2net.com/ru/

A screenshot is a screenshot of a computer screen, or rather of what is shown on it. Moreover, the picture is taken in the computer itself. You can take a screenshot of a web page, a screenshot of any photo, program, and even text. Here is an example of a screenshot of the text in Word:
I know how to take a screenshot in several ways, but usually I use one. I am not a designer and I know Photoshop at an everyday level, because all my life I have been working with texts and my main program was Word. But a screenshot was required from time to time. And I did it in a very simple PAINT program, which is in any Windows. What I like about this program:
- In it, you can crop a screenshot.
- Resize in pixels or percentage
- Draw something: an arrow, highlight an element with an oval, etc.
- Rotate left to right image
- Make some kind of inscription
- Erase what you don't need and fill with any color
By writing the text on the screenshot, you will get such a small homemade banner or postcard (if you are interested in how to make a banner that opens in a new window, there is a separate article on this topic "Banner in a new window"). The screenshot with the text looks like this:
If you want to learn how to turn a picture into an active link on any page of your blog or third-party resource, an article will come in handy on how to make a picture a link. Which can also be useful for a blogger.
Today we will learn how to take not only a simple screenshot, but also as a bonus - with text, which will come in handy more than once in the future, especially if you have your own blog.
How to take a screenshot of a page
You will need: hands and the Paint program. You may not know, but you already have it, if you use Windows, it is included in the package by default standard programs... I worked with her in ancient versions of Windows.
Instructions "How to work in Paint"
1. Take a screenshot. To take a screenshot of a page, you need to open the page that you want to "photograph" and press a single button on the keyboard. It is usually located in the topmost row and is called Prt Sc (print screen)... That's it, the frame is shot.
2. Open the Paint program. To do this, go to the START menu - ALL PROGRAMS - STANDARD - PAINT - OPEN. The program will load and the main window will open:

3. Paste the screenshot into the program. In step 1, we saved it - it is in the buffer, now it needs to be transferred to any program in order to save it as an image. To do this, you just need to click on the INSERT icon in the upper left corner (highlighted in a red circle in the picture).

4. Save. If you need a snapshot of the whole (a screenshot of the computer screen), then at this stage you can save the image. Click on the floppy disk icon in the upper left corner (highlighted in blue). A new window will appear:

In the topmost field, specify the path where you are saving the file.
In the FILE NAME field enter a title for the screenshot... Preferably in Latin, in English - especially if you are saving a photo or screenshot for a blog. In general, it is better to immediately get used to saving all files in the Latin alphabet - this is more correct. For example, when restoring a blog from a backup, images named in Cyrillic usually crash. Then you have to manually return each one. I neglected the rule until the first backup ..
In the FILE TYPE field select extension... I usually choose JPEG - it weighs less. At the end, click SAVE. Your screenshot is ready.
How to crop a screenshot
If you need a part of the screen, then the screenshot must be cropped before saving. We return to step 3: we inserted the screenshot into the program.
Go to the VIEW - REDUCE tab.
Return to the MAIN tab and click on the CUT button. The cursor will become a crosshair.
Holding left button mouse, select the desired fragment of the screen - the area will be highlighted with a dotted line.
Right-click on the selected fragment. Click COPY.
Now you need to paste the copied fragment into a blank document and save it. In the lower picture, this is the area highlighted with a red oval: click on the small white arrow, select CREATE in the drop-down window. Opens clear sheet... Click on INSERT. The fragment appears in the window. Click SAVE (floppy disk icon) and save as in step 4.

How to put an inscription or text on a screenshot
And the promised bonus. If you need to make some inscription on the screenshot, before saving, enter the menu text editor(in the picture above it is the letter A in a blue circle). Then click on the area of the screen where you want to create an inscription, and holding the left mouse button, select the required area. A dotted rectangle appears in which you can write text.

In red oval: font and size are selected.
Green Oval: Select a font color.
Blue Oval: Transparent or opaque background below the text.
When the inscription is ready, click anywhere on the screen with the mouse to exit the editor. And save the image as described above. Your postcard is ready!
Now you know not only, how to take a screenshot of a page but also know how to work with Paint. It is lightweight, understandable and always at hand. When you get used to it, you will be able to take a screenshot in a couple of minutes.
There is also a very interesting and also not complicated program for working with images - FastStone Image Viewer, in which you can change and beautifully design photos.
 Skype free download Russian version Install Skype application
 How to recover a photo on Android after deleting it?
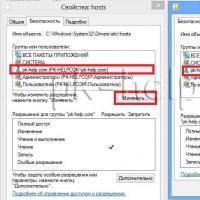 Original hosts for Windows operating systems What should be in a Windows 7 host
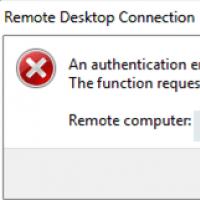 An authentication error has occurred
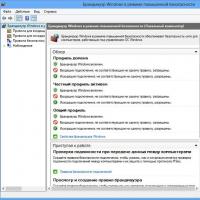 Open the following ports at the client's workstation
 How to hide all VKontakte friends in the new version?
 Hide friends on VKontakte