Tl wr841n v9 прошивка dd wrt. Перепрошивка TP-LINK TL-WR841N в DD-WRT. Додаткові режими. репитер
Чому ми рекомендуємо використовувати альтернативну прошивку для роутера 841-, замість заводської. Справа в тому, що дд-врт - це ідеальний засіб для усунення несправностей роутерів. Вона звичайно, не ідеальна, але все одно дає набагато більше можливостей, ніж прошивка з заводу. До того ж деякі проблеми можна виправити тільки за допомогою її, такі, наприклад, як.
Так само DD-WRT більш універсальна. Ви можете налаштувати Ваш роутер Tp-link 841n як маршрутизатор, точка доступу або повторювач, в залежності від Ваших потреб. Таким чином, ви можете купити $ 15-20 роутер і перетворити його в те, що вам потрібно.
Як відбувається процес перепрошивки роутера TP-link 841n?
У випадку з TP-LINK TL-WR841N - це досить просто.
- Завантажте прошивку. Поточну версію DD-WRT скачати тут, врахуйте, необхідно качати обидва файли.
- Вимкніть і підключіть кабель до вашого порту і один з портів LAN на маршрутизаторі.
- Увімкніть роутер
- Відкрийте командний рядокі введіть наступні дві команди: ipconfig / releaseі ipconfig / renew
- http://192.168.0.1
- Натисніть «системні інструменти», потім натисніть кнопку «оновлення прошивки». Оберіть factory-to-ddwrt.binі натисніть оновити. Процедура перепрошивки займає кілька секунд. Дочекайтеся закінчення оновлення і перезавантаження.
- Перейдіть на командний рядок і введіть: ipconfig / releaseі ipconfig / renew
- В адресному рядку браузера введіть http://192.168.1.1
- встановіть пароль
- Перейдіть в «адміністрування» - «оновлення прошивки». Знову увійдіть в систему і натисніть кнопку Огляд. Оберіть TL-WR841ND-webflash.binі натисніть оновити.
От і все. Тепер роутер TP-Link TL-WR841ND працює на альтернативній прошивці DD-WRT. І можна налаштувати його, як ви хочете.
TP-Link's TL-WR841N router supports the DD-WRT firmware.
Upgrading the router's firmware is simple: (Remember, when upgrading firmware, always be connected to your router through an ethernet cable, as you will loose WiFi connectivity once the firmware has been updated. After the update, you will have to reset your wifi settings ).
Under System Tools, select the " Firmware upgrade"link

Choose the "Factory-To-DDWRT.bin" file that you just downloaded and click the upgrade button. Wait for about 5 minutes. DD-WRT should be installed and should come up if you browse to http://192.168.1.1/
Next go to the DD-WRT Administration page and select the Firmware tab. Install the 2nd firmware update file "TL-WR841ND-Webflash.bin" that you downloaded.
That's it - you now have TL-WR841N v7.0 running DD-WRT firmware.
The final step will be for you to go through the setup process and define your Wifi settings.
Reverting to TP-Link's firmware:
If you need to revert to TP-Link's firmware, then you need to download the appropriate file from: "http://www.dd-wrt.com/phpBB2/viewtopic.php?t=85237&postdays=0&postorder=asc&start=5" . Remember, to be able to download the file you need to create an account on that website. (After creating the account and logging in via the Quick Links button, you should see the file download link).

Download and unzip the contents of the "WR841Nv7_webrevert.rar" file. You will find a bin file within the RAR file. Go to DD-WRT and use the upgrade option to upload the "wr841nv7_webrevert.bin" file. After clicking the upgrade button, you will have to wait about 5 minutes for the router to reboot and complete installation.
After you have reverted the firmware, download the latest TP-Link firmware from TP-Link's website and upgrade the firmware to that version.
I finally got frustrated with the wireless coverage in my house last year. I have my FiOS wireless router in the garage, because that's where the cable comes into the house. Plus, my house is wired, so I can keep my switches, NAS, and other networking gear out of sight there. I also got frustrated that the Chromecast I have kept getting dropped from the network. Since the wireless router was over 6 years old, it was time for an upgrade.
Now I love the Verizon FiOS service, but their equipment policies stink. They want $ 100 to upgrade to the latest router, which uses wireless-N technology and supposedly extends the range of the wireless network. I figured there had to be a cheaper, and possibly better way.
A friend of mine recently extended his network with a TP-LINK TL-WR841N router. He suggested loading on the open source router firmware, DD-WRT. The router is $ 20 on Amazon, and since I like working on tech projects, I figured it was worth a shot.
I found plenty of information that helped with the loading of the firmware, but the rest of this post will detail my experience setting up the router. Below are instructions and a few photos should you want to put DD-WRT on a TP-LINK TL-WR-841N router.
Before getting started, let's start with the contents of the box. You get a router, an AC adapter, a 3-ft cat 5 cable, and manuals. In other words, the usual stuff you'd expect. From there, if you want the short instructions on what to do, I suggest checking out this link: How I upgraded a TP-Link TL-WR841N to DD-WRT. Of all the information that I found on the internet, this link had the best information. It's a simple 10-step guide to help you through the process, although it does not have pictures and assumes a moderate level of technical proficiency. It's also for version 8.4 of the router, and the version I bought was 9.2. When using the guide, just be careful which version of the DD-WRT firmware you download since there can be differences in chipsets between router versions.

The rest of this post will share my experience changing the default firmware on the router. By the way, any of the images below can be enlarged by clicking on them.
Step 1: Download the DD-WRT firmware
Here's how I got the latest version of the DD-WRT firmware for router version 9.2:

UPDATE: As pointed out by "pancakes" in the comments below, you may want to try the latest 2015 builds. You can get the two files by. I have not tried them yet on my router, but "pancakes" reports that it runs stable on the v9.
Step 2: Install DD-WRT on the router
I recommend using a laptop for the DD-WRT firmware installation, if you have one available. It's easier to access and configure the ethernet connections.
- Disable your laptop wireless (if you're using a wired connection on a laptop, or desktop, disconnect the cable from your computer). Take the cat 5 cable and plug one end into your laptop and the other end into one of the router's switch ports (do not use the blue port marked 'WAN').
- Plug the router in and turn it on.
- Open a command window (on Windows, click the 'Start' menu and type 'cmd' into the search box). At the prompt, enter the command 'ipconfig / release'. Once that command is finished, type the command 'ipconfig / renew'.


- Open a web browser and type 192.168.0.1 in the URL bar. You'll be prompted to enter the generic password information that is provided in the router's documentation.

- The Quick Setup screen for the router will appear. Click 'Exit', and then click 'System Tools', and 'Firmware Upgrade' in the left hand navigation menu.


- Click 'Choose File' and find the file factory-to-ddwrt.bin that you downloaded from Step 1 - Download the DD-WRT Firmware. Click 'Upgrade', and then 'OK' when the 'Are you sure?' Dialog box pops up. Sit back and wait for the system to reboot. You will get a message the software has been successfully restarted, but the web page will not refresh. Do not panic, continue to step 7.

- Open the command window (or open another one) and type 'ipconfig / release' and 'ipconfig / renew' again (follow the same process as step 3 above).
- Reconnect to the router as in step 4, but this time, type 192.168.1 .1 into the URL bar. It's a subtle, but very important difference. You'll be prompted to enter a username and password to finish the setup. Make sure to write these down somewhere and keep them in a safe place - you'll need them later, possibly as soon as the next step.

- Click on the 'Administration' tab. You may be asked to put in the username and password that you just created. Then go to the 'Firmware Upgrade' tab. Find the file tl-wr841nd-webflash.bin that you downloaded from Step 1. Click 'Upgrade'.

- After a minute or two, the upgrade will complete and the router will reboot.
Congratulations! You have successfully flashed the TL-WR841N firmware to DD-WRT.
Step 3: Extend your network
I'm not going to go into the step-by-step details for this section. There are various ways you can use the DD-WRT software to extend your network. I chose the 'Access Point' method, but you may decide on a different method depending on your situation.
If you want the detailed instructions for extending the network following the 'Access Point' method, I'd recommend using
Волею випадку в мої руки потрапив бездротової роутер Tp-Link WR-841ND. Давно хотів протестувати роутер з можливістю встановлення альтернативних прошивок на предмет швидкості роботи і складності настройки. Багато людей себе звуть DD-WRT, але, в той же час, часто бачу в мережі теми «як повернути заводську прошивку».
Отже, за традицією коротенько опис пристрою. Коробки не було, так що фотографій поліграфії не буде.
Корпус роутера виконаний з білого пластику і має симпатичний футуристичний дизайн. По периметру верхньої частини корпусу виконані приховані прорізи для вентиляції пристрою.
Вельми порадували антени. Вони переконливо виглядають, мають посилення в 5 dBi. До того вони, знімні, що може бути корисним (на відміну від моделі WR-841N).

Знизу у корпуса також є безліч отворів для циркуляції повітря.

Апаратна ревізія у роутера 8.1.

В цілому, роутер справив непогане враження. Зовнішній виглядяк у літаючої тарілки, солідні антени, хороша вентиляція корпусу (ймовірно, для охолодження потужної начинки). На такому влаштуванні інтернет повинен борознити простори Всесвіту просто літати.
Особисто я в даний моменткористуюся роутером Dlink DIR-300 (rev. D1). Який має тільки одну внутрішню антену з посиленням 3.75 dBi. З'явився непоганий привід порівняти пристрої різних виробників, тим більше, що вони обидва є недорогими пристроями для будинку.
Технічні характеристики
Роутер побудований на базі чіпсета Atheros AR9341 rev 1.1, що працює на частоті 535 МГц. На борту у роутера 32 МБ ОЗУ і 4 Мб флеш-пам'яті. Має 2 антени з посиленням 5 dBi. Максимальна заявлена швидкість 300 Мбіт / с.
Другий учасник тестів Dlink DIR-300 D1 побудований на чіпі Realtek RTL8196E з частотою 400 МГц. На борту також 32 МБ ОЗУ і 4 Мб флеш-пам'яті. Максимальна заявлена швидкість 150 Мбіт / с.
умови тестування
Підключення до інтернету здійснювалося по протоколу PPPoE на максимальній швидкості 100 Мбіт / с. Бездротове підключення здійснювалося за стандартом 802.11n, бездротова мережа була захищена WPA2-PSK / AES.
Тестування проводилося на ноутбуці з бездротовим адаптером стандарту 802.11n на чіпі Realtek RTL8188CE. В якості другого бездротового пристрою в деяких тестах використовувався комп'ютер з wifi-адаптером TP-Link TL-WN727N, також підтримує стандарт 802.11n.
Тест проводився в типовій панельній багатоповерхівці з безліччю бездротових пристроїв. Сканування мереж за допомогою програми Acrylic WiFi Home показувало наявність 20-30 мереж в діапазоні 2,4 ГГц.
використовувані прошивки
Як стандартна прошивки використовувалася прошивка від 28 лютого 2014 року. Це остання версія штатного ПО.
Також, оскільки дана модельроутера підтримує DD-WRT, було вирішено прошу і подивитися, що з цього вийде. Опишу коротко процес прошивки, тим більше що він простий до непристойності.
Беремо з сайту dd-wrt.com файли factory-to-ddwrt.binі tl-wr841nd-webflash.bin(Файли лежать)
Підключаємо роутер до комп'ютера за допомогою патч-корду. Через браузер (192.168.0.1) заходимо в меню роутера в пункт System Tools → Firmware Upgrade і підсовує програмі перший файл (factory-to-ddwrt.bin). Тиснемо Upgrade.
Коли індикатор завантаження дійде до кінця необхідно буде в адресному рядку прописати нову адресу 192.168.1.1. Ми зайшли в DD-WRT. Далі тупотимо в меню Administration → Firmware Upgrade і скармливаем роутера другу частину прошивки (tl-wr841nd-webflash.bin). Після закінчення завантаження можна починати працювати.
Налаштування роутера відбувається аналогічно будь-якого іншого роутера:
- підключення до інтернету: Setup - Basic Setup - WAN Setup. Для уникнення фрагментації пакетів можна встановити MTU відповідно до настройками провайдера. У мого провайдера MTU = 1480 (за замовчуванням MTU = тисяча чотиреста дев'яносто два).
- настройка wi-fi: Wireless - Basic Settings.
- настройка безпеки: Wireless - Wireless Security.


До речі, якщо з якихось причин ви захочете повернути заводську прошивку, то зробити це буде також просто. Досить завантажити файл wr841nv8_webrevert.binз сайту dd-wrt.com і прошити їм пристрій через web-інтерфейс (ось посилання на відповідну тему).
Тестування передачі даних усередині мережі
Тестування швидкості передачі даних між комп'ютером і ноутбуком за допомогою утиліти iperf показало наступні результати.

Як видно, роутер непогано справляється з маршрутизацією трафіку між локальними клієнтами. Зокрема, швидкість між роутером і бездротовим клієнтом піднімалася до 90 Мбіт / с, що досить непогано.
Великої різниці між прошивками тести не показали. Єдине, DD-WRT дещо краще справлялася з багатопотокової передачею даних.
Тестування роботи з PPPoE
Тестування інтернет-з'єднання по протоколу PPPoE за допомогою сервісу speedtest.net і закачування торрентів показало наступні результати.

Заміри швидкості за допомогою speedtest`а показали помітно кращі результати на прошивці DD-WRT при підключенню по wi-fi. Швидкість скачування торрентів також помітно зросла.
Звертає на себе увагу і помітне зменшення пінгу, особливо при складних умовах прийому.
Потрібно відзначити, що вимірювання швидкості проводилось при обмеженні кількості бенкетів до 50, тому що велика кількість бенкетів може привести до зниження швидкості скачування.
Тест D-link Dir-300 D1
Швидкості передачі даних усередині локальної мережі у даного роутера можна подивитися в цьому. Швидкості у нього були помітно менше, ніж у TP-Link`а. Подивимося, як це позначиться на роботі з інтернетом по PPPoE.

Швидкість роботи у D-Link`а виявилася приблизно на рівні TP-Link`а із стічною прошивкою. В цілому, це непогано, з огляду на більш слабку антену. Безумовно, є сенс перейти на TP-Link, але прошивку поміняти обов'язково.
Додаткові режими. Репитер.
DD-WRT має безліч налаштувань, але особисто мені було цікаво наскільки роутер впорається з функцією репитера.
Штатна прошивка має режим WDS (Wireless Distribution System), який дозволяє об'єднати кілька роутерів в одну мережу. За інформацією з форуму Tp-Link дана функція працює тільки з роутерами цієї ж компанії. Мені не вдалося змусити її працювати з іншим роутером.
Налаштування корисних властивостей в DD-WRT не очевидна, але після недовгих танців з бубнами все запрацювало як треба (можна з деякими застереженнями використовувати ось цю інструкцію з Хабра).
Отже, з метою експерименту я засунув базовий роутер в найдальший кут комори. При цьому для ослаблення сигналу його довелося засунути в велику каструлю з нержавіючої сталі фірми Zepter (не реклама) і накрити кришкою. :)
Репитер був встановлений в сусідній кімнаті, а приймач - через 2 стіни від нього.
Рівень сигналу:
Dlink DIR-300 (базовий) - 70 dBm
TP-Link WR841ND (ретрансляція) - 57 dBm
Різниця в потужності сигналу більш ніж в 10 разів. Запускаємо тест.

Показники досить непогані, зростання швидкості приблизно в 2,5 рази.
Також зазначу, що в прошивці DD-WRT є власний режим WDS.
Додаткові режими. Точка доступу.
Такі функції роутера, як підтримка PPPoE-з'єднання і NAT створюють певне навантаження на процесор роутера. Подивимося, чи стане роутер швидше якщо їх відключити. Для цього необхідно перетворити наш роутер в більш простий пристрій - точку доступу.
Засобами штатної прошивки мені це зробити не вдалося (можливо, через недостатню прямоти рук), а ось з DD-WRT все пройшло відносно гладко. Ось за цим посиланням можна подивитися варіанти настройки DD-WRT для різних завдань: ретрансляція, міст, точка доступу, свитч.
У режимі точки доступу роутер не роздає IP-адреси підключеним пристроям, їх необхідно прописувати вручну в параметрах мережевих карт. Всі підключені пристрої (як провідні, так і бездротові) знаходяться в одній підмережі і бачать одного (наприклад, запросто можна розшарити папки). Доступу в інтернет ні у кого немає, оскільки NAT не працює. Щоб один з пристроїв отримало доступ в інтернет потрібно з нього встановити PPPoE з'єднання з провайдером (також як і при підключенні кабелю безпосередньо до комп'ютера). Як правило, одночасно може бути встановлено тільки одне таке з'єднання (втім, це залежить від провайдера).

У такому режимі роутер тільки пересилає пакети даних з одного порту в інший, навантаження на процесор мінімальна. Результати тестів нижче.

Швидкість по кабелю в такому режимі не відрізнялася від режиму роутера, а ось швидкість по wi-fi виявилася трохи нижче, що трохи дивно.
викачування торентів
Окремо скажу пару слів про скачування торрентів. Велика кількістьз'єднань створює додаткове навантаження на роутер. В даному випадку, при збільшенні кількості бенкетів приблизно до 100 я помітив деяке зниження швидкості (відсотків на 20-30). У таблицях це не відображено.

Для отримання максимальної швидкості на прошивці DD-WRT краще обмежити кількість з'єднань до 50.
Чутливість до якості лінії
Як не дивно, але роутер виявився досить чутливим до якості лінії. Так, в первісній версії текстів він показував швидкість соседіненія з інтернетом в районі 20-30 Мбіт / с як по wi-fi, так і по кручений парі. При цьому комп'ютер і ноутбук легко качали 60-80 Мбіт / с.
Заміна техподдержкой провайдера порту комутатора і конекторів на кручений парі вирішили цю проблему.
Відповідно, довелося заново тестувати швидкості по PPPoE.
висновки
Отже, за підсумками знайомства з пристроєм можу сказати наступне. Дане бюджетне пристрій володіє непоганим дизайном і солідними антенами (сигнал просто відмінний).
Швидкість всередині локальної мережі по провідному підключенню трохи нижче 100 Мбіт / с, а «по повітрю» може досягати 90 Мбіт / с. Обмін даними між двома бездротовими пристроями знижує швидкість до 30-35 Мбіт / с. Втім, цього цілком достатньо для обміну невеликими об'ємами даних (музика, фото).
Також роутер показав середні швидкості роботи в інтернеті по протоколу PPPoE на стандартній прошивці (40-60 Мбіт / с).
установка альтернативної прошивки DD-WRT (остання версія від грудня 2014 року) дозволяє трохи поліпшити роботу роутера, піднявши швидкість роботи і істотно скоротивши затримки. Також дана прошивка дозволяє використовувати роутер як репитера для розширення зони покриття мережі або в якості точки доступу.
PS. Прохання враховувати, що результати тестів залежать від багатьох факторів, включаючи геометрію приміщення, обладнання провайдера і т.д. Відповідно, в інших умовах роботи результати можуть дещо відрізнятися.
I have been with PlusNet for over two years now and am a happy camper as far as fiber optic broadband is concerned but as I am no longer on a broadband contract with PlusNet and had no intention of going on one, so the only way I could get a change to my ageing router was by purchasing a new one.
Hence I started reading about my options and soon enough realised that an old router can be given new lease of life using DD-WRT. Equally soon-ish I also realised that the router from PlusNet - TG582n - is quite rubbish and does not play nice with any of the open source firmwares.
So I figured that if I have to just play around a bit, I might as well start with something cheaper and cheaper is what I found in the TP-Link router TL-WR841n at just £ 16.00. You can "t get any cheaper than that in my opinion. OK, so now that we have established that I am cheap and my new router is cheap, let" s move on to interesting stuff.
I had read that TP-Link router and specifically TL-WR841n plays nicely with DD-WRT but it was only after I had my new toy did I realise that these things also come in hardware version and while interwebs is filled with instructions on installing DD -WRT for upto v9, when it comes to v11 in Europe, it can be a bit tricky to proceed. There are some instructions in forums but nothing that walks one end to end hence this post.
There are two ways to ensure that the DD-WRT firmware gets flashed on the router:
- Apply Unlocked stock firmware- This is the one I used and to use this I downloaded the modified firmware from NeDark that he has provided in a post on the OpenWRT forum
- Using TFTP server- This is considered to be a safe approach because you do not have to use any modded version of stock firmware to apply it. However, if like me you are anyway going to flash it with DD-WRT, I feel it "sa bit of pain that can be avoided as it involves setting up TFTP server and making your router to connect to this server can take some time and effort. It is explained.
Right, so assuming you want to go with the first and easier approach, first you need to download the modded firmware from NeDark. He has uploaded it on his dropbox link and I have also uploaded a copy of this firmware.
I recommend that you download all the three files from my folder on Mediafire using the link below but if you would much rather download directly from DD-WRT, then the links for rest of the two files that I used are also in references and below.
Assuming that now you have all the three files safely downloaded to you computer we just follow the simple steps below:
- Connect the power supply to the TP-Link router and switch it on.
- Connect the ethernet cable in one of the yellow LAN slots of the router.
- Switch-off the wifi on your computer and connect the other end of the ethernet cable to the ethernet port of your computer.
- Once the ethernet connection on your laptop is established, open a browser and type 192.168.0.1 and press enter.
- You will be presented with TP-LINK admin interface.
- Login using the credentials username: admin; password: admin.
- Now click on Browse button and select the file from NeDARK - wr841n (EU) _v11_150616.bin from your downloaded folder.
- Refresh the browser screen and you will once again be presented with TP-LINK admin interface.
- Once again login using the credentials username: admin; password: admin.
- On left hand navigation locate and click on System Tools and then on expanded menu click on Firmware Upgrade
- Now click on Browse button and select the file factory-to-ddwrt.bin.
- Click on Upgrade button. It will take roughly 30 to 40 seconds and router will reboot.
- Disconnect the ethernet cable from Laptop and reboot the laptop - This isn "t always required but just to be safe.
- Reconnect the ethernet cable to the laptop. Make sure that wifi is switched off on the laptop.
- Once the ethernet connection on your laptop is established, open a browser and type 192.168.1.1 and press enter.<-- Notice the different IP than what was used in step 4 .
- If all has gone well until now you will be greeted with DD-WRT login interface and will actually be asked to change the password.
- After providing the password, navigate to tab Administration and then sub-tab named Firmware upgrade.
- Click on Browse and this time select tl-wr841nd-webflash.bin and Click upgrade. This will take 40 seconds or so and your router has now been liberated.
This is it for flashing TP-LINK TL-WR841N v11 router with DD-WRT. I will be writing more about how to configure DD-WRT to work with Plusnet fiber optic broadband and to play nice with NEST so stay tuned if this interests you.
I made fiber optic broadband work with no fuss but with NEST there were some issues basically down to auto setting changing to channel 13.
Making NEST play nice with DD-WRT
The issue was that NEST would suddenly drop internet connection and then not identify the SSID for my router. The SSID just won "t appear in the list of available wireless networks.
- NEST apparently does not like channel 13, possibly even Channel 11 and 12. Changing the channel to any of the single digit (1 - 9) works well.
- In addition giving a static IP for NEST MAC seems to have resolved any network drops whatsoever.
- Under Wireless Setting, I also changed the Beacon Interval to 211.
- Under Administration tab -> Management -> IP Filter Settings, I changed the TCP timeout to 1800 and UDP timeout to 3600.
Configure router for PlusNet Fiber Optic Broadband
For configuring PlusNet fiber optic broadband, the settings I used are as below:
Setup -> Basic Setup

Setup -> DDNS

Wireless -> Basic Settings

Wireless -> Wireless Security

Administration -> Management

Administration -> Commands
Add the following in the startup commands
# Fix lan port communication 841 v7, v9, v11 swconfig dev eth0 set enable_vlan 1 swconfig dev eth0 set apply

Above basic setting ensures that PlusNet fiber optic broadband works perfectly fine.
 Безкоштовний супутниковий інтернет це міф чи реальність?
 Як видалити Mozilla Firefox повністю з комп'ютера?
 Хто винайшов телефон і в якому році?
 Способи пошуку інформації в мережі
 Будівництво Біломорканалу: історія, терміни, опис
 Біломорсько-Балтійський канал
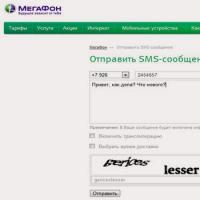 Відправка прохання передзвонити (жебраки) з Мегафона Як послати чекаю дзвінка з мегафона