What is the program that removes the pixels on the screen. How to remove a dead pixel on the monitor. How to remove dead pixels
Scientists from Cornell University and the University of Texas at Austin achieved 71% accuracy in recognizing blurry and pixelated images. If the algorithm makes five attempts in a row, then the recognition accuracy reaches 83%. At the same time, the chance that an ordinary person recognizes a face hidden behind pixels is 0.19%, according to Quartz.
To look beyond the veil of pixels, the scientists used relatively simple tools: the Torch open-source deep learning library, as well as neural network templates and standard datasets taken from it, which are also in the public domain. It is this simplicity and availability of tools that distinguishes the method of scientists from other similar experiments. Previously, scientists from the Max Planck Society developed recognition of people in blurry Facebook photos. They used a more complex program, but it is inferior in accuracy to the development of American scientists.
The researchers emphasize that relying on old methods of protecting privacy is no longer worth it. Computer vision and machine learning are able to see what is hidden from our eyes.
The algorithm does not recreate the face or image pixel by pixel, it only tells what or who is in the photo using pre-known data. The system works both with regular images with blur and pixels, and with P3 - the JPEG-encrypted format.
For the experiment, the researchers took regular images available on the internet and then ran them through YouTube's pixelation tool. After that, the algorithm was provided with two sets of images - originals and processed versions. This approach made it possible to train the algorithm. In the future, he was shown other photographs of the same people, but the program still recognized them in blurry pictures from a different angle. The accuracy of personal identification was 57%, and with five attempts - 85%.
“We use this poor man approach. It is enough to take some training data, add neural networks, several basic image recognition algorithms - and even with this approach, you can get very good results,” said Vitaly Shmatikov, one of the authors of the study.
Hawking: 'An encounter with aliens could end badly for us'
Almost everyone can achieve such results, it is enough to find the necessary set of training data on the Internet. But scientists say it's not difficult - some data is publicly available on the Internet, such as a database of handwritten numbers. At the same time, the researchers note that there are already methods that are several times superior to their result, which means that you can no longer rely on pixelization.
Facial recognition could be the technology that will have the greatest impact on our future. It is enough to imagine that the whole city is equipped with cameras, all citizens are being monitored, and their identity is established almost instantly.
A Sichuan University professor uses hidden cameras to identify students and track their attendance. The same technology helps to determine the mood of students in lectures.
There are several reasons why a dead pixel appears on a monitor. This is the long stay of the LCD monitor outside the premises typical for such devices, for example, in the kitchen, where, in addition to constant temperature fluctuations, there is a lot of humidity.
We are not talking about the content of fatty vapors in the air, which penetrate the inside of the devices and adversely affect their operation.
Mechanical impact on the monitor is a frequent occurrence when a finger is pressed on the matrix with an excessive force. And many other reasons.
But you need to understand that a dead pixel can also be present on a new monitor or laptop matrix, and for many models of such devices this is considered normal.
What are dead pixels?
On the monitor, you can see dead pixels of various types, this:
- On a black background, white dots are the first type;
- On a white background, black dots are the second type;
- Multi-colored pixels, green, red, magenta and blue, are the third type.
In simple terms, a dead pixel is constantly glowing white or color, as well as black dots that do not react in any way to a change in the color rendition of the monitor screen.
All of the above types are legalized by the international standard ISO-13406, which also regulates the permissible number of dead pixels in different classes of monitors.
A lot here depends on the model of the matrix used, so when buying an LCD monitor or laptop, be sure to turn them on and check for such problems.
This is easy to do by visually inspecting the matrix or using a special utility, taking it with you to a store on a flash drive. We will talk about such programs below.
- First-class monitors are considered the best and should not have dead pixels a priori.
- The second class allows the presence of no more than 5 problematic pixels of type III, no more than two failed pixels of the first and second types.
- The third class assumes the presence of no more than 50 defective peeps of type III, up to 15 of the second and up to 5 of the first types.
- The fourth class allows the presence of 500 defective pixels of type III, 150 of the second and, respectively, 50 of the third type.
At the heart of the device of each pixel is a thin-film transistor, which controls the entire color rendering process at a specific point on the screen.
If this transistor is out of order, then we can observe a black dot on the screen and we will not be able to change something at the software level.
You can notice such a pixel only on bright screens or where the picture is transmitted in white.
Therefore, as a rule, despite the fact that the black pixel cannot be repaired at home, it is rarely paid attention to, as it is the least noticeable and does not irritate the eyes.
Other types of dead pixels are called "stuck pixels" (stuck point). They glow in different colors and are very annoying to the PC user, as they are clearly visible on the screen.
Here, as a rule, users of laptops, LCD monitors and other devices that use similar technology in the operation of screens are struggling with these broken pixels.
How to remove dead pixels?
Remove a dead pixel on the monitor, meaning " stuck pixels", at home, you can use three main methods:
- Software;
- mechanical;
- Software-mechanical.
There are situations when defective pixels, during a long operation of the monitor, disappear on their own, but this is a very rare occurrence and you should not count on it. Especially if the problem arose in the most visible place and interferes with work.
Program method
The method that is the most popular in solving our problem, as it helps in 80% of cases.
The principle of its use is that during the operation of a special program with a fast frequency, the colors of the pixels next to the broken one change.
As a result, more current is supplied to the problem area, as a result, the defective pixel is gradually resuscitated.
In each case, the recovery time of a broken pixel may be different, it all depends on the complexity of the situation and on the program settings.
In the utility settings, you can change the frequency of color changes and the period of its operation. In some cases, it will take from 20 minutes to 5-6 hours to solve the problem.
Programs for finding dead pixels.
If you come to test your monitor for dead pixels, then you can use a simple free utility IsMyLcdOK.
There are versions for both 32 and 64 bit systems.
Installation of the program is not required.
After running the utility, the following window will appear.
Acting according to the instructions, you can quickly check any monitor, including the one you want to buy for broken squeaks. The size of the program is about 200 Kb.
Multifunctional utility for checking and testing monitors. It has many features, including checking for broken pixels.
Very easy to use, so it makes no sense to describe its work.
Programs for recovering dead pixels.
The most famous and one of the most effective programs is Bad Crystal. It is developed in three versions Ultimate, Mobile and Primary, respectively, has different functionality. It is considered one of the best software in this category.
At the moment, the current version is 6.1.9 BUILD 4061, the official website of the z-drex.com program. Here you can also read how to use the program.
You can also use previously released working versions, which are easy to download from torrents if you feel sorry for paying $14.99 for the rarely used Bad Crystal program.
Let's consider the program operation on the example of version 3.0 Ultimate.
After installing and launching the program, a window will appear with the ability to select operating modes.
If you have a trial version, then in this case only the CCM mode will be available. The efficiency of this mode will not exceed 55%.
More efficient SMF and CFV modes work only in the paid version and provide pixel restoration in 80% of cases.
The PPM mode is used for preventive maintenance, which should be carried out after recovery procedures, at least once a month.
After selecting the desired mode, click "Launch".
A window will appear that needs to be put on a broken pixel.
By default, the program will run for 10 minutes. If during this period of time the dead pixel has not disappeared, press Speed Up and change the settings. It is necessary to increase the speed and time of the program.
Basically, it is a free Java application. To use it, you need to go to the official website jscreenfix.com and click on the "Launch JScreenFix" button.
You will be taken to this page with a square with running pixels.
Move this square to the problem area of the screen. By default, the program will run for 10 minutes.
If the problem persists, you can increase the running time of the Java application.
The program is free and fully functional. After installing and launching it, the following window will appear.
For example, 5 dead pixels were detected. We set the appropriate settings and press start.
Five blinking dots will appear in the upper left part of the screen, each of which must be placed under a dead pixel.
Check the result after 10 minutes. If necessary, increase the operating time and repeat again.
The UDPixel program has other useful functionality.
mechanical way
The mechanical method of recovering dead pixels can be used both separately and together with the programs described above.
The essence of this method lies in the following:
- The place of the broken pixel on the screen is marked in any safe way, the monitor or laptop is turned off;
- A toothpick is taken and cotton wool is wound around it. Or you can use an ear stick or other object;
- With this device, gently press on the pixel, with a little scrolling. Don't overdo it with effort.
After a while, turn on the device and check the result, if necessary, repeat these steps several times. Be patient, this can take up to 30 minutes.
If everything worked out, run one of the above programs and enhance the effect.
Some use the same method, but with the monitor turned on and in parallel, they still use the program. But this method cannot be called safe, so we do not recommend it.
There is another way, using a PDA stylus.
To do this, you will need to very accurately set the stylus opposite the broken pixel, fix it in that position and turn off the monitor.
Do not press the stylus hard against the screen and, without reducing the pressing force, turn the monitor back on. When the screen fully switches to the operating mode, remove the stylus, thereby relieving the effort on the dead pixel.
If the first time did not give an effect, repeat everything from the beginning by manipulating the force on the pixel and positioning the stylus.
Thus, we are trying to move the "stuck" pixel from its place and make it work correctly. In 80% of cases, this can be done.
One more way.
This method can help in 20% of cases and this is a good chance to correct the situation in our favor.
Disconnect the monitor from all power sources - network, video card, etc. Remove the battery from the laptop by completely de-energizing it with this. Don't forget your internet cable.
Leave the device in this state for several days, for example, you went to the country for the weekend.
During this time, all the monitor capacitors will be discharged by 100%, and the residual current will leave the thin film transistors.
When you turn on the device, there is a chance that the stuck pixel will work.
This also applies to objects with a large contact area.
Outcome
As we can see, a dead pixel in a monitor, in most cases, with the exception of black, can be restored at home.
Actions do not require much knowledge, the main thing is to learn how to use the right software correctly and not overdo it with effort during the mechanical procedure for fixing the problem.
But do not forget that the presence of dead pixels is also possible in new devices, so carefully check them for such a malfunction when buying.
Today, every family can afford to buy a computer. In view of the rapid progress of computer technology, they become obsolete. fast , and they are being replaced by more powerful and updated models. Therefore, everyone can afford to buy a computer or laptop now. Moreover, most of them already have a couple or even more computers.
For example, my friend has a computer that is installed in the kitchen so that it is not boring to cook and, in fact, have dinner. The computer is of medium power, but for home use it will do very well. But using it in the kitchen, in the summer heat, and even with the stove or oven turned on, the problems were not long in coming. Dead pixels began to appear on the monitor. While there are only a couple of them, urgent measures must be taken so that the problem does not worsen. Today I will teach you how to remove dead pixels, fix them.
For those who are not familiar with such a term as dead pixels, I’ll tell you - these are such non-working dots or parts of a dot on the monitor. You can also watch them on your phone. But most often they are visible on computer screens.
If the pixel does not work at all, then it will be black and it will be possible to notice it only on white or light colors of the monitor. This type of broken pixel is considered the most harmless. But, despite this, there is nothing to fix here.
The most popular and at the same time the most noticeable dead pixels are points of bright red, blue, green, yellow, turquoise or magenta. These dead subpixels are also called stuck pixels.
If any of these pixels appear in the middle of the screen, it will annoy you especially if it is red. Such a broken pixel is immediately noticeable.
One of the features of dead pixels is that they not only appear unpredictably, but they can also disappear unpredictably. For example, on my old monitor, when I first started using it, there were already three dots of different colors. Maybe I didn’t notice them when I bought them, or they appeared on the first day of use, I don’t know anymore. But I didn’t bother at all about these points, since they didn’t interfere with viewing the picture on the monitor at all. I have had this monitor for 5 years. And during this time, the dots didn’t bother me at all and I watched them very rarely, despite the fact that they were clearly in the middle of the screen.
Most likely, the points were not captured due to the fact that the monitor was on an MVA matrix, and not on the most popular TN. This matrix has one feature - small defects are not noticeable. Before writing this article, I decided to check whether it would be possible to remove dead pixels on my old monitor. I turn it on, and the pixels are fine. I did not find a single broken point.
How to remove dead pixels?
Naturally, we will not talk about methods using high technologies, since they are used only in special laboratories and with special equipment. But there is a treatment method that will help you remove dead pixels at home.
There are only two ways to remove dead pixels at home, this is a software method and a mechanical one. I'm sure you, like me, were also not aware that there are programs that can fix dead pixels. So far, I have been able to find only two such programs.
Software method for recovering dead pixels
This method became possible due to the technology of fast color change of adjacent pixels. Thanks to this process, a large amount of energy is supplied to the sub-pixel, which makes it come to life. Using this technology, you can resurrect from 55% to 80% of already dead pixels.
But, using this method, you need to be patient. Since it will take a lot of time to restore some pixels. You'll have to get out and experiment if you can't immediately restore the broken pixels. Experimentation will consist in changing the speed of changing colors and the running time of the program itself.
The restored pixels mayow fade away. Most often this is facilitated by hot weather. But, the repeated recovery procedure and the broken pixels work again. But, there are times when the pixel can no longer be restored.
Dead pixel repair software
As I said, I found only two programs that can restore dead pixels. One of them is " Bad Crystal". By downloading the free version, you can use it for 30 days, but with limited functionality. By downloading this version, you will not have access to advanced technologies. But there is an option to use the older version of Bad Crystal 2.6. It works without restrictions, but after the first minute of operation, the program window is completely darkened.But you can solve this problem using a hardware tablet.You need to move the program window with the mouse and then do not release the left mouse button.You can hold it in this position using a mug.When in this position, you will constantly observe the program window.If someone finds a version of the program already with treatment, then do not forget to do it before installation.After all, there can be very unpleasant surprises in the downloaded file.
After installing the program, run it. You will immediately need to select the device with which you will need to work: screen, computer, mobile phone, console or plasma panel.

If you use the program on a phone or game console, the video file will be generated for the selected resolution. It will need to be played in repeat mode on a mobile device. For a plasma panel, you can burn a DVD or HD disc with a finished video or run it from a computer in Full Screen mode. Since you are working with a monitor from a computer, so we need to select "Computer Monitor".
To open an additional menu, we need to move the mouse cursor to the top of the program window. You will see that only 4 modes are available to you: Common Clearing (CCM), System Modified (SMF), Complex Force (CFV), Personal Protection (PPM).

But even of these available modes in the free version, you can only use two, these are CCM and PPM. The remaining modes provide a higher percentage of recovered pixels, so they are only available in the paid version. The CSM mode is selected by default.
When we figured out the interface, click on the "Launch" button. After that, the working window of the program must be moved to the area of broken pixels. We wait 10 minutes and check the result. If the dots are still in place, then it is necessary to increase the speed of the program. To do this, press "Speed Up" button.
This button will not be visible until you hover over it. It is located in the upper left corner of the program window.

We also wait 10-15 minutes and check the result again. If even after increasing the speed, the dead pixel does not disappear, we increase the speed of the program to the maximum and again check the result of the work. Thus, a lot of time can be spent on restoring a pixel. He will eventually recover, but do you have enough nerve for this procedure. I learned about cases when such recovery lasted for 10 hours.
In order for the pixels not to get stuck again, I advise you to turn on the automatic prevention mode - PPM. This mode works by changing colors on the monitor over time. You need to run this process a couple of times a month, at times when no one is sitting at the computer. In manual mode, you can also run this procedure. But I couldn't stop her. Maybe he waited a little, but when the program was running, it was written that there were 30 seconds left. In fact, the work went on all the time. To terminate the program, you must end the process called “ppm.exe” in the task manager.
The next program with which you can restore broken pixels is JScreenFix. Although, JScreenFix can hardly be called a program. This is a Java application. Java must be installed on your computer for it to work. More recently, this program was freely available and absolutely free, you can look for the old version.
The JScreenFix program is completely different from the previous one. The application will automatically determine the place of its work. You just need to click on the "Locale" button. The program window will turn black and you will need to move this window around the screen of your monitor. We are not in a hurry, because the program will have to determine all the dead pixels. In order not to look for points on your own, you need to select "Full Screen", to have the app scan the entire screen at once. The stage of checking for dead pixels is completely free.
But the second stage of working with the program, namely the restoration of dead pixels, will already require payment for use. In this, the program is similar to "Bad Crystal". On the application website, you can find ready-made videos depicting the operation of the program. You can use them to restore pixels. But given that the resolution on the video is significantly different from the original work of the program, it is not effective You can use any player to play it, so the video can be played both on your phone and on your computer.
The manufacturers of both programs recommend that the monitor be prevented. To do this, you need to start the "recovery process". Honestly, I will not tell you how much it is really necessary and whether it is worth spending time on it. But if we are talking about plasma panels, then such prevention will really be useful.
Mechanical way to solve the problem
If the above programs have not coped with the task, it's time to move on to more serious intervention. In fact, the method is ridiculously simple - you need to give a kind of massage to your monitor. Yes, you read it right. We take an ear stick in our hands and with pressure we drive over the place where the broken pixels formed. It is not necessary to press hard, before the appearance of divorces. And in this way we massage the problem area on the monitor. Continue this massage for about 15 - 30 minutes.If after this procedure the dead pixels disappear, then the problem was not serious. But, for prevention, you need to run "Bad Crystal" and process this very area. If the broken pixel has not sold, then you need to double-strike on the problem, namely, run the "Bad Crystal" program and at the same time massage the problem area with an ear stick. Massage can be stopped after 15 minutes, and the program will have to be left running for at least 10 hours. Then you will definitely be able to get rid of dead pixels.
I hope this knowledge will not be useful to you and dead pixels will not visit your monitors. And if they are formed, then they are imperceptible and will soon disappear.
In some cases, when processing images in Photoshop, we can get absolutely disgusting "ladders" of pixels along the contour of the object. Most often this happens with a strong increase, or cutting out elements of small size.
In this tutorial, we will discuss several ways to remove pixels in Photoshop.
So, as we said above, there are three different options for pixel smoothing. In the first case, it will be one interesting "smart" function, in the second - a tool called "Finger", and in the third "Feather".
We will conduct experiments on such a funny character from the past:
After the increase, we get an excellent source for training:

Method 1: Refine Edge Function
To use this feature, you must first select a character. Perfect for our case. "Quick selection".
- We take the tool.

- Select Merlin. For convenience, you can zoom in using the keys. CTRL and +.

- We are looking for a button with the inscription "Refine Edge" at the top of the interface.

- After clicking, a settings window will open, in which, first of all, you need to set a convenient view:

In this case, it will be more convenient to view the results on a white background - so we can immediately see how the final image will look.
- We configure the following parameters:

- In the lower part of the window, in the drop-down list, select the output to new layer with layer mask, and press OK by applying function parameters.

- The result of all actions will be the following smoothing (the layer with a white fill was created manually, for clarity):

This example works well for removing pixels from the edges of the image, but they remain in the rest of the areas.
Method 2: Finger Tool
Let's work with the results obtained earlier.
At 100% scale, the result looks quite decent:

It is worth noting that work "Finger" quite painstaking, and the tool itself is not very accurate, so the method is suitable for small images.
Method 3: "Feather"
About the instrument "Feather" We have a good tutorial on our site.
The pen is used when it is necessary to accurately stroke extra pixels. This can be done both along the entire length of the contour, and on its section.

These were three quite affordable and uncomplicated ways to smooth pixel ladders in Photoshop. All options have the right to exist, as they are used in different situations.
Pixelation occurs when you have a low image resolution and you can recognize each pixel with the naked eye. While we don't have the ability to completely eradicate image pixelation, we can reduce the problem. If you learn how to use the various features of the Photoshop software, you will be able to reduce the pixelation in all your images.
You can reduce Pixelation in Photoshop using the "Ctrl" key on your computer.
Step 1
Open your image with Photoshop.
Step 2
Click on "View". Click "Actual Pixels" to determine the level of pixelation in your image.
Step 3
Go to your "Main Menu". Click "Filter", "Noise" and finally "Despeckle". This allows you to align the pixels that your picture contains.
Step 4
Hold down the "Ctrl" and "f" buttons at the same time. Repeat this process a series of four times.
Step 5
Click "Smart Blur" in the "Filter" menu. Set your radius to about 1.5px and your threshold to 14px. Click Login.
 How to delete queries in the Yandex search bar
 AMD Catalyst Control Center: installation and configuration Setting up for viewing video and photos
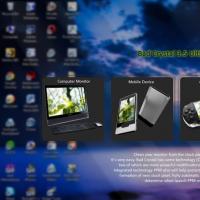 How to fix a dead pixel on a monitor
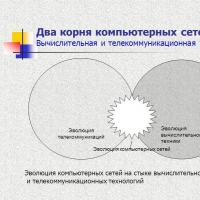 Understanding Telecommunications Systems Using Telecommunications Systems
 Kinds and types of computers. Types of computers. Manipulator "Computer mouse"
 Turning an old tablet into a photo frame
 Safely hide Android apps from the list of programs