How to distribute mobile Internet from a smartphone via Wi-Fi? We set up an access point (Wi-Fi router) on a phone with Android OS. Turn on Wi-Fi using a switch or a combination of buttons on the keyboard
Fix Wi-Fi connection problems
If you have problems with your Wi-Fi connection, such as using Wi-Fi authentication or staying connected, try the solutions below. For example, try these steps if there is an exclamation point in the Wi-Fi icon on your Pixel or Nexus device's screen.
To check if each solution works, try opening a web page on your device.
Tablet does not connect to Wi-Fi: authentication error
Step 1: Check Settings & Restart
- Make sure Wi-Fi is turned on. Then turn it off and on again to reconnect. Learn to.
- Make sure airplane mode is turned off. Then turn it on and off again to connect again. Learn to.
Press your device's power button for a few seconds. Then tap Restart on the screen. (If you don't see "Restart", hold down the Power button for about 30 seconds until your phone starts up.)
Step 2: Find the type of problem
- device
Try connecting to the Wi-Fi network using another device, such as a laptop or a friend's phone. If other devices can use the network, the problem is most likely related to your device.
Check to see if your device can connect to another Wi-Fi network, such as one at a friend's house or a public network. If your device can connect in a different location, the problem is most likely a network issue.
If your device connects to a Wi-Fi network but you still don't have internet, the problem is most likely related to your internet connection.
Step 3: Troubleshoot by Problem Type
device
- Click InternetWi-Fi network name.
- Click Show password.
Removing a Wi-Fi network from your device
- Open the Device Settings app.
- Click InternetWi-Fi.
- If necessary, enable Wi-Fi.
- In the list, touch and hold the saved network you want to delete.
- Click Forget about the network.
Adding a Wi-Fi network again
- Open the Device Settings app.
- Click InternetWi-Fi.
- At the end of the list, click Add network.
- If necessary, enter the network name (SSID) and other security information.
- Click Save. If required, enter a password.
The problem may be from a downloaded application. To find out, restart your device in Safe Mode.
- Enable Safe Mode. Learn to.
- Try connecting to your Wi-Fi network again.
- Open the Device Settings app.
- Click InternetWi-Fi network name.
Most likely, a downloaded app is causing the problem.
- To exit Safe Mode, restart your device.
- Remove recently downloaded apps one by one. See if the connection works.
- After uninstalling the app that is causing the problem, reinstall other apps.
There is probably a problem with your Wi-Fi network or Internet connection.
internet & network
If you own the Wi-Fi router and modem, try turning it off and on again.
- Unplug the router and modem power cords from the wall outlet within 15 seconds.
- Reinsert the power cords.
- Make sure all cords and cables are securely fastened at both ends.
- Wait a few minutes until the lights on the modem and router work correctly. (See the device's instruction manual or manufacturer's website.)
If the lights are not working correctly, you may have a problem with your modem, router, or Internet connection.
Contact your network administrator or your Internet service provider. For example, there may be a service failure, or they may need to reset the connection.
Public networks, such as coffee shops or airports, will often have a web page for you. If you do not complete this page, the public connection will not work.
To access the network with such a page, log in or agree to the terms.
If you don't see a page like this after connecting to a public network:
- Check the notification that asks you to sign in.
- Open a new page in a new window.
If these steps don't work, try restarting your network connection:
- Open the Device Settings app.
- Click InternetWi-Fi.
- Touch and hold the network name. Click Forget about the network.
- Queue Wi-Fi and then turn it back on.
- In the list, tap the network name.
- You will receive a notification to login. Click the notification.
- To connect to the network, agree to the terms and conditions.
- Open the Device Settings app.
- Click Internet More Reset Wi-Fi, Mobile & Bluetooth.
- Below click Reset settings.
Wi-Fi hotspot
- Open the Device Settings app.
- Click InternetHotspot & tethering.
- Turn on Portable Wi-Fi Hotspot.
- If it was already turned on, turn it off and on again.
- If your device has not had hotspots before, first press Setting up a Wi-Fi hotspot.
Not all mobile service providers work with mobile hotspots.
If you have problems, please contact your carrier. Ask if your device can connect to mobile hotspots and if they are included in your data plan.
Articles and Lifehacks
The task of how to set up Wi-Fi on a smartphone arises one day for most owners of modern devices. If the gadget operates on the Android operating system, then the problem can be solved very simply and quickly.
Setup instructions
If your mobile device has automatic settings, then you won’t have to do anything complicated:- Go to the “Settings” category.
- Here you should select the “Wireless Networks” block from all the presented tabs. In some smartphones, this category may be designated as “Network”, from which you can enter the “Wi-Fi” section.
- Opposite the selected category, the user must check the specially designated checkbox. You don't have to look for anything here. The block should be called “Wi-Fi”.
- Then you need to go here to the “Wi-Fi Settings” section. At this point, you should enable notifications that will arrive when new points are detected when they fall within the range of the device.
This will allow you to see the name of the “source” when the smartphone comes within the radius of the found Wi-Fi network. In this case, a special icon will appear indicating whether it is password protected or not.

You don't have to do anything particularly complicated. The owner of the mobile device should:
- When all of the above functions are activated, simply add a network. To do this, you just need to click on the selected point.
- Then the gadget will automatically connect to it when it is detected, since the IP address will already be saved in the smartphone’s memory.
If the network is closed with a password, then the cipher will need to be entered in a special field that appears.
If the point that distributes the Internet to wireless gadgets does not automatically assign IP addresses, which indicates that the DHCP server function is disabled, then you will have to work a little.
You can connect to a given network only if you know the range of IP addresses for a given point. You just have to enter any unoccupied address located in this range.
You also still need to fill out another field, which is designated as a gateway. This parameter must be understood as the IP of the access point or router that distributes the Internet. You may also need a network mask, DNS 1, DNS 2.
When a situation arises in which the Asus Zenfone 2 does not see Wi-Fi, this is the result of a number of reasons and the device is not always to blame for the current situation. Therefore, the following information is useful for users who encounter this problem. Let's take a closer look at the following points:
- Software glitch;
- Setting up a router;
- Hardware failure;
- Recommendations from the Service Center.
- Software glitch
If the smartphone does not see Wi-Fi, the reason may be due to the influence of an application installed in the phone’s memory. To rule out this possibility, unload programs that were installed shortly before the problem occurred. It also helps to identify this source of the problem by safely starting the Asus Zenfone 2. If the device works flawlessly, the software is to blame.
Also, the inability to determine the network is caused by a driver failure. In this case, rolling back the OS to an earlier version or to a factory setting helps. To do a Hard reset, turn off the Asus Zenfone 2, and then hold down the power and volume up buttons. After the reset, all user information will be deleted along with the source of the problem.
Setting up the router
Often what is mistaken for a phone malfunction turns out to be a malfunction of additional equipment. To verify this, just check whether the device sees Wi-Fi in other places. In this case, we are not talking about a failure - it is an incorrect configuration of the router. Therefore, the following measures can correct the situation:
- resetting the router;
- wireless network channel selection below 10;
- enabling support for other standards on the router;
- reflashing the router.
If manipulations with the router do not produce results, the reason may be the failure of the components of the Asus Zenfone 2 smartphone.
Hardware failure
Hardware malfunction also affects if the smartphone does not see Wi-Fi. When other malfunctions in the functionality of the Asus Zenfone 2 are observed, the issue may be a defect in the conductive paths or cables. The reason could also be a failure of the Wi-Fi module. Troubleshooting component problems requires diagnostics using specialized equipment.
If Asus Zenfone 2 does not see Wi-Fi, use the help of a service center. Troubleshooting requires diagnostics. Repairs performed at the Asus Service Center guarantee prompt elimination of the malfunction and eliminate the possibility of breakdowns caused by careless disassembly and assembly of the smartphone. This will also save the client’s time - delivery is provided by couriers of the Asus Service Center.
This article will talk about typical problems when connecting your phone to a wireless Wi-Fi network, the most common of which are Android stuck at “obtaining an IP address” or an authentication error when connecting. Less common, but it occurs when your Android phone or iPhone simply does not see the Wi-Fi network.
The step-by-step instructions will discuss the following problem options in order and what to do in each case.
- Authentication error (or phone says Saved WPA/WPA2)
- Endlessly obtaining an IP address on Android
- The phone does not see the Wi-Fi network
Wi-Fi authentication error on Android
If your Android phone or tablet reports “authentication error” when connecting to Wi-Fi, or writes “Authentication” for a while, and then still does not connect to the wireless network (when Android writes Saved WPA/WPA2 - this is usually the same situation) , then in most cases the problem is the Wi-Fi password, and the problem can occur even when you enter it correctly (but, of course, this is what you should check first, the article can help with this, you can also just look into router settings).
But it’s not always a matter of incorrect input: it happens that you are guaranteed to enter the password correctly, but an authentication error still occurs.
The first thing you should try here:
- Delete the Wi-Fi network (forget it) in the phone settings, try connecting to it again by entering the password.
- Reboot the router (unplug it and plug it back in).
If none of this helps, go to the router settings (any of the instructions for setting up a router on this site will help with this, they all start with how to go into the router settings), and then into the Wi-Fi network settings and try the following ( after each change, save the settings, delete the previously saved network on the phone and try to connect again):
If even these points do not help, make sure once again that in the Wi-Fi network security settings in the router settings, WPA/WPA2 (Personal) authentication is set, and not some other type (this option should be supported on any Android phone). It also sometimes helps to change the network operating mode from b/g/n or auto to 802.11 n only or 802.11 b/g.
Android constantly writes Obtaining an IP address and does not connect to Wi-Fi
The second most common problem with connecting a phone (specifically Android) is endless attempts to connect with the text “Obtaining an IP address.”
What could be causing the situation:
- The DHCP server is disabled in the router settings.
- Just an Android glitch.
If you don’t know exactly about the first point, then first just reboot the router, perhaps this will solve the problem. If this does not help, then the following steps:
- Check if DHCP is enabled on the router; if not, enable it.
- If it is enabled, but still “Obtaining an IP address,” then try setting a static IP address on the phone.
And now more about how to do both.

To enable the DHCP server, you will need to go to the router settings (any instructions for setting up D-Link, Asus, TP-link, Zyxel routers begin with a description of how to enter its settings) and make sure that the DHCP server is enabled (usually , there just needs to be a checkmark like this): on almost all router models this option is located in the LAN or LAN (local area network) section:
- On ASUS routers - LAN - DHCP server tab
- On TP-Link routers - Additional settings - DHCP settings
- On Zyxel Keenetic routers - In “Home Network” - Networking, enable “Server” for the DHCP option. Or, on Keenetic Lite, in Home Network - Segments, check that DHCP is enabled.
- On D-Link - in the “Network” or “LAN” section, the “DHCP Server” item or tab
The second option is to set a static IP address on Android, to do this:

Save the settings and try connecting to the Wi-Fi network from your phone again.
Android phone or iPhone does not see Wi-Fi network
If your phone does not see the desired Wi-Fi network, but sees other networks, then in most cases the problem is in the Wi-Fi channels used. The fact is that by default in the router settings in the wireless network parameters it is usually set to “Region: Russia” and channel: auto, which forces the router to select channels from 1 to 13. But: some devices do not support channels more than 10. (On this topic there is a separate instruction :)
Thus, the first thing you should try is to go into the router settings, go to the wireless network settings settings and change one of two things:
- Region - set to USA, supported by almost all devices, only 10 channels.
- Change the channel manually (set within 10).
After that, save the settings and check if your phone can see the network now. If this does not help solve the problem, then it makes sense to also try changing the channel width in the router settings, and for older phones, try also changing the network operating mode to 802.11 b/g.
 Setting up an access point (Wi-Fi router) on a phone with Android OS
 Program for the emotional and creative development of preschool children “Inspiration”
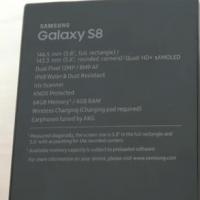 Galaxy S8 Rostest and Eurotest - what is the difference and what to choose?
 How to make money on Webmoney: real ways Earning webmoney in 1 hour
 How to unfreeze a VK page without a phone number
 How to download videos from Instagram How to download from Instagram stories
 Defraggler what is this program?