Local network for android. Android and Windows LAN - how to connect. Connecting Android to a local network How to connect your phone to a computer's local network
If users think about distributing the Internet via Wi-Fi for their Android phone / tablet in the first place, then after a while there is a desire to transfer their files to a computer via the same Wi-Fi. This approach will allow you to get several advantages - quick access to remote media (including playback of audio / video files), and ... there is no need to use bluetooth or usb-cable!
In this guide, I will describe how to implement:
1) Connecting a mobile device to the hard drives of a Windows PC;
2) General principles for creating a home local area network (LAN).
Connecting an Android device to a LAN
So, here's what we need (typical set):
- Mobile device (in my case Asus Nexus tablet);
- Android App ES File Explorer;
- The computer to whose hard drives we will connect;
- The router to which the computer and Android device are connected;
It is assumed that your mobile device is already connected to the router via Wi-Fi, since this topic deserves a separate discussion, we will not consider it within the framework of this article.

LAN setup
Usually, when connecting through a router, there are no problems, everything happens automatically, dynamic IP addresses are issued for devices. But it is important that all your computers are in the same workgroup. How to do it?
Go to "Control Panel > System", look for the section "Computer name, domain name, workgroup name" and click "Change settings" and again "Change".
In the "Workgroup" field, write "WORKGROUP". Then click "OK" and restart your PC.

Go to "Control Panel > Network and Internet > Network and Sharing Center" and share folders.

If for some reason we get an error about the unavailability of the RPC server, then go to "Management (right-click on the "My Computer" icon")> Services and Applications" and start the services:
- Remote procedure call (RPC);
- Server;
- DCOM server process launcher;
We try to detect our PCs in EN Explorer, if it fails again, go to the next section.
Setting up IP addresses
If it is difficult to connect devices in the local network, it is recommended to enter the IP addresses of the devices manually. Occupation is tedious, but not difficult :)
1. We go on the computer to "Control Panel> Network and Internet> change the view to" Large icons "in the upper right corner> Network and Sharing Center> Change adapter settings".
We select our connection, my laptop is connected to the router via an Ethernet cable ("Local Area Connection"), so I configure it. Similarly, you can configure the "Wireless connection".

2. To simplify our task, right-click on the icon of our connection and select the "Status" item, in the window that opens, click the "Details" button.

We are interested in the current IP address of the computer and the main gateway. We will need them in the next paragraph. Leave this window open for now.
3. Again, right-click on "Local Area Connection" (point 2). Select "Properties" from the list. And go to the properties "Internet Protocol Version IP (TCP / IPv4)".
The easiest solution to connect your Android phone to your computer via WiFi is ES File Explorer. The application is free and has a clear interface, but most Android phone owners are limited to using it only as a file manager. To open the network capabilities of the program, you must:
If the connection is successful, all directories on the computer available for public use will be displayed.
To open files from a phone on a computer via WiFi, it is recommended to use another menu item: “Network -> FTP”. Authentication or selection of additional settings is not required. The application will automatically create an FTP server on your smartphone, open the required port and provide a ready-made connection link.

You can view or download files from your phone via WiFi in any browser. It is enough to enter the specified data in its address bar.

If, in addition to viewing files, you need to download folders from your Android device or upload folders to it, you can do this through standard operating system applications. To do this, just enter the server address that was provided by the program directly into the "Explorer" line. Directories that are located in the smartphone's memory will open in the same form as files with folders on the computer itself.

In the search bar enter es file explorer and press Search:
Select an application from the search results ES Explorer from the developer ES APP Group:
Click Install:
Click Accept:
After completing the download and installation of the application ES Explorer(or ES File Explorer) click Open:
Setting ES File Explorer
The application has three screens:
- Home Page(HomePage);
- Device;
- Net.
Go to screen Net by scrolling to the side and press the button in the lower left corner Create:
Select the connection type from the list: LAN:
In the settings window Server indicate:
- server IP address;
- Username;
- Password;
- Display name (optional)
and press OK:
in a list called LAN your computer will be added (it can be a laptop, server, network storage, in general, any network device with a drive).
Using ES File Explorer to access a computer over the network from an Android device
Click on the icon of the network device you just added (see the figure above).
If the username and password were correct, you will see a list of network folders.
In our example, we opened the desired network folder with media content under the name Media. Therefore, we go to the network folder Media:
In it we see videos:
And audio recordings in a folder Music:
We check music playback - we click directly on the file in the network folder. A window appears with a choice of player. Set the checkbox Set as default and choose your favorite player:
The recording will play:
You can switch the display of a folder to a list or a table using the button View:
How to copy a file from a computer to an Android device
Long press on the file to turn on the selection mode.
Check the files you want to copy from the network drive to your Android device.
Click the button Yet and select Copy to:
Select the folder on your Android device where you want to copy files from the network folder and press OK:
Create another folder in the folder or just click OK to copy files directly to the current folder:
Files being copied:
Most of those who first become the owner of an Android tablet or smartphone sooner or later ask themselves the question: how to connect an Android device to a computer via WiFi?
If you are tired of transferring files from a personal computer to an Android device and vice versa using a flash drive or memory card, or if you dream of watching movies and listening to music from your PC via WiFi, these couple of methods will help you using well-known programs from the Google Play Store.
To scan the network environment, press the button with the image of a magnifying glass, after which the network scan will begin.
After scanning is completed, a list of servers (computers) with their network addresses will appear on the screen.
If your computer is not found during the scan, you can add it manually. To do this, go to the menu -> create -> server, and in the window that opens, enter the network address of the computer or folder on it, login, password, server name. If you do not need a username and password, check the "anonymous" box. The server name is optional. If no name was entered, the address entered in the first field will be displayed instead in the list of network resources.
We press the OK button, and we see how a new server has appeared in the list of network resources, by tapping on it, we will see its folders and disks to which network access is open.
Everything. You now have the ability to copy and open files on a remote computer over a local network.
If you cannot access a computer running Windows-7, try in Control Panel -> Network and Sharing Center -> Advanced Sharing Options check the box next to " Disable password protected sharing". And make sure that the options "Turn on network discovery" and "Turn on file and printer sharing" are also enabled there.
Also, do not forget in the properties of the drive or folder to which you want to give access over the network, enable sharing and set permissions for users, if this option is available.Total Commander, as you know, is a classic two-pane manager, and in order to copy a file over the network, we need to open the folder on the computer on one panel, and the local tablet folder on the second, and then simply drag the desired file from one panel to another.
First of all, we need to install the application itself. Total Commander can be downloaded.
After that, you will need to add a plug-in to the program to work on the local network. To do this, click on the main window of the program on the item "Add plugins (Download from the site) ...":
After that, a window will open, prompting you to go to the plugin download page:
Click the "OK" button, after which the browser will start and the following page will open in it:
We need to select the second item LAN (Windows network) Plugin and tap on the link Download + Install
In the window that opens, select the Play Store
The LAN plugin window will open in the Play Store. Click on the "Install" button
After installing the plugin, the LAN icon will appear on the main screen of Total Commander (Windows shared network directories):
With this item, you will navigate to the files and folders on your computer. However, first we need to access it. To do this, click on the above icon, and add a new server to the list of computers by tapping on the corresponding icon:
In the window that opens, type:
The name of your computer, as you want to see it in the list:
Computer network name or network address, username and password:
You do not need to set a username and password if your computer has network access to folders and directories for all users.
To find out the network address of the computer, click on the WiFi connection icon with the second mouse button and select "Status", and in the window that opens, click on the "Details" button.
In the iPv4 Address line you will see the network address of your computer.
Everything. Now you can access your computer's folders and files through your local network via WiFi.
If you can’t access a computer running Windows-7, try in “Control Panel” -> “Network and Sharing Center” -> “Advanced Sharing Options” check the box next to “Turn off password sharing protection."
Also, make sure that the options "Turn on network discovery" and "Turn on file and printer sharing" are also enabled there.Also, do not forget in the properties of the disk or folder on the computer to which you want to give access over the network, enable sharing and set permissions for users, if this option is available.
I will probably be right if I say that every second owner of a tablet or phone on the Android operating system at least once thought about the question - how to make friends with your mobile gadget with a home local network so that you can download videos and music from a computer or laptop, and in reverse to throw off pictures and shot videos. Unfortunately, while this operating system does not have built-in support for the Samba protocol, which runs the network environment in Windows. But as Baron Munchausen used to say: "There are no hopeless situations"! In principle, there is a very simple and quick solution that allows you to connect Android to the Windows local network using the excellent free utility "ES Explorer".
True, here one must be clearly aware that in order to implement the idea, the home LAN must be organized through a WiFi router (or, at least, there must be a wireless access point), with which the phone or tablet will be connected. It doesn't have a cable jack!
We find it in the Play Market application "ES Explorer", install and run.
In the main menu of the program, select the "Network" section:
Another submenu will open, in which you need to select the "LAN" section:
Otherwise, run it manually by clicking on the "Scan" button. The program will detect your computer and show it in the list. In fact, it is an analogue of the Network Neighborhood in Windows.
We click on it. If guest access is configured on the PC, then the login will be automatically made with Guest rights. Otherwise, you will be prompted for a username and password:
The easiest solution to connect your Android phone to your computer via WiFi is ES File Explorer. The application is free and has a clear interface, however, most owners...


The principle of creating a local network in any version of Windows (XP, 7, 8, 10) is practically nothing is not different. The exceptions are complex multi-layered corporate networks that use multiple subnets, proxy servers, and VPNs.
But in this article we will look at how to create home network, without resorting to buying expensive equipment, but using a regular switch or router with Wi-Fi support.
What is needed to create a network
First of all, to create a local network from a certain number of computers, we need equipment:
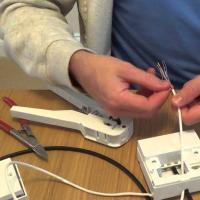
note: in the event that a direct connection is used (i.e. we insert a twisted pair cable into both devices without using a router), then you will need not a standard cable, but cross— over, unless modern MDI-X enabled NICs are installed. In this case, the standard crimping method can be used.
How to create a local network
Now we proceed directly to the creation. First we need to prepare:
- Install all equipment in its place - computers, routers, etc.
- crimping cable, if necessary.
- Doing wiring, i.e. we stretch the twisted pair cable to the equipment.
- We connect twisted pair equipment.
Costs note that when the connection is made and all devices are running, the connection connectors on the computers should shine. The same applies to routers with routers, only they have light bulbs located on front panel. If any light is off, then the connection is made. not right.
When the connection is made, you need to configure the network in the operating system.
To start checking working group, for which we go to the properties " my computer". You can not open the properties, but use a combination Win+
R and enter in the window sysdm.
cpl.
On all devices working group must be the same, otherwise the computers will not see each other.
To change the group, just click on the button. change and enter a group name. Name must be entered Latin, and match on all devices. 
Then we look for network icon in the notification area and with its help we get to Network and Sharing Center.
Here we are interested in the link changing advanced options, it's third from the left and will allow you to edit sharing options. For each profile choose: Enable network discovery, autotuning And general access to files and printers. 
Scrolling page and below disable shared access with password protection. All other settings can be left. Click Save changes and exit.
This completes the setup. The network should work, but only if your router distributes dynamic addresses.
If a router was used, or the devices were connected directly with a cable, then a few more settings need to be made.
Network settings
When direct connection or using a router, we need change computer ip addresses. For this necessary:

We will not describe what each setting is responsible for, because. this is a fairly broad topic. It is enough to enter on all computers the addresses that are described above.
After making all the above settings, the network should work. However, do not forget that a firewall or antivirus can completely block the network. Therefore, if nothing worked, check their settings or temporarily disable them altogether.
Local network via WiFi router
Setting up a network through a router is absolutely nothing is not different from what we have described above.
If the device is configured to distribute dynamic addresses, then the addresses do not need to be changed. Well, if IPs static, you will have to use the previous section.
Also, there will be no difference between whether the device is connected by cable or via Wi-Fi, in most routers, the address distribution settings are configured simultaneously and on wireless and on wired connection.
How to make shared folders
After everything is set up, you need to create shared folders to exchange information.

However, this is still not enough. Now on the folder properties window you need to find the tab security. And then successively press Change – Add.
Articles and Lifehacks
For users who have modern gadgets at their disposal - smartphones or tablets, sooner or later the question arises, how to connect Android to a home network?
After all, sooner or later everyone will want to access the contents of the local computer from their mobile. At the same time, it is important not only to familiarize yourself with the files, view videos, photos and listen to music, but also duplex copying of files.
What is required to connect
To connect Android to a local network, the following is required:- Wi-Fi router to which the device must be connected;
- computer with Windows system;
- configured Internet access from the mobile phone itself, on which the file manager (ES Explorer) must be installed.
Connection instructions

First you need to provide access via the network to the necessary files and folders on the computer (or to the whole disk). For this you need:
- by adding an account, create a new mobile username: go to the "Start" menu, select "Settings", and then - "Control Panel" and clicking on the item "User Accounts", add a new entry, indicating the boundaries of the rights of the user being created;
- go to the "Access" tab;
- select "Sharing";
- in the context menu, select a pre-created mobile username, while you can also set the permission level when reading files;
- then you should open the settings menu on the mobile and activate Wi-Fi: this option will become available if you go to the "Wireless networks" section;
- connect to the network by correctly choosing its name, and carefully enter the password; in this case, you can select the "show password characters" option, in order to avoid errors when entering it.
After Android is connected to the network, the user will immediately have access to all folders and files that are allowed access, and will be able to perform the necessary actions with them.
We expand the possibilities of data exchange between a home computer and a device on the Android platform using a file manager. Preparing the material "File Manager for Android" I came across a cool feature for connecting Android to a Windows local network. So, let's take an example of how to do this.
Given: Wi-Fi hotspot, computer with Windows operating system (in my case it is Windows 7), Android gadget with a file manager installed, which has a SAMBA server function (I have ES File Explorer).
Step one: create a new user on the computer
This is not a mandatory step, you can use the data of already created users, but I decided to make a new one, especially for authorization through my Android phone.
To create a new user, go to: Start - control panel - add and remove accounts.
Everything is simple here, the only thing is to make an account with normal access. After that, in the account settings, be sure to create a password.

Step Two: Create a Shared Folder on Your Computer
Not necessarily a folder, you can connect an entire partition, such as drive C. Right-click on the document or folder that we want to share, go to the "Access" tab and click "Sharing". In the drop-down menu, select the username that you created in the previous step, and do not forget to set the permission level to read and write.

The general section to which we will connect from the Android system has been created.
Step three: create a server in the file manager
Launch ES File Explorer, go to the LAN tab. We press the hardware key "Menu", then "Create" in the dialog box, click "Server".

There are a lot of incomprehensible settings, but if you look, then there is nothing wrong with them.

Now about everything in order:
Domain: leave blank
The address: here we drive the IP of our computer (this parameter can be found by writing the ipconfig command to the Windows console, how to get into the console can be seen in the screenshots below)

 Login: account name from the first step
Password: account password from the first step
Name: leave blank, or come up with any name for our server
After entering all the data, click "OK". Congratulations! The server has been created, now we can go to the computer directly from our phone (well, or tablet).

This is how easy it is to set up a network between Windows and Android 🙂 If you have any questions, ask in the comments, I will definitely answer.
UPD: it is not always necessary to use the network to exchange data, it is often necessary to play any media files from a computer, for this purpose it is perfect.
 How and where to connect your home phone yourself
 Rolsen is the largest electronics manufacturer in Russia
 Changes in the tariff "go to zero
 Yota (mobile operator): reviews, tariffs, connection
 How to find a tablet if it is lost or stolen How to find a stolen android tablet
 Review of the smartphone HTC U Ultra: think for me
 What can be made from an old mobile phone: a couple of original ideas What can be made from a broken cell phone