How to connect a telephone line. How and where to connect your home phone yourself. Phone connection types
Articles and Lifehacks
Despite the fact that today landlines are history, users are often interested in how and where to connect a home phone.
The use of cell phones allows people to communicate without being tied to a specific location. In addition, tariffs for cellular communication are often lower than for landline. However, some people want to bring a landline telephone into the apartment.
- Connecting the device is not difficult, but there are certain subtleties known only to a narrow circle of specialists. To install a home phone, you need a special socket.
- The machine should be connected to a similar outlet using a wire terminated with RJ-11 connectors. One of the connectors must be inserted into the socket, and the second - into the tube connector.
- The cables located in the socket are wound on screws to which the corresponding terminals are connected.
- The installation of the device can be carried out anywhere in the house, for which you need to stretch the telephone wire to the desired point.
- Consider the features of the multifunctional machine: it is usually connected to an electrical outlet, and therefore it must be located at the installation site of the machine.
- The next option is to connect a radiotelephone. This type of device allows, without using a telephone wire, to install the base anywhere in the house.
Varieties of connecting the phone in the house

- The fixed handset has a 2-wire type of connection coming from the PBX.
- When installing a telephone with a 4-wire connection type, 2 wires are used (green and red center wires).
- When installing the device without using a telephone socket, use wires of these colors. The polarity of the wires when connecting can be ignored.
- When the machine is connected to the network, a beep sounds, and sometimes there is no dial tone when dialing a phone number.
- In a situation like this, the problem is with the setup, not the connection of the phone. There are 2 types of telephone communication - digital and analog, differing in the principles of dialing.
- Having installed the telephone, it is mandatory to check the settings of the following functions: call forwarding, ringer volume, caller ID, night mode, and automatic answering.
- Incorrect settings of these functions may cause problems with calls.
Connecting a device such as a telephone socket (connector), at first glance, is not difficult. The electrical voltage supplied to it is safe for humans. Therefore, it seems that everything can be done without disconnecting from the current source. However, when making wire connections, it should be borne in mind that if someone calls during operation, you can get an electric shock. The voltage during a call rises to 120 volts, and this value is already palpably on the fingers.
In fact, for a person unfamiliar with the design features of the phone and wiring diagram, to collect the entire line will not be so easy. However, nothing is impossible. It is enough to at least theoretically imagine how to connect the wires, and then all the work will take no more than half an hour.
There can be as many connectors for connecting a cable and a telephone in an apartment. All detachable devices are connected in parallel, and only two wires are used in the line. If your communication device does not work after installation, just swap the wiring. And now we will understand in more detail.
We are all used to the fact that the wires in our apartments in their mass are attached to the wall in its lower part. In new houses, all communications are hidden inside the wall, and various cables can also be hidden inside the baseboard. When wiring hidden in the wall, then for laying the cable a groove is made to the installation site of the socket connector. In all cases, a set of the following measures is carried out:
- With the help of a grinder, a channel is cut into which the wire is laid. In order for the wires to stay in the groove, they are reinforced there with plaster. After the gypsum has dried, the groove is plastered and puttied.
- The second option for fixing the cable in the channel is to use plastic brackets that press the wiring against the wall. This method involves an open mount, but it can also be used with a large number of wiring lines inside the channel.
- Mounting under the baseboard is quite simple if you have plastic baseboards with special grooves. Wooden plinths will have to be made to order with milling for wires. Using an old wooden baseboard will force the chisel to gouge the groove.
- The next step is to install and connect the laid cable to the connector. The socket connector is attached to the wall with screws through the holes in the back of the box. After that, the wiring is connected to the terminals and the box cover is closed. This method is suitable when there is an external type connector box.
- If the box is of an internal type, then you will have to make a recess in the wall with a puncher according to the size of the socket box. The box inside the recess is connected to the wiring and fixed with a gypsum mortar. After the gypsum dries, everything around the box is carefully puttied.
Before connect wiring, they need to be checked with a tester for polarity. If the connection is not made correctly, then the equipment will not work. But this is not a reason for frustration - it will be enough just to swap the wires. All of these actions are not so difficult for a beginner. In this case, the circuit may be needed only in order to know where certain cables will pass.
Connecting to the wires of detachable devices
 Exist socket connectors old and new types. The telephone, like any technology, has gone through its stages of evolution. Once the connection with the device was carried out directly. In the second half of the 20th century, they began to use the connection using sockets (connectors). Such connectors and plugs for them were designated by the letters RTSHK-4, that is, telephone plug-in connectors with four contacts. These connectors allowed two devices to be connected to them.
Now only two contacts are used in residential buildings. Such connectors are designated by letters and numbers: rj-9, rj-11, rj-12. The first of them is intended for connecting the voice tube to the device, and the latter is used in office premises, as it can use several lines. We are also interested in the second of the connectors.
You can connect the rj-11 socket connector yourself, without calling a specialist. The main thing - stick to the scheme and prepare the necessary tools for work:
- despite the fact that the telephone line is conductive, rubber gloves must be used; in this case, gloves used by electricians are not needed - just take those that are sold in hardware stores;
- in order not to confuse anything with the wires, you must have a tester with you to check the voltage;
- you will definitely need both a Phillips and a flat screwdriver;
- pliers and some kind of knife will help to remove the insulation;
- you should stock up on the required footage of a two-core cable with a cross section of 0.3 to 0.5 millimeters.
When the preparatory work is completed, we proceed to assemble the circuit of the entire line. The main work is carried out in several stages:
- We put on gloves and begin to remove insulation in the right places. The insulation is removed carefully so that the internal conductors are not damaged. Damage to the cores can cause a breakdown and everything will have to be done again.
- The next step is to connect the cable to the outlet. Here it is necessary to refer to the diagram, which is either in the instructions or inside the housing of the socket connector.
- The tester checks the "plus" and "minus". If the wires are connected incorrectly, there will always be interference in the tube. The wires are fastened in special grooves and fixed with screws.
- At the last stage, the socket housing is attached. How it is attached has already been said: either it is built into the wall, or it is attached to it.
On this, we can say that the installation of the line is completed. If there are no new problems, then everything is done correctly.
Connecting a telephone socket. Diagram for RJ connectors
 Making a self-connection, buy universal socket and plug. Both old-style phones and new ones are connected to such connectors without any problems. A connector for an rj-11 connector and four pins for attaching a cable are built into the case. Everything is connected elementarily: two incoming wires (red and green) are attached to the terminals. Red insulation indicates a core with a plus sign and green insulation with a minus sign. Next to the contacts is a plastic tongue, next to which these two conductive wires are attached.
There are times when unknowingly bought socket with six pins. This standard is for RJ-25. It is not used in residential buildings and apartments, but you can still connect it. How to properly connect the telephone socket in this case, the diagram will help:
- wiring is connected to the third and fourth contacts - red and green, which are at the very top;
- cables to all sockets are always used of the same type.
Connecting the legrand telephone socket
 The name comes from the company of the same name. All products of this French brand are of high quality and ease of use. Connecting the wires is easier than in all the cases described. Using legrand, it is not necessary to strip the wires from the insulation in order to connect to the contacts. The design features of the socket connector are such that when the wiring is inserted into the clamp, the insulation cuts itself as required. With one turn of the clamp, the insulation is stripped and the stripped core is secured.
After connecting to the legrand line, it is checked with special devices. Experts advise doing this with a multimeter. Terminal voltage must not exceed 60 volts. If everything is so, then the connection was made exactly according to the scheme.
Telephone socket - a device with which a telephone is connected to a line or its separate direction. The device allows you to turn off the device and quickly connect it to the network in another room. There are different types, each of which has its own characteristics, not only external, but also in terms of installation.
Structure and classification system
Any socket for the phone consists of the following parts:
- Frame. It is made of dielectric materials, usually plastic or ceramic.
- Spring loaded contacts. Metal is used to make them. The contacts allow electrical current to flow through the telephone wires and plug into the telephone.
- Clamps. Used to connect the wire to the network.
Connection of telephone sockets is carried out in two ways - overhead (wall, open) and hidden. In the first case, the wiring is located on the surface, and the socket is installed directly on the wall. In the second way, the socket is mounted in a special socket, which, together with the wires, is hidden in the wall under the plaster.
Basic standards
With the development of technology, obsolete outlets are being replaced by new ones. More and more consumers are changing RTSHK-4 to a modern RJ-11 socket, the latter is considered universal. Its connector is the same as that of other types, the difference lies in the number of wires running in the cable.
There are 5 standards for telephone sockets:
- RTSHK-4. Now practically not used. Consists of a body and 4 contacts. The fork has 4 plates made of metal. In the center is a plastic pin, which ensures the rigidity of the connection.
- RJ-11 and RJ-12. These connectors are the most common. Used to connect different types of phones. Can have 2, 4, 6 contacts. Suitable for home use.
- RJ-14. The sockets are designed for installation in offices where you need to connect fax phones, modems for the Internet and similar devices. Sometimes the design has 4 contacts connected to four-wire wires. This makes it possible to use two different lines at the same time.
- RJ-25. Like the previous species, it is found in office buildings. 6 connectors are used to connect local networks, modems, faxes and other necessary equipment.
- The last standard is called combined. By design, the socket is a combination of RTSHK-4 and RJ-11.
Note! There is another standard that is not included in the list - RJ-45. Used to connect complex circuits in laptops, modems, etc.
Schemes and methods of connection
Features of connecting telephone cables vary depending on the type of sockets. For example, installing and connecting the most common of them - RJ-11 and RJ-12 - have several nuances:
- In the design of the socket, there are 2 and 4 contacts, which differ in small sizes. In the center there must be a recess for the cores of the supply cable.
- Phones are connected to two central contacts.
- To deepen the veins, you will need a cross-cutting knife. If it is not there, you should use the usual one.
- Before straightening the cores, it is necessary to strip the wire by about 4 cm.
- During flush mounting, experts advise using a KSPV cable with a copper core. The TRP cable is not suitable in this case - it is better to use it as a distributor.
Preparatory work
Before you install or replace a telephone jack, you need to prepare tools and materials:
- a screwdriver with a handle covered with insulating material;
- socket box;
- cable - useful if you need to install a new outlet, and not just replace the old one;
- perforator;
- socket directly;
- several screws;
- wire cutters;
- insulating tape;
- multimeter;
- hand protection gloves;
- Double-sided tape;
- pencil and bright marker.
The set of tools may vary depending on the installation method.
Step-by-step instruction
The action plan for an open-type installation looks something like this:
- Protect your hands by wearing rubber gloves. This is important: the voltage in the network sometimes reaches 110 - 120V.
- Using a side cutter, peel the wire from the insulating layer by about 4 cm. You need to act carefully, trying not to damage the cores.
- Using a multimeter, determine the polarity of the contacts. Although it is believed that it is not necessary to follow the rules of polarity.
- Connect the contacts to the conductors.
- Connect cable cores. Fasten with special screws.
- In designs with 4 contacts, 2 central ones should be used when connecting.
- Fix the socket on the wall using adhesive tape. For greater reliability of fastening, it is better to take self-tapping screws.
- Put on the cover.
Connecting a hidden outlet has no fundamental differences. But it has some features:
- Immediately mark the wiring and location of the outlet on the wall.
- Using a puncher, make a hole for the socket. Self-tapping screws are required for fastening.
- The design is fixed in the socket box with spacer screws.
- After the installation is completed, connect the electricity. If everything is done correctly, the socket will work.
 Devices are double and single. Dual phones are usually installed in offices - provided that there is a need to use two phones at the same time. They connect the same way.
To avoid mistakes in installation, following simple tips from experts will help:
- It is better to use devices for flush mounting. They fit more harmoniously into the interior. But to install them, you will have to violate the integrity of the walls and wall covering.
- In the selection process, it is recommended to pay attention only to trusted companies with a good reputation. This is a guarantee of safety and reliability.
- Most sockets have numbered contacts. If there is no marking, you should look at the colors. Green, orange or blue contacts in combination with white are positive, contacts of the same colors, but without white, are negative.
- During the installation of products of the old standard, it will not be superfluous to remember the color design of the contacts: orange, black and green - positive, red, yellow, blue - negative.
Varieties of sockets for connecting a telephone differ in design, installation method and other parameters. If you follow the instructions, installing these devices will be easy.
During the development of communications, several standards have been created for connecting fixed telephone sets to existing lines. Almost all of them are used in one way or another in everyday life and in industrial enterprises.
Inside the networks of large organizations that have existed for several decades, one can find models of various designs working simultaneously, mounted at different times. Features of their device must be considered before installing and connecting the telephone.
Purpose and standards of telephone sockets
The main task of the socket is to provide a quick and reliable connection of telephone sets to existing communication lines, created by a permanently placed part - a socket or "mother-contact" and a movable plug inserted into it: "father-contact".
Design features

Materials and tools
The main devices that may be needed when laying telephone wiring:
- side cutters - for cable cutting;
- knife - for stripping the ends of the wires;
- screwdriver - fastening the ends in the socket;
- screws - fastening the base of the device to the wall;
- drill - drilling holes for fixing the outdoor device;
- carbide-tipped drill - usually used with a diameter of 4.2 mm;
- plastic inserts in the holes;
- "Bulgarian" with a disc for concrete - for hidden wiring;
- perforator with a core drill, the size of the drill in accordance with the size of the box;
- - to clarify the polarity of the contacts in the connector when connecting;
- protective latex gloves - if during work there is an accidental call to the phone, the potential difference can reach 120V, which is no longer safe with direct contact.

Work order
- If you decide to install hidden wiring, you must first make a channel for laying the telephone cable. With the help of a “grinder”, pierce the channel along the entire length and lay the wire in it, seal the channel with cement mortar.
- When making open wiring, you will need special plastic brackets for attaching the cable to the wall and an electric drill with a drill. Insert plastic inserts into holes with a depth of about 20 mm, and fix the wire under the bracket with a nail or screw. All fasteners are sold as a set, there are no problems with the compatibility of the components.
- Installation under a baseboard will require the use of a chisel, with which the baseboard is removed from the wall to lay the wire. After that, the plinth is driven into place with regular nails.
- When installing the outer box, it must first be connected to the cable. After that fix it on the wall. Here, options are possible, determined by the design of the boxes themselves. If its base has holes for mounting, you need to attach it to the installation site and mark the location of the holes on the wall. Using a drill, drill holes, install the inserts and fix the base of the box with the screws from the kit. Then install the cover, which has special latches for this. The base without mounting holes can be mounted on the wall using double-sided tape. The mount is quite reliable, but it is advisable to hold the case when disconnecting the connector.
- When installing the inner box, you need to use a perforator and a core drill according to the diameter of the box. Having made a blind hole in the wall, install the box into it, connect it to the cable and fix it in the hole. Replace the cover.
- When connecting the contacts, you need to check with the tester the correspondence of the poles (the location of "+" and "-").
All works are simple and accessible to a non-professional performer.
Types of connectors. Application features of RJ11, RJ12 and other types
Telephone jacks serve not only to connect devices to a communication line. They are used to connect with other devices and communication devices.
Sockets are made with one, two or more connectors and can provide simultaneous connection of several subscribers.
In a wide variety of connectors, it is necessary to consider some of their varieties:
- RJ11 - two-wire version, used to connect to linear networks.
- RJ14 - equipped with four conductors and four contacts, compatible with most models of modern phones. To connect one subscriber, you need to use the 2nd and 3rd contacts. If you need to connect several additional lines, you need to use the 1st and 4th contacts. If an overhead telephone socket is used, the line is connected with red and green wires.
- RJ25 - has three pairs of contacts, its connection requires the participation of a qualified telephone specialist.
- RTSHK-4 is a legacy of the Soviet period, however, it is being produced and used to the present. It comes with a special key. The connection is made in a one-piece way with a branch-type box. If there are several points of this type in the room, they are closed using a capacitor.
Let's talk about devices for connecting RJ11 and RJ12 in more detail:
- The first of these product types is used for individual connections in conventional telephone networks.
- The second is used for networks with heavy loads - in office or public places.
These types of connectors have two or four pins, made like a metal plug, connected to the pins that are located in the center. For installation, a special tool is desirable - a crossover knife, which allows you to remove the braid without damaging the wire and crimp the plug when installed on the wire.

To connect you need:
- remove the braid from the wire to a length of 4 - 5 centimeters;
- straighten each cable core, the number of which is from 4 to 6;
- put all the wiring in the grooves of the socket;
- check the presence of contact between the connector and the telephone cable.
Starting the connection, you need to take care of safety measures when performing work. Be sure to wear rubber gloves that can protect against electric shock.
Common socket design standards indicate that a red braid usually indicates a positive conductor, and green indicates a negative rating. The tester will help you verify this.
The connection methods of all sockets are identical, but they differ in the way they are installed depending on the version.
In practice, the installation of popular French-made sockets such as Legrnd is also carried out. The product line of this type is very diverse, sockets are available with any type of installation: external, internal and any other. Color coding follows European standards and is identical in similar products from other manufacturers.
Examples of prices for telephone connectors
Table 1
| Image | Model, description | Price, rub) | Manufacturer |
| Reksant. With adapter function for using euro sockets together with old domestic ones | 60 | Russia | |
| Telephone socket internal Reksant 2 - 6p-4s (2 ports), color milky white | 380 | Russia | |
| Telephone socket internal Reksant 1 - 6p-4s (1 port), color milky white | 290 | Russia | |
| Telephone socket Proconnect 2-6p-4c | 55 | Brand | |
| Telephone socket RJ12 1 module 6 contacts ABB Zenit N2117.6AN | 500 | Brand | |
| Telephone socket 2 RJ11Legrand Suno 774839 | 490 | Legrand France |
- When working on laying a telephone cable, you need to remember the safety rules:
- When chasing a cable groove in brick or concrete, be sure to use goggles or a face shield to protect your eyes and face.
- Take the same safety precautions when drilling holes for attaching a cable or outlet base.
- When cutting material from the grooved channels, from a blind hole for the socket box, install a protective disk on the chisel to prevent damage to the hands.
- Wiring work must be done with protective gloves.
- If there is no device for checking the polarity of the wires, use a cut potato. Stick the ends of the wires into the pulp, the surface of the pulp around the positive wire will soon begin to darken.
- Modern sockets are made in a safe version. However, they must be installed in a place inaccessible to children.
- When stripping the ends of the cable for connection, it is necessary to avoid damaging the insulation of the internal wires and, moreover, the conductors themselves. This leads to a deterioration in the quality of communication and the possibility of a line break.
- If an old Soviet two-core wire is used in the form of a plastic ribbon with wires along the edges, it is unacceptable to fasten it by driving nails between the wires. This often leads to line breaks during installation. If a nail comes into contact with a wire, a ground pair can form, degrading the quality of the connection.
Conducting all the work thoughtfully and accurately, you can successfully cope with the simple task of wiring and installing sockets. Take it without hesitation and you will be successful!
To connect a telephone jack, you will need the following:

And, of course, you will need the outlet itself.
Types of sockets
The type of outlet you choose depends on how you install it.
Sockets are divided into the following types:
Wall-mounted Euro sockets
External type sockets
Soviet-style sockets
The installation of Soviet-style sockets - RTSHK-4 was previously carried out together with a capacitor, which checked the line and at the time of the call notified that it was busy. Now sockets are installed without a capacitor, which greatly simplifies this process.
In order to more clearly highlight the process of connecting a telephone socket, consider an example of installing an external universal socket - RJ-11.
How to connect an external type socket
Be sure to wear protective gloves before proceeding with the installation.
Important! During a call, the voltage in the telephone line increases by 100-120 volts, so working with an outlet without gloves poses a serious threat to life and health.
Now you need to use side cutters or a special tool for working with a cable to expose the telephone line wire, stripping it of 4 cm of insulation. The cores must be even, so they will need to be straightened.

Important! The insulation must be removed very carefully, trying not to make notches on the copper wires, otherwise they can easily break.
When the wire is prepared for the upcoming work, you can start connecting. To do this, you need to open the socket housing and familiarize yourself with its contents.
Inside the socket you can see the following:

To connect a telephone for home use, only two terminals and two wires are enough. Therefore, at first glance, the contents of the box may seem strange, because there are as many as 4 terminals. But the remaining 2 are used to connect another telephone line.
In our case, you will need 2 terminals (they are circled in red in the figure), to which the telephone line will be connected. Next, you should connect the wire to the red ("minus") and green ("plus") wires, screwing the wires to the metal screws.

In order to observe the correct connection, you need to check the polarity of the line with a multimeter or tester.
Advice! If you suddenly didn’t have a tester at hand, you can use ordinary potatoes. To do this, cut the potato in half and insert the ends of the cable into it: near the “plus”, the color will change.

Not all telephone sets require strict polarity, in most cases it is not important.
After all operations are completed - the cover returns back and snaps into place. Then the box is attached to the wall using self-tapping screws or a double-sided adhesive pad.

After connecting, be sure to check if there is a connection.
Installing a hidden socket
Another common type of telephone sockets are flush sockets.
They look like this:

They are very comfortable because they do not protrude from the wall and look neat. And although the process of connecting them is no different from connecting external sockets, you still have to tinker, as you will need to mount holes in the wall.
To connect a hidden outlet, in addition to all the tools already listed (screwdriver, multimeter, side cutters, cable), you will also need a socket box, puncher and fasteners.
Before you start making a hole for laying the cable, you need to prepare a puncher by choosing an appropriate nozzle for it with a diameter equal to the diameter of the box itself. Next, you need to drill a round hole and install the appropriate socket in it.

In order to bring a cable to the socket, you need to drill a recess in the wall, which, after the wire is installed in it, is plastered. The finished groove must be filled with cable so that about 10 cm of wire is left in the socket.

This is followed by the same process of connecting the cable cores to the terminals, as in the case of an external telephone socket.
After, the box is installed in the socket and securely fastened to the wall with spacer screws. A decorative overlay is fixed on top - the installation process is over.
It is good to feel like the owner of your house and a jack of all trades. But if the process of connecting a telephone socket with your own hands seemed too complicated for you, then do not run to the masters.
A video that tells about the process of installing a telephone and electrical outlet will clarify all the incomprehensible moments of installation:
The telephone socket is inherently a low-current type of socket devices, the main functions of which are:
- Connecting wired and wireless devices to the appropriate network and provision of telephone communications.
- Implementation modem and fax connections.
- Connection and organization of mini-ATS.
Connecting a telephone socket in practice is much easier than the electrical variety. However, this process still requires caution and accuracy, since for its implementation it is necessary to perform a series of electrical work associated with high voltage.
Installation and connection of such devices is ideal for people with little experience in this area, or beginners who are just gaining relevant experience.
Previously, this process caused fewer questions, since there was a single standard governing the installation of such devices. To date, there are several European standards called Registered Jack (RJ). There are several different ways to connect telephone sockets, this process can be done independently with RJ-14 and RJ-25 devices.
Features and connection diagram
RJ-11 socket
Telephone sockets have their own individual connection features, if we talk about the modern and most common RJ-11 and RJ-12 standards, they have the following connection nuances:
- In the design of the device 2-4 contacts can be included, which are small metal plugs. Between these elements, the deepening of the cores of the supply wire is required.
- Connecting the phones themselves occurs exclusively through 2 central contacts.
- For mounting fixtures with the specified standard, professional craftsmen use a special kind of working tool called a crossover knife. However, if its frequent use is not planned in the future, then you can limit yourself to the most ordinary knife with a sharpened blade. Such a tool is used to deepen the cores; when cutting through the insulating layer, contact will be provided.
- Before straightening lived it is necessary to remove the outer layers from the wire, 4 cm is enough to carry out such stripping.
- For inner lining it is recommended to use the KSPV cable, which has a single wire core in its design, which is most often made of copper. The outer sheath is usually made of plastics with a white color. The TRP cable is most often used as a distributor.

connection diagram
Necessary tools and materials
Depending on the type of telephone jack, as well as the standard used, different tools and materials may be required.
- Screwdriver, which, according to the type of working surface and dimensions, corresponds to the screws used to fasten the device. The screwdriver handle must be insulated to avoid.
- Cable if it is not replacing the old device, but laying a completely new one.
- Perforator, as well as a cable, will be needed if a new outlet is being installed.
- The outlet itself.
- Knife with a sharp blade.
- Self-tapping screws.
- Wire cutters.
- Insulating tape.
- Universal or tester.
- Protective gloves.
- Single and double sided adhesive tape.
- graphite pencil and a marker with bright paint, which will be required for marking.
Step-by-step instruction
 Initially, a simple way to connect a universal telephone jack will be considered. To date, the most common devices that comply with European standards RJ-11 and RJ-12.
In order to connect them, you must adhere to the following algorithm of actions:
- Initially, you will need to turn off the power supply and wear protective gloves, since the voltage indicator in the telephone network is 60V, and in working condition it can reach 110-120V.
- Using side cutters remove the insulating layer from the conductors, while it is important not to touch the cores themselves. The length of the stripped cable should be about 4 cm.
- With a tester determine the polarity of the contacts.
- Connect conductors to contacts. In a telephone jack, the red wire is negative and the green wire is positive. It is not necessary to follow the polarity connection rules, but there is a certain risk that in the future the telephone will give its own from time to time during operation.
- Connect cable cores, then tighten and ensure secure fixation with special screws for clamping.
- Some Models have in their design 2-4 contacts, which have a fork shape, these elements are made of steel. In such a situation, 2 center contacts are used.
- Make a commit and mounting a telephone socket on the wall surface. This can be done with double-sided tape, but the most effective way is to use self-tapping screws.
- Snap cover of this fixture.
There are varieties of telephone sockets of a hidden type. The connection process for them has no fundamental differences with the connection of classic device options.
Significant differences exist only in the process of their installation and are as follows:
- Apply markings on the wall the future location of the telephone socket.
- Pre, you will need to make a hole in the surface with a puncher, it will be needed for the subsequent installation of the socket. Fixation and fastening of this element is achieved through the use of self-tapping screws.
- Device fixture inside the mounting box can be done using spacer screws for special purposes.
- Put on the outer protective case, after which you can return the voltage to the network and test the installed device.
At the same time, you need to know that absolutely any kind of telephone sockets can be not the usual single, but double devices. Such devices are usually installed in offices or other premises where there are several telephone sets with different numbers, but sometimes it may be necessary to install them at home.
The installation or connection process has no fundamental differences from the work carried out with a single design. The only change is an increase in the number of conductors that need to be connected.
Types of telephone sockets
 When considering different types of such devices, one of the main classifications is their division according to the method of installation:
- Devices for outdoor installation.
- Devices with internal wiring.
A secondary classification applicable to both types is the division of these devices according to the number of connectors available:
- Single connector models designed to connect 1 device, they are the most popular option for installation in private houses or residential apartments.
- Multiple Models allow you to connect several different devices at once, most often found in offices and office premises.
Also, sockets with different connectors are presented on the modern market.

This parameter is determined by the type of standard used:
- RJ-11 is one of the most common options, implies the presence of 2 conductors in the design. Such devices are most often found and are recommended for installation if there is a linear-type telephone line to which the device is connected.
- RJ-12 less common, as they are rarely used for domestic purposes. The main purpose is to connect to office PBX or a number of types of network cards.
- RJ-14 has 4 conductors in its design and the same number of contacts. It is a universal connector designed and suitable for most modern models of telephone equipment. To connect and ensure the operation of one line, contacts 2 and 3 are used, if for some reason several lines are required, then the connection is made through contacts 1 and 4. Surface-mounted sockets must use a green and red conductor, which are usually located in the center of the fixture.
- RJ-25 includes in its design 3 pairs of working contacts at once. Devices of this type are extremely complex and unsuitable for self-assembly. To carry out this process, you will need to involve a qualified specialist who understands electrical and telephony issues.
- RJ-9 is a special type of connectors, the main task of which is to connect the handset directly to the device.
- RTSHK 4 is already a technically obsolete type of sockets that were common in the USSR in the past; 4 wide contacts and a key are included in the design. Designed for a specific connection option in a one-piece way, for its implementation, the presence of a branch-type box is required. The presence of several telephone sockets within the same room contributes to the creation of a special electrical circuit, an additional capacitor is required to close it.
Regardless of the type of telephone jack, a special type of power cable will need to be installed inside this device. Different options do not have structural differences, all plugs have similar dimensions and connectors, but they may differ in the number of contacts available.

telephone wire marking
All the main issues related to the installation and connection of telephone sockets have been considered, summing up, we can give a number of the following useful recommendations:
- most popular today, is a built-in type of device, since it harmoniously fits into any room and is an extremely inconspicuous element. However, it must be borne in mind that its installation will take longer and the wall decoration will suffer.
- The best thing purchase devices that were produced by well-known and trusted manufacturers who have managed to positively establish themselves in this area. Today, such companies are Legrand and Vico.
- On some models there may be no pin numbering, usually applied to the body of the device. In this case, knowing the rules of color marking can help: green, orange or blue in combination with white are used to indicate positive contacts; the same colors, only monotonous and without the addition of white, indicate a negative contact.
- If a telephone jack is being installed old style, it does not hurt to also know the color marking rules that were used before: the orange, black or green conductor is positive; red, yellow or blue conductor must be negative.
Cell phones are now widely used. However, there are still tens of millions of wired telephones and cordless telephones in use, and many people prefer them over cell phones.
Long-distance and international calls from a fixed home telephone set are much cheaper, you do not need to constantly monitor the level of battery charge and periodically change them.
Connecting one or more parallel fixed telephones and radiotelephones to a communication line with your own hands is the simplest task, almost any person who does not even know the intricacies of a connected business can do it.
What is the voltage in the telephone line
The telephone communication line is under 40-60 V DC voltage if the telephone is not connected or connected, but the handset is placed on the telephone set. During a call, the voltage in the communication line becomes variable with an amplitude of up to 120 V. When you pick up the handset, the voltage drops to 6-12 V. This voltage is not life-threatening, but it can cause discomfort. It is impossible to disable the communication line or damage the telephone set during connection. The telephone line may be disconnected for several minutes if the handset is picked up for a long time without dialing, or if the wires of the communication line are short-circuited. The telephone line is automatically switched off by an automatic telephone exchange (ATS) to save electricity. So you can safely proceed to independently connect the phone to the communication line.
Before connecting a landline phone or radiotelephone to a communication line, it is advisable, but not necessary, to check that the communication line is ready. Line voltage can be designed to measure DC voltage. If the phone is not connected to the line or connected, and the handset is on the phone, the device should show a voltage of 40-60 V. If there is no voltmeter, you can check using potatoes, and this is not a joke, but a real way to check. It is enough to stick the noodle wires stripped of insulation into the cut of the potato. Batteries are not needed, as the wires are already energized.
Scheme of connecting a wired landline telephone to a PBX
From the automatic telephone exchange (ATS) to each house, a hundred-pair telephone cable is stretched, which branches out with ten pair cables along the entrances of the house. The ends of ten paired cables are soldered into ten paired plinths in the entrances of the house. Plinths are installed in boxes or fixed on the walls. In the photo - a plinth with an open lid.

Previously, plinth cases were made of duralumin, now they are made of plastic. In modern plinths, line wires of communication lines are connected by pressing into combs with a special tool. From one of the pairs of plinths to your apartment, a communication line is stretched with a TRP telephone wire, which signalmen call noodles. At the end of this wire, an RTSHK-4 socket (old-style) or a modern RJ-11 socket is installed in the apartment, and a wired telephone is connected to it using a plug.
As you can see, the scheme for connecting a wired landline telephone is simple: an individual pair of wires is stretched from the PBX to your apartment, through which communication is carried out. As can be seen from the diagram, the plug and socket are needed solely for ease of use - and they do not take part in the operation of the phone. You can connect the telephone wires coming from the plinth to the telephone cord, and the telephone will work successfully.
How to connect the phone to the communication line
Connection of telephone sets, including radiotelephones, to the line is carried out by means of a detachable connection - plugs and sockets. At present, telephone connectors of two standards are used in operation. Obsolete Soviet, corresponding to the requirements of GOST 8810-81 (CT SEV 5396-85), which was valid until 01.01.92 (RTSHK-4), and modern telephone plugs and RJ-11 sockets, corresponding to the international standard IEC 60669-1 and 60884- 1 (623K). Universal telephone plugs and sockets are also used, which make it possible to connect plugs and sockets produced according to the new and old standard to each other.
The question seems irrelevant, but there are still many phones in operation that have been connected for a long time, and if you repair the connector yourself or transfer the phone, this information may be required.

Of course, the Soviet telephone connector is bulky, does not correspond to modern aesthetic views, but it is reliable and has successfully performed for a long time, and continues to perform the functions assigned to it.
The telephone jack has four pins for connecting the plug and two for switching the capacitor. The positioning of the plug during insertion is ensured by the holes in the socket cover. The line is connected with a screw connection to the two right-hand contacts. To control the integrity of the line, a capacitor was also installed in the outlet, which was connected to the upper right contact and the lower left one. When the plug was inserted into the socket, it broke the circuit with a wedge-shaped pin, and the capacitor was turned off. When it was necessary to check the line, it was enough to remove the socket, and the signalmen from the exchange could, by applying alternating voltage to the pair, check the condition of the line, and thus determine what exactly was the cause of the lack of communication, the line or the telephone. When two phones are connected in parallel and the plug of one of them is removed, the line sits heavily, since the alternating voltage passes well through the capacitor. If you accidentally forget such a socket connected to the telephone line, then be sure to disconnect it from the line or remove the capacitor. It is desirable to remove it from all connected telephone sockets, since the capacitor does not participate in modern telephone communication lines - and therefore is not needed.

The telephone plug is a plastic box consisting of two halves, one of which has four flat contacts inserted, a cord coming from the telephone is connected to them with screws. The photo clearly shows which contacts to connect it to. For the operation of the telephone, it does not matter to which contacts the wires are connected, the main thing is that the contacts of the telephone socket, to which the wires of the line come, are connected to the contacts of the plug, to which the wires from the telephone come. The wedge-shaped pin is used to disconnect the test capacitor from the communication line.
With the advent of foreign-made phones in everyday life, in which the cord ended with an RJ-11 6P4C plug, and the sockets were all installed with RTSHK-4, adapters (adapters) immediately appeared on sale, allowing any owner of the novelty to connect the phone to the line without outside help.

In the adapter, the two upper flat pins were connected to RJ-11 pins 3 and 4 (standard crimping scheme), in the photo on the left, and the lower flat pins were connected to RJ-11 pins 2 and 5, in the photo at the bottom of the adapter.
Connecting a telephone to a universal socket RTSHK-4 623K RJ-11
Another creation of the transitional period is a universal socket, a symbiosis of RTSHK-4 and RJ-11 sockets. I don’t know why they were produced, but it can be assumed that they were replaced by the worn-out RTSHK-4, thereby providing the ability to connect phones with plugs of any standards.

Contacts 3 and 4 of both RJ-11 telephone sockets are connected in parallel with the right RTSHK-4 (standard connection), and contacts 2 and 5 of the telephone socket are connected in parallel with the left RTSHK-4.
Connecting a telephone to a 623K RJ-11 6P4C socket
Modern sockets for connecting phones under the RJ-11 4P4C plug are small-sized. They are available in different body colors, they are wall-mounted, for internal wiring and combined (for simultaneous connection of telephones to a communication line and computers to local networks and the Internet using RJ-45 plugs).

In the socket shown, the line wires of the telephone line must be connected to green And red wires that are connected to pins 2 and 3 of the RJ-11 4P4C socket. The polarity of the phone connection does not matter.
Connecting the phone by crimping noodles in RJ-11
You can completely do without a standard outlet by connecting the telephone directly to the telephone wire, the so-called noodles. To do this, you need to crimp the end of the noodle that fits the phone into an RJ-11 socket.

The insulation diameter of the conductors of the noodles is larger than necessary, and it will not work to insert them into the RJ-11 connector. To do this, completely remove the insulation. Without insulation, the wires cannot be crimped into RJ-11, and therefore they must first be put on tubes taken from twisted pair wires or other wires of suitable size.

Now all that remains is to insert the noodle wires into pins 2 and 3 of the RJ-11 connector and crimp with special pliers (crimper) or manually using the technology described in the article "How to crimp a twisted pair cable without pliers". The polarity of the wires does not matter.
To connect the phone, you will need to remove the regular connection wire from it and insert the RJ-11 connector crimped on the noodles into the connector on the case.
Connecting a fixed telephone with a handset to the line is carried out with a telephone line cord with RJ-11 4P4C plugs at the ends. Of these, as a rule, only two middle contacts are used to connect the phone. The remaining contacts are often absent, since they are intended for connecting two fixed telephones in parallel (telephone sets must support the ability to work in this mode) according to the director-secretary system. This is when when you pick up the handset of one of the phones, the second one automatically turns off.
According to the standard for connecting a telephone, a wire of a certain color marking must be suitable for each contact number. This is designed for ease of repair and maintenance. It doesn't matter what color the wire is connected to. The main thing is that the wires coming from the PBX are connected to the two middle contacts 2 and 3 of the telephone plug. The current standard provides the following color scheme for crimping a line wire to an RJ-11 plug.

Previously, there was a different standard, according to which the crimping of the RJ-11 plug had to be done according to the color scheme below.

The polarity of the connection for a landline phone that is not connected in a paired circuit does not matter. There is a special tool for crimping the wires in the RJ-11 plug, but you can get by with one screwdriver.
When buying an RJ-11 plug for connecting a line, you should pay attention to the fact that its width must be 9.5 mm. The fact is that the RJ-11 plug for the cord connecting the telephone to the handset has exactly the same appearance, but its width is 7.5 mm and you can buy the wrong plug.
Sometimes, for convenience, it is required to connect one or more devices in parallel to a telephone set already connected to the communication line, including radiotelephones. Such a connection is made by simply connecting sockets in parallel, in the same way that electrical sockets are connected to electrical wiring. The polarity of the wires does not matter. Modern phones load the telephone line very little and you can connect at least 10 phones in parallel. The disadvantages of such a connection include the lack of confidentiality during a conversation. That is, during your conversation, whoever picks up the phone on any phone connected in parallel can hear your conversation. There are blocker schemes that allow you to block all other telephones when you pick up the handset on one of the phones.

After connecting several telephones in parallel, a situation may arise when a ringing signal comes in, only one telephone rings, and all the others only emit a short, soft sound. The reason for this is the presence of the Caller ID (Automatic Number Identification) system in the calling phone, configured to determine the telephone number of the caller before picking up the handset. Thus, caller ID immediately automatically picks up the phone and already generates a ringing signal. For this reason, all other phones connected in parallel do not ring. Usually, in modern phones, you can turn on the caller ID function to determine the number after you pick up the handset. Then, when a ringing signal is received, all phones will ring. Caller ID, included in the caller identification mode before picking up the handset, is also bad for those who call you over long distances. This is due to the fact that even if the call comes in your absence, the countdown of the connection time and charging start without lifting the handset. The advantages of the Caller ID system include the fact that if phones without Caller ID are installed in places of rest, and with Caller ID - in another room, then you will not be disturbed by a night call.
There are also ready-made solutions in the form of a radiotelephone with several handsets, which allow not only blocking, but also switching the caller from a lifted handset to any other. However, such phones are not affordable for everyone and have a significant drawback. During a power outage, they do not work; and in the tubes they have batteries installed that last for several years, then the battery needs to be replaced, and this is comparable in cost to the cost of an ordinary push-button telephone. Therefore, to ensure uninterrupted communication, you still need to keep an ordinary phone in reserve.
Connecting a telephone cord to a line by twisting wires
In life, there are situations when you need to connect the phone to the line, but there is no outlet. In this case, it is possible to connect the wires with a twist without degrading the quality of communication. Such a connection is even more reliable than a detachable one. The only drawback is that you have to cut the wire if you need to connect another one. And even then, in modern phones, cords with telephone sets are connected with RJ11 plugs and it is always easy to disconnect it from the line in case, for example, of repairing the phone. I have one phone connected in this way, while the entire cord is hidden behind the door trim, only a 15 cm long piece with an RJ11 plug at the end, which is immediately inserted into the phone socket, comes out.
The telephone cord is very flexible, it is a special wire with strands made using a special technology. A very thin copper ribbon is wound around a cotton thread. Such a conductor is called tinsel. Tinsel wires are widely used in the production of headphones, connecting handsets to bases, that is, in cases where the wires are constantly bent during operation.

There are several conductors of tinsel in each vein, and they are still twisted among themselves. Soldering tinsel is very difficult, and the mechanical strength of such soldering is low. To obtain a reliable and mechanically strong twist connection, it must be performed using the following technology.
First, the tinsel of the telephone cord is released from insulation for a length of 10-15 mm and the conductors of the linear wire for a length of 20-25 mm with a shift with a knife. The thread of tinsel does not need to be removed. Then both wires are folded together, the tinsel is bent towards the conductor, and the core of the linear wire is wound onto the tinsel pressed against the insulation. It is enough to make three to five turns.
In the same way, twisting is performed with the second conductor of the cord. As you can see, it turned out a neat connection. The resulting connection is covered with insulating tape. If you have a PVC tube of a suitable diameter, you can put a piece of it on the twisted place for insulation. The connection can also be made straight by bending the line wire through 180° before insulating. In this case, the mechanical strength will increase significantly.
Telephone line repair
If the landline phone stops working, then they usually call the signalman and wait for his arrival, often at an inconvenient time for themselves. However, if you don’t want to wait and have a desire, then you can restore the connection with your own hands.
There can be two reasons for the telephone to stop working: either the telephone set is broken, or the telephone line is broken. If you have a spare telephone set, connect it instead of the idle one; if a connection has appeared, then the phone is to blame for the breakdown, and if the connection has not appeared, the line is to blame.
The serviceability of the line can be checked by measuring the voltage at the telephone socket. If there is no device, you need to check the reliability of connecting the linear communication wire to the socket contacts. If the connection in the socket is reliable, then you can use the wire to trace to which contacts of the plinth your line is connected, and check the reliability of the connection to the contacts in the plinth. If there is no way to trace, then you can check the reliability of connecting all suitable lines to the plinth, because one of them is yours. If there is voltage on the contacts of the plinth, and your pair is connected securely, then the wire going to the installation point of the phone is broken. If there is no voltage, then you need to disconnect one of the conductors going to the apartment, and measure again after 5-10 minutes. If voltage appears, it means that a short circuit has occurred in the wire going from the plinth to the socket in your apartment. To verify this fact, it is enough to reconnect the line wire to the plinth contacts and measure the voltage, it should disappear again.
Handset device and handset cord repair
Landline handset device
The appearance of the handset is well known to everyone. It consists of two plastic detachable parts: the base, in which the microphone and telephone capsule are fixed, and the cover, which is usually screwed to the base with one or two self-tapping screws. As can be seen from the handset wiring diagram below, the microphone and the telephone capsule are connected to each other by three colored actuators.

One wire is common for the microphone and telephone capsule (black in the diagram), the second is for the microphone (green), and the third is for the telephone capsule (red). When replacing a microphone or capsule, the polarity of their connection must be observed, otherwise a microphone effect will appear. This is when the speaker hears his voice on the phone, or a whistle may appear.
Landline phone cord repair
In stationary telephones, the tubes are connected to the telephone body with a twisted cord with two RJ-11 4P4C plugs at the ends. During a conversation, the twisted cord of the handset is constantly bent and eventually frayed at the point of exit from the plug, usually on the side of the handset. The phone first starts to "wheeze", and there comes a moment when you and the interlocutor do not hear each other. The most likely cause of poor communication is damage to the coiled telephone cord. Although the cause can also be a carbon microphone or a telephone capsule.

To check the cord, you need to move it at the exit from the handset or phone case. If you notice that in some positions the connection becomes stable, then the telephone cord has frayed in this place. The cord should be replaced with a new one. But you can do without going to the store, using the RJ-11, RJ-45 crimping technology with tongs or without tongs.
To remove the RJ-11 plug from the handset, you need to press the RJ-11 plug retainer to its base with your finger and remove the plug from the handset. Then pull out the lamellas a little and remove the cord from the plug, shorten it by 1.5-2 cm (cut off the damaged piece of cord), remove the insulating tube to a length of 5 mm. It is not necessary to remove the insulation from the conductors. Then you need to insert the prepared cord into the RJ-11 plug until it stops, observing the color scheme for connecting the wires. If you do not remember how the cord was inserted into the RJ-11 plug, then you can see how it is inserted into it at the other end of the cord. If you removed both ends of the cord from the RJ-11 plugs and do not know how to insert the ends of the wire correctly, then the crimp color scheme below will help you.
RJ-11 Phone Plug Crimp Color Scheme
The RJ-11 plugs on the handset cord are crimped in a 180 degree color scheme. For example, if on the 1st pin of the RJ-11 plug at one end of the cord there was a white wire, and on the 4th - yellow, then on the second end of the cord on the 1st pin of the RJ-11 plug should be yellow, and on the 4th - m contact - white. The photo shows the color scheme for crimping a twisted cord for a landline phone.
I have done such repairs of twisted telephone cords many times, especially at a time when such landline telephones with tubes connected by twisted cords only appeared, and it was not possible to buy a new twisted cord.
When buying an RJ-11 plug for a cord, pay attention to its width, which should be 7.5 mm, since the RJ-11 plug for a line has exactly the same appearance, but its width is 9.5 mm.
Background during a call
If a telephone conversation is accompanied by a low-frequency background of 50 Hz or a radio transmission, then one of the reasons for this phenomenon may be poor insulation between one of the conductors of the telephone pair with the ground. Then the symmetry of the wires is broken, and the interference signals induced on them from the electrical and radio wires passing nearby at the ends of the telephone pair do not cancel each other out. More often this can be observed in rainy weather, when the humidity is high, due to which the insulation resistance of the wires decreases. It is difficult to find this malfunction on your own without a high-voltage ohmmeter, it is better to call the signalmen. They should fix the problem for free.
Telephone extension
Sometimes it becomes necessary to move the phone to another place, and the length of the cord connected to the outlet does not allow this. Not everyone wants to dismantle and install an outlet in a new place. In addition, traces of dismantling can spoil the appearance of the wall. A simple telephone extension cord will solve this problem. You can buy a ready-made extension cord, they come in different colors, any length and with different types of plugs and sockets at the ends. It is not difficult to make a telephone extension cord yourself from a plug, socket and a piece of any wire.

On the left in the photo is a homemade telephone extension cord, which I made a very long time ago for the convenience of phone repair. The socket is screwed to the coil, on which the extension cord is wound for easy storage. The wire is taken stranded, and its two pieces are twisted together by hand. On the right is a factory-made telephone extension cable for modern telephones with RJ11 plugs at the ends. To install it, you need to remove the standard wire from the telephone and the socket, and then insert a longer one.
If there is no plug and socket at hand, you can build up or extend the standard wire by inserting any double wire or two single conductors twisted together in any place. For insertion, a wire of any section, stranded or solid, is suitable. To do this, a regular wire is cut into two parts, best of all at a distance of 10-15 cm from the plug, if suddenly in the future you need to restore it to its original form by pressing the connector. The connection of the ends is done according to the technology described above. If the insert is made of a stranded thin wire or a thick single-core, then the tinsel does not bend, but is folded in parallel with the stripped conductor and wrapped around a wire with a diameter of about 0.5 mm.
Modern cords for telephones began to be made not from tinsel, but from an ordinary stranded wire of a rather small cross section. The wire that I cut to demonstrate the technology with photographs turned out to have only 6 conductors with a diameter of 0.2 mm. Such thin wires must be connected using a special technology.
The insulation is removed with a shift, as shown in the photo. Next, the wires need to be tinned and the thinner conductor is wound around the thicker one. If the wires are approximately the same diameter, then they are simply twisted. Then the place of twisting is soldered with solder. If you are not familiar with soldering technology, you can visit the site page How to solder with a soldering iron. Now you need to insulate the connection with several turns of electrical tape. To give an aesthetic appearance, one of the conductors can be bent and then insulated. The second pair is connected in the same way. As you can see, it turned out a reliable and beautiful connection.
For example, I decided to demonstrate how you can extend a telephone cord using a single-core wire for electrical wiring, the core diameter of which is 1 mm.
The connection of telephone wires is carried out in exactly the same way as described above.
According to the above technology, it is possible to connect the wires of any electrical circuits, conductors in any devices and devices, including Internet computer networks.
Laying a telephone line in the apartment
The value of the current flowing through the wires of the communication line does not exceed 10 mA, so there are practically no requirements for the cross section of the core, it is enough that the conductor is 0.1 mm in diameter. Thick cores are made to reduce signal losses with a long line length and to ensure sufficient mechanical strength during switching. Based on this, communication lines can be laid with almost any wire. The main thing is that the conductors run parallel to each other, or are twisted together.
When laying communication lines inside residential and industrial buildings, a double wire TRP 2 × 0.4 is usually used (core diameter - 0.4 mm., cross section - 0.12 mm 2, resistance - 148 Ohm / km) or TRP 2 × 0, 5 (core diameter - 0.5 mm., cross section - 0.21 mm 2, resistance - 94 Ohm / km), with insulation from PVC (polyvinylchloride) category CAT1. Signalers call it "noodles".

The use of such a wire is due to its low price and ease of installation. Since the connecting strip of plastic between the conductors is quite wide, you can fasten the wire to the walls by punching it in the center with studs.

If you need to make a turn in the gasket, then the TRP wire is simply bent, as shown in the photo. Sometimes a jumper is cut through and the conductors are moved apart at the turning point, but this is worse, since the symmetry of the line is violated.
A wire fixed to the wall with the help of special plastic brackets with dowel-studs looks much better. Brackets are available for different sizes of wires and cables, sometimes designed for fastening both round and flat wires.

The dowel-studs of the brackets are made of hardened steel and are hammered without bending even into concrete walls.
Recently, communication wires are often noodles, laid in a cable channel, this allows all wires (Internet, TV cable, intercom, etc.) to be laid together, which simplifies installation and looks beautiful. Cable channels are available in different sizes, which allows you to lay in them an almost unlimited number of wires.
It is convenient to lay a telephone wire and wires for other purposes inside the floor plinth, which has a cable channel.
Using twisted-pair Internet cable
for telephone line
Now many people have cable for the Internet in their homes. This cable usually uses only two pairs of the 4 available. Free pairs can be used for the telephone line. To figure out which of the pairs are free, the article on the site Crimping RJ-45 twisted-pair cable for the Internet will help you. For the communication line, one of the free pairs is taken, brown or blue. A twisted pair consists of two wires twisted together. The insulation of one of them is painted with a solid color, and the insulation of the second is white with stripes of the color of the first.
This is another article from the section about. Today, almost every person has a home phone in his house. Each phone is connected to a special socket. In this article, we'll show you how to connect a telephone jack.
Connecting a telephone socket is not so common. Compared to conventional sockets, they are rarely installed. If you need to install a telephone socket, then we will talk about this in the article.
Types of telephone sockets
Telephone sockets can have several types. The main types include:
- Built-in euro telephone sockets.
- External telephone sockets.
- Telephone sockets of the old type.
This product may differ only in appearance. Connecting a telephone socket in this case is practically no different. Now it will be possible to study telephone sockets visually:

In this photo you can see that this socket has 4 pins. You will need to connect a telephone contact to these wires. This type of telephone jack must be connected to the wall. Also today you can find built-in telephone sockets. You can see this type of device in the photo below:

As you can see, this design is complex. Here you can see not only the complexity of the design, but also the complexity of the connection. If you need, then you can read about.
Features of connecting a telephone socket
Installing a telephone socket on your own involves observing certain features. If you install a Lengard telephone socket, then you will no longer need to strip the wires. This product has a special self-cleaning function. The cable connection in this case will be carried out by turning the mechanism half a turn. You can see this process in the photo below:

After completing this step, you can pick up the handset and check for a dial tone. If the beep does not appear, then you should check the polarity. If the phone still does not work, then check the integrity of the contacts.
Connecting a telephone socket according to the scheme
Most telephone sockets have only two pins. The telephone cable will have the same number of pins. An ordinary telephone jack contains only two pins, that is, 3 and 4. Sometimes a telephone jack may have unnumbered pins. In any case, you need to be guided by the color coding, which is shown below.
During the development of communications, several standards have been created for connecting fixed telephone sets to existing lines. Almost all of them are used in one way or another in everyday life and in industrial enterprises.
Inside the networks of large organizations that have existed for several decades, you can find models of various designs that work simultaneously, mounted at different times. Features of their device must be considered before installing and connecting the telephone.
Purpose and standards of telephone sockets
The main task of the socket is to provide a quick and reliable connection of telephone sets to existing communication lines, created by a permanently placed part - a socket or "mother-contact" and a movable plug inserted into it: "father-contact".
Design features
Any electrical outlet of communication systems consists of:
1. cases-stands made of dielectric materials: plastic or ceramics;
2. spring-loaded metal contactsproviding reliable passage of network currents to the telephone set through the plug and cord;
3. terminal clamps that provide connection of wires from a fixed network.
All these devices are classified as low-current circuits. They can be made for installation:
1. hidden in the wall way;
2. overhead method.
Installation features affect the types of installation and connection of sockets, which must be taken into account, combined with the design of the telephones used.
Features of the main standards
For a telephone line, only two wires were previously used, creating a closed circuit for the current flow circuit, and inside the socket, two contacts were also used to connect them.

If you cut off the plug and socket and twist or otherwise connect in pairs the metal wires of the wires of the telephone set and the working network, and then wrap it with a layer of electrical tape, then the connection will work. This principle was used to create a one-piece connection through a special tap-off box.
It still works reliably. Only for its implementation modern designs of contact systems and reliable methods of their isolation from harmful environmental factors are used.
In modern conditions, there is an integration of low-current circuits, telephone line systems and computer networks. Equipment for them is constantly updated and modified.
Inside low-current systems, sockets are installed, created according to different RJ standards with several pairs of contacts. They have the technical ability to connect a telephone. This is often used by specialists, using only two contacts out of all available.
An overview of typical models of detachable connections, their types are given in table No. 1.
Types of low current connector standards
Table #1
| Name | Purpose (for phones) | Notes |
| RJ-9 connectors (P4C4) | Connecting the handset in the machine | RJ10 analogue. RJ22 |
| RJ-11 connectors (P6C4, P6C2) | 2 pin wiring diagram | |
| RJ-14 Connectors | 4 pin wiring diagram | |
| RJ-25 connectors | Connecting a telephone set to a line | 6 pins wiring diagram |
| Connectors RJ-45 (8р8с) | Connecting computer networks or a telephone to a line | 8 pins wiring diagram |
| RTSHK-4 | USSR standard for connecting a telephone set to a line | |
| Connecting a telephone set to a line | ||
| TAE connectors | Connecting German and French models of telephone sets to the line |
Connector differences
RTSHK-4 - four-pin telephone socket for plug-in connection with a capacitor

The standard has been in operation since the 1980s. The plastic housing of the plug and socket has a dielectric key, which prevents incorrect connection of the electrical circuit.
When installing several telephones on one line, an appropriate number of RTSHK-4 sockets connected in parallel was created. A capacitor with a capacitance of 1 stu in 1 microfarad was mounted at the end of the line to conduct technical tests and create "busy" effects on the side of the calling user.
RJ-11 Connectors
Now telephones, sockets and plugs are equipped with an RJ series connector, which has the same body, dimensions and design for connecting one, two, three or four pairs of electrical circuits. However, they can be equipped with different designs of plastic locks with special cutouts, which exclude the installation of separate RJ11, 14, 25 plugs into RJ45 connectors.
They must be taken into account when connecting various manipulators. Otherwise, you can not learn an electrical contact or even break the connector, break its body.
The RJ11 interface is designed exclusively for a two-wire telephone line. It can be used not only for one phone, but can be used by several devices assembled in blocks for various devices.

The RJ11 connector is widely used not only in stationary models, but also for connecting the base of radio telephones, which allow you to talk at a certain distance from it due to radio signal transmission technologies between the handset and the base over the air using an electronic receiver and transmitter.

Combined RJ-11 connectors with RTSHK-4
The method of connecting telephone sets through combined adapters equipped with combined connectors is implemented in a composite design, which makes it possible to simplify installation with an additional accessory.

Connectors RJ-14, RJ-25
Their appearance corresponds to the previous RJ11 design. The difference lies in the number of contacts and possible differences in plastic locks.

RJ-45 connectors
They are designed for low-current circuits with four pairs of contacts, allowing the use of circuits for connecting complex communications and computer systems used in modems, laptops and other similar devices.

Methods for marking switching circuits
The socket contacts are connected in accordance with a pre-designed scheme. The design of the telephone most often allows you to ignore the polarity of the connection. However, for some devices this is technically unacceptable: they may not work correctly or fail.
To facilitate installation and troubleshooting in the circuit, manufacturers mark the contacts. It can be carried out:
1. by applying numbers near the contacts or marking them on the wiring diagram:
2. highlighting wires in a certain color.
In practice, there may be several ways of switching wires. They are shown in tables No. 2, 3, 4.
Marking for connecting cores of twisted pair cables to a socket
Table number 2
| contact no. | Type T/R | +/- | |||
| RJ-11 | RJ-14 | RJ-25 | |||
| 1 | - | - | white-green | T | + |
| 2 | - | white-orange | white-orange | T | + |
| 3 | Blue | Blue | Blue | R | - |
| 4 | White-blue | White-blue | White-blue | T | + |
| 5 | - | Orange | Orange | R | - |
| 6 | - | - | Green | R | - |
Old marking for connecting cable cores to a socket to a socket
Table #3
| contact no. | Type T/R | +/- | |||
| RJ-11 | RJ-14 | RJ-25 | |||
| 1 | - | - | Orange | T | + |
| 2 | - | The black | The black | T | + |
| 3 | Red | Red | Red | R | - |
| 4 | Green | Green | Green | T | + |
| 5 | - | Yellow | Yellow | R | - |
| 6 | - | - | Blue | R | - |
German marking for connecting cable cores to a socket
Table No. 4
| contact no. | Connector name, color | Type T/R | +/- | ||
| RJ-11 | RJ-14 | RJ-25 | |||
| 1 | - | - | Pink | T | + |
| 2 | - | Green | Green | T | + |
| 3 | White | White | White | R | - |
| 4 | Brown | Brown | Brown | T | + |
| 5 | - | Yellow | Yellow | R | - |
| 6 | - | - | Gray | R | - |
Wiring diagrams for telephone sockets and plugs
Let's analyze the issue using the example of the RTSHK-4 connector, which is used to communicate not only with the end subscriber, but also for an additional line - communication between the secretary and the director.

One pair of contacts is used on the line coming from the PBX, and the second pair is used to organize additional communication through the service channel.
The diagram shows the mounting location of a 1 microfarad capacitance with an operating voltage of 160 volts. Now they refused such a connection, they stopped mounting the capacitor. It practically does not affect the quality of communication.
The designs of the RTSHK-4 connectors are already outdated. They are gradually being replaced by new, more convenient devices that take up little space. But, the electrical connection scheme has not fundamentally changed. For the operation of one telephone, it is still enough to simply create a closed electrical circuit with a two-core PBX line.
Modern telephone sockets are usually combined into consolidated blocks used in conjunction with other communication devices: computer equipment, fiber optic cable networks, electrical devices.

Such blocks are concentrated in one place convenient for maintenance and hidden from prying eyes.

Telephone network hazards
Whatever the "experienced" electricians-communicators say, who were "beaten" with current from the voltage of the automatic telephone exchange line, safety issues need to be paid attention.
The connection of the telephone jack is usually carried out under the quiescent voltage of the communication line. Its value is about 60 volts. If you manage to catch the moment of an incoming call, then a variable sinusoid with an amplitude of up to 120 volts passes through the network.
It may well create a current path through the body of the connecting master. If the hands are wet or sweat has appeared on the body, then the conductivity will increase sharply. Pain will become very unpleasant, cause convulsive reactions. It is better to avoid them by protecting your hands with thin dielectric gloves and observing other technical safety measures.
Methods for mounting telephone sockets
Subject to certain technical issues, telephone sockets are mounted in the same way as ordinary electrical ones. These points are already described in the article:. Check it out: there are already disclosed methods of preparation and fastening for open and closed wiring systems.
You will also find useful material on this issue in the article for wiring and low-current circuits. This method is used when the repair is completed, dirty work cannot be done, and telephone wiring must be laid neatly and neatly.
Modern plastic cable channels can be selected for any design of the premises. They are equipped with numerous accessories, including electrical and telephone sockets.
Thus, in order to install and properly connect a telephone socket, it is necessary to select its model according to the dimensions and technical characteristics corresponding to your telephone set, and also take into account the recommendations set forth in the proposed material.
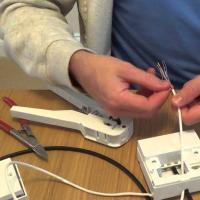 How and where to connect your home phone yourself
 Rolsen is the largest electronics manufacturer in Russia
 Changes in the tariff "go to zero
 Yota (mobile operator): reviews, tariffs, connection
 How to find a tablet if it is lost or stolen How to find a stolen android tablet
 Review of the smartphone HTC U Ultra: think for me
 What can be made from an old mobile phone: a couple of original ideas What can be made from a broken cell phone